2016 CHEVROLET ORLANDO capaci
[x] Cancel search: capaciPage 99 of 372

Black plate (5,1)Chevrolet Orlando Owner Manual - 2013 - CRC - 6/5/12
Storage 4-5
Hook the loops on the convenience
net onto the hooks (1) and the
hooks on the convenience net onto
the lashing eyes (2).
The net should not be used to store
heavy loads.
Roof Rack System
{WARNING
If something is carried on top of
the vehicle that is longer or wider
than the roof rack—like paneling,
plywood, or a mattress —the
wind can catch it while the vehicle
is being driven. The item being
carried could be violently torn off,
and this could cause a collision
and damage the vehicle. Never
carry something longer or wider
than the roof rack on top of the
vehicle unless using a GM
certified accessory carrier.
This vehicle can be equipped with
roof rack crossrails. GM certified
crossrails can be purchased as an
accessory. See your dealer for
additional information.
Notice: Loading cargo on the
roof rack that weighs more than
100 kg (220 lbs) or hangs over the rear or sides of the vehicle may
damage the vehicle. Load cargo
so that it rests evenly between
the crossrails, making sure to
fasten cargo securely.
To prevent damage or loss of cargo
when driving, check to make sure
the crossrails and cargo are
securely fastened. Loading cargo on
the roof rack will make the vehicle's
center of gravity higher. Avoid high
speeds, sudden starts, sharp turns,
sudden braking, or abrupt
maneuvers; otherwise it may result
in loss of control. If driving for a long
distance, on rough roads, or at high
speeds, occasionally stop the
vehicle to make sure the cargo
remains in its place. Do not exceed
the maximum vehicle capacity when
loading the vehicle. For more
information on vehicle capacity and
loading, see
Vehicle Load Limits on
page 9‑9.
Page 109 of 372
Black plate (9,1)Chevrolet Orlando Owner Manual - 2013 - CRC - 6/5/12
Instruments and Controls 5-9
Speedometer
The speedometer shows the
vehicle's speed in either kilometers
per hour (km/h) or miles per
hour (mph).
Odometer
The odometer shows how far the
vehicle has been driven, in either
kilometers or miles.
This vehicle has a tamper-resistant
odometer. The digital odometer will
read 99999.9 if it is turned back.
If the vehicle needs a new odometer
installed, it must be set to the
mileage total of the old odometer.
If that is not possible, then it must
be set at zero and a label must be
put on the driver door to show the
old mileage reading when the new
odometer was installed.
Tachometer
The tachometer displays the engine
speed in revolutions per
minute (rpm).Notice:
If the engine is operated
with the tachometer in the shaded
warning area, the vehicle could
be damaged, and the damages
would not be covered by the
vehicle warranty. Do not operate
the engine with the tachometer in
the shaded warning area.
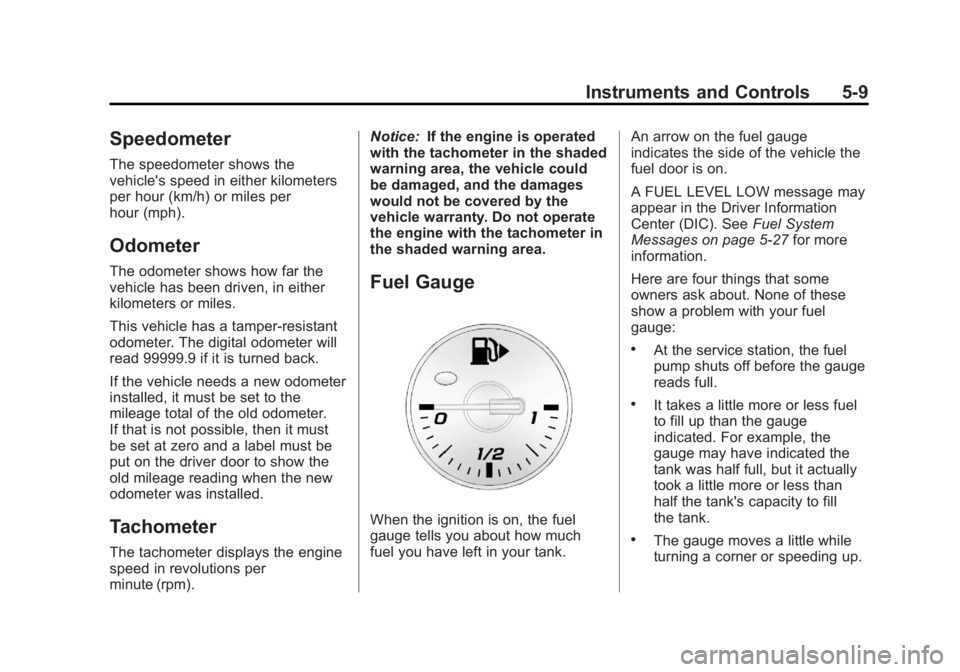
Fuel Gauge
When the ignition is on, the fuel
gauge tells you about how much
fuel you have left in your tank. An arrow on the fuel gauge
indicates the side of the vehicle the
fuel door is on.
A FUEL LEVEL LOW message may
appear in the Driver Information
Center (DIC). See
Fuel System
Messages on page 5‑27 for more
information.
Here are four things that some
owners ask about. None of these
show a problem with your fuel
gauge:
.At the service station, the fuel
pump shuts off before the gauge
reads full.
.It takes a little more or less fuel
to fill up than the gauge
indicated. For example, the
gauge may have indicated the
tank was half full, but it actually
took a little more or less than
half the tank's capacity to fill
the tank.
.The gauge moves a little while
turning a corner or speeding up.
Page 189 of 372
Black plate (9,1)Chevrolet Orlando Owner Manual - 2013 - CRC - 6/5/12
Driving and Operating 9-9
WARNING (Continued)
vehicle can overheat, causing an
engine compartment fire or other
damage. Spin the wheels as little
as possible and avoid going
above 56 km/h (35 mph).
Rocking the Vehicle to Get
it Out
Turn the steering wheel left and
right to clear the area around the
front wheels. Turn off any traction
system. Shift back and forth
between R (Reverse) and a low
forward gear, spinning the wheels
as little as possible. To prevent
transmission wear, wait until the
wheels stop spinning before shifting
gears. Release the accelerator
pedal while shifting, and press
lightly on the accelerator pedal
when the transmission is in gear.Slowly spinning the wheels in the
forward and reverse directions
causes a rocking motion that could
free the vehicle. If that does not get
the vehicle out after a few tries, it
might need to be towed out. If the
vehicle does need to be towed out,
see
Towing the Vehicle on
page 10‑75.
Vehicle Load Limits
It is very important to know how
much weight the vehicle can
carry. This weight is called the
vehicle capacity weight and
includes the weight of all
occupants, cargo, and all
nonfactory-installed options.
Two labels on the vehicle show
how much weight it may
properly carry: the Tire and
Loading Information label and
the Certification label.
{WARNING
Do not load the vehicle any
heavier than the Gross
Vehicle Weight Rating
(GVWR), or either the
maximum front or rear Gross
Axle Weight Rating (GAWR).
This can cause systems to
break and change the way the
vehicle handles. This could
cause loss of control and a
crash. Overloading can also
shorten the life of the vehicle.
Page 190 of 372
Black plate (10,1)Chevrolet Orlando Owner Manual - 2013 - CRC - 6/5/12
9-10 Driving and Operating
Tire and Loading Information
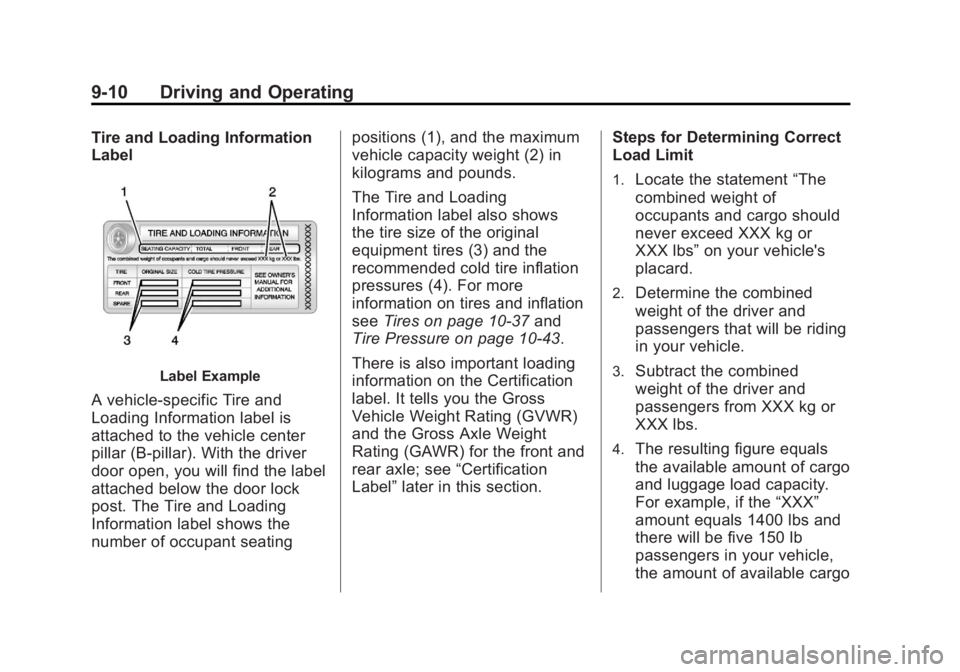
Label
Label Example
A vehicle-specific Tire and
Loading Information label is
attached to the vehicle center
pillar (B-pillar). With the driver
door open, you will find the label
attached below the door lock
post. The Tire and Loading
Information label shows the
number of occupant seatingpositions (1), and the maximum
vehicle capacity weight (2) in
kilograms and pounds.
The Tire and Loading
Information label also shows
the tire size of the original
equipment tires (3) and the
recommended cold tire inflation
pressures (4). For more
information on tires and inflation
see
Tires on page 10‑37 and
Tire Pressure on page 10‑43.
There is also important loading
information on the Certification
label. It tells you the Gross
Vehicle Weight Rating (GVWR)
and the Gross Axle Weight
Rating (GAWR) for the front and
rear axle; see “Certification
Label” later in this section. Steps for Determining Correct
Load Limit
1.Locate the statement
“The
combined weight of
occupants and cargo should
never exceed XXX kg or
XXX lbs” on your vehicle's
placard.
2.Determine the combined
weight of the driver and
passengers that will be riding
in your vehicle.
3.Subtract the combined
weight of the driver and
passengers from XXX kg or
XXX lbs.
4.The resulting figure equals
the available amount of cargo
and luggage load capacity.
For example, if the “XXX”
amount equals 1400 lbs and
there will be five 150 lb
passengers in your vehicle,
the amount of available cargo
Page 191 of 372
Black plate (11,1)Chevrolet Orlando Owner Manual - 2013 - CRC - 6/5/12
Driving and Operating 9-11
and luggage load capacity is
650 lbs (1400−750 (5 x 150)
= 650 lbs).
5.Determine the combined
weight of luggage and cargo
being loaded on the vehicle.
That weight may not safely
exceed the available cargo
and luggage load capacity
calculated in Step 4.
6.If your vehicle will be towing
a trailer, the load from your
trailer will be transferred to
your vehicle. Consult this
manual to determine how this
reduces the available cargo
and luggage load capacity of
your vehicle.
See Trailer Towing on page 9‑45
for important information on
towing a trailer, towing safety
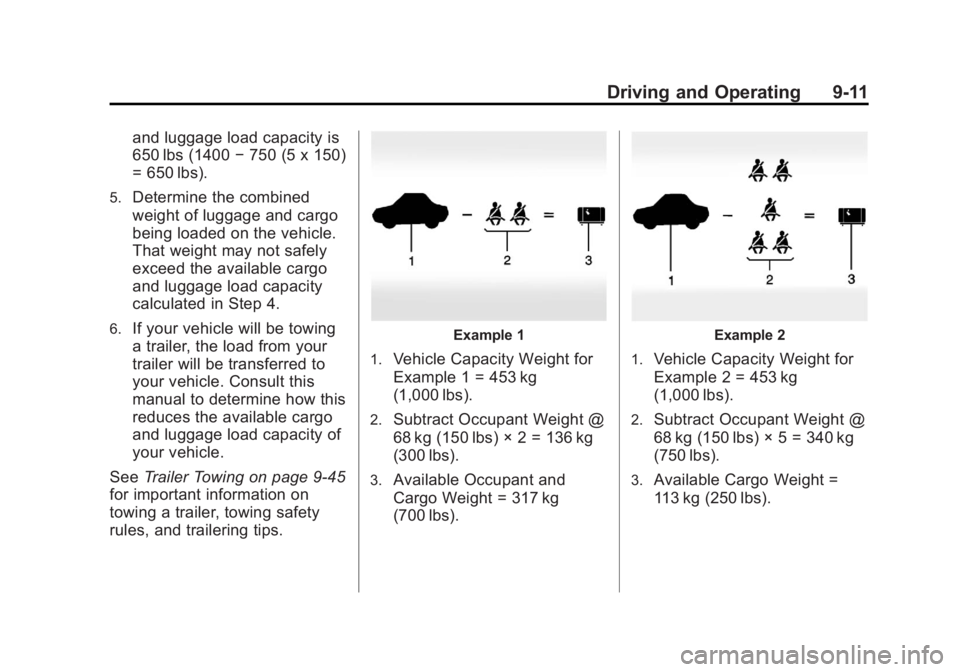
rules, and trailering tips.Example 1
1.
Vehicle Capacity Weight for
Example 1 = 453 kg
(1,000 lbs).
2.Subtract Occupant Weight @
68 kg (150 lbs) × 2 = 136 kg
(300 lbs).
3.Available Occupant and
Cargo Weight = 317 kg
(700 lbs).
Example 2
1.
Vehicle Capacity Weight for
Example 2 = 453 kg
(1,000 lbs).
2.Subtract Occupant Weight @
68 kg (150 lbs) × 5 = 340 kg
(750 lbs).
3.Available Cargo Weight =
113 kg (250 lbs).
Page 192 of 372
Black plate (12,1)Chevrolet Orlando Owner Manual - 2013 - CRC - 6/5/12
9-12 Driving and Operating
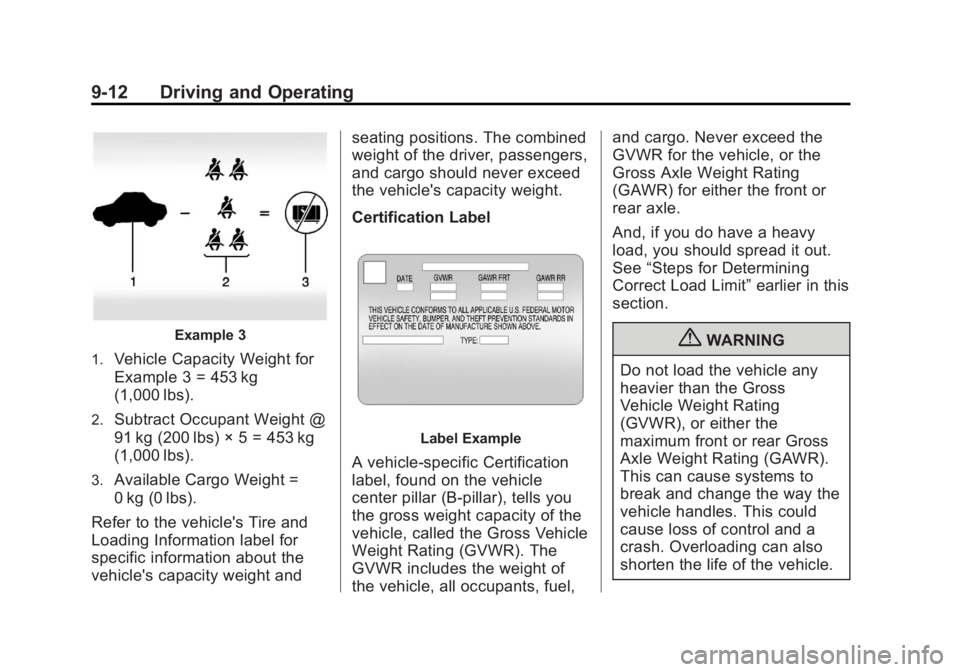
Example 3
1.
Vehicle Capacity Weight for
Example 3 = 453 kg
(1,000 lbs).
2.Subtract Occupant Weight @
91 kg (200 lbs) × 5 = 453 kg
(1,000 lbs).
3.Available Cargo Weight =
0 kg (0 lbs).
Refer to the vehicle's Tire and
Loading Information label for
specific information about the
vehicle's capacity weight and seating positions. The combined
weight of the driver, passengers,
and cargo should never exceed
the vehicle's capacity weight.
Certification Label
Label Example
A vehicle-specific Certification
label, found on the vehicle
center pillar (B-pillar), tells you
the gross weight capacity of the
vehicle, called the Gross Vehicle
Weight Rating (GVWR). The
GVWR includes the weight of
the vehicle, all occupants, fuel,and cargo. Never exceed the
GVWR for the vehicle, or the
Gross Axle Weight Rating
(GAWR) for either the front or
rear axle.
And, if you do have a heavy
load, you should spread it out.
See
“Steps for Determining
Correct Load Limit” earlier in this
section.
{WARNING
Do not load the vehicle any
heavier than the Gross
Vehicle Weight Rating
(GVWR), or either the
maximum front or rear Gross
Axle Weight Rating (GAWR).
This can cause systems to
break and change the way the
vehicle handles. This could
cause loss of control and a
crash. Overloading can also
shorten the life of the vehicle.
Page 236 of 372
Black plate (8,1)Chevrolet Orlando Owner Manual - 2013 - CRC - 6/5/12
10-8 Vehicle Care
{WARNING
The engine oil dipstick handle
may be hot; it could burn you.
Use a towel or glove to touch the
dipstick handle.
2. Pull out the dipstick and clean it with a paper towel or cloth, then
push it back in all the way.
Remove it again, keeping the tip
down, and check the level.
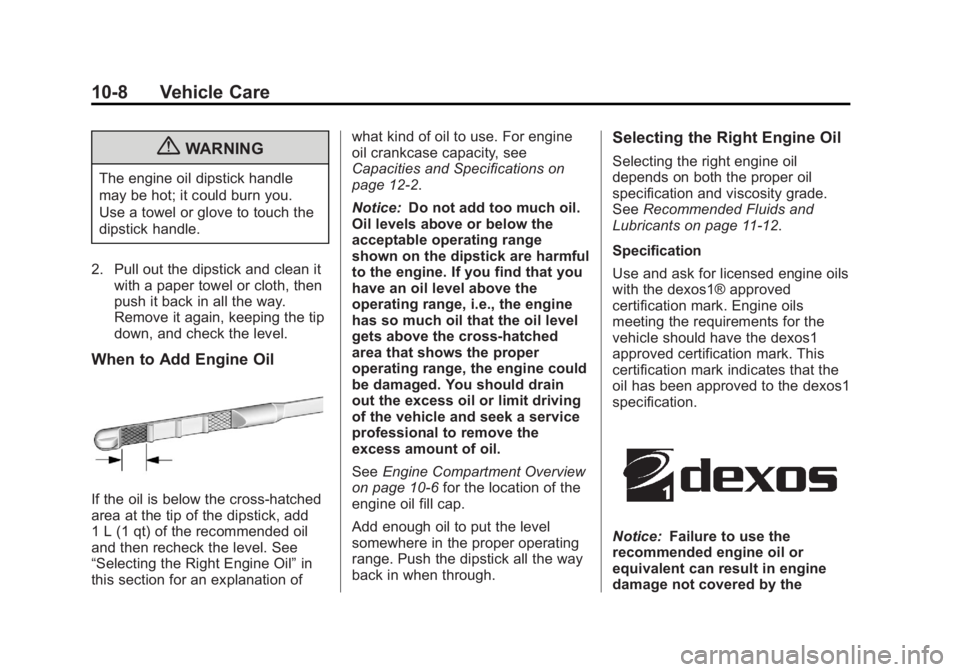
When to Add Engine Oil
If the oil is below the cross-hatched
area at the tip of the dipstick, add
1 L (1 qt) of the recommended oil
and then recheck the level. See
“Selecting the Right Engine Oil” in
this section for an explanation of what kind of oil to use. For engine
oil crankcase capacity, see
Capacities and Specifications on
page 12‑2.
Notice:
Do not add too much oil.
Oil levels above or below the
acceptable operating range
shown on the dipstick are harmful
to the engine. If you find that you
have an oil level above the
operating range, i.e., the engine
has so much oil that the oil level
gets above the cross-hatched
area that shows the proper
operating range, the engine could
be damaged. You should drain
out the excess oil or limit driving
of the vehicle and seek a service
professional to remove the
excess amount of oil.
See Engine Compartment Overview
on page 10‑6 for the location of the
engine oil fill cap.
Add enough oil to put the level
somewhere in the proper operating
range. Push the dipstick all the way
back in when through.
Selecting the Right Engine Oil
Selecting the right engine oil
depends on both the proper oil
specification and viscosity grade.
See Recommended Fluids and
Lubricants on page 11‑12.
Specification
Use and ask for licensed engine oils
with the dexos1® approved
certification mark. Engine oils
meeting the requirements for the
vehicle should have the dexos1
approved certification mark. This
certification mark indicates that the
oil has been approved to the dexos1
specification.
Notice: Failure to use the
recommended engine oil or
equivalent can result in engine
damage not covered by the
Page 247 of 372
Black plate (19,1)Chevrolet Orlando Owner Manual - 2013 - CRC - 6/5/12
Vehicle Care 10-19
Brakes
This vehicle has disc brakes. Disc
brake pads have built-in wear
indicators that make a high-pitched
warning sound when the brake pads
are worn and new pads are needed.
The sound can come and go or be
heard all the time the vehicle is
moving, except when applying the
brake pedal firmly.
{WARNING
The brake wear warning sound
means that soon the brakes will
not work well. That could lead to
a crash. When the brake wear
warning sound is heard, have the
vehicle serviced.
Notice: Continuing to drive with
worn-out brake pads could result
in costly brake repair. Some driving conditions or climates
can cause a brake squeal when the
brakes are first applied or lightly
applied. This does not mean
something is wrong with the brakes.
Properly torqued wheel nuts are
necessary to help prevent brake
pulsation. When tires are rotated,
inspect brake pads for wear and
evenly tighten wheel nuts in the
proper sequence to torque
specifications in
Capacities and
Specifications on page 12‑2.
Brake linings should always be
replaced as complete axle sets.
Brake Pedal Travel
See your dealer if the brake pedal
does not return to normal height,
or if there is a rapid increase in
pedal travel. This could be a sign
that brake service might be
required.
Brake Adjustment
Every time the brakes are applied,
with or without the vehicle moving,
the brakes adjust for wear.
Replacing Brake System Parts
The braking system on a vehicle is
complex. Its many parts have to be
of top quality and work well together
if the vehicle is to have really good
braking. The vehicle was designed
and tested with top-quality brake
parts. When parts of the braking
system are replaced, be sure to get
new, approved replacement parts.
If this is not done, the brakes might
not work properly. For example,
installing disc brake pads that are
wrong for the vehicle, can change
the balance between the front and
rear brakes —for the worse. The
braking performance expected can
change in many other ways if the
wrong replacement brake parts are
installed.