2016 CHEVROLET MALIBU instrument cluster
[x] Cancel search: instrument clusterPage 162 of 420
Chevrolet Malibu Owner Manual (GMNA-Localizing-U.S./Canada/Mexico-
9087641) - 2016 - crc - 9/3/15
Lighting 161
Lighting
Exterior Lighting
Exterior Lamp Controls . . . . . . . 161
Exterior Lamps OffReminder . . . . . . . . . . . . . . . . . . . 163
Headlamp High/Low-Beam Changer . . . . . . . . . . . . . . . . . . . . 163
Flash-to-Pass . . . . . . . . . . . . . . . . 163
Daytime Running Lamps (DRL) . . . . . . . . . . . . . . . 163
Automatic Headlamp System . . . . . . . . . . . . . . . . . . . . . . 163
Hazard Warning Flashers . . . . . 164
Turn and Lane-Change Signals . . . . . . . . . . . . . . . . . . . . . . 164
Interior Lighting
Instrument Panel IlluminationControl . . . . . . . . . . . . . . . . . . . . . . 165
Courtesy Lamps . . . . . . . . . . . . . . 165
Dome Lamps . . . . . . . . . . . . . . . . . 165
Reading Lamps . . . . . . . . . . . . . . 166
Lighting Features
Entry Lighting . . . . . . . . . . . . . . . . 166
Exit Lighting . . . . . . . . . . . . . . . . . . 166
Battery Load Management . . . 167
Exterior Lighting
Exterior Lamp Controls
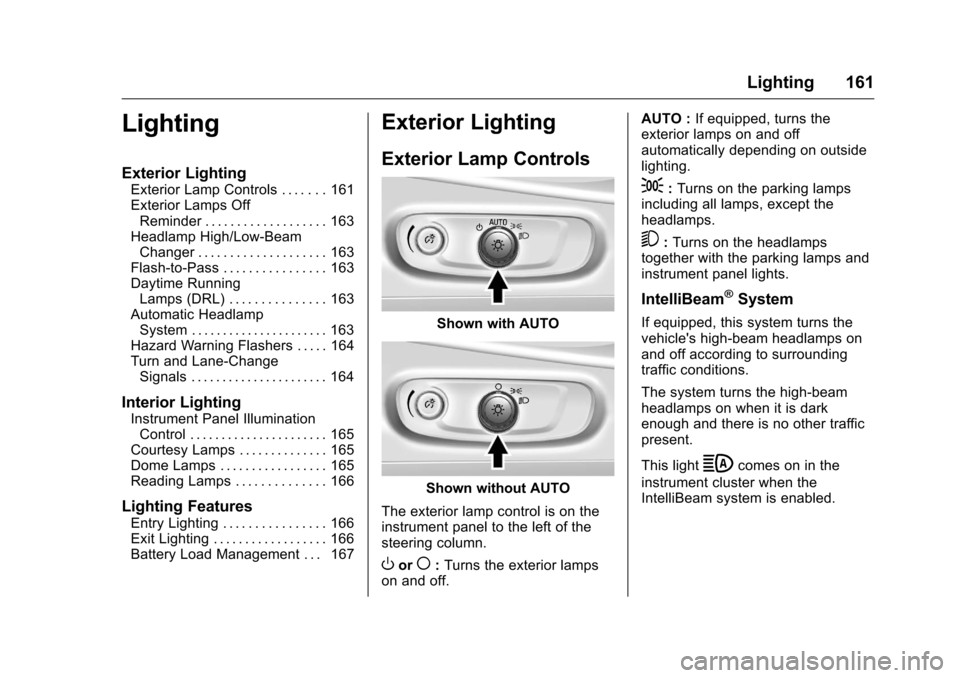
Shown with AUTO
Shown without AUTO
The exterior lamp control is on the
instrument panel to the left of the
steering column.
Oor(: Turns the exterior lamps
on and off. AUTO :
If equipped, turns the
exterior lamps on and off
automatically depending on outside
lighting.
;: Turns on the parking lamps
including all lamps, except the
headlamps.
5: Turns on the headlamps
together with the parking lamps and
instrument panel lights.
IntelliBeam®System
If equipped, this system turns the
vehicle's high-beam headlamps on
and off according to surrounding
traffic conditions.
The system turns the high-beam
headlamps on when it is dark
enough and there is no other traffic
present.
This light
bcomes on in the
instrument cluster when the
IntelliBeam system is enabled.
Page 163 of 420
Chevrolet Malibu Owner Manual (GMNA-Localizing-U.S./Canada/Mexico-
9087641) - 2016 - crc - 9/3/15
162 Lighting
Turning On and Enabling
IntelliBeam
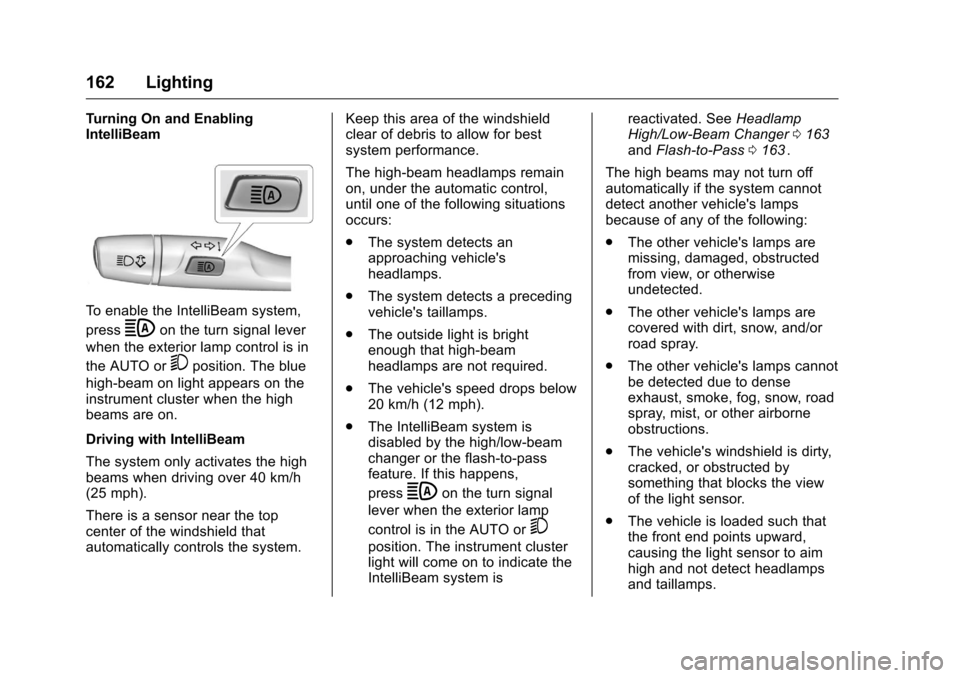
To enable the IntelliBeam system,
press
bon the turn signal lever
when the exterior lamp control is in
the AUTO or
5position. The blue
high-beam on light appears on the
instrument cluster when the high
beams are on.
Driving with IntelliBeam
The system only activates the high
beams when driving over 40 km/h
(25 mph).
There is a sensor near the top
center of the windshield that
automatically controls the system. Keep this area of the windshield
clear of debris to allow for best
system performance.
The high-beam headlamps remain
on, under the automatic control,
until one of the following situations
occurs:
.
The system detects an
approaching vehicle's
headlamps.
. The system detects a preceding
vehicle's taillamps.
. The outside light is bright
enough that high-beam
headlamps are not required.
. The vehicle's speed drops below
20 km/h (12 mph).
. The IntelliBeam system is
disabled by the high/low-beam
changer or the flash-to-pass
feature. If this happens,
press
bon the turn signal
lever when the exterior lamp
control is in the AUTO or
5
position. The instrument cluster
light will come on to indicate the
IntelliBeam system is reactivated. See
Headlamp
High/Low-Beam Changer 0163
iiand Flash-to-Pass 0163ii.
The high beams may not turn off
automatically if the system cannot
detect another vehicle's lamps
because of any of the following:
. The other vehicle's lamps are
missing, damaged, obstructed
from view, or otherwise
undetected.
. The other vehicle's lamps are
covered with dirt, snow, and/or
road spray.
. The other vehicle's lamps cannot
be detected due to dense
exhaust, smoke, fog, snow, road
spray, mist, or other airborne
obstructions.
. The vehicle's windshield is dirty,
cracked, or obstructed by
something that blocks the view
of the light sensor.
. The vehicle is loaded such that
the front end points upward,
causing the light sensor to aim
high and not detect headlamps
and taillamps.
Page 164 of 420
Chevrolet Malibu Owner Manual (GMNA-Localizing-U.S./Canada/Mexico-
9087641) - 2016 - crc - 9/3/15
Lighting 163
.Driving on winding or hilly roads.
The IntelliBeam system may need to
be disabled if any of the above
conditions exist.
Exterior Lamps Off
Reminder
A warning chime sounds if the driver
door is opened while the ignition is
off and the exterior lamps are on.
Headlamp High/
Low-Beam Changer
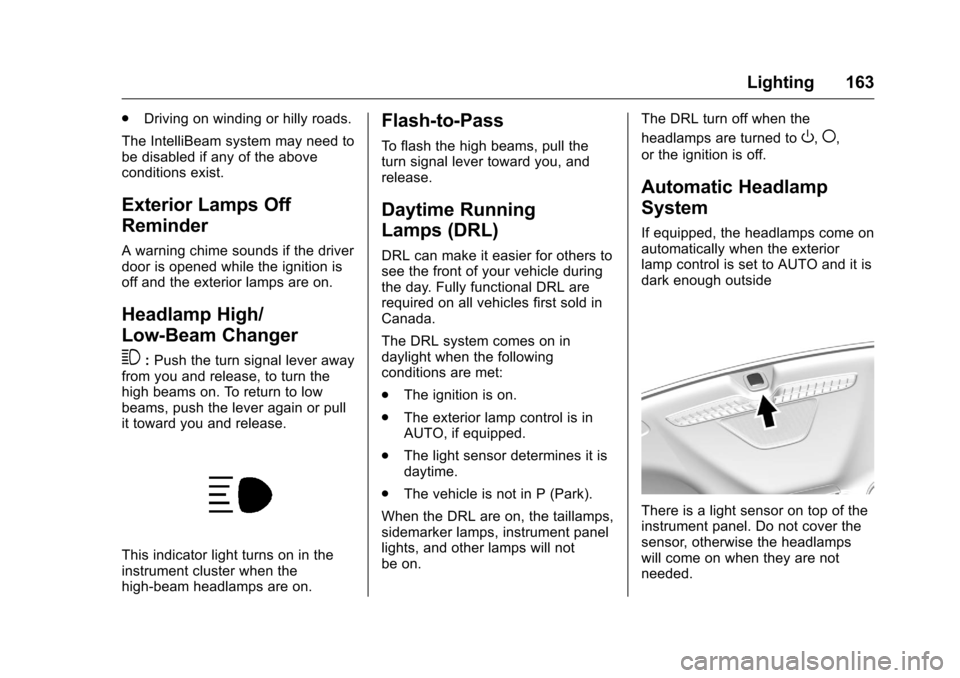
3
: Push the turn signal lever away
from you and release, to turn the
high beams on. To return to low
beams, push the lever again or pull
it toward you and release.
This indicator light turns on in the
instrument cluster when the
high-beam headlamps are on.
Flash-to-Pass
To flash the high beams, pull the
turn signal lever toward you, and
release.
Daytime Running
Lamps (DRL)
DRL can make it easier for others to
see the front of your vehicle during
the day. Fully functional DRL are
required on all vehicles first sold in
Canada.
The DRL system comes on in
daylight when the following
conditions are met:
. The ignition is on.
. The exterior lamp control is in
AUTO, if equipped.
. The light sensor determines it is
daytime.
. The vehicle is not in P (Park).
When the DRL are on, the taillamps,
sidemarker lamps, instrument panel
lights, and other lamps will not
be on. The DRL turn off when the
headlamps are turned to
O,(,
or the ignition is off.
Automatic Headlamp
System
If equipped, the headlamps come on
automatically when the exterior
lamp control is set to AUTO and it is
dark enough outside
There is a light sensor on top of the
instrument panel. Do not cover the
sensor, otherwise the headlamps
will come on when they are not
needed.
Page 165 of 420
Chevrolet Malibu Owner Manual (GMNA-Localizing-U.S./Canada/Mexico-
9087641) - 2016 - crc - 9/3/15
164 Lighting
The system may also turn on the
headlamps when driving through a
parking garage or tunnel.
When it is bright enough outside,
the headlamps will turn off or may
change to Daytime Running
Lamps (DRL).
The automatic headlamp system
turns off when the exterior lamp
control is turned to
Oor the ignition
is off.
Lights On with Wipers
If the windshield wipers are
activated in daylight with the engine
on, and the exterior lamp control is
in AUTO, the headlamps, parking
lamps, and other exterior lamps
come on. The transition time for the
lamps coming on varies based on
wiper speed. When the wipers are
not operating, these lamps turn off.
Move the exterior lamp control to
O
or;to disable this feature.
Hazard Warning Flashers
|: Press this button to make the
front and rear turn signal lamps
flash on and off. Press again to turn
the flashers off.
The hazard warning flashers turn on
automatically if the airbags deploy.
Turn and Lane-Change
Signals
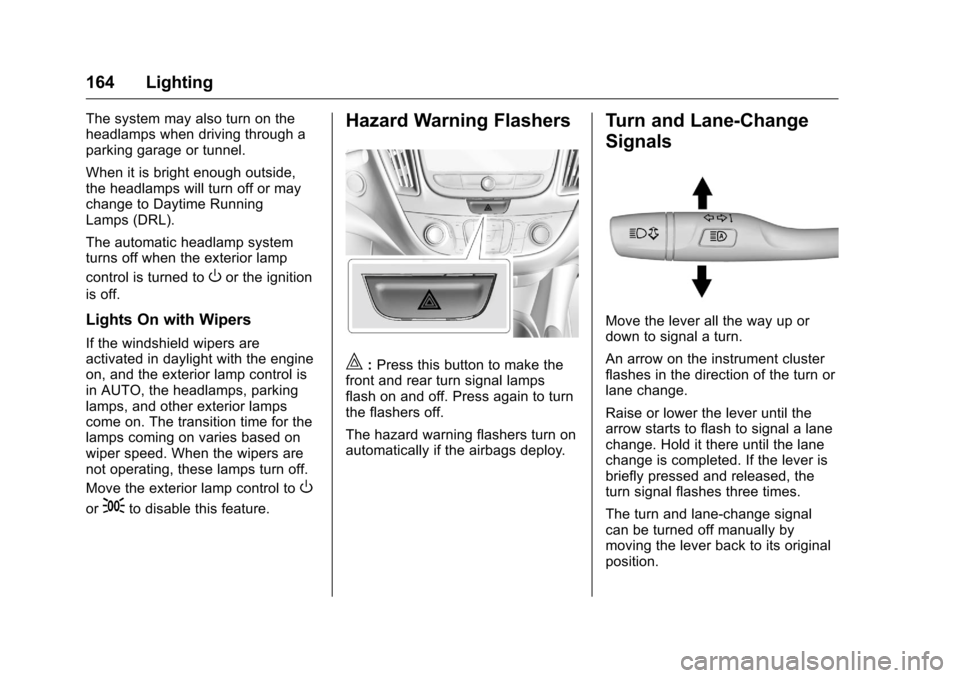
Move the lever all the way up or
down to signal a turn.
An arrow on the instrument cluster
flashes in the direction of the turn or
lane change.
Raise or lower the lever until the
arrow starts to flash to signal a lane
change. Hold it there until the lane
change is completed. If the lever is
briefly pressed and released, the
turn signal flashes three times.
The turn and lane-change signal
can be turned off manually by
moving the lever back to its original
position.
Page 166 of 420
Chevrolet Malibu Owner Manual (GMNA-Localizing-U.S./Canada/Mexico-
9087641) - 2016 - crc - 9/3/15
Lighting 165
If after signaling a turn or lane
change, the arrow flashes rapidly or
does not come on, a signal bulb
may be burned out.
Replace any burned out bulbs. If a
bulb is not burned out, check the
fuse. SeeFuses0311
ii.
Interior Lighting
Instrument Panel
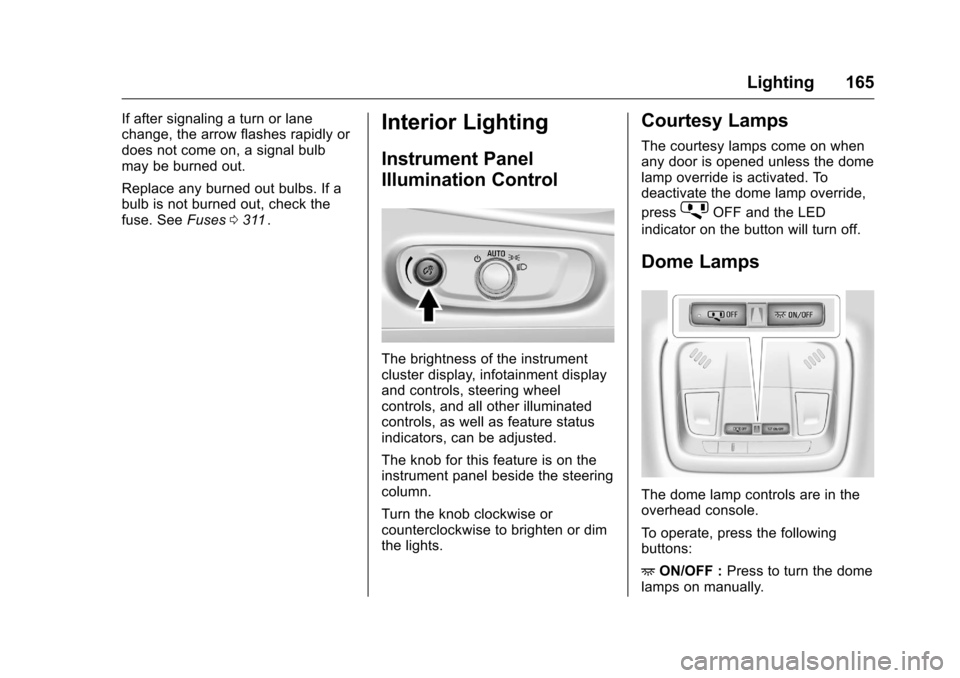
Illumination Control
The brightness of the instrument
cluster display, infotainment display
and controls, steering wheel
controls, and all other illuminated
controls, as well as feature status
indicators, can be adjusted.
The knob for this feature is on the
instrument panel beside the steering
column.
Turn the knob clockwise or
counterclockwise to brighten or dim
the lights.
Courtesy Lamps
The courtesy lamps come on when
any door is opened unless the dome
lamp override is activated. To
deactivate the dome lamp override,
press
jOFF and the LED
indicator on the button will turn off.
Dome Lamps
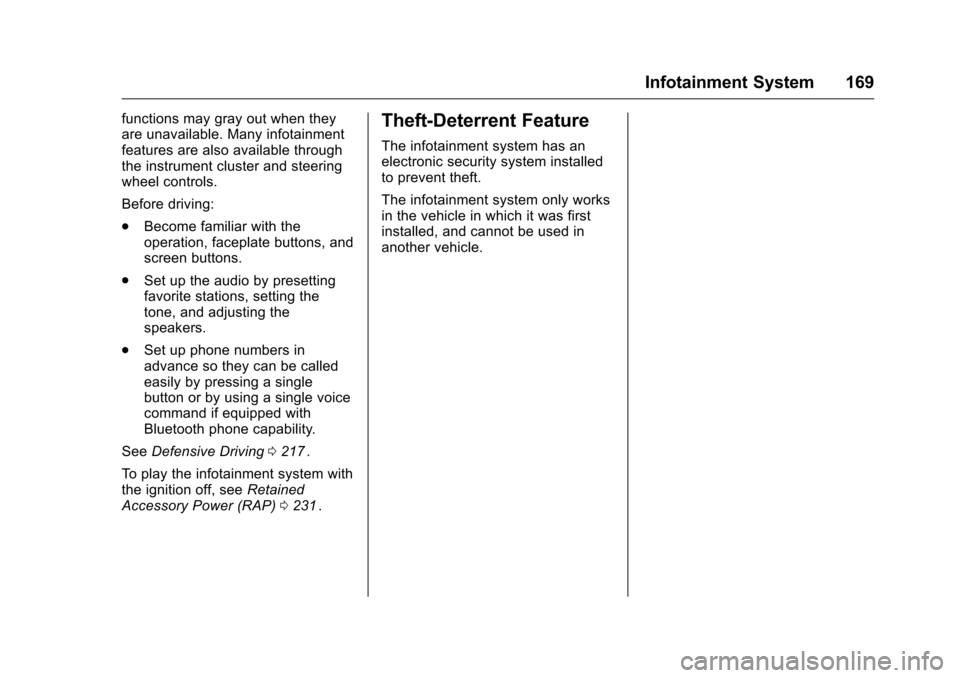
The dome lamp controls are in the
overhead console.
To operate, press the following
buttons:
+ ON/OFF : Press to turn the dome
lamps on manually.
Page 170 of 420
Chevrolet Malibu Owner Manual (GMNA-Localizing-U.S./Canada/Mexico-
9087641) - 2016 - crc - 9/3/15
Infotainment System 169
functions may gray out when they
are unavailable. Many infotainment
features are also available through
the instrument cluster and steering
wheel controls.
Before driving:
.Become familiar with the
operation, faceplate buttons, and
screen buttons.
. Set up the audio by presetting
favorite stations, setting the
tone, and adjusting the
speakers.
. Set up phone numbers in
advance so they can be called
easily by pressing a single
button or by using a single voice
command if equipped with
Bluetooth phone capability.
See Defensive Driving 0217
ii.
To play the infotainment system with
the ignition off, see Retained
Accessory Power (RAP) 0231
ii.
Theft-Deterrent Feature
The infotainment system has an
electronic security system installed
to prevent theft.
The infotainment system only works
in the vehicle in which it was first
installed, and cannot be used in
another vehicle.
Page 237 of 420
Chevrolet Malibu Owner Manual (GMNA-Localizing-U.S./Canada/Mexico-
9087641) - 2016 - crc - 9/3/15
236 Driving and Operating
position indicator within the
instrument cluster. When using the
ERS mode a number will display
next to the L, indicating the current
gear that has been selected.
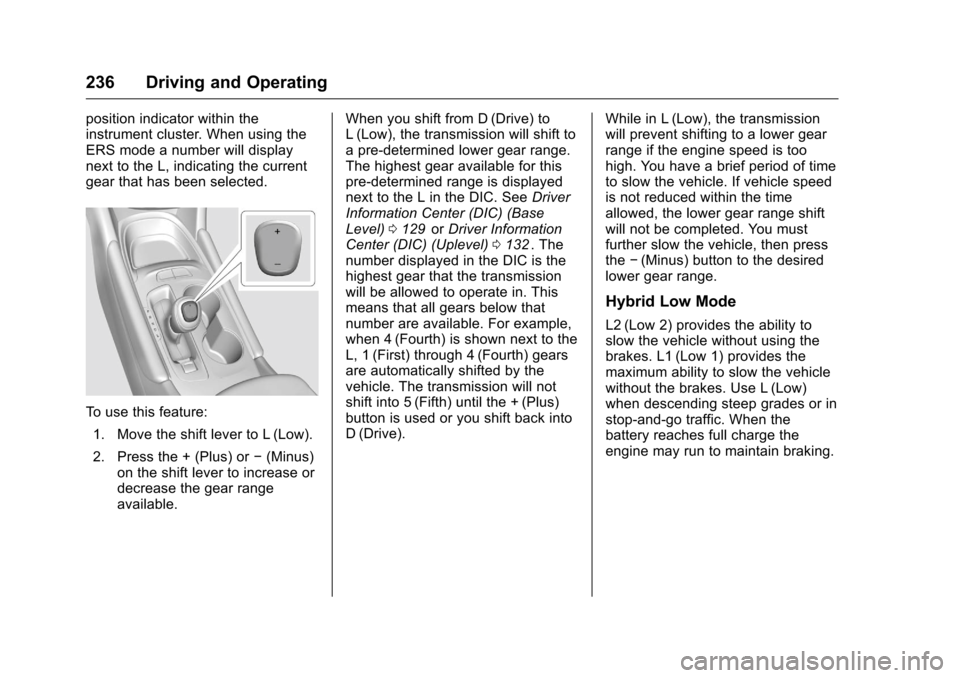
To use this feature:1. Move the shift lever to L (Low).
2. Press the + (Plus) or −(Minus)
on the shift lever to increase or
decrease the gear range
available. When you shift from D (Drive) to
L (Low), the transmission will shift to
a pre-determined lower gear range.
The highest gear available for this
pre-determined range is displayed
next to the L in the DIC. See
Driver
Information Center (DIC) (Base
Level) 0129
iior Driver Information
Center (DIC) (Uplevel) 0132ii. The
number displayed in the DIC is the
highest gear that the transmission
will be allowed to operate in. This
means that all gears below that
number are available. For example,
when 4 (Fourth) is shown next to the
L, 1 (First) through 4 (Fourth) gears
are automatically shifted by the
vehicle. The transmission will not
shift into 5 (Fifth) until the + (Plus)
button is used or you shift back into
D (Drive). While in L (Low), the transmission
will prevent shifting to a lower gear
range if the engine speed is too
high. You have a brief period of time
to slow the vehicle. If vehicle speed
is not reduced within the time
allowed, the lower gear range shift
will not be completed. You must
further slow the vehicle, then press
the
−(Minus) button to the desired
lower gear range.
Hybrid Low Mode
L2 (Low 2) provides the ability to
slow the vehicle without using the
brakes. L1 (Low 1) provides the
maximum ability to slow the vehicle
without the brakes. Use L (Low)
when descending steep grades or in
stop-and-go traffic. When the
battery reaches full charge the
engine may run to maintain braking.
Page 243 of 420
Chevrolet Malibu Owner Manual (GMNA-Localizing-U.S./Canada/Mexico-
9087641) - 2016 - crc - 9/3/15
242 Driving and Operating
vehicle wheel brakes to assist the
driver in keeping the vehicle on the
intended path.
If cruise control is being used and
traction control or StabiliTrak begins
to limit wheel spin, cruise control will
disengage. Cruise control may be
turned back on when road
conditions allow.
Both systems come on
automatically when the vehicle is
started and begins to move. The
systems may be heard or felt while
they are operating or while
performing diagnostic checks. This
is normal and does not mean there
is a problem with the vehicle.
It is recommended to leave both
systems on for normal driving
conditions, but it may be necessary
to turn TCS off if the vehicle gets
stuck in sand, mud, ice, or snow.
SeeIf the Vehicle Is Stuck 0222
iiand “Turning the Systems Off and
On” later in this section.
The indicator light for both systems
is in the instrument cluster. This
light will:
.
Flash when TCS is limiting
wheel spin.
. Flash when StabiliTrak is
activated.
. Turn on and stay on when either
system is not working.
If either system fails to turn on or to
activate, a message displays in the
Driver Information Center (DIC),
and
dcomes on and stays on to
indicate that the system is inactive
and is not assisting the driver in
maintaining control. The vehicle is
safe to drive, but driving should be
adjusted accordingly.
If
dcomes on and stays on:
1. Stop the vehicle. 2. Turn the engine off and wait
15 seconds.
3. Start the engine.
Drive the vehicle. If
dcomes on
and stays on, the vehicle may need
more time to diagnose the problem.
If the condition persists, see your
dealer.
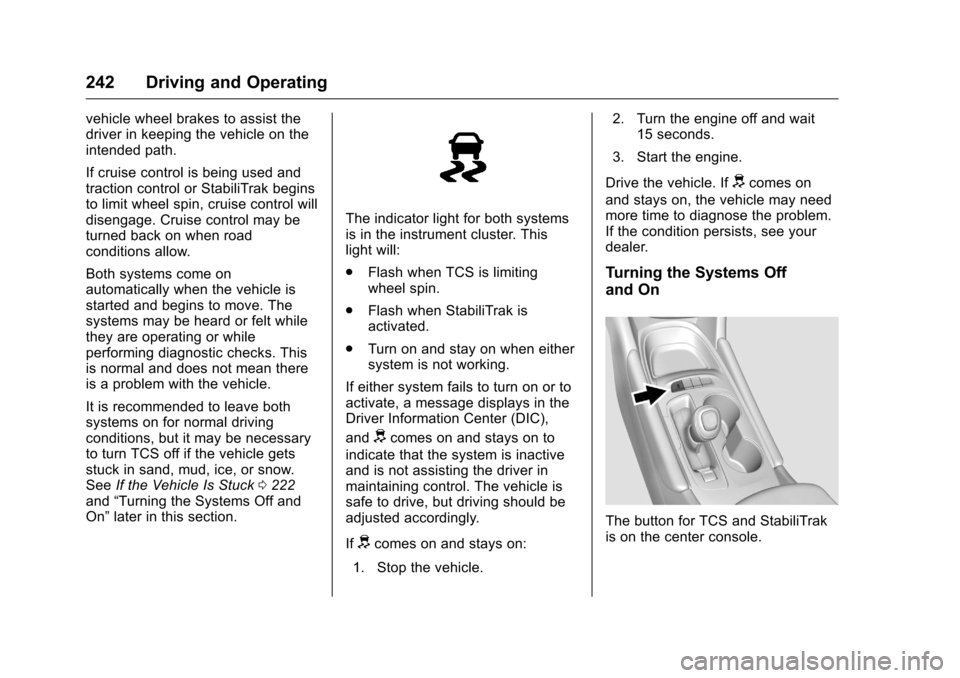
Turning the Systems Off
and On
The button for TCS and StabiliTrak
is on the center console.