2016 CHEVROLET MALIBU instrument cluster
[x] Cancel search: instrument clusterPage 299 of 420
Chevrolet Malibu Owner Manual (GMNA-Localizing-U.S./Canada/Mexico-
9087641) - 2016 - crc - 9/3/15
298 Vehicle Care
The coolant surge tank pressure
cap can be removed when the
cooling system, including the surge
tank pressure cap and upper
radiator hose, is no longer hot.1. Turn the pressure cap slowly counterclockwise. If a hiss is
heard, wait for that to stop.
A hiss means there is still
some pressure left.
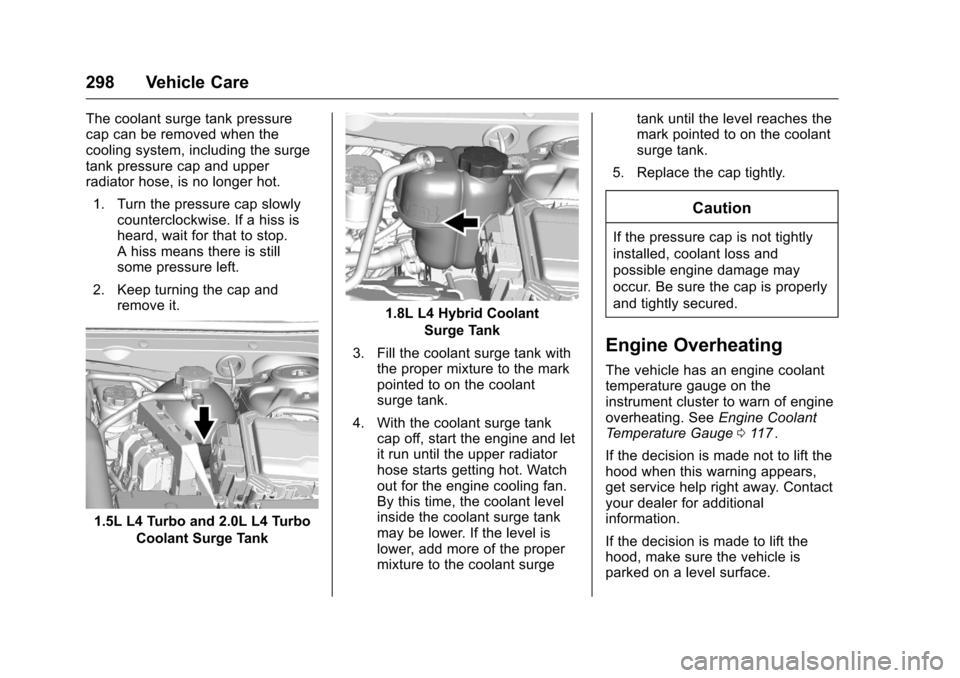
2. Keep turning the cap and remove it.
1.5L L4 Turbo and 2.0L L4 Turbo
Coolant Surge Tank
1.8L L4 Hybrid CoolantSurge Tank
3. Fill the coolant surge tank with the proper mixture to the mark
pointed to on the coolant
surge tank.
4. With the coolant surge tank cap off, start the engine and let
it run until the upper radiator
hose starts getting hot. Watch
out for the engine cooling fan.
By this time, the coolant level
inside the coolant surge tank
may be lower. If the level is
lower, add more of the proper
mixture to the coolant surge tank until the level reaches the
mark pointed to on the coolant
surge tank.
5. Replace the cap tightly.
Caution
If the pressure cap is not tightly
installed, coolant loss and
possible engine damage may
occur. Be sure the cap is properly
and tightly secured.
Engine Overheating
The vehicle has an engine coolant
temperature gauge on the
instrument cluster to warn of engine
overheating. See Engine Coolant
Temperature Gauge 0117
ii.
If the decision is made not to lift the
hood when this warning appears,
get service help right away. Contact
your dealer for additional
information.
If the decision is made to lift the
hood, make sure the vehicle is
parked on a level surface.
Page 329 of 420
Chevrolet Malibu Owner Manual (GMNA-Localizing-U.S./Canada/Mexico-
9087641) - 2016 - crc - 9/3/15
328 Vehicle Care
Your vehicle has also been
equipped with a TPMS malfunction
indicator to indicate when the
system is not operating properly.
The TPMS malfunction indicator is
combined with the low tire pressure
telltale. When the system detects a
malfunction, the telltale will flash for
approximately one minute and then
remain continuously illuminated.
This sequence will continue upon
subsequent vehicle start-ups as
long as the malfunction exists.
When the malfunction indicator is
illuminated, the system may not be
able to detect or signal low tire
pressure as intended. TPMS
malfunctions may occur for a variety
of reasons, including the installation
of replacement or alternate tires or
wheels on the vehicle that prevent
the TPMS from functioning properly.
Always check the TPMS malfunction
telltale after replacing one or more
tires or wheels on your vehicle to
ensure that the replacement or
alternate tires and wheels allow the
TPMS to continue to function
properly.See
Tire Pressure Monitor
Operation 0328ii.
See Radio Frequency Statement
0 394
ii.
Tire Pressure Monitor
Operation
This vehicle may have a Tire
Pressure Monitor System (TPMS).
The TPMS is designed to warn the
driver when a low tire pressure
condition exists. TPMS sensors are
mounted onto each tire and wheel
assembly, excluding the spare tire
and wheel assembly. The TPMS
sensors monitor the air pressure in
the tires and transmits the tire
pressure readings to a receiver
located in the vehicle.
When a low tire pressure condition
is detected, the TPMS illuminates
the low tire pressure warning light located on the instrument cluster.
If the warning light comes on, stop
as soon as possible and inflate the
tires to the recommended pressure
shown on the Tire and Loading
Information label. See
Vehicle Load
Limits 0222
ii.
A message to check the pressure in
a specific tire displays in the Driver
Information Center (DIC). The low
tire pressure warning light and the
DIC warning message come on at
each ignition cycle until the tires are
inflated to the correct inflation
pressure. Using the DIC, tire
pressure levels can be viewed. For
additional information and details
about the DIC operation and
displays see Driver Information
Center (DIC) (Base Level) 0129
iior
Driver Information Center (DIC)
(Uplevel) 0132
ii.
The low tire pressure warning light
may come on in cool weather when
the vehicle is first started, and then
turn off as the vehicle is driven. This
could be an early indicator that the
air pressure is getting low and
needs to be inflated to the proper
pressure.
Page 364 of 420
Chevrolet Malibu Owner Manual (GMNA-Localizing-U.S./Canada/Mexico-
9087641) - 2016 - crc - 9/3/15
Vehicle Care 363
Interior Care
To prevent dirt particle abrasions,
regularly clean the vehicle's interior.
Immediately remove any soils.
Newspapers or dark garments can
transfer color to the vehicle’s
interior.
Use a soft bristle brush to remove
dust from knobs and crevices on the
instrument cluster. Using a mild
soap solution, immediately remove
hand lotions, sunscreen, and insect
repellent from all interior surfaces or
permanent damage may result.
Use cleaners specifically designed
for the surfaces being cleaned to
prevent permanent damage. Apply
all cleaners directly to the cleaning
cloth. Do not spray cleaners on any
switches or controls. Remove
cleaners quickly.
Before using cleaners, read and
follow all safety instructions on the
label. While cleaning the interior,
open the doors and windows to get
proper ventilation.To prevent damage, do not clean
the interior using the following
cleaners or techniques:
.
Never use a razor or any other
sharp object to remove soil from
any interior surface.
. Never use a brush with stiff
bristles.
. Never rub any surface
aggressively or with too much
pressure.
. Do not use laundry detergents or
dishwashing soaps with
degreasers. For liquid cleaners,
use approximately 20 drops per
3.8 L (1 gal) of water.
A concentrated soap solution will
create streaks and attract dirt.
Do not use solutions that contain
strong or caustic soap.
. Do not heavily saturate the
upholstery when cleaning.
. Do not use solvents or cleaners
containing solvents.
Interior Glass
To clean, use a terry cloth fabric
dampened with water. Wipe droplets
left behind with a clean dry cloth.
If necessary, use a commercial
glass cleaner after cleaning with
plain water.
Caution
To prevent scratching, never use
abrasive cleaners on automotive
glass. Abrasive cleaners or
aggressive cleaning may damage
the rear window defogger.
Cleaning the windshield with water
during the first three to six months
of ownership will reduce tendency
to fog.
Speaker Covers
Vacuum around a speaker cover
gently, so that the speaker will not
be damaged. Clean spots with water
and mild soap.
Page 375 of 420
Chevrolet Malibu Owner Manual (GMNA-Localizing-U.S./Canada/Mexico-
9087641) - 2016 - crc - 9/3/15
374 Service and Maintenance
.To avoid break-down or failure to
start the vehicle, maintain a
battery with full cranking power.
. Trained dealer technicians have
the diagnostic equipment to test
the battery and ensure that the
connections and cables are
corrosion-free.
Belts
. Belts may need replacing if they
squeak or show signs of
cracking or splitting.
. Trained dealer technicians have
access to tools and equipment
to inspect the belts and
recommend adjustment or
replacement when necessary.
Brakes
Brakes stop the vehicle and are
crucial to safe driving.
. Signs of brake wear may include
chirping, grinding, or squealing
noises, or difficulty stopping. .
Trained dealer technicians have
access to tools and equipment
to inspect the brakes and
recommend quality parts
engineered for the vehicle.
Fluids
Proper fluid levels and approved
fluids protect the vehicle’s systems
and components. See
Recommended Fluids and
Lubricants 0376
iifor GM approved
fluids.
. Engine oil and windshield
washer fluid levels should be
checked at every fuel fill.
. Instrument cluster lights may
come on to indicate that fluids
may be low and need to be
filled.
Hoses
Hoses transport fluids and should
be regularly inspected to ensure
that there are no cracks or leaks.
With a multi-point inspection, your
dealer can inspect the hoses and
advise if replacement is needed. Lamps
Properly working headlamps,
taillamps, and brake lamps are
important to see and be seen on
the road.
.
Signs that the headlamps need
attention include dimming, failure
to light, cracking, or damage.
The brake lamps need to be
checked periodically to ensure
that they light when braking.
. With a multi-point inspection,
your dealer can check the lamps
and note any concerns.
Shocks and Struts
Shocks and struts help aid in control
for a smoother ride.
. Signs of wear may include
steering wheel vibration, bounce/
sway while braking, longer
stopping distance, or uneven
tire wear.
. As part of the multi-point
inspection, trained dealer
technicians can visually inspect
the shocks and struts for signs
Page 411 of 420
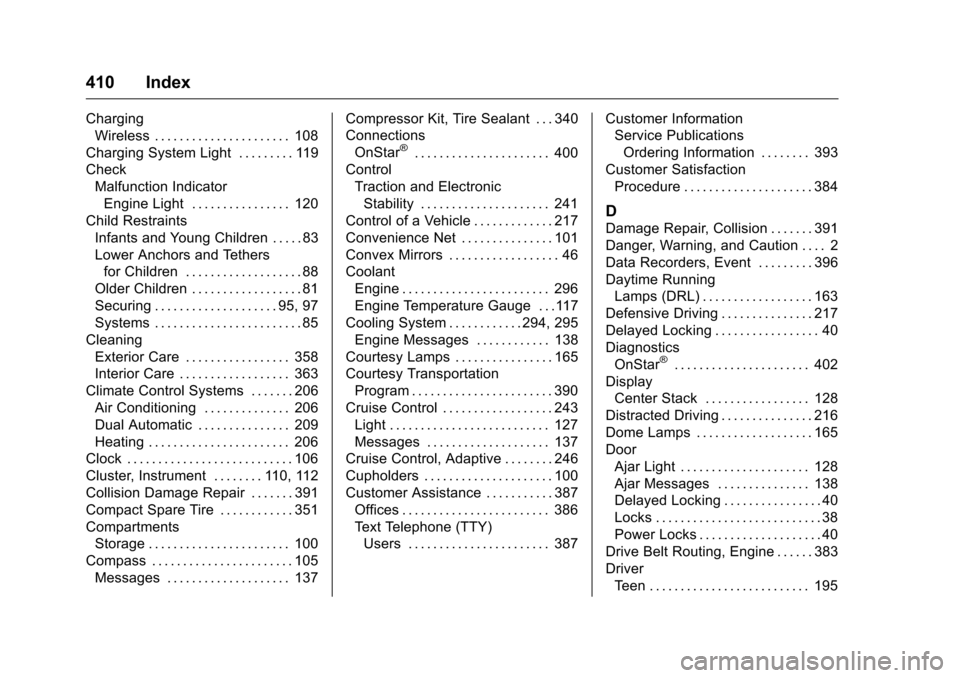
Chevrolet Malibu Owner Manual (GMNA-Localizing-U.S./Canada/Mexico-
9087641) - 2016 - crc - 9/3/15
410 Index
ChargingWireless . . . . . . . . . . . . . . . . . . . . . . 108
Charging System Light . . . . . . . . . 119
Check Malfunction IndicatorEngine Light . . . . . . . . . . . . . . . . 120
Child Restraints
Infants and Young Children . . . . . 83
Lower Anchors and Tethersfor Children . . . . . . . . . . . . . . . . . . . 88
Older Children . . . . . . . . . . . . . . . . . . 81
Securing . . . . . . . . . . . . . . . . . . . . 95, 97
Systems . . . . . . . . . . . . . . . . . . . . . . . . 85
Cleaning Exterior Care . . . . . . . . . . . . . . . . . 358
Interior Care . . . . . . . . . . . . . . . . . . 363
Climate Control Systems . . . . . . . 206 Air Conditioning . . . . . . . . . . . . . . 206
Dual Automatic . . . . . . . . . . . . . . . 209
Heating . . . . . . . . . . . . . . . . . . . . . . . 206
Clock . . . . . . . . . . . . . . . . . . . . . . . . . . . 106
Cluster, Instrument . . . . . . . . 110, 112
Collision Damage Repair . . . . . . . 391
Compact Spare Tire . . . . . . . . . . . . 351
Compartments
Storage . . . . . . . . . . . . . . . . . . . . . . . 100
Compass . . . . . . . . . . . . . . . . . . . . . . . 105 Messages . . . . . . . . . . . . . . . . . . . . 137 Compressor Kit, Tire Sealant . . . 340
Connections
OnStar
®. . . . . . . . . . . . . . . . . . . . . . 400
Control Traction and ElectronicStability . . . . . . . . . . . . . . . . . . . . . 241
Control of a Vehicle . . . . . . . . . . . . . 217
Convenience Net . . . . . . . . . . . . . . . 101
Convex Mirrors . . . . . . . . . . . . . . . . . . 46
Coolant Engine . . . . . . . . . . . . . . . . . . . . . . . . 296
Engine Temperature Gauge . . .117
Cooling System . . . . . . . . . . . . 294, 295 Engine Messages . . . . . . . . . . . . 138
Courtesy Lamps . . . . . . . . . . . . . . . . 165
Courtesy Transportation Program . . . . . . . . . . . . . . . . . . . . . . . 390
Cruise Control . . . . . . . . . . . . . . . . . . 243 Light . . . . . . . . . . . . . . . . . . . . . . . . . . 127
Messages . . . . . . . . . . . . . . . . . . . . 137
Cruise Control, Adaptive . . . . . . . . 246
Cupholders . . . . . . . . . . . . . . . . . . . . . 100
Customer Assistance . . . . . . . . . . . 387
Offices . . . . . . . . . . . . . . . . . . . . . . . . 386
Text Telephone (TTY)Users . . . . . . . . . . . . . . . . . . . . . . . 387 Customer Information
Service Publications
Ordering Information . . . . . . . . 393
Customer Satisfaction Procedure . . . . . . . . . . . . . . . . . . . . . 384
D
Damage Repair, Collision . . . . . . . 391
Danger, Warning, and Caution . . . . 2
Data Recorders, Event . . . . . . . . . 396
Daytime RunningLamps (DRL) . . . . . . . . . . . . . . . . . . 163
Defensive Driving . . . . . . . . . . . . . . . 217
Delayed Locking . . . . . . . . . . . . . . . . . 40
Diagnostics OnStar
®. . . . . . . . . . . . . . . . . . . . . . 402
Display
Center Stack . . . . . . . . . . . . . . . . . 128
Distracted Driving . . . . . . . . . . . . . . . 216
Dome Lamps . . . . . . . . . . . . . . . . . . . 165
Door Ajar Light . . . . . . . . . . . . . . . . . . . . . 128
Ajar Messages . . . . . . . . . . . . . . . 138
Delayed Locking . . . . . . . . . . . . . . . . 40
Locks . . . . . . . . . . . . . . . . . . . . . . . . . . . 38
Power Locks . . . . . . . . . . . . . . . . . . . . 40
Drive Belt Routing, Engine . . . . . . 383
Driver Teen . . . . . . . . . . . . . . . . . . . . . . . . . . 195
Page 414 of 420
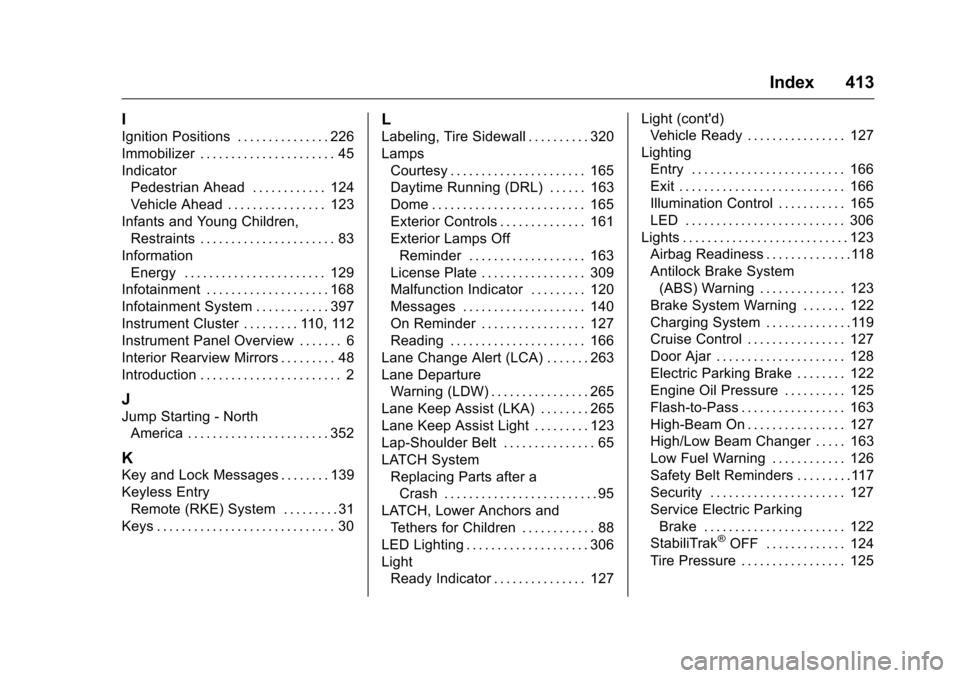
Chevrolet Malibu Owner Manual (GMNA-Localizing-U.S./Canada/Mexico-
9087641) - 2016 - crc - 9/3/15
Index 413
I
Ignition Positions . . . . . . . . . . . . . . . 226
Immobilizer . . . . . . . . . . . . . . . . . . . . . . 45
IndicatorPedestrian Ahead . . . . . . . . . . . . 124
Vehicle Ahead . . . . . . . . . . . . . . . . 123
Infants and Young Children, Restraints . . . . . . . . . . . . . . . . . . . . . . 83
Information Energy . . . . . . . . . . . . . . . . . . . . . . . 129
Infotainment . . . . . . . . . . . . . . . . . . . . 168
Infotainment System . . . . . . . . . . . . 397
Instrument Cluster . . . . . . . . . 110, 112
Instrument Panel Overview . . . . . . . 6
Interior Rearview Mirrors . . . . . . . . . 48
Introduction . . . . . . . . . . . . . . . . . . . . . . . 2
J
Jump Starting - North America . . . . . . . . . . . . . . . . . . . . . . . 352
K
Key and Lock Messages . . . . . . . . 139
Keyless EntryRemote (RKE) System . . . . . . . . . 31
Keys . . . . . . . . . . . . . . . . . . . . . . . . . . . . . 30
L
Labeling, Tire Sidewall . . . . . . . . . . 320
Lamps Courtesy . . . . . . . . . . . . . . . . . . . . . . 165
Daytime Running (DRL) . . . . . . 163
Dome . . . . . . . . . . . . . . . . . . . . . . . . . 165
Exterior Controls . . . . . . . . . . . . . . 161
Exterior Lamps OffReminder . . . . . . . . . . . . . . . . . . . 163
License Plate . . . . . . . . . . . . . . . . . 309
Malfunction Indicator . . . . . . . . . 120
Messages . . . . . . . . . . . . . . . . . . . . 140
On Reminder . . . . . . . . . . . . . . . . . 127
Reading . . . . . . . . . . . . . . . . . . . . . . 166
Lane Change Alert (LCA) . . . . . . . 263
Lane Departure Warning (LDW) . . . . . . . . . . . . . . . . 265
Lane Keep Assist (LKA) . . . . . . . . 265
Lane Keep Assist Light . . . . . . . . . 123
Lap-Shoulder Belt . . . . . . . . . . . . . . . 65
LATCH System Replacing Parts after aCrash . . . . . . . . . . . . . . . . . . . . . . . . . 95
LATCH, Lower Anchors and
Tethers for Children . . . . . . . . . . . . 88
LED Lighting . . . . . . . . . . . . . . . . . . . . 306
Light Ready Indicator . . . . . . . . . . . . . . . 127 Light (cont'd)
Vehicle Ready . . . . . . . . . . . . . . . . 127
Lighting Entry . . . . . . . . . . . . . . . . . . . . . . . . . 166
Exit . . . . . . . . . . . . . . . . . . . . . . . . . . . 166
Illumination Control . . . . . . . . . . . 165
LED . . . . . . . . . . . . . . . . . . . . . . . . . . 306
Lights . . . . . . . . . . . . . . . . . . . . . . . . . . . 123 Airbag Readiness . . . . . . . . . . . . . .118
Antilock Brake System
(ABS) Warning . . . . . . . . . . . . . . 123
Brake System Warning . . . . . . . 122
Charging System . . . . . . . . . . . . . .119
Cruise Control . . . . . . . . . . . . . . . . 127
Door Ajar . . . . . . . . . . . . . . . . . . . . . 128
Electric Parking Brake . . . . . . . . 122
Engine Oil Pressure . . . . . . . . . . 125
Flash-to-Pass . . . . . . . . . . . . . . . . . 163
High-Beam On . . . . . . . . . . . . . . . . 127
High/Low Beam Changer . . . . . 163
Low Fuel Warning . . . . . . . . . . . . 126
Safety Belt Reminders . . . . . . . . .117
Security . . . . . . . . . . . . . . . . . . . . . . 127
Service Electric Parking Brake . . . . . . . . . . . . . . . . . . . . . . . 122
StabiliTrak
®OFF . . . . . . . . . . . . . 124
Tire Pressure . . . . . . . . . . . . . . . . . 125