2016 CHEVROLET MALIBU fold seats
[x] Cancel search: fold seatsPage 13 of 420
Chevrolet Malibu Owner Manual (GMNA-Localizing-U.S./Canada/Mexico-
9087641) - 2016 - crc - 9/3/15
12 In Brief
Memory Features
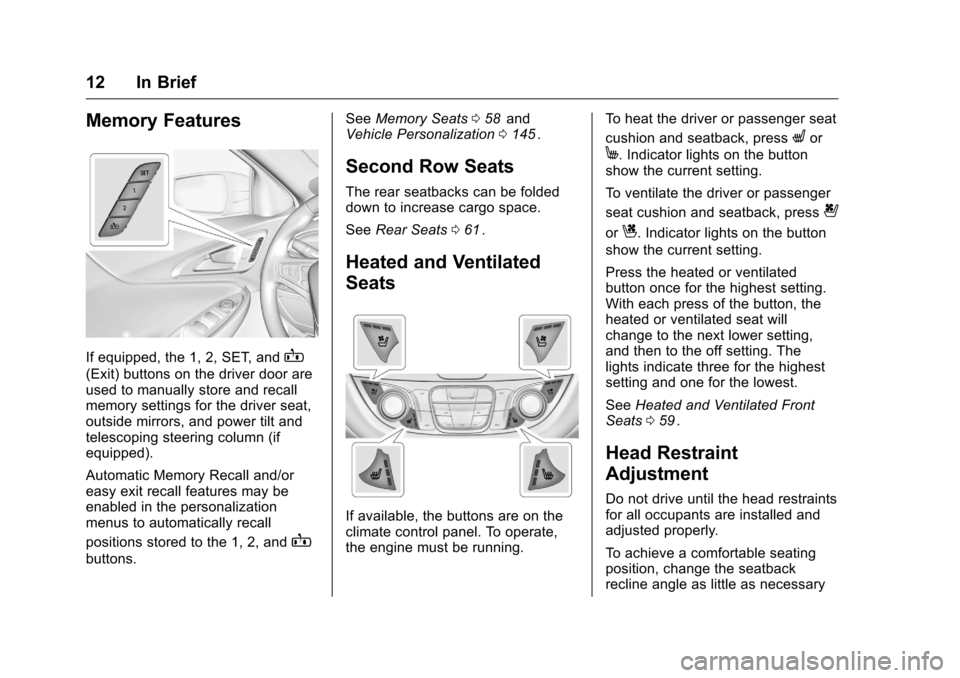
If equipped, the 1, 2, SET, andB
(Exit) buttons on the driver door are
used to manually store and recall
memory settings for the driver seat,
outside mirrors, and power tilt and
telescoping steering column (if
equipped).
Automatic Memory Recall and/or
easy exit recall features may be
enabled in the personalization
menus to automatically recall
positions stored to the 1, 2, and
B
buttons.See
Memory Seats 058
iiand
Vehicle Personalization 0145ii.
Second Row Seats
The rear seatbacks can be folded
down to increase cargo space.
See Rear Seats 061
ii.
Heated and Ventilated
Seats
If available, the buttons are on the
climate control panel. To operate,
the engine must be running. To heat the driver or passenger seat
cushion and seatback, press
Lor
M. Indicator lights on the button
show the current setting.
To ventilate the driver or passenger
seat cushion and seatback, press
{
orC. Indicator lights on the button
show the current setting.
Press the heated or ventilated
button once for the highest setting.
With each press of the button, the
heated or ventilated seat will
change to the next lower setting,
and then to the off setting. The
lights indicate three for the highest
setting and one for the lowest.
See Heated and Ventilated Front
Seats 059
ii.
Head Restraint
Adjustment
Do not drive until the head restraints
for all occupants are installed and
adjusted properly.
To achieve a comfortable seating
position, change the seatback
recline angle as little as necessary
Page 48 of 420
Chevrolet Malibu Owner Manual (GMNA-Localizing-U.S./Canada/Mexico-
9087641) - 2016 - crc - 9/3/15
Keys, Doors, and Windows 47
Power Mirrors
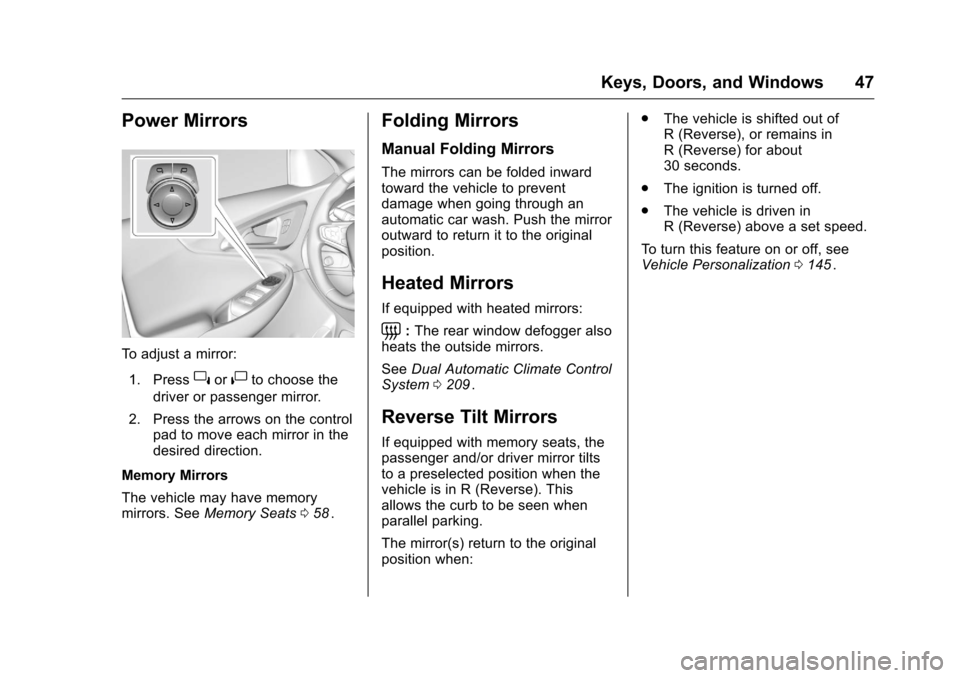
To adjust a mirror:1. Press
}or|to choose the
driver or passenger mirror.
2. Press the arrows on the control pad to move each mirror in the
desired direction.
Memory Mirrors
The vehicle may have memory
mirrors. See Memory Seats 058
ii.
Folding Mirrors
Manual Folding Mirrors
The mirrors can be folded inward
toward the vehicle to prevent
damage when going through an
automatic car wash. Push the mirror
outward to return it to the original
position.
Heated Mirrors
If equipped with heated mirrors:
=:The rear window defogger also
heats the outside mirrors.
See Dual Automatic Climate Control
System 0209
ii.
Reverse Tilt Mirrors
If equipped with memory seats, the
passenger and/or driver mirror tilts
to a preselected position when the
vehicle is in R (Reverse). This
allows the curb to be seen when
parallel parking.
The mirror(s) return to the original
position when: .
The vehicle is shifted out of
R (Reverse), or remains in
R (Reverse) for about
30 seconds.
. The ignition is turned off.
. The vehicle is driven in
R (Reverse) above a set speed.
To turn this feature on or off, see
Vehicle Personalization 0145
ii.
Page 62 of 420
Chevrolet Malibu Owner Manual (GMNA-Localizing-U.S./Canada/Mexico-
9087641) - 2016 - crc - 9/3/15
Seats and Restraints 61
Rear Seats
Folding the Seatback
Either side of the seatback can be
folded down for more cargo space.
Fold a seatback only when the
vehicle is not moving.
Caution
Folding a rear seat with the safety
belts still fastened may cause
damage to the seat or the safety
belts. Always unbuckle the safety
belts and return them to their
normal stowed position before
folding a rear seat.
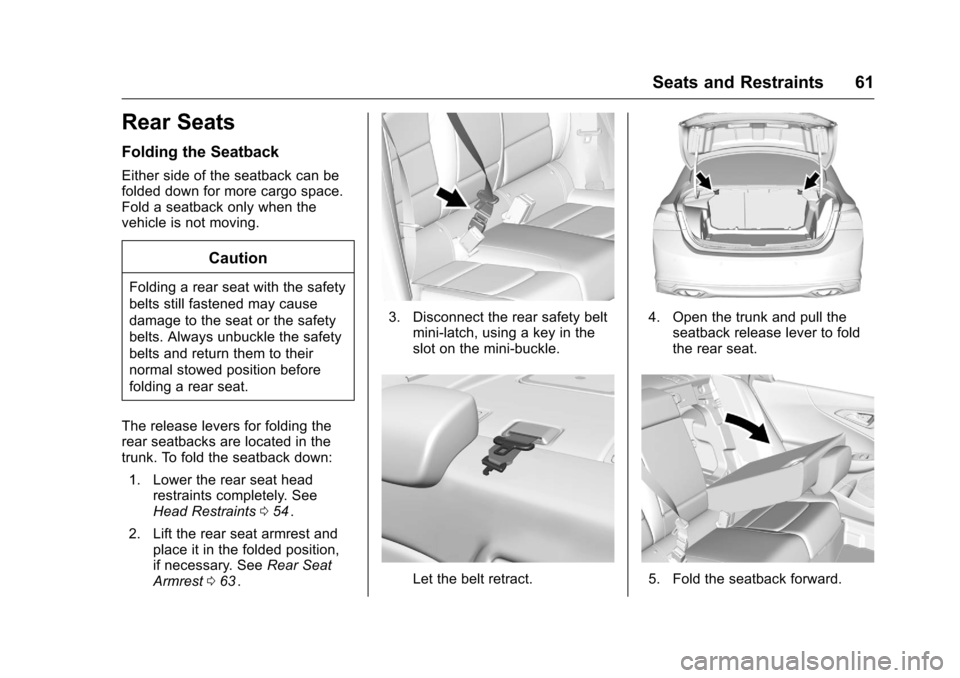
The release levers for folding the
rear seatbacks are located in the
trunk. To fold the seatback down: 1. Lower the rear seat head restraints completely. See
Head Restraints 054
ii.
2. Lift the rear seat armrest and place it in the folded position,
if necessary. See Rear Seat
Armrest 063
ii.
3. Disconnect the rear safety belt
mini-latch, using a key in the
slot on the mini-buckle.
Let the belt retract.
4. Open the trunk and pull theseatback release lever to fold
the rear seat.
5. Fold the seatback forward.
Page 64 of 420
Chevrolet Malibu Owner Manual (GMNA-Localizing-U.S./Canada/Mexico-
9087641) - 2016 - crc - 9/3/15
Seats and Restraints 63
Rear Seat Armrest
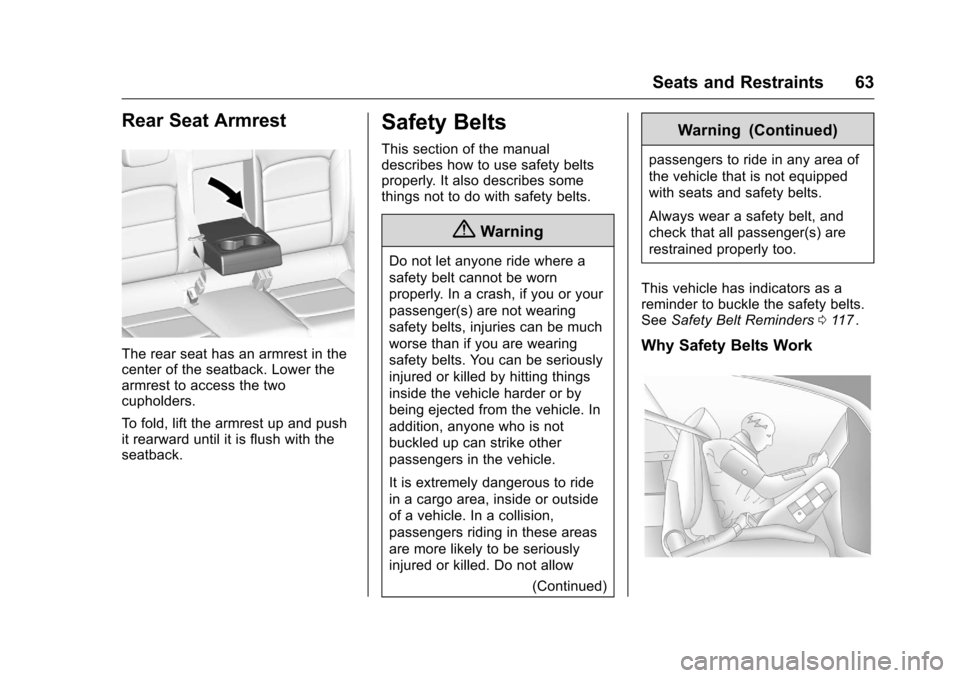
The rear seat has an armrest in the
center of the seatback. Lower the
armrest to access the two
cupholders.
To fold, lift the armrest up and push
it rearward until it is flush with the
seatback.
Safety Belts
This section of the manual
describes how to use safety belts
properly. It also describes some
things not to do with safety belts.
{Warning
Do not let anyone ride where a
safety belt cannot be worn
properly. In a crash, if you or your
passenger(s) are not wearing
safety belts, injuries can be much
worse than if you are wearing
safety belts. You can be seriously
injured or killed by hitting things
inside the vehicle harder or by
being ejected from the vehicle. In
addition, anyone who is not
buckled up can strike other
passengers in the vehicle.
It is extremely dangerous to ride
in a cargo area, inside or outside
of a vehicle. In a collision,
passengers riding in these areas
are more likely to be seriously
injured or killed. Do not allow(Continued)
Warning (Continued)
passengers to ride in any area of
the vehicle that is not equipped
with seats and safety belts.
Always wear a safety belt, and
check that all passenger(s) are
restrained properly too.
This vehicle has indicators as a
reminder to buckle the safety belts.
See Safety Belt Reminders 0117
ii.
Why Safety Belts Work
Page 93 of 420
Chevrolet Malibu Owner Manual (GMNA-Localizing-U.S./Canada/Mexico-
9087641) - 2016 - crc - 9/3/15
92 Seats and Restraints
Warning (Continued)
Buckle any unused safety belts
behind the child restraint so
children cannot reach them. Pull
the shoulder belt all the way out
of the retractor to set the lock,
and tighten the belt behind the
child restraint after the child
restraint has been installed.
Caution
Do not let the LATCH
attachments rub against the
vehicle’s safety belts. This may
damage these parts. If necessary,
move buckled safety belts to
avoid rubbing the LATCH
attachments.
Do not fold the rear seatback
when the seat is occupied. Do not
fold the empty rear seat with a
safety belt buckled. This could
damage the safety belt or the(Continued)
Caution (Continued)
seat. Unbuckle and return the
safety belt to its stowed position,
before folding the seat.
If you need to secure more than one
child restraint in the rear seat, see
Where to Put the Restraint 087
ii.
This system is designed to make
installation of child restraints easier.
When using lower anchors, do not
use the vehicle's safety belts.
Instead use the vehicle's anchors
and child restraint attachments to
secure the restraints. Some
restraints also use another vehicle
anchor to secure a top tether. 1. Attach and tighten the lower attachments to the lower
anchors. If the child restraint
does not have lower
attachments or the desired
seating position does not have
lower anchors, secure the child
restraint with the top tether and
the safety belts. Refer to the child restraint manufacturer
instructions and the
instructions in this manual.
1.1. Find the lower anchors for
the desired seating
position.
1.2. Put the child restraint on the seat.
If the head restraint
interferes with the proper
installation of the child
restraint, the head
restraint may be removed.
See“Head Restraint
Removal and
Reinstallation” at the end
of this section.
1.3. Attach and tighten the lower attachments on the
child restraint to the lower
anchors.
2. If the child restraint manufacturer recommends that
the top tether be attached,
attach and tighten the top
tether to the top tether anchor,
Page 95 of 420
Chevrolet Malibu Owner Manual (GMNA-Localizing-U.S./Canada/Mexico-
9087641) - 2016 - crc - 9/3/15
94 Seats and Restraints
be no more than 2.5 cm (1 in)
of movement for proper
installation.
Head Restraint Removal and
Reinstallation
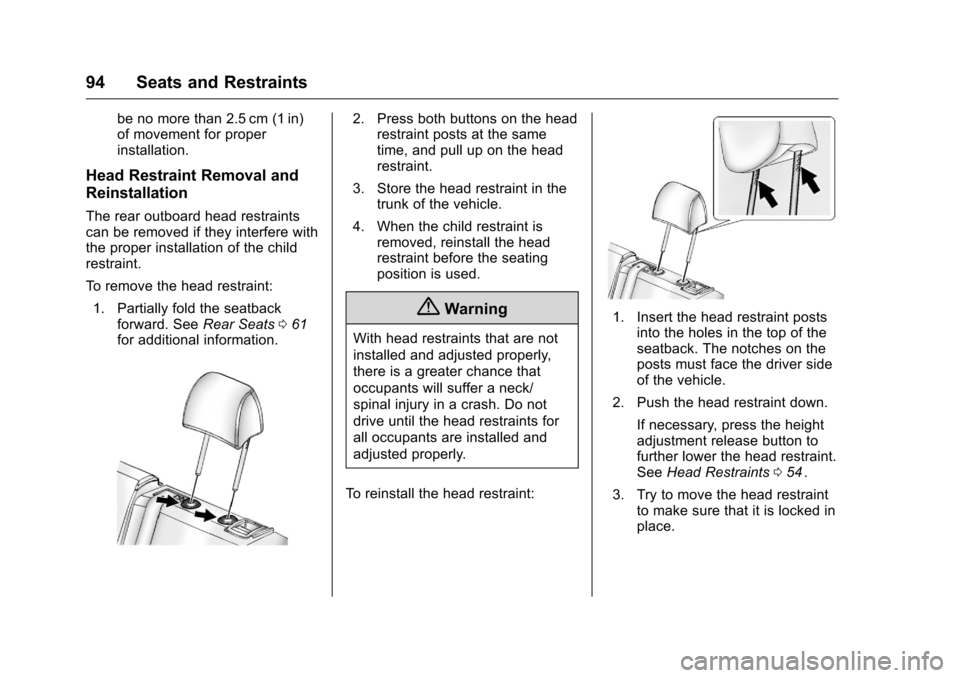
The rear outboard head restraints
can be removed if they interfere with
the proper installation of the child
restraint.
To remove the head restraint:1. Partially fold the seatback forward. See Rear Seats061
iifor additional information.
2. Press both buttons on the head
restraint posts at the same
time, and pull up on the head
restraint.
3. Store the head restraint in the trunk of the vehicle.
4. When the child restraint is removed, reinstall the head
restraint before the seating
position is used.
{Warning
With head restraints that are not
installed and adjusted properly,
there is a greater chance that
occupants will suffer a neck/
spinal injury in a crash. Do not
drive until the head restraints for
all occupants are installed and
adjusted properly.
To reinstall the head restraint:
1. Insert the head restraint posts into the holes in the top of the
seatback. The notches on the
posts must face the driver side
of the vehicle.
2. Push the head restraint down.
If necessary, press the height
adjustment release button to
further lower the head restraint.
See Head Restraints 054
ii.
3. Try to move the head restraint to make sure that it is locked in
place.
Page 226 of 420
Chevrolet Malibu Owner Manual (GMNA-Localizing-U.S./Canada/Mexico-
9087641) - 2016 - crc - 9/3/15
Driving and Operating 225
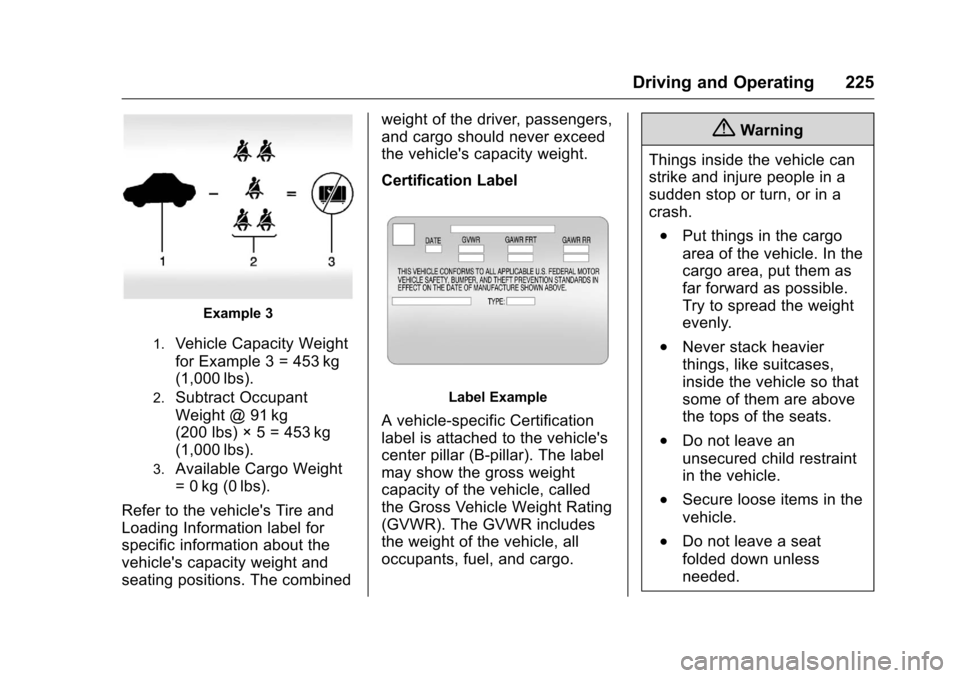
Example 3
1.Vehicle Capacity Weight
for Example 3 = 453 kg
(1,000 lbs).
2.Subtract Occupant
Weight @ 91 kg
(200 lbs) × 5 = 453 kg
(1,000 lbs).
3.Available Cargo Weight
= 0 kg (0 lbs).
Refer to the vehicle's Tire and
Loading Information label for
specific information about the
vehicle's capacity weight and
seating positions. The combined weight of the driver, passengers,
and cargo should never exceed
the vehicle's capacity weight.
Certification Label
Label Example
A vehicle-specific Certification
label is attached to the vehicle's
center pillar (B-pillar). The label
may show the gross weight
capacity of the vehicle, called
the Gross Vehicle Weight Rating
(GVWR). The GVWR includes
the weight of the vehicle, all
occupants, fuel, and cargo.
{Warning
Things inside the vehicle can
strike and injure people in a
sudden stop or turn, or in a
crash.
.Put things in the cargo
area of the vehicle. In the
cargo area, put them as
far forward as possible.
Try to spread the weight
evenly.
.Never stack heavier
things, like suitcases,
inside the vehicle so that
some of them are above
the tops of the seats.
.Do not leave an
unsecured child restraint
in the vehicle.
.Secure loose items in the
vehicle.
.Do not leave a seat
folded down unless
needed.
Page 415 of 420
Chevrolet Malibu Owner Manual (GMNA-Localizing-U.S./Canada/Mexico-
9087641) - 2016 - crc - 9/3/15
414 Index
Lights (cont'd)Traction Control System
(TCS)/StabiliTrak
®. . . . . . . . . . 125
Traction Off . . . . . . . . . . . . . . . . . . . 124
Locks Automatic Door . . . . . . . . . . . . . . . . . 41
Delayed Locking . . . . . . . . . . . . . . . . 40
Door . . . . . . . . . . . . . . . . . . . . . . . . . . . . 38
Lockout Protection . . . . . . . . . . . . . . 41
Power Door . . . . . . . . . . . . . . . . . . . . . 40
Safety . . . . . . . . . . . . . . . . . . . . . . . . . . 41
Loss of Control . . . . . . . . . . . . . . . . . 219
Low Fuel Warning Light . . . . . . . . . 126
Lower Anchors and Tethers for Children (LATCH
System) . . . . . . . . . . . . . . . . . . . . . . . . 88
Lumbar Adjustment . . . . . . . . . . . . . . 56 Front Seats . . . . . . . . . . . . . . . . . . . . . 56
M
Maintenance
Records . . . . . . . . . . . . . . . . . . . . . . 379
Maintenance and Care Additional . . . . . . . . . . . . . . . . . . . . . 373
Maintenance Schedule . . . . . . . . . 368 Recommended Fluids andLubricants . . . . . . . . . . . . . . . . . . . 376
Malfunction Indicator Lamp . . . . . 120
Manual Mode . . . . . . . . . . . . . . . . . . . 235 Memory Features . . . . . . . . . . . . . . . . 12
Memory Seats . . . . . . . . . . . . . . . . . . . 58
Messages
Airbag System . . . . . . . . . . . . . . . . 143
Battery Voltage andCharging . . . . . . . . . . . . . . . . . . . . 136
Brake System . . . . . . . . . . . . . . . . 136
Compass . . . . . . . . . . . . . . . . . . . . . 137
Door Ajar . . . . . . . . . . . . . . . . . . . . . 138
Engine Cooling System . . . . . . . 138
Engine Oil . . . . . . . . . . . . . . . . . . . . 139
Engine Power . . . . . . . . . . . . . . . . 139
Fuel System . . . . . . . . . . . . . . . . . . 139
Key and Lock . . . . . . . . . . . . . . . . . 139
Lamp . . . . . . . . . . . . . . . . . . . . . . . . . 140
Object Detection System . . . . . 140
Ride Control System . . . . . . . . . . 142
Security . . . . . . . . . . . . . . . . . . . . . . 143
Service Vehicle . . . . . . . . . . . . . . . 143
Starting the Vehicle . . . . . . . . . . . 143
Steering System . . . . . . . . . . . . . . 143
Tire . . . . . . . . . . . . . . . . . . . . . . . . . . . 144
Transmission . . . . . . . . . . . . . . . . . 144
Vehicle . . . . . . . . . . . . . . . . . . . . . . . 136
Vehicle Reminder . . . . . . . . . . . . . 145
Window . . . . . . . . . . . . . . . . . . . . . . . 145 Mirrors
Automatic Dimming
Rearview . . . . . . . . . . . . . . . . . . . . . . 48
Convex . . . . . . . . . . . . . . . . . . . . . . . . . 46
Folding . . . . . . . . . . . . . . . . . . . . . . . . . 47
Heated . . . . . . . . . . . . . . . . . . . . . . . . . 47
Manual Rearview . . . . . . . . . . . . . . . 48
Power . . . . . . . . . . . . . . . . . . . . . . . . . . 47
Tilt in Reverse . . . . . . . . . . . . . . . . . . 47
Mirrors, Interior Rearview . . . . . . . . 48
Monitor System, Tire Pressure . . . . . . . . . . . . . . . . . . . . . . 327
Multi-band Antenna . . . . . . . . . . . . . 180
N
Navigation OnStar®. . . . . . . . . . . . . . . . . . . . . . 399
Net, Convenience . . . . . . . . . . . . . . 101
New Vehicle Break-In . . . . . . . . . . . 226
O
Object Detection System Messages . . . . . . . . . . . . . . . . . . . . . 140
Odometer . . . . . . . . . . . . . . . . . . . . . . . 115 Trip . . . . . . . . . . . . . . . . . . . . . . . . . . . .115
Off-Road Recovery . . . . . . . . . . . . . . . . . . . . . 218
Oil Engine . . . . . . . . . . . . . . . . . . . . . . . . 289