2016 CHEVROLET EQUINOX steering
[x] Cancel search: steeringPage 182 of 324
Chevrolet Equinox Owner Manual (GMNA-Localizing-U.S./Canada/Mexico-
9234773) - 2016 - crc - 9/3/15
Driving and Operating 181
objects. FCA will not detect another
vehicle ahead until it is completely
in the driving lane.
{Warning
FCA does not provide a warning
to help avoid a crash, unless it
detects a vehicle. FCA may not
detect a vehicle ahead if the FCA
sensor is blocked by dirt, snow,
or ice, or if the windshield is
damaged. It may also not detect a
vehicle on winding or hilly roads,
or in conditions that can limit
visibility such as fog, rain,
or snow, or if the headlamps or
windshield are not cleaned or in
proper condition. Keep the
windshield, headlamps, and FCA
sensors clean and in good repair.Collision Alert
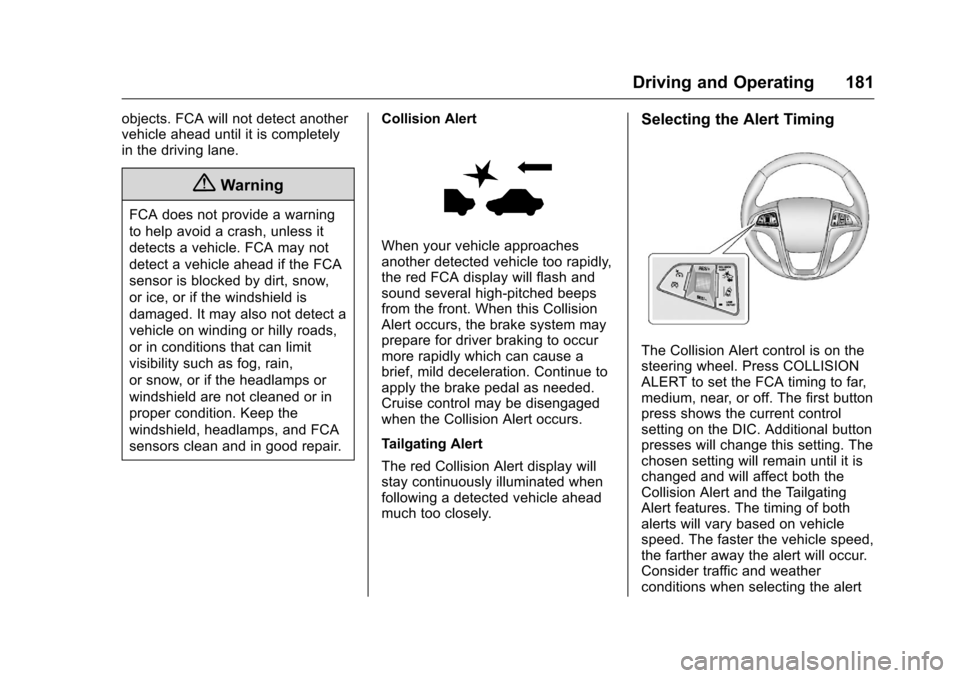
When your vehicle approaches
another detected vehicle too rapidly,
the red FCA display will flash and
sound several high-pitched beeps
from the front. When this Collision
Alert occurs, the brake system may
prepare for driver braking to occur
more rapidly which can cause a
brief, mild deceleration. Continue to
apply the brake pedal as needed.
Cruise control may be disengaged
when the Collision Alert occurs.
Tailgating Alert
The red Collision Alert display will
stay continuously illuminated when
following a detected vehicle ahead
much too closely.
Selecting the Alert Timing
The Collision Alert control is on the
steering wheel. Press COLLISION
ALERT to set the FCA timing to far,
medium, near, or off. The first button
press shows the current control
setting on the DIC. Additional button
presses will change this setting. The
chosen setting will remain until it is
changed and will affect both the
Collision Alert and the Tailgating
Alert features. The timing of both
alerts will vary based on vehicle
speed. The faster the vehicle speed,
the farther away the alert will occur.
Consider traffic and weather
conditions when selecting the alert
Page 185 of 324
Chevrolet Equinox Owner Manual (GMNA-Localizing-U.S./Canada/Mexico-
9234773) - 2016 - crc - 9/3/15
184 Driving and Operating
Lane Departure
Warning (LDW)
If equipped, LDW may help avoid
crashes due to unintentional lane
departures. It may provide an alert if
the vehicle is crossing a lane
without using a turn signal in that
direction. LDW uses a camera
sensor to detect the lane markings
at speeds of 56 km/h (35 mph) or
greater.
{Warning
The LDW system does not steer
the vehicle. The LDW system
may not:. Provide enough time to
avoid a crash.
. Detect lane markings under
poor weather or visibility
conditions. This can occur if
the windshield or
headlamps are blocked by
dirt, snow, or ice; if they are
(Continued)
Warning (Continued)
not in proper condition; or if
the sun shines directly into
the camera.
. Detect road edges.
. Detect lanes on winding or
hilly roads.
If LDW only detects lane
markings on one side of the road,
it will only warn you when
departing the lane on the side
where it has detected a lane
marking. Always keep your
attention on the road and
maintain proper vehicle position
within the lane, or vehicle
damage, injury, or death could
occur. Always keep the
windshield, headlamps, and
camera sensors clean and in
good repair. Do not use LDW in
bad weather conditions.
How the System Works
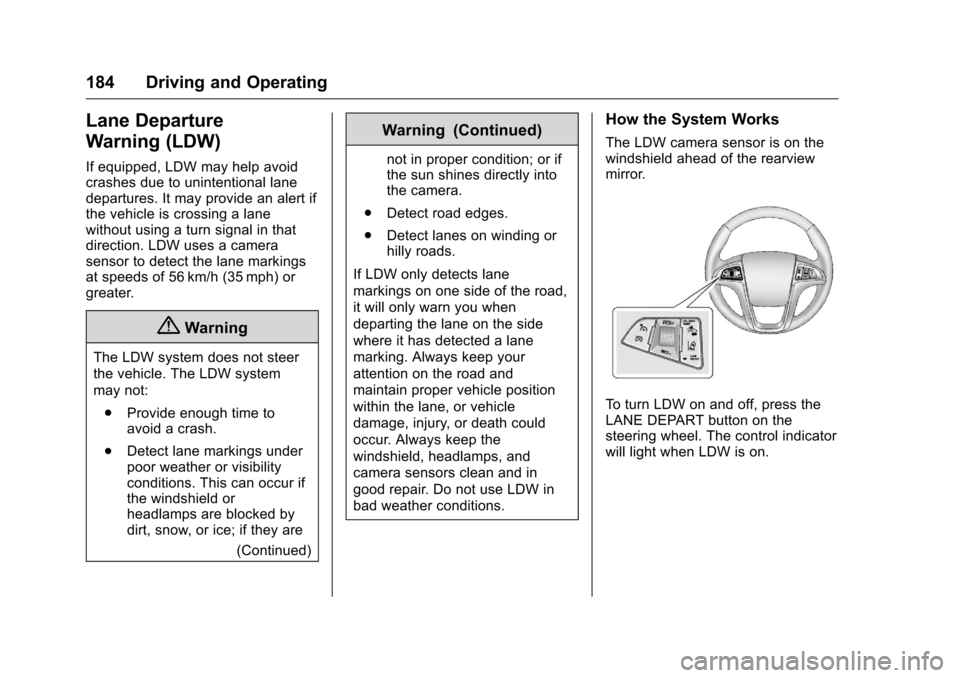
The LDW camera sensor is on the
windshield ahead of the rearview
mirror.
To turn LDW on and off, press the
LANE DEPART button on the
steering wheel. The control indicator
will light when LDW is on.
Page 192 of 324
Chevrolet Equinox Owner Manual (GMNA-Localizing-U.S./Canada/Mexico-
9234773) - 2016 - crc - 9/3/15
Driving and Operating 191
electric brakes, start the
combination moving and then apply
the trailer brake controller by hand
to be sure the brakes work.
During the trip, check occasionally
to be sure that the load is secure
and the lamps and any trailer
brakes still work.
Towing with a Stability Control
System
When towing, the sound of the
stability control system might be
heard. The system is reacting to the
vehicle movement caused by the
trailer, which mainly occurs during
cornering. This is normal when
towing heavier trailers.
Following Distance
Stay at least twice as far behind the
vehicle ahead as you would when
driving the vehicle without a trailer.
This can help to avoid situations
that require heavy braking and
sudden turns.
Passing
More passing distance is needed
when towing a trailer. Because the
rig is longer, it is necessary to go
farther beyond the passed vehicle
before returning to the lane.
Backing Up
Hold the bottom of the steering
wheel with one hand. To move the
trailer to the left, move your hand to
the left. To move the trailer to the
right, move your hand to the right.
Always back up slowly and,
if possible, have someone
guide you.
Making TurnsCaution
Making very sharp turns while
trailering could cause the trailer to
come in contact with the vehicle.
The vehicle could be damaged.
Avoid making very sharp turns
while trailering. When turning with a trailer, make
wider turns than normal so the
trailer will not strike soft shoulders,
curbs, road signs, trees or other
objects. Use the turn signal well in
advance and avoid jerky or sudden
maneuvers.
Turn Signals When Towing a
Trailer
The turn signal indicators on the
instrument panel flash whenever
signaling a turn or lane change.
Properly hooked up, the trailer
lamps also flash, telling other
drivers the vehicle is turning,
changing lanes or stopping.
When towing a trailer, the arrows on
the instrument panel flash for turns
even if the bulbs on the trailer are
burned out. Check occasionally to
be sure the trailer bulbs are still
working.
Driving on Grades
Reduce speed and shift to a lower
gear before starting down a long or
steep downgrade. If the
transmission is not shifted down, the
Page 198 of 324
Chevrolet Equinox Owner Manual (GMNA-Localizing-U.S./Canada/Mexico-
9234773) - 2016 - crc - 9/3/15
Vehicle Care 197
Vehicle Care
General Information
General Information . . . . . . . . . . 198
California Proposition65 Warning . . . . . . . . . . . . . . . . . 198
California Perchlorate Materials Requirements . . . . . 198
Accessories and Modifications . . . . . . . . . . . . . . . . 198
Vehicle Checks
Doing Your OwnService Work . . . . . . . . . . . . . . . 199
Hood . . . . . . . . . . . . . . . . . . . . . . . . . 200
Engine Compartment Overview . . . . . . . . . . . . . . . . . . . . 201
Engine Cover . . . . . . . . . . . . . . . . . 204
Engine Oil . . . . . . . . . . . . . . . . . . . . 204
Engine Oil Life System . . . . . . . 207
Automatic Transmission Fluid . . . . . . . . . . . . . . . . . . . . . . . . 208
Engine Air Cleaner/Filter . . . . . . 208
Cooling System . . . . . . . . . . . . . . 209
Engine Coolant . . . . . . . . . . . . . . . 210
Engine Overheating . . . . . . . . . . 214
Power Steering Fluid (2.4L L4 Engine) . . . . . . . . . . . . . . . . . . . . . 215
Power Steering Fluid (3.6L V6 Engine) . . . . . . . . . . . . . . . . . . 215 Washer Fluid . . . . . . . . . . . . . . . . . 216
Brakes . . . . . . . . . . . . . . . . . . . . . . . 216
Brake Fluid . . . . . . . . . . . . . . . . . . . 217
Battery - North America . . . . . . 218
All-Wheel Drive . . . . . . . . . . . . . . . 219
Starter Switch Check . . . . . . . . . 219
Automatic Transmission Shift
Lock Control Function
Check . . . . . . . . . . . . . . . . . . . . . . . 219
Ignition Transmission Lock Check . . . . . . . . . . . . . . . . . . . . . . . 219
Park Brake and P (Park) Mechanism Check . . . . . . . . . . 220
Wiper Blade Replacement . . . . 220
Headlamp Aiming
Headlamp Aiming . . . . . . . . . . . . 221
Bulb Replacement
Bulb Replacement . . . . . . . . . . . . 222
Halogen Bulbs . . . . . . . . . . . . . . . . 222
Fog Lamps . . . . . . . . . . . . . . . . . . . 222
Taillamps, Turn Signal, Sidemarker, Stoplamps, and
Back-Up Lamps . . . . . . . . . . . . . 222
License Plate Lamp . . . . . . . . . . 223
Replacement Bulbs . . . . . . . . . . . 224
Electrical System
Fuses . . . . . . . . . . . . . . . . . . . . . . . . 224
Engine Compartment Fuse Block . . . . . . . . . . . . . . . . . . . . . . . . 224 Instrument Panel Fuse
Block . . . . . . . . . . . . . . . . . . . . . . . . 227
Wheels and Tires
Tires . . . . . . . . . . . . . . . . . . . . . . . . . . 229
All-Season Tires . . . . . . . . . . . . . . 230
Winter Tires . . . . . . . . . . . . . . . . . . 230
Summer Tires . . . . . . . . . . . . . . . . 231
Tire Sidewall Labeling . . . . . . . . 231
Tire Designations . . . . . . . . . . . . . 233
Tire Terminology andDefinitions . . . . . . . . . . . . . . . . . . 234
Tire Pressure . . . . . . . . . . . . . . . . . 237
Tire Pressure Monitor System . . . . . . . . . . . . . . . . . . . . . . 238
Tire Pressure Monitor Operation . . . . . . . . . . . . . . . . . . . 239
Tire Inspection . . . . . . . . . . . . . . . . 242
Tire Rotation . . . . . . . . . . . . . . . . . 242
When It Is Time for New Tires . . . . . . . . . . . . . . . . . . . . . . . . 243
Buying New Tires . . . . . . . . . . . . . 244
Different Size Tires and Wheels . . . . . . . . . . . . . . . . . . . . . . 245
Uniform Tire Quality Grading . . . . . . . . . . . . . . . . . . . . . 246
Wheel Alignment and Tire Balance . . . . . . . . . . . . . . . . . . . . . 247
Wheel Replacement . . . . . . . . . . 247
Tire Chains . . . . . . . . . . . . . . . . . . . 248
If a Tire Goes Flat . . . . . . . . . . . . 249
Page 201 of 324
Chevrolet Equinox Owner Manual (GMNA-Localizing-U.S./Canada/Mexico-
9234773) - 2016 - crc - 9/3/15
200 Vehicle Care
Keep a record with all parts receipts
and list the mileage and the date of
any service work performed. See
Maintenance Records0284
ii.
Caution
Even small amounts of
contamination can cause damage
to vehicle systems. Do not allow
contaminants to contact the fluids,
reservoir caps, or dipsticks.
Hood
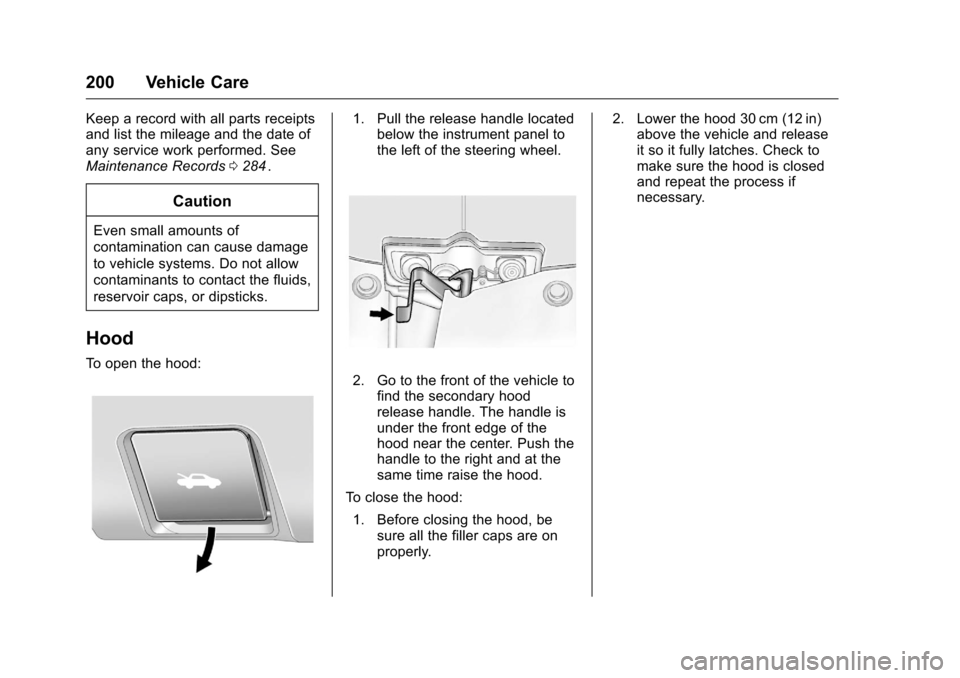
To open the hood:
1. Pull the release handle located
below the instrument panel to
the left of the steering wheel.
2. Go to the front of the vehicle to
find the secondary hood
release handle. The handle is
under the front edge of the
hood near the center. Push the
handle to the right and at the
same time raise the hood.
To close the hood: 1. Before closing the hood, be sure all the filler caps are on
properly. 2. Lower the hood 30 cm (12 in)
above the vehicle and release
it so it fully latches. Check to
make sure the hood is closed
and repeat the process if
necessary.
Page 205 of 324
Chevrolet Equinox Owner Manual (GMNA-Localizing-U.S./Canada/Mexico-
9234773) - 2016 - crc - 9/3/15
204 Vehicle Care
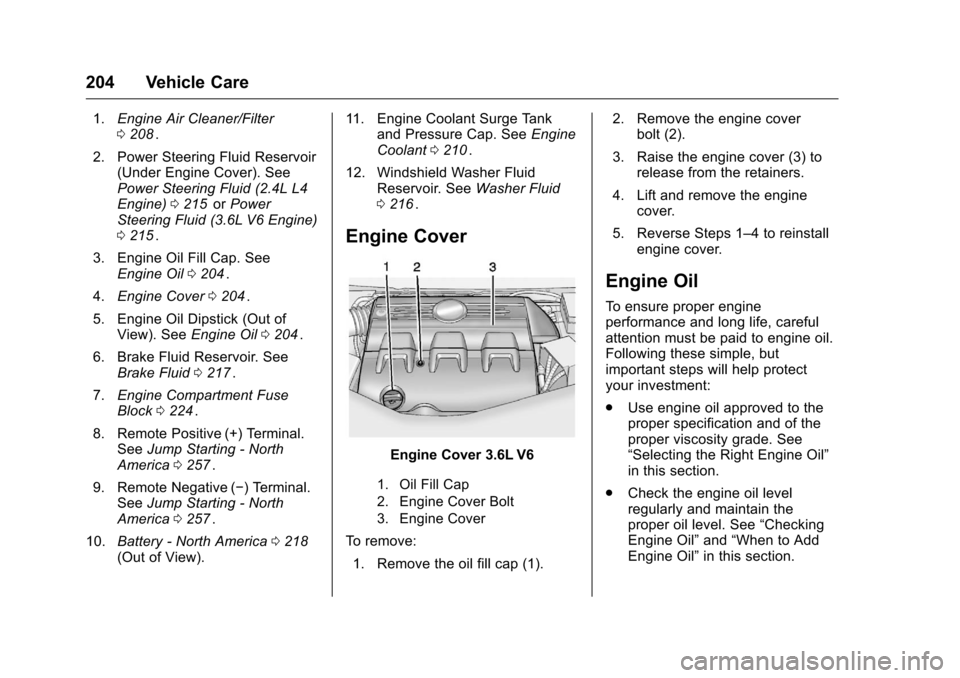
1.Engine Air Cleaner/Filter
0208ii.
2. Power Steering Fluid Reservoir (Under Engine Cover). See
Power Steering Fluid (2.4L L4
Engine) 0215
iior Power
Steering Fluid (3.6L V6 Engine)
0 215
ii.
3. Engine Oil Fill Cap. See Engine Oil 0204
ii.
4. Engine Cover 0204
ii.
5. Engine Oil Dipstick (Out of View). See Engine Oil0204
ii.
6. Brake Fluid Reservoir. See Brake Fluid 0217
ii.
7. Engine Compartment Fuse
Block 0224
ii.
8. Remote Positive (+) Terminal. See Jump Starting - North
America 0257
ii.
9. Remote Negative (−) Terminal. See Jump Starting - North
America 0257
ii.
10. Battery - North America 0218
ii(Out of View). 11. Engine Coolant Surge Tank
and Pressure Cap. See Engine
Coolant 0210
ii.
12. Windshield Washer Fluid Reservoir. See Washer Fluid
0 216
ii.
Engine Cover
Engine Cover 3.6L V6
1. Oil Fill Cap
2. Engine Cover Bolt
3. Engine Cover
To remove:
1. Remove the oil fill cap (1). 2. Remove the engine cover
bolt (2).
3. Raise the engine cover (3) to release from the retainers.
4. Lift and remove the engine cover.
5. Reverse Steps 1–4 to reinstall engine cover.
Engine Oil
To ensure proper engine
performance and long life, careful
attention must be paid to engine oil.
Following these simple, but
important steps will help protect
your investment:
.Use engine oil approved to the
proper specification and of the
proper viscosity grade. See
“Selecting the Right Engine Oil”
in this section.
. Check the engine oil level
regularly and maintain the
proper oil level. See “Checking
Engine Oil” and“When to Add
Engine Oil” in this section.
Page 216 of 324
Chevrolet Equinox Owner Manual (GMNA-Localizing-U.S./Canada/Mexico-
9234773) - 2016 - crc - 9/3/15
Vehicle Care 215
back on, continue to drive normally
and have the cooling system
checked for proper fill and function.
If the warning continues, pull over,
stop, and park the vehicle
right away.
If there is no sign of steam, idle the
engine for three minutes while
parked. If the warning is still
displayed, turn off the engine until it
cools down.
Power Steering Fluid
(2.4L L4 Engine)
The vehicle has electric power
steering and does not use power
steering fluid.
Power Steering Fluid
(3.6L V6 Engine)
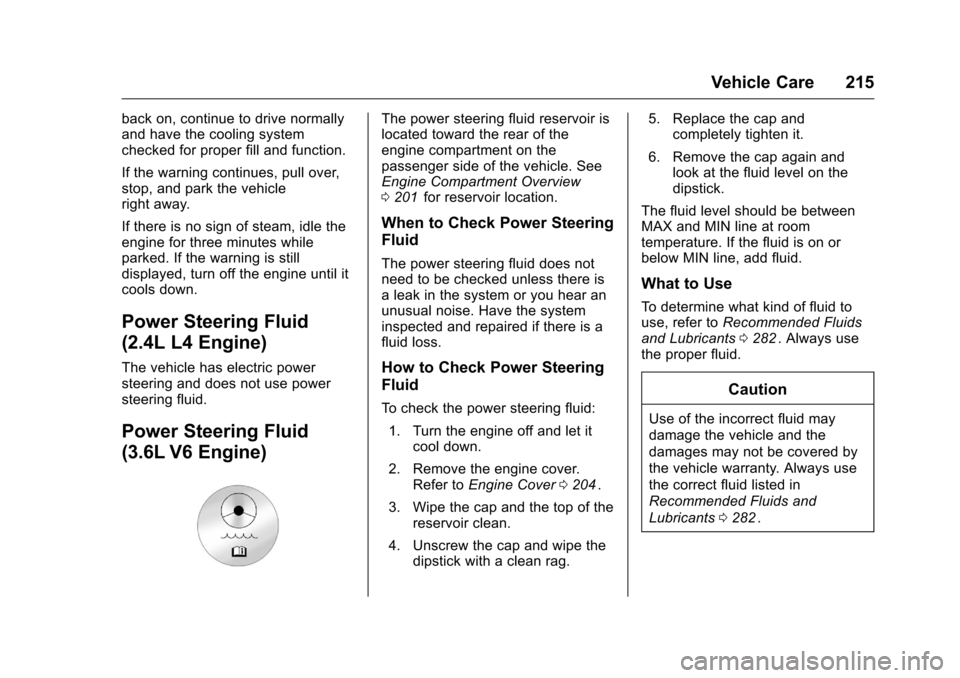
The power steering fluid reservoir is
located toward the rear of the
engine compartment on the
passenger side of the vehicle. See
Engine Compartment Overview
0201
iifor reservoir location.
When to Check Power Steering
Fluid
The power steering fluid does not
need to be checked unless there is
a leak in the system or you hear an
unusual noise. Have the system
inspected and repaired if there is a
fluid loss.
How to Check Power Steering
Fluid
To check the power steering fluid:
1. Turn the engine off and let it cool down.
2. Remove the engine cover. Refer to Engine Cover 0204
ii.
3. Wipe the cap and the top of the reservoir clean.
4. Unscrew the cap and wipe the dipstick with a clean rag. 5. Replace the cap and
completely tighten it.
6. Remove the cap again and look at the fluid level on the
dipstick.
The fluid level should be between
MAX and MIN line at room
temperature. If the fluid is on or
below MIN line, add fluid.
What to Use
To determine what kind of fluid to
use, refer to Recommended Fluids
and Lubricants 0282
ii. Always use
the proper fluid.
Caution
Use of the incorrect fluid may
damage the vehicle and the
damages may not be covered by
the vehicle warranty. Always use
the correct fluid listed in
Recommended Fluids and
Lubricants 0282
ii.
Page 228 of 324
Chevrolet Equinox Owner Manual (GMNA-Localizing-U.S./Canada/Mexico-
9234773) - 2016 - crc - 9/3/15
Vehicle Care 227
Mini Fuses Usage46 Fuel System Control Module Ignition
47 Spare
48 Rear Drive Module
49 Lift Gate Module Logic
50 Instrument Panel Fuse Block Ignition
51 Heated Seat– Front
52 Fuel System Control Module
53 Engine Control Module
54 Rear Vision Camera
78 Passenger Power Lumbar
Midi Fuse Usage 55 Electric Power Steering Micro
Relays Usage
56 AIR Pump Solenoid
57 Brake Booster
58 Cooling Fan Low
59 Headlamp High Beam
60 Cooling Fan Control
61 Wiper On/Off Control
62 Air Conditioning Compressor
63 Rear Defogger
64 Wiper Speed
65 Fog Lamp
66 Engine Control
67 Starter
68 Run/Crank
Mini Relays Usage 69 Cooling Fan High
70 AIR Pump MotorInstrument Panel Fuse
Block
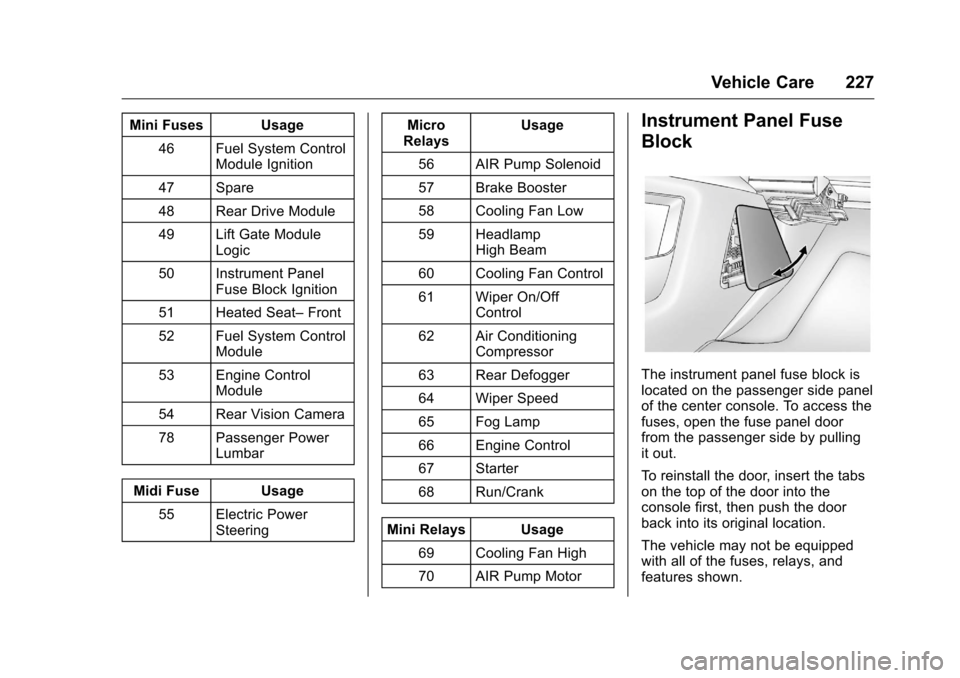
The instrument panel fuse block is
located on the passenger side panel
of the center console. To access the
fuses, open the fuse panel door
from the passenger side by pulling
it out.
To reinstall the door, insert the tabs
on the top of the door into the
console first, then push the door
back into its original location.
The vehicle may not be equipped
with all of the fuses, relays, and
features shown.