2016 CHEVROLET CRUZE LIMITED radio
[x] Cancel search: radioPage 172 of 357
Chevrolet Cruze Limited Owner Manual (GMNA-Localizing-U.S./Canada-
9282844) - 2016 - crc - 9/3/15
Driving and Operating 171
Driving Information
Distracted Driving
Distraction comes in many forms
and can take your focus from the
task of driving. Exercise good
judgment and do not let other
activities divert your attention away
from the road. Many local
governments have enacted laws
regarding driver distraction. Become
familiar with the local laws in
your area.
To avoid distracted driving, always
keep your eyes on the road, hands
on the wheel, and mind on the drive.
.Do not use a phone in
demanding driving situations.
Use a hands-free method to
place or receive necessary
phone calls.
. Watch the road. Do not read,
take notes, or look up
information on phones or other
electronic devices.
. Designate a front seat
passenger to handle potential
distractions. .
Become familiar with vehicle
features before driving, such as
programming favorite radio
stations and adjusting climate
control and seat settings.
Program all trip information into
any navigation device prior to
driving.
. Wait until the vehicle is parked
to retrieve items that have fallen
to the floor.
. Stop or park the vehicle to tend
to children.
. Keep pets in an appropriate
carrier or restraint.
. Avoid stressful conversations
while driving, whether with a
passenger or on a cell phone.
{Warning
Taking your eyes off the road too
long or too often could cause a
crash resulting in injury or death.
Focus your attention on driving. Refer to the infotainment section for
more information on using that
system and the navigation system,
if equipped, including pairing and
using a cell phone.
Defensive Driving
Defensive driving means
“always
expect the unexpected.” The first
step in driving defensively is to wear
the safety belt. See Safety Belts
0 53
ii.
. Assume that other road users
(pedestrians, bicyclists, and
other drivers) are going to be
careless and make mistakes.
Anticipate what they might do
and be ready.
. Allow enough following distance
between you and the driver in
front of you.
. Focus on the task of driving.
Drunk Driving
Death and injury associated with
drinking and driving is a global
tragedy.
Page 182 of 357
Chevrolet Cruze Limited Owner Manual (GMNA-Localizing-U.S./Canada-
9282844) - 2016 - crc - 9/3/15
Driving and Operating 181
Starting and
Operating
New Vehicle Break-In
Caution
The vehicle does not need an
elaborate break-in. But it will
perform better in the long run if
you follow these guidelines:. Do not drive at any one
constant speed, fast or slow,
for the first 805 km (500 mi).
Do not make full-throttle
starts. Avoid downshifting to
brake or slow the vehicle.
. Avoid making hard stops for
the first 322 km (200 mi) or
so. During this time the new
brake linings are not yet
broken in. Hard stops with
new linings can mean
premature wear and earlier
replacement. Follow this
(Continued)
Caution (Continued)
breaking-in guideline every
time you get new brake
linings.
Following break-in, engine speed
and load can be gradually
increased.
Ignition Positions
(Keyless Access)
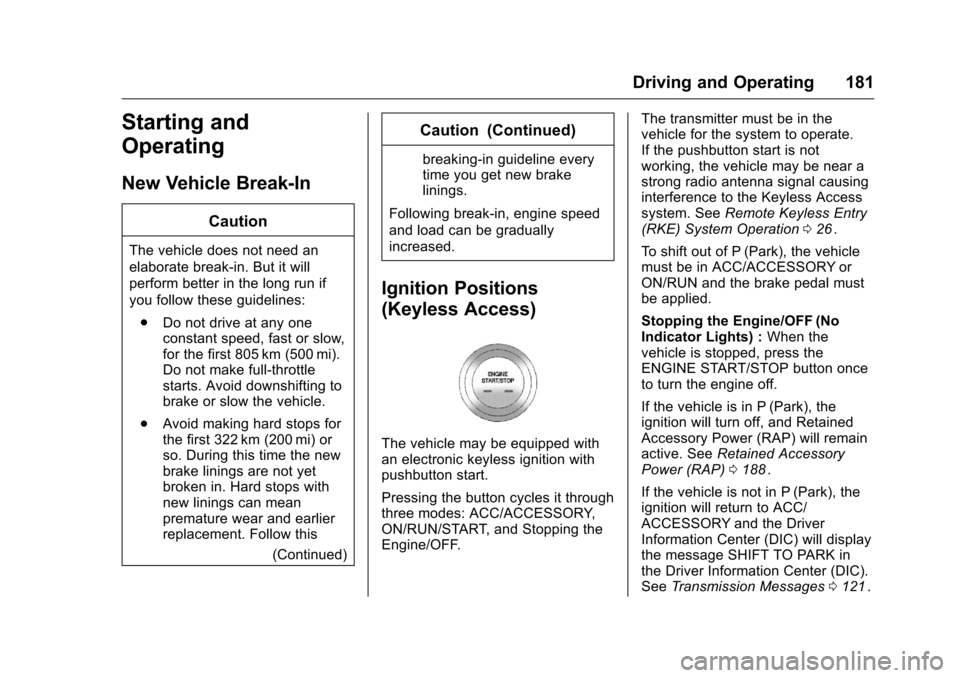
The vehicle may be equipped with
an electronic keyless ignition with
pushbutton start.
Pressing the button cycles it through
three modes: ACC/ACCESSORY,
ON/RUN/START, and Stopping the
Engine/OFF. The transmitter must be in the
vehicle for the system to operate.
If the pushbutton start is not
working, the vehicle may be near a
strong radio antenna signal causing
interference to the Keyless Access
system. See
Remote Keyless Entry
(RKE) System Operation 026
ii.
To shift out of P (Park), the vehicle
must be in ACC/ACCESSORY or
ON/RUN and the brake pedal must
be applied.
Stopping the Engine/OFF (No
Indicator Lights) : When the
vehicle is stopped, press the
ENGINE START/STOP button once
to turn the engine off.
If the vehicle is in P (Park), the
ignition will turn off, and Retained
Accessory Power (RAP) will remain
active. See Retained Accessory
Power (RAP) 0188
ii.
If the vehicle is not in P (Park), the
ignition will return to ACC/
ACCESSORY and the Driver
Information Center (DIC) will display
the message SHIFT TO PARK in
the Driver Information Center (DIC).
See Transmission Messages 0121
ii.
Page 189 of 357
Chevrolet Cruze Limited Owner Manual (GMNA-Localizing-U.S./Canada-
9282844) - 2016 - crc - 9/3/15
188 Driving and Operating
away from moving engine
parts. If you do not it could be
damaged.
The length of time the heater should
remain plugged in depends on
several factors. Ask a dealer in the
area where you will be parking the
vehicle for the best advice on this.
Retained Accessory
Power (RAP)
These vehicle accessories may be
used for up to 10 minutes after the
engine is turned off:
. Audio System
. Power Windows
. Sunroof
The power windows and sunroof will
continue to work for up to
10 minutes or until any door is
opened. The radio will work when
the key is in ON/RUN or ACC/
ACCESSORY. Once the key is
turned from ON/RUN to LOCK/OFF,
the radio will continue to work for 10 minutes, or until the driver door is
opened or the key is removed from
the ignition.
Shifting Into Park
Shift into P (Park):
1. Hold the brake pedal down and set the parking brake.
See Parking Brake 0198
ii.
2. Hold the button on the shift lever and push the lever toward
the front of the vehicle into
P (Park).
3. Turn the ignition to LOCK/OFF.
Leaving the Vehicle with the
Engine Running
{Warning
It can be dangerous to leave the
vehicle with the engine running.
It could overheat and catch fire. (Continued)
Warning (Continued)
It is dangerous to get out of the
vehicle if the shift lever is not fully
in P (Park) with the parking brake
firmly set. The vehicle can roll.
Do not leave the vehicle when the
engine is running. If you have left
the engine running, the vehicle
can move suddenly. You or others
could be injured. To be sure the
vehicle will not move, even when
you are on fairly level ground,
always set the parking brake and
move the shift lever to P (Park).
SeeShifting Into Park 0188
ii.
If you are towing a trailer, see
Driving Characteristics and
Towing Tips 0212
ii.
If you have to leave the vehicle with
the engine running, the vehicle must
be in P (Park) and the parking
brake set.
Release the button and check that
the shift lever cannot be moved out
of P (Park).
Page 209 of 357
Chevrolet Cruze Limited Owner Manual (GMNA-Localizing-U.S./Canada-
9282844) - 2016 - crc - 9/3/15
208 Driving and Operating
unsafe to change lanes. Before
making a lane change, check the
SBZA display, check mirrors, glance
over your shoulder, and use the turn
signals.
Left Side MirrorDisplayRight Side Mirror Display
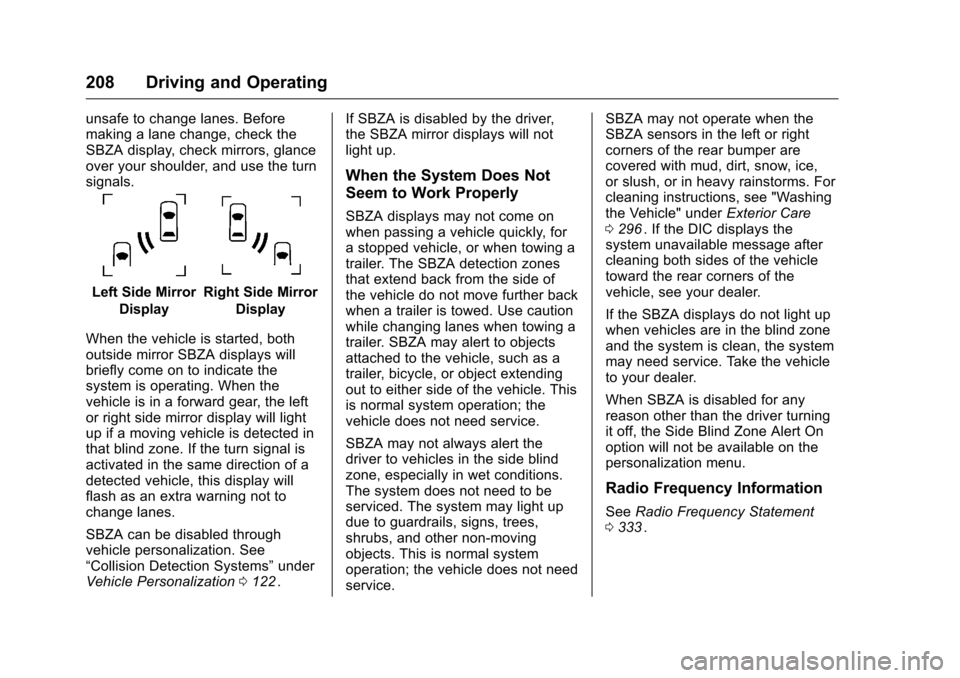
When the vehicle is started, both
outside mirror SBZA displays will
briefly come on to indicate the
system is operating. When the
vehicle is in a forward gear, the left
or right side mirror display will light
up if a moving vehicle is detected in
that blind zone. If the turn signal is
activated in the same direction of a
detected vehicle, this display will
flash as an extra warning not to
change lanes.
SBZA can be disabled through
vehicle personalization. See
“Collision Detection Systems” under
Vehicle Personalization 0122
ii. If SBZA is disabled by the driver,
the SBZA mirror displays will not
light up.
When the System Does Not
Seem to Work Properly
SBZA displays may not come on
when passing a vehicle quickly, for
a stopped vehicle, or when towing a
trailer. The SBZA detection zones
that extend back from the side of
the vehicle do not move further back
when a trailer is towed. Use caution
while changing lanes when towing a
trailer. SBZA may alert to objects
attached to the vehicle, such as a
trailer, bicycle, or object extending
out to either side of the vehicle. This
is normal system operation; the
vehicle does not need service.
SBZA may not always alert the
driver to vehicles in the side blind
zone, especially in wet conditions.
The system does not need to be
serviced. The system may light up
due to guardrails, signs, trees,
shrubs, and other non-moving
objects. This is normal system
operation; the vehicle does not need
service. SBZA may not operate when the
SBZA sensors in the left or right
corners of the rear bumper are
covered with mud, dirt, snow, ice,
or slush, or in heavy rainstorms. For
cleaning instructions, see "Washing
the Vehicle" under
Exterior Care
0 296ii. If the DIC displays the
system unavailable message after
cleaning both sides of the vehicle
toward the rear corners of the
vehicle, see your dealer.
If the SBZA displays do not light up
when vehicles are in the blind zone
and the system is clean, the system
may need service. Take the vehicle
to your dealer.
When SBZA is disabled for any
reason other than the driver turning
it off, the Side Blind Zone Alert On
option will not be available on the
personalization menu.
Radio Frequency Information
See Radio Frequency Statement
0 333ii.
Page 264 of 357
Chevrolet Cruze Limited Owner Manual (GMNA-Localizing-U.S./Canada-
9282844) - 2016 - crc - 9/3/15
Vehicle Care 263
The Tire and Loading
Information label on the vehicle
indicates the original equipment
tires and the correct cold tire
inflation pressures. The
recommended pressure is the
minimum air pressure needed to
support the vehicle's maximum
load carrying capacity. See
Vehicle Load Limits0177
ii.
How the vehicle is loaded
affects vehicle handling and ride
comfort. Never load the vehicle
with more weight than it was
designed to carry.
When to Check
Check the tires once a month or
more. Do not forget the compact
spare, if the vehicle has one.
The cold compact spare tire
pressure should be at 420 kPa
(60 psi). See Compact Spare
Tire 0289
ii. How to Check
Use a good quality pocket-type
gauge to check tire pressure.
Proper tire inflation cannot be
determined by looking at the tire.
Check the tire inflation pressure
when the tires are cold, meaning
the vehicle has not been driven
for at least three hours or no
more than 1.6 km (1 mi).
Remove the valve cap from the
tire valve stem. Press the tire
gauge firmly onto the valve to
get a pressure measurement.
If the cold tire inflation pressure
matches the recommended
pressure on the Tire and
Loading Information label, no
further adjustment is necessary.
If the inflation pressure is low,
add air until the recommended
pressure is reached. If the
inflation pressure is high, press
on the metal stem in the center
of the tire valve to release air.
Recheck the tire pressure with
the tire gauge. Put the valve caps back on the
valve stems to keep out dirt and
moisture and prevent leaks. Use
only valve caps designed for the
vehicle by GM. TPMS sensors
could be damaged and would
not be covered by the vehicle
warranty.
Tire Pressure Monitor
System
The Tire Pressure Monitor System
(TPMS) uses radio and sensor
technology to check tire pressure
levels. The TPMS sensors monitor
the air pressure in your tires and
transmit tire pressure readings to a
receiver located in the vehicle.
Each tire, including the spare (if
provided), should be checked
monthly when cold and inflated to
the inflation pressure recommended
by the vehicle manufacturer on the
vehicle placard or tire inflation
pressure label. (If your vehicle has
tires of a different size than the size
indicated on the vehicle placard or
Page 265 of 357
Chevrolet Cruze Limited Owner Manual (GMNA-Localizing-U.S./Canada-
9282844) - 2016 - crc - 9/3/15
264 Vehicle Care
tire inflation pressure label, you
should determine the proper tire
inflation pressure for those tires.)
As an added safety feature, your
vehicle has been equipped with a
tire pressure monitoring system
(TPMS) that illuminates a low tire
pressure telltale when one or more
of your tires is significantly
under-inflated.
Accordingly, when the low tire
pressure telltale illuminates, you
should stop and check your tires as
soon as possible, and inflate them
to the proper pressure. Driving on a
significantly under-inflated tire
causes the tire to overheat and can
lead to tire failure. Under-inflation
also reduces fuel efficiency and tire
tread life, and may affect the
vehicle's handling and stopping
ability.
Please note that the TPMS is not a
substitute for proper tire
maintenance, and it is the driver's
responsibility to maintain correct tire
pressure, even if under-inflation hasnot reached the level to trigger
illumination of the TPMS low tire
pressure telltale.
Your vehicle has also been
equipped with a TPMS malfunction
indicator to indicate when the
system is not operating properly.
The TPMS malfunction indicator is
combined with the low tire pressure
telltale. When the system detects a
malfunction, the telltale will flash for
approximately one minute and then
remain continuously illuminated.
This sequence will continue upon
subsequent vehicle start-ups as
long as the malfunction exists.
When the malfunction indicator is
illuminated, the system may not be
able to detect or signal low tire
pressure as intended. TPMS
malfunctions may occur for a variety
of reasons, including the installation
of replacement or alternate tires or
wheels on the vehicle that prevent
the TPMS from functioning properly.
Always check the TPMS malfunction
telltale after replacing one or more
tires or wheels on your vehicle to
ensure that the replacement oralternate tires and wheels allow the
TPMS to continue to function
properly.
See
Tire Pressure Monitor
Operation 0264
ii.
See Radio Frequency Statement
0 333
ii.
Tire Pressure Monitor
Operation
This vehicle may have a Tire
Pressure Monitor System (TPMS).
The TPMS is designed to warn the
driver when a low tire pressure
condition exists. TPMS sensors are
mounted onto each tire and wheel
assembly, excluding the spare tire
and wheel assembly. The TPMS
sensors monitor the air pressure in
the tires and transmits the tire
pressure readings to a receiver in
the vehicle.
Page 267 of 357
Chevrolet Cruze Limited Owner Manual (GMNA-Localizing-U.S./Canada-
9282844) - 2016 - crc - 9/3/15
266 Vehicle Care
about one minute and then stays on
for the remainder of the ignition
cycle. A DIC warning message also
displays. The malfunction light and
DIC warning message come on at
each ignition cycle until the problem
is corrected. Some of the conditions
that can cause these to come
on are:
.One of the road tires has been
replaced with the spare tire. The
spare tire does not have a
TPMS sensor. The malfunction
light and DIC message should
go off after the road tire is
replaced and the sensor
matching process is performed
successfully. See “TPMS Sensor
Matching Process” later in this
section.
. The TPMS sensor matching
process was not done or not
completed successfully after
rotating the tires. The
malfunction light and the DIC
message should go off after
successfully completing the
sensor matching process. See
"TPMS Sensor Matching
Process" later in this section. .
One or more TPMS sensors are
missing or damaged. The
malfunction light and the DIC
message should go off when the
TPMS sensors are installed and
the sensor matching process is
performed successfully. See
your dealer for service.
. Replacement tires or wheels do
not match the original equipment
tires or wheels. Tires and wheels
other than those recommended
could prevent the TPMS from
functioning properly. See Buying
New Tires 0270
ii.
. Operating electronic devices or
being near facilities using radio
wave frequencies similar to the
TPMS could cause the TPMS
sensors to malfunction.
If the TPMS is not functioning
properly it cannot detect or signal a
low tire condition. See your dealer
for service if the TPMS malfunction
light and DIC message comes on
and stays on.
TPMS Sensor Matching
Process
Each TPMS sensor has a unique
identification code. The identification
code needs to be matched to a new
tire/wheel position after rotating the
vehicle’s tires or replacing one or
more of the TPMS sensors. The
TPMS sensor matching process
should also be performed after
replacing a spare tire with a road
tire containing the TPMS sensor.
The malfunction light and the DIC
message should go off at the next
ignition cycle. The sensors are
matched to the tire/wheel positions,
using a TPMS relearn tool, in the
following order: driver side front tire,
passenger side front tire, passenger
side rear tire, and driver side rear.
See your dealer for service or to
purchase a relearn tool. A TPMS
relearn tool can also be purchased.
See Tire Pressure Monitor Sensor
Activation Tool at
www.gmtoolsandequipment.com or
call 1-800-GM TOOLS
(1-800-468-6657).
Page 304 of 357
Chevrolet Cruze Limited Owner Manual (GMNA-Localizing-U.S./Canada-
9282844) - 2016 - crc - 9/3/15
Vehicle Care 303
Cleaning High Gloss Surfaces
and Vehicle Information and
Radio Displays
Use a microfiber cloth on high gloss
surfaces or vehicle displays. First,
use a soft bristle brush to remove
dirt that can scratch the surface.
Then gently clean by rubbing with a
microfiber cloth. Never use window
cleaners or solvents. Periodically
hand wash the microfiber cloth
separately, using mild soap. Do not
use bleach or fabric softener. Rinse
thoroughly and air dry before
next use.
Caution
Do not attach a device with a
suction cup to the display. This
may cause damage and would
not be covered by the vehicle
warranty.
Instrument Panel, Leather,
Vinyl, Other Plastic Surfaces,
Low Gloss Paint Surfaces, and
Natural Open Pore Wood
Surfaces
Use a soft microfiber cloth
dampened with water to remove
dust and loose dirt. For a more
thorough cleaning, use a soft
microfiber cloth dampened with a
mild soap solution.
Caution
Soaking or saturating leather,
especially perforated leather, as
well as other interior surfaces,
may cause permanent damage.
Wipe excess moisture from these
surfaces after cleaning and allow
them to dry naturally. Never use
heat, steam, or spot removers. Do
not use cleaners that contain
silicone or wax-based products.
Cleaners containing these
solvents can permanently change(Continued)
Caution (Continued)
the appearance and feel of
leather or soft trim, and are not
recommended.
Do not use cleaners that increase
gloss, especially on the instrument
panel. Reflected glare can decrease
visibility through the windshield
under certain conditions.
Caution
Use of air fresheners may cause
permanent damage to plastics
and painted surfaces. If an air
freshener comes in contact with
any plastic or painted surface in
the vehicle, blot immediately and
clean with a soft cloth dampened
with a mild soap solution.
Damage caused by air fresheners
would not be covered by the
vehicle warranty.