2015 VAUXHALL ANTARA tyre pressure
[x] Cancel search: tyre pressurePage 13 of 223

In brief11
1Side air vents .....................120
2 Fixed air vents .................... 121
3 High beam .......................... 107
Headlight flash ...................107
Turn and lane-change
signals ................................ 109
Exit lighting ......................... 113
Parking lights .....................110
Cruise control ....................... 91
4 Remote control on
steering wheel ......................73
Trip computer .....................101
5 Horn ..................................... 74
6 Instruments .......................... 80
7 Windscreen wiper and
washer system, headlight
washer system .....................74
Rear window wiper and
washer system .....................768Info-Display .......................... 95
Check control, tyre
pressure monitoring
system ................................ 178
Trip computer .....................101
9 Centre air vents .................. 120
10 Hazard warning flashers ....108
Parking assist ..................... 143
Electronic Stability Control . 139
Descent control system ...... 140
Status LED for anti-theft
alarm system ........................ 25
Folding exterior mirrors ........28
Eco button for stop/start
system ................................. 125
11 Infotainment system .............10
12 Front passenger airbag ........47
13 Status LEDs for front
passenger airbag .................49
Control indicator for front
passenger seat belt .............42
14 Glovebox .............................. 5715Fuse box ............................ 172
16 Climate control system ....... 115
17 Ignition switch with
steering wheel lock ............124
18 Accelerator pedal ...............124
19 Driver airbag ........................ 47
20 Brake pedal ........................ 137
21 Clutch pedal ....................... 123
22 Steering wheel adjustment ..73
23 Bonnet release ...................154
24 Coin storage ......................... 56
25 Card holder .......................... 56
26 Light switch ........................ 106
Automatic light control .......106
Instrument illumination .......111
Rear fog light ...................... 110
Front fog lights ...................109
Headlight range
adjustment ......................... 107
Page 18 of 223

16In briefTransmission
Manual transmission
Reverse: with the vehicle stationary,
wait 3 seconds after depressing
clutch pedal and engage the gear.
If the gear does not engage, set the
lever to neutral, release the clutch
pedal and depress again; then repeat
gear selection.
Manual transmission 3 134.
Automatic transmissionP=parkR=reverseN=neutralD=drive
Manual mode: move selector lever
from D to the left.
<=higher gear]=lower gear
The selector lever can only be moved
out of P when the ignition is on and
the foot brake is applied. To engage
P or R, push the release button.
Automatic transmission 3 130.
Starting off
Check before starting off ■ Tyre pressure and condition 3 178,
3 210.
■ Engine oil level and fluid levels 3 154.
■ All windows, mirrors, exterior lighting and number plates are free
from dirt, snow and ice and are
operational.
■ Proper position of mirrors, seats, and seat belts 3 28, 3 35,
3 42.
■ Brake function at low speed, particularly if the brakes are wet.
Page 74 of 223

72Storage
To calculate the EC kerb weight,
enter the data for your vehicle in the
Weights table at the front of this
manual.
The EC kerb weight includes
weights for the driver (68 kg),
luggage (7 kg) and all fluids (tank
90 % full).
Optional equipment and
accessories increase the kerb
weight.
■ Driving with a roof load increases the sensitivity of the vehicle to
cross-winds and has a detrimental
effect on vehicle handling due to the vehicle's higher centre of
gravity. Distribute the load evenly
and secure it properly with retaining
straps. Adjust the tyre pressure and
vehicle speed according to the load conditions. Check and retighten the
straps frequently.
Do not drive faster than 75 mph.
The permissible roof load is
100 kg. The roof load is the
combined weight of the roof rack
and the load.
Page 91 of 223

Instruments and controls89Tyre pressure monitoring
system
w illuminates or flashes yellow.
Illuminates Tyre pressure loss. Stop immediately
and check tyre pressure.
A corresponding message also
appears on the Info-Display 3 92.
Flashes Fault in system or tyre without
pressure sensor mounted ( e.g. spare
wheel). After approx. one minute the
control indicator illuminates
continuously. A corresponding
message also appears on the Info-
Display.
Consult a workshop.
Tyre pressure monitoring system
3 178.
Engine oil pressure
I illuminates red.Illuminates when the ignition is
switched on and extinguishes shortly
after the engine starts. If it does not
illuminate, seek the assistance of a
workshop.
Illuminates when the engine is runningCaution
Engine lubrication may be
interrupted. This may result in
damage to the engine and/or
locking of the drive wheels.
1. Depress clutch.
2. Select neutral gear, set selector lever to N.
3. Move out of the flow of traffic as quickly as possible without
impeding other vehicles.
4. Switch off ignition.
9 Warning
When the engine is off,
considerably more force is needed
to brake and steer. During an
Autostop the brake servo unit will still be operational.
Do not remove key until vehicle is stationary, otherwise the steeringwheel lock could engage
unexpectedly.
Check oil level before seeking the
assistance of a workshop 3 154.
Change engine oil
C illuminates yellow.
When the engine is started, C
illuminates briefly. If it does not
illuminate, seek the assistance of a
workshop.
The engine oil life monitor lets you know when to change the oil. Control
indicator C illuminates to indicate
that engine oil life has been
diminished and the oil needs
changing.
Page 102 of 223

100Instruments and controlsVehicle messagesWarning chimes
When starting the engine or whilst driving
Only one warning chime will sound at a time.
The warning chime regarding
unfastened seat belts has priority
over any other warning chime.
■ If seat belt is not fastened.
■ When operating the turn and lane- change signals.
■ When the vehicle is being driven and the electrical parking brake is
applied 3 137.
■ When releasing the electrical parking brake without applying the
foot brake 3 90.
■ If there is a fault in the braking system 3 85.
■ If the parking assist detects an object 3 143.■ During automatic self-cleaning of
the diesel particle filter 3 128.
■ In vehicles equipped with engine overspeed warning; when vehicle
speed exceeds 75 mph 3 91.
When the vehicle is parked and/ or the driver's door is opened ■ When the key is in the ignition switch.
■ With exterior lights on.
Tyre pressure
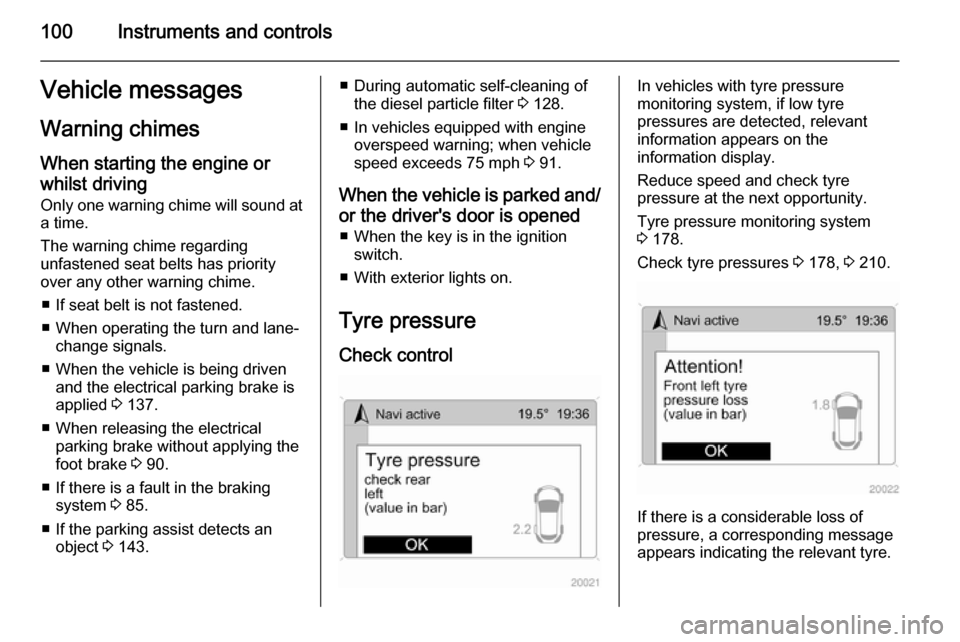
Check controlIn vehicles with tyre pressure
monitoring system, if low tyre
pressures are detected, relevant
information appears on the
information display.
Reduce speed and check tyre
pressure at the next opportunity.
Tyre pressure monitoring system
3 178.
Check tyre pressures 3 178, 3 210.
If there is a considerable loss of
pressure, a corresponding message
appears indicating the relevant tyre.
Page 103 of 223

Instruments and controls101
Steer out of the flow of traffic as
quickly as possible without
endangering other vehicles. Stop and
check the tyres. Mount the spare
wheel 3 186, 3 189.
Tyre pressure monitoring system 3 178.Trip computer
Trip computer in Board-
Info-Display
The trip computer provides
information on driving data, which is
continually recorded and evaluated electronically. Access trip computer
vehicle data by pressing the BC
button on the Infotainment system or
the left adjuster wheel on the steering
wheel.
Some of the functions appear on the
display in an abbreviated form. Once
a function has been selected, the
subsequent rows of the trip computer
function are displayed.
The functions are displayed in the
following order:
■ Instantaneous consumption
■ Average consumption
■ Effective consumption
■ Average speed
■ Distance travelled■ Range
■ Stop watch
Board-Info-Display 3 92.
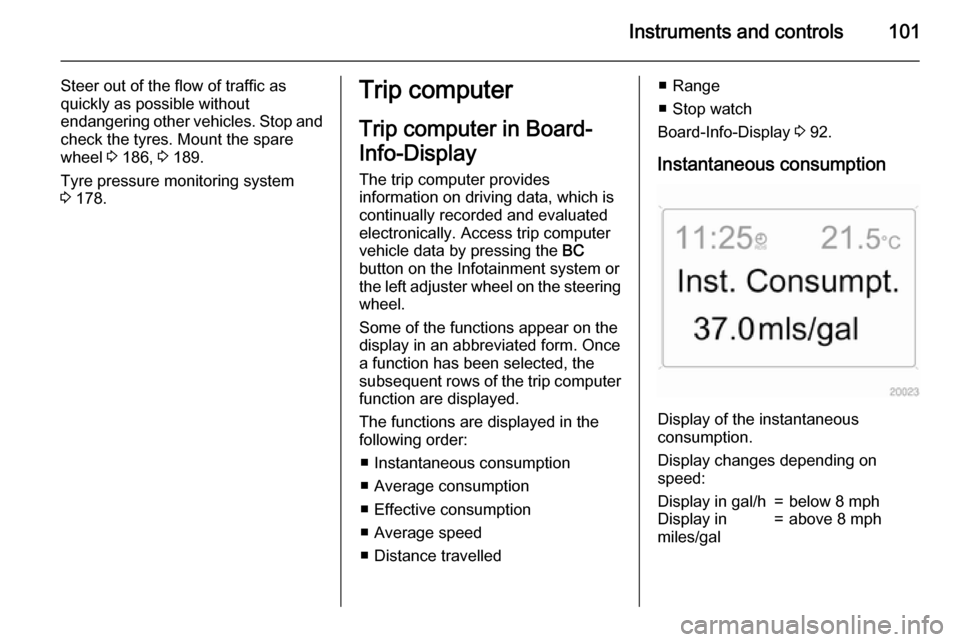
Instantaneous consumption
Display of the instantaneous
consumption.
Display changes depending on
speed:
Display in gal/h=below 8 mphDisplay in
miles/gal=above 8 mph
Page 137 of 223

Driving and operating135
Ensure tyres (including the spare) areinflated to the correct pressure
3 210 and are suitable for the
prevailing road conditions. For
optimum system performance, the
vehicle's tyres should not have
varying degrees of wear.
If control indicator B flashes in the
instrument cluster during driving, All-
wheel drive is temporarily disabled. If
B flashes continuously, there is a fault
in the system; seek the assistance of
a workshop.
All-wheel drive control indicator B
3 86.
On-road driving
The increased traction of All-wheel
drive vehicles offers greater driving
control in adverse road conditions,
particularly heavy snow and ice.
However, All-wheel drive vehicles are not "skid-proof" and do not decrease
stopping distances.
All-wheel drive vehicles have a higher
centre of gravity than conventional vehicles. Always approach curves at
an appropriate driving speed. Do notattempt to go as fast through turns as
you might in a conventional vehicle.
Strong crosswinds can affect the normal steering of the vehicle. Drive
slower under strong crosswind
conditions.
Off-road driving ■ Avoid protruding objects (such as rocks or tree stumps) that may
damage the underbody and tyres of your vehicle.
■ Test the brakes after operating in mud, to clear excess mud from the
braking surfaces.
■ Grip the steering wheel when travelling over rough terrain.
Terrain conditions can cause rapid
and unexpected movement in the
steering.
The ground clearance, ramp angle,
angle of approach and departure and
wading depth need to be considered, especially in hilly conditions and
when wading, to prevent the vehicle
becoming stuck and possibly
damaged.
Vehicle dimensions 3 207.Towing the vehicle 3 192.
Driving through water
Do not exceed the maximum wading
depth 3 207.
Check the depth of water: choose the
lowest entry and departure angles
before entering. Maintain a steady
engine speed, to help prevent water
from entering the exhaust system, but
do not exceed 3 mph, to avoid
splashing the water.
Drive with the flow wherever possible,
not against it. If you have to drive
against the flow, try to drive at an
angle to it, so that the leading corner
of the vehicle will help deflect water
from the engine compartment. Avoid
splashing the water - if the ignition
system becomes wet, the engine may
stall.
Avoid water entering the air intake
system. If water enters the air intake
system, engine seizure with severe
costly damage may result.
Test the brakes after leaving the
water - wet brakes are less effective
than dry ones. Perform the service
Page 138 of 223

136Driving and operating
operations for wading , involving
checks for water contamination, at
the earliest opportunity.
Service checks after wading
Check for the ingress of water into the following:
■ Brake fluid reservoir
■ Air cleaner element
■ Engine
■ Transmission
■ Axles
■ Interior of vehicle
Renew any lubricating oil or hydraulic
fluid that has a milky appearance,
indicating contamination with water.
Cleaning
Clean the vehicle thoroughly and as
soon as possible after driving off-
road.
Do not let mud remain dry on any part
of the vehicle as it becomes abrasive and can damage paint, glass, seals,
bearings and brake components. If
left to build up, mud can seriously
affect the airflow through and overmechanical components and cause
localised overheating and failure of
parts, especially in the engine
compartment.
Ensure the radiator core and the area
between the radiator and intercooler/
oil cooler (where installed) is cleaned, to maintain proper cooling air flow.
Check the radiator and cooler cores
for blockage (sand, silt etc.).
Check the tyre treads.
Clean and check the mechanical
parts of the vehicle, particularly the
following areas:
■ Driveshafts, including sealing bellows
■ Front brake calipers, pads and discs
■ Front suspension
■ Clutch fork sealing bellows
■ Rear brake calipers, pads and discs
■ Rear suspension
■ Fuel tank and underguard
■ Breathers, axles and fuel tank
■ Load sensing valve■ Transfer box and underguard
■ Engine oil pan and underguard
Observe the following: ■ Do not spray high-pressure water directly at the vehicle seals
■ The wheels must be removed to clean all mud and stones from the
brake calipers and to check brake
pad wear
■ The areas on the upper side of the underguards must be cleared of
stones, to prevent damage to the
engine oil pan and the fuel tank