Page 470 of 564
470 5-2. Steps to take in an emergency
The compact spare tire
The compact spare tire is identified by the label “TEMPORARY USE
ONLY” on the tire sidewall.
Use the compact spare tire temporarily, and only in an emergency.
Make sure to check the tire inflation pressure of the compact spare tire.
(P. 535)
After completing the tire change
The tire pressure warning system must be reset. (P. 386)
When using the compact spare tire
As the compact spare tire is not equipped with a tire pressure warning valve
and transmitter, low inflation pressure of the spare tire will not be indicated
by the tire pressure warning system. Also, if you replace the compact spare
tire after the tire pressure warning light comes on, the light remains on.
If you have a flat front tire on a road covered with snow or ice
Install the compact spare tire on one of the rear wheels of the vehicle. Per-
form the following steps and fit tire chains to the front tires:
Replace a rear tire with the compact spare tire.
Replace the flat front tire with the tire removed from the rear of the
vehicle.
Fit tire chains to the front tires.
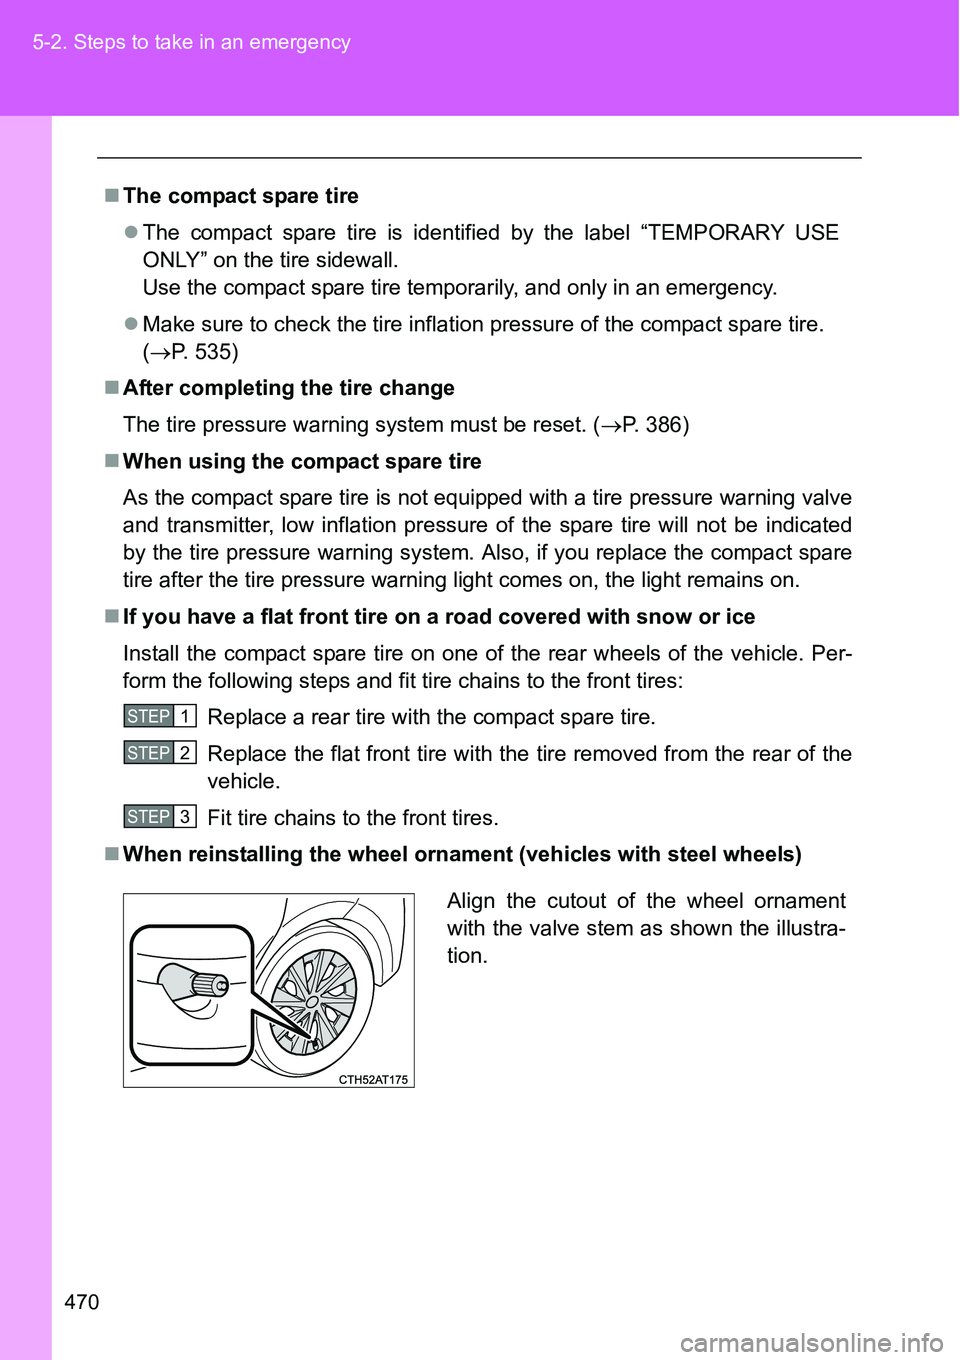
When reinstalling the wheel ornament (vehicles with steel wheels)
STEP1
STEP2
STEP3
Align the cutout of the wheel ornament
with the valve stem as shown the illustra-
tion.
Page 474 of 564
474 5-2. Steps to take in an emergency
CAUTION
When installing the wheel nuts
Be sure to install the wheel nuts with the tapered end facing inward.
(P. 398)
Failure to follow these precautions could cause the wheel nuts to loosen and
the tire to fall off, resulting in death or serious injury.
NOTICE
Do not drive the vehicle with a flat tire.
Do not continue driving with a flat tire.
Driving even a short distance with a flat tire can damage the tire and the
wheel beyond repair.
Be careful when driving over bumps with the compact spare tire
installed on the vehicle.
The vehicle becomes lower when driving with the compact spare tire com-
pared to when driving with standard tires. Be careful when driving over
uneven road surfaces.
Driving with tire chains and the compact spare tire
Do not fit tire chains to the compact spare tire.
Tire chains may damage the vehicle body and adversely affect driving per-
formance.
When replacing the tires
When removing or fitting the wheels, tires or the tire pressure warning valve
and transmitter, contact any authorized Toyota dealer or repairer, or another
duly qualified and equipped professional as the tire pressure warning valve
and transmitter may be damaged if not handled correctly.
To avoid damage to the tire pressure warning valves and transmitters
When a tire is repaired with liquid sealants, the tire pressure warning valve
and transmitter may not operate properly. If a liquid sealant is used, contact
any authorized Toyota dealer or repairer, or another duly qualified and
equipped professional or other qualified service shop as soon as possible.
Make sure to replace the tire pressure warning valve and transmitter when
replacing the tire. (P. 385)
Page 477 of 564
5
477 5-2. Steps to take in an emergency
When trouble arises
Compressor
Power plugAir pressure gauge
Compressor switch
Page 478 of 564
478 5-2. Steps to take in an emergency
Before performing emergency repair
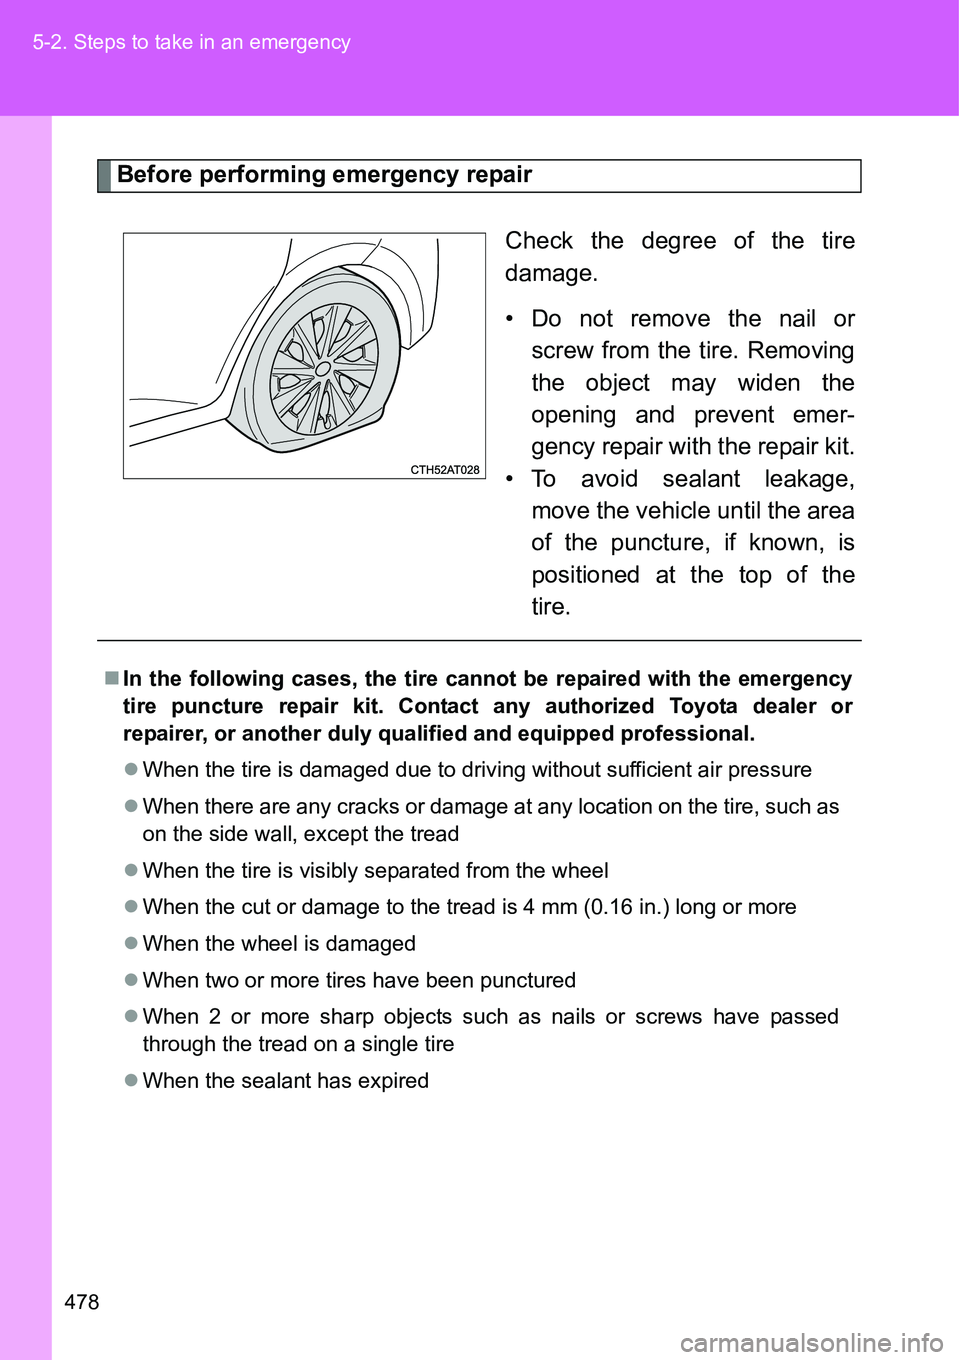
Check the degree of the tire
damage.
• Do not remove the nail or
screw from the tire. Removing
the object may widen the
opening and prevent emer-
gency repair with the repair kit.
• To avoid sealant leakage,
move the vehicle until the area
of the puncture, if known, is
positioned at the top of the
tire.
In the following cases, the tire cannot be repaired with the emergency
tire puncture repair kit. Contact any authorized Toyota dealer or
repairer, or another duly qualified and equipped professional.
When the tire is damaged due to driving without sufficient air pressure
When there are any cracks or damage at any location on the tire, such as
on the side wall, except the tread
When the tire is visibly separated from the wheel
When the cut or damage to the tread is 4 mm (0.16 in.) long or more
When the wheel is damaged
When two or more tires have been punctured
When 2 or more sharp objects such as nails or screws have passed
through the tread on a single tire
When the sealant has expired
Page 483 of 564
5
483 5-2. Steps to take in an emergency
When trouble arises
Connect the bottle to the com-
pressor.
As shown in the illustration, insert
the bottle vertically into the com-
pressor to connect making sure
that the claw on the bottle's neck
is hooked onto the cutout of the
compressor case.
Check the specified tire inflation
pressure.
Tire inflation pressure is speci-
fied on the label in the glove box.
(P. 535)
Start the vehicle’s engine.
To inject the sealant and inflate
the tire, turn the compressor
switch on.
STEP10
STEP11
STEP12
STEP13
Page 484 of 564
484 5-2. Steps to take in an emergency
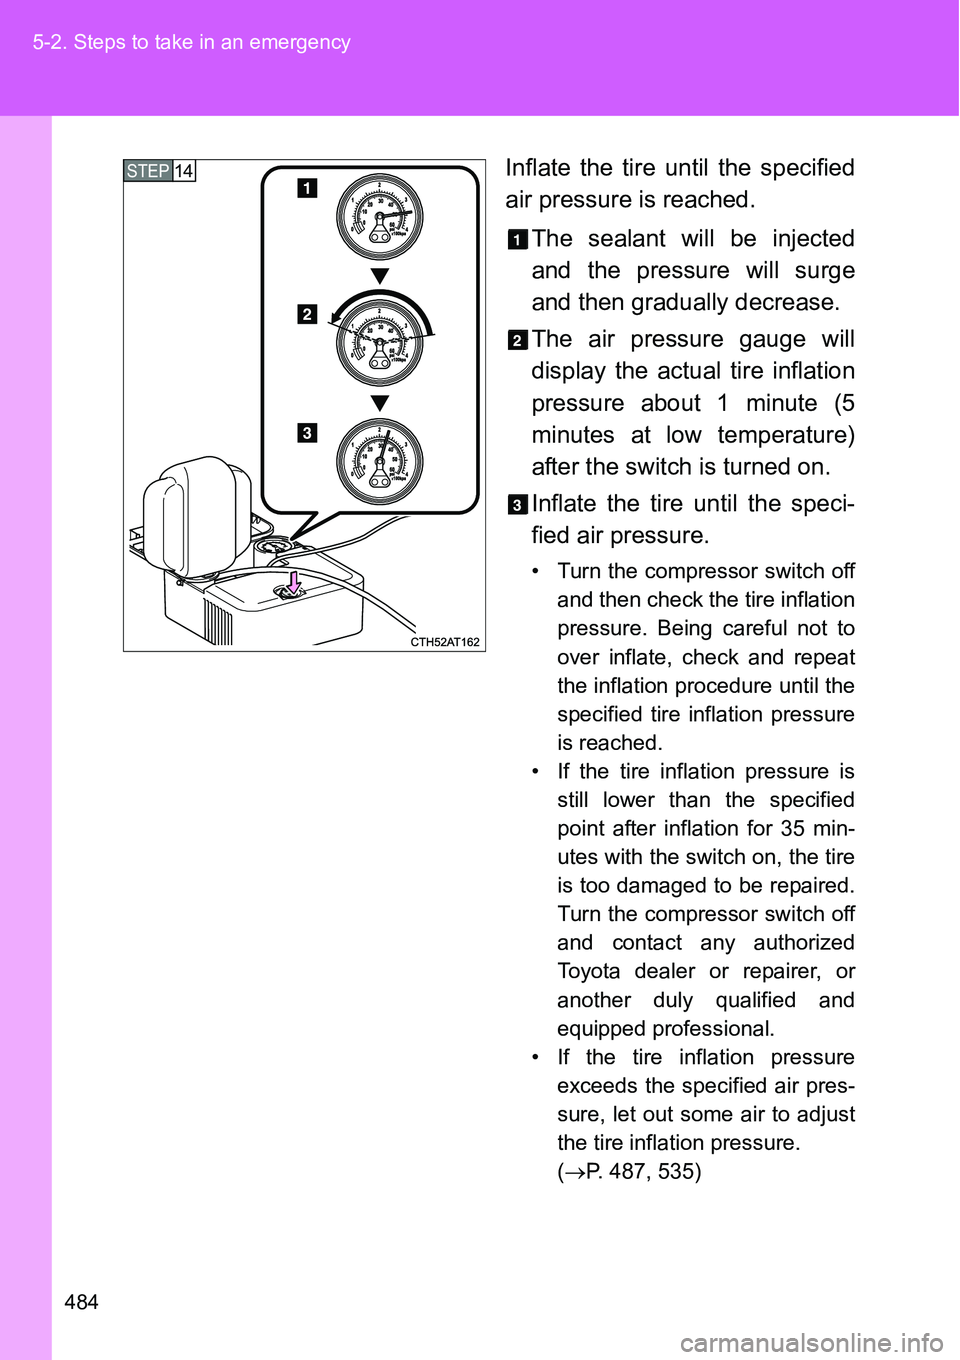
Inflate the tire until the specified
air pressure is reached.
The sealant will be injected
and the pressure will surge
and then gradually decrease.
The air pressure gauge will
display the actual tire inflation
pressure about 1 minute (5
minutes at low temperature)
after the switch is turned on.
Inflate the tire until the speci-
fied air pressure.
• Turn the compressor switch off
and then check the tire inflation
pressure. Being careful not to
over inflate, check and repeat
the inflation procedure until the
specified tire inflation pressure
is reached.
• If the tire inflation pressure is
still lower than the specified
point after inflation for 35 min-
utes with the switch on, the tire
is too damaged to be repaired.
Turn the compressor switch off
and contact any authorized
Toyota dealer or repairer, or
another duly qualified and
equipped professional.
• If the tire inflation pressure
exceeds the specified air pres-
sure, let out some air to adjust
the tire inflation pressure.
(P. 487, 535)
STEP14
Page 486 of 564
486 5-2. Steps to take in an emergency
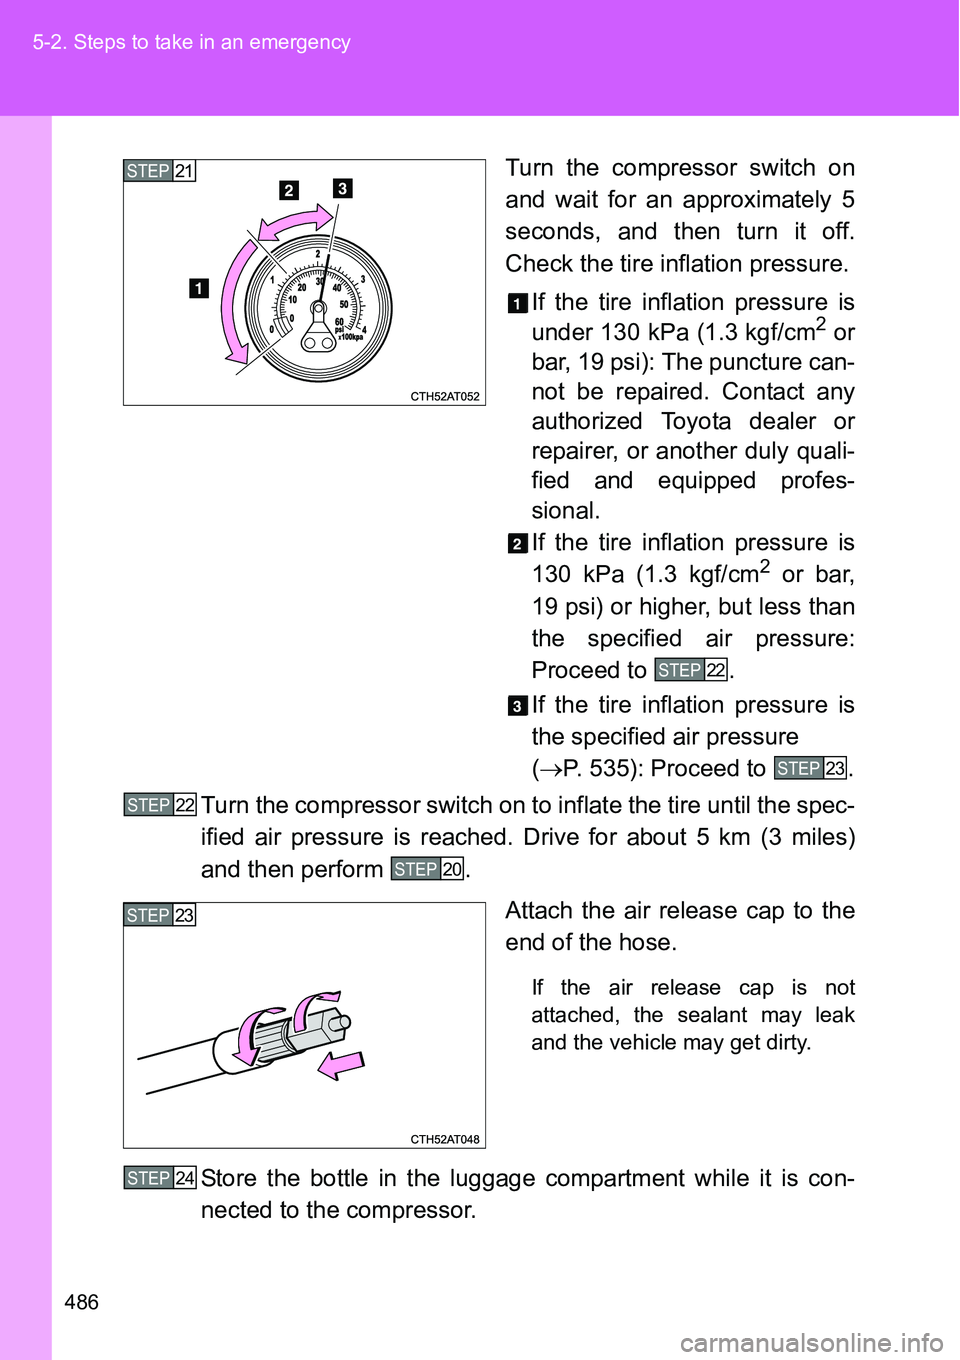
Turn the compressor switch on
and wait for an approximately 5
seconds, and then turn it off.
Check the tire inflation pressure.
If the tire inflation pressure is
under 130 kPa (1.3 kgf/cm
2 or
bar, 19 psi): The puncture can-
not be repaired. Contact any
authorized Toyota dealer or
repairer, or another duly quali-
fied and equipped profes-
sional.
If the tire inflation pressure is
130 kPa (1.3 kgf/cm
2 or bar,
19 psi) or higher, but less than
the specified air pressure:
Proceed to .
If the tire inflation pressure is
the specified air pressure
(P. 535): Proceed to .
Turn the compressor switch on to inflate the tire until the spec-
ified air pressure is reached. Drive for about 5 km (3 miles)
and then perform .
Attach the air release cap to the
end of the hose.
If the air release cap is not
attached, the sealant may leak
and the vehicle may get dirty.
Store the bottle in the luggage compartment while it is con-
nected to the compressor.
STEP21
STEP22
STEP23
STEP22
STEP20
STEP23
STEP24
Page 487 of 564
5
487 5-2. Steps to take in an emergency
When trouble arises
Taking precautions to avoid sudden braking, sudden accelera-
tion and sharp turns, drive carefully at under 80 km/h (50
mph) to the nearest authorized Toyota dealer or repairer, or
another duly qualified and equipped professional for tire repair
or replacement.
If the tire is inflated to more than the specified air pressure
Disconnect the hose from the valve.
Disconnect the hose from the valve, remove the air release cap
from the hose and then reconnect the hose.
Turn the compressor switch on and wait for several seconds, and
then turn it off. Check that the air pressure indicator shows the
specified air pressure.
If the air pressure is under the designated pressure, turn the com-
pressor switch on again and repeat the inflation procedure until the
specified air pressure is reached.
The valve of a tire that has been repaired
After a tire is repaired with the emergency tire puncture repair kit, the valve
should be replaced.
Note for checking the emergency tire puncture repair kit
Check the sealant expiry date occasionally.
The expiry date is shown on the bottle. Do not use sealant whose expiry
date has already passed. Otherwise, repairs conducted using the emer-
gency tire puncture repair kit may not be performed properly.
STEP25
STEP1
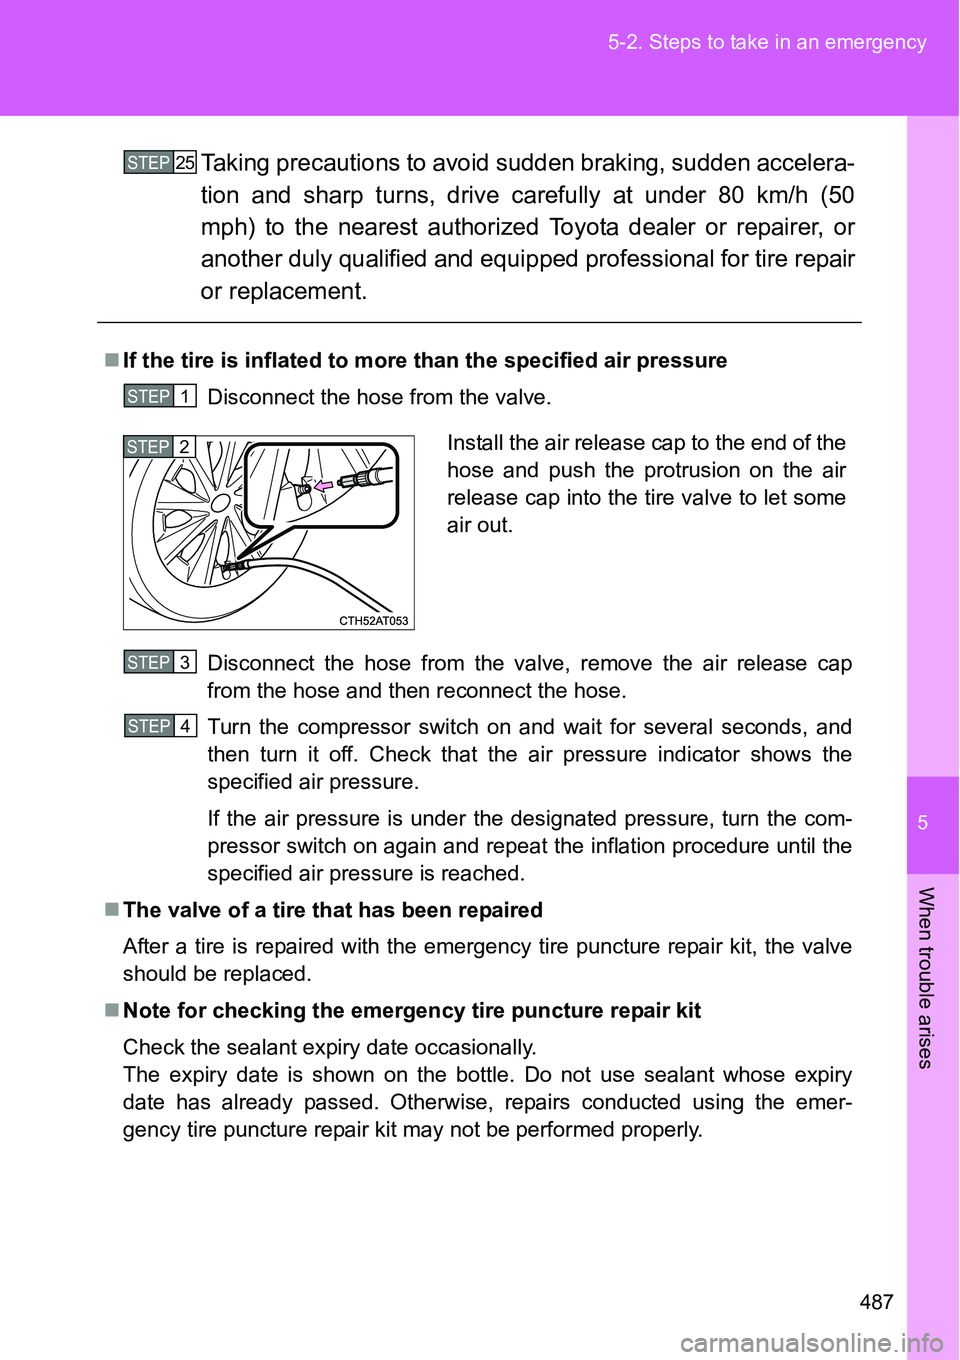
Install the air release cap to the end of the
hose and push the protrusion on the air
release cap into the tire valve to let some
air out.STEP2
STEP3
STEP4