Page 227 of 590

227
2-5. Driving information
2
When driving
●
Instability happens more frequently when descending steep or long
downhill grades. Before descending, slow down and downshift. Do
not make sudden downshifts while descending steep or long down-
hill grades.
● Avoid holding the brake pedal down too long or applying the
brakes too frequently. This could cause the brakes to overheat and
result in reduced braking efficiency.
● Due to the added load of the trailer, your vehicle’s engine may
overheat on hot days (at temperatures over 85°F [30°C]) when
driving up a long or steep grade. If the engine coolant temperature
gauge indicates overheating, immedi ately turn off the air condition-
ing (if in use), pull your vehicle off the road and stop in a safe spot.
( P. 508)
● Always place wheel blocks under both the vehicle’s and the
trailer’s wheels when parking. Ap ply the parking brake firmly, and
put the transmission in P (automatic transmission) or in 1 or R
(manual transmission). Avoid park ing on a slope, but if unavoid-
able, do so only after performing the following:
Apply the brakes and keep them applied.
Have someone place wheel blo cks under both the vehicle’s
and trailer’s wheels.
When the wheel blocks are in pl ace, release the brakes slowly
until the blocks absorb the load.
Apply the parking brake firmly.
Shift into P (automatic transmission) or 1 or R (manual trans-
mission) and turn off the engine.
● When restarting after parking on a slope:
With the transmission in P (automatic transmission) or the
clutch pedal (manual transmission) depressed, start the
engine. On vehicles with an au tomatic transmission, be sure
to keep the brake pedal depressed.
Shift into a forward gear. If reversing, shift into R.
Page 228 of 590

228 2-5. Driving information
Release the parking brake (and also the brake pedal on vehi-
cles with an automatic transmission), and slowly pull or back
away from the wheel blocks. Stop and apply the brakes.
Have someone retrieve the blocks.
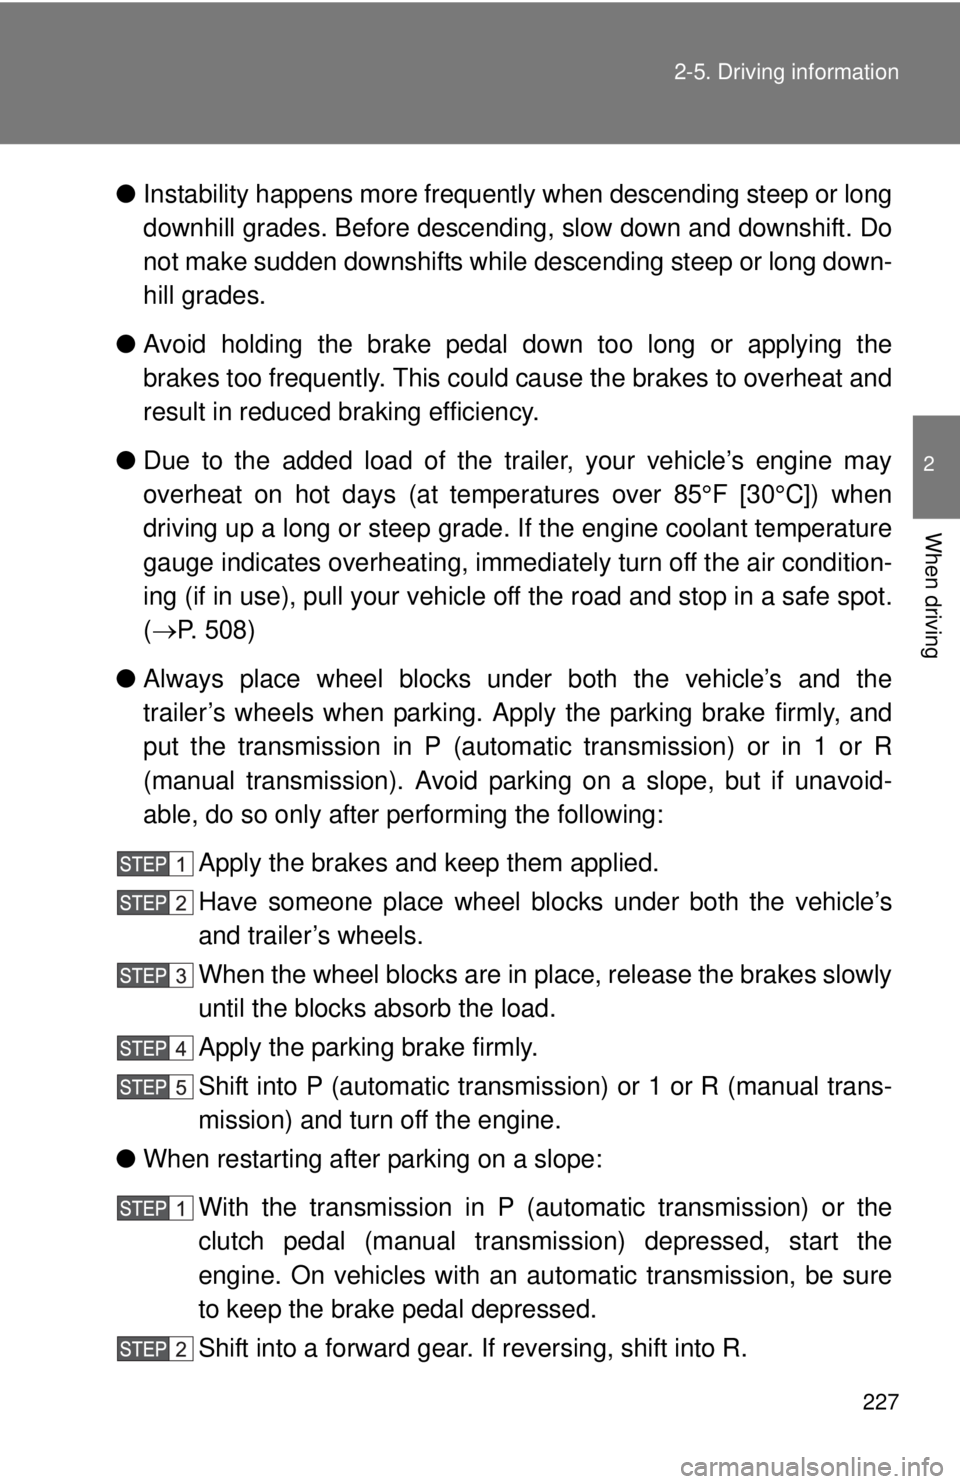
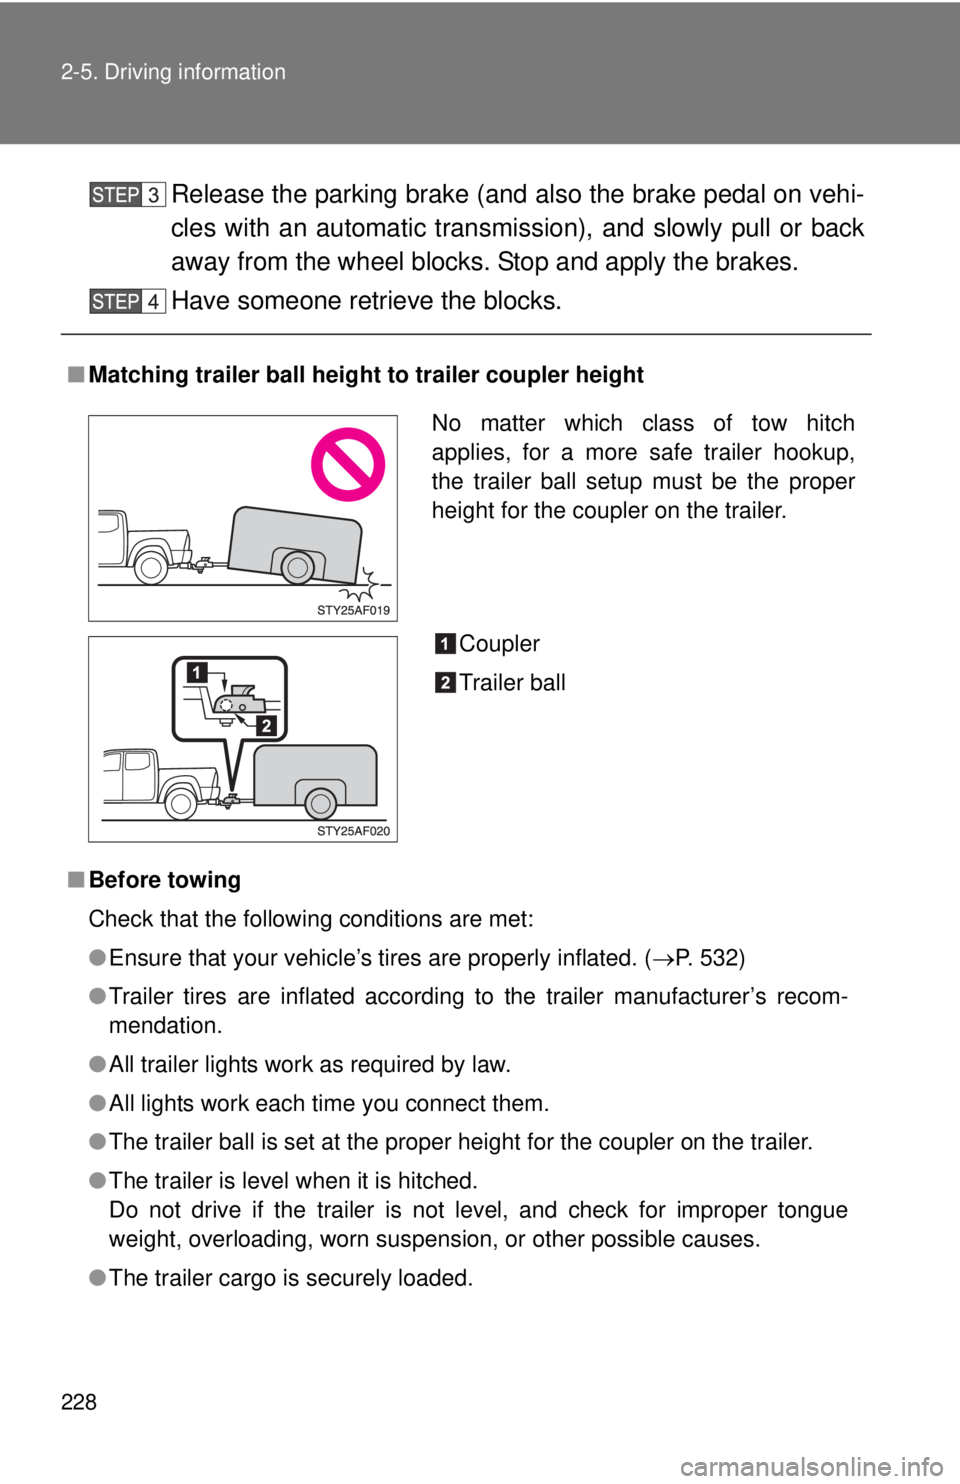
■ Matching trailer ball height to trailer coupler height
■ Before towing
Check that the following conditions are met:
●Ensure that your vehicle’s tires are properly inflated. ( P. 532)
● Trailer tires are inflated according to the trailer manufacturer’s recom-
mendation.
● All trailer lights work as required by law.
● All lights work each time you connect them.
● The trailer ball is set at the proper height for the coupler on the trai\
ler.
● The trailer is level when it is hitched.
Do not drive if the trailer is not level, and check for improper tongue
weight, overloading, worn suspension, or other possible causes.
● The trailer cargo is securely loaded.
No matter which class of tow hitch
applies, for a more safe trailer hookup,
the trailer ball setup must be the proper
height for the coupler on the trailer.
Coupler
Trailer ball
Page 235 of 590

Interior and exteriorfeatures3
235
3-1. Using the air conditioning
system and defogger
Air conditioning system .... 236
3-2. Using the multimedia system Multimedia system types .............................. 243
Entune Audio ................... 245
USB port/AUX port ........... 249
Setup menu...................... 250
Basic audio operations..... 256
Using the radio ................. 261
Playing an audio CD and MP3/WMA/AAC discs .... 263
Listening to an iPod ......... 270
Listening to a USB memory device .............. 276
Using the AUX port .......... 281
Connecting Bluetooth
®.... 282
Listening to Bluetooth®
audio .............................. 304
Using a Bluetooth
®
phone ............................. 305
Operating the sub woofer (on some Access Cab
models) .......................... 334
Detachable pole antenna .......................... 335 3-3. Using the interior lights
Interior lights list ............... 338
• Interior light .................... 339
• Personal lights ............... 339
3-4. Using the storage features List of storage features .... 340
• Glove box....................... 341
• Front console box .......... 341
• Cup holders ................... 342
• Bottle holders ................. 344
• Auxiliary boxes ............... 345
• Overhead console .......... 348
3-5. Other interior features Sun visors ........................ 349
Vanity mirrors ................... 350
Clock ................................ 351
Power outlets (12 VDC) ... 352
Power outlet (120 VAC) ... 353
Seat heaters..................... 359
Seatback table ................. 361
Floor mat .......................... 362
Luggage compartment features .......................... 364
Garage door opener......... 373
Compass (vehicles with auto anti-glare inside
rear view mirror) ............. 381
Page 236 of 590
236
3-1. Using the air conditioning system and defogger
Air conditioning system
Adjusting the settings■ Adjusting the temperature setting
Turn the temperature control dial clockwise (warm) or counter-
clockwise (cool).
If is not pressed, the system will blow ambient temperature air or
heated air.
For quick cooling, turn the temperature control dial to the MAX A/C posi-
tion. The air conditioning will automatically turn on and the air intake
selector will be set to recirculated air mode.
■ Adjusting the fan speed
Turn the fan speed control dial clockwise (increase) or counter-
clockwise (decrease).
Set the dial to OFF to turn the fan off.
Outside air or recirculated
air mode switch Air outlet selection dialAir conditioning
ON/OFF switch Temperature control dial
Fan speed control dial
Page 242 of 590
242 3-1. Using the air conditioning system and defogger
CAUTION
■To prevent the windshield from fogging up
Do not set the air outlet selection dial to during cool air operation in
extremely humid weather. The difference between the temperature of the
outside air and that of the windshield can cause the outer surface of the
windshield to fog up, blocking your vision.
NOTICE
■To prevent battery discharge
Do not leave the air conditioning system on longer than necessary when the
engine is stopped.
Page 251 of 590
251
3-2. Using the multimedia system
3
Interior and exterior features
General settings
Settings are available for adjusting the operation sounds, screen ani-
mation, etc.
■ Screen for general settings
Press the “SETUP” button.
Select “General” on the “Setup” screen.
Select to adjust the clock.
( P. 252)
“English”, “Français” or
“Español” can be selected.
On/off can be selected to
sound beeps.
Select to change the screen
color.
Select to change the keyboard
layout.
The animation effect for the
screen can be set to on/off.
Select to delete personal data
( P. 252)
Select to update program ver-
sions. For details, contact your
Toyota dealer.
Select to display the software
information. Notices related to
third party software used in
this product are enlisted. (This
includes instructions for
obtaining such software,
where applicable.)
Page 252 of 590
252 3-2. Using the multimedia system
■Setting the clock
Select “Clock” on the “General Settings” screen.
Adjust the time, then select “OK”.
■ Delete personal data
Select “Delete Personal Data” on the “General Settings”
screen.
Select “Delete”.
Check carefully beforehand, as data cannot be retrieved once
deleted.
A confirmation screen will be displayed. Select “Yes”.
The following personal data will be deleted or changed to its
default settings.
• General settings
• Audio settings
• Phone settings
■ To return to the default settings
Select “Default”, and then “Yes”.
Page 338 of 590
338
3-3. Using the interior lights
Interior lights list
■Illuminated entry system
When the interior light switch is in the DOOR position, the interior light auto-
matically turns on/off according to whether the doors are locked/unlocked
and whether the doors are open/closed.
■ To prevent the battery from being discharged
If the interior light remains on when the door is not fully closed and the inte-
rior light switch is in the DOOR position, the light will go off automatically
after 20 minutes.
Interior light ( P. 339)
Personal lights ( P. 339)