Page 178 of 292
178
2. SETUP
COROLLA_13CY_Navi_U
■EDITING THE CONTACT IN A DIF-
FERENT WAY (FROM THE “Contact
Details” SCREEN)
1Display the phone top screen.
(P.158)
2Select the “Contacts” , “Call History”
tab or the “Favorites” tab and select
the desired contact.
3Select “Edit Contact” .
“E-mail Addresses” : Select to display all
registered e-mail addresses for the con-
tact.
4Follow the steps in “EDITING THE
CONTACT DATA” from “STEP 4”.
(P.177)
1Select “Delete Contacts” .
2Select the desired contact and select
“Delete”.
3Select “Yes” when the confirmation
screen appears.
DELETING THE CONTACT
DATA
For PBAP compatible Bluetooth
®
phones, this function is available when
“Automatic Contact/History Transfer”
is set to off. ( P.174)
INFORMATION
●Multiple data can be selected and
deleted at the same time.
Page 179 of 292
179
2. SETUP
COROLLA_13CY_Navi_U
PHONE
7
■DELETING THE CONTACT IN A DIF-
FERENT WAY (FROM THE “Contact
Details” SCREEN)
1Display the phone top screen.
(P.158)
2Select the “Contacts” , “Call History”
tab or the “Favorites” tab and select
the desired contact.
3Select “Delete Contact” .
4Select “Yes” when the confirmation
screen appears.
■REGISTERING THE CONTACTS IN
THE FAVORITES LIST
1Select “Add Favorite” .
2Select the desired contact to add to the
favorites list.
Dimmed contacts are already stored as a
favorite.
3Check that a confirmation screen is
displayed when the operation is com-
plete.
INFORMATION
● When a Bluetooth® phone is deleted,
the contact data will be deleted at the
same time.
FAVORITES LIST SETTING
Up to 15 contacts (maximum of 4 num-
bers per contact) can be registered in
the favorites list.
Page 180 of 292
180
2. SETUP
COROLLA_13CY_Navi_U
When 15 contacts have already been
registered to the favorites list
1When 15 contacts have already been
registered to the favorites list, a regis-
tered contact needs to be replaced.
Select “Yes” when the confirmation
screen appears to replace a contact.
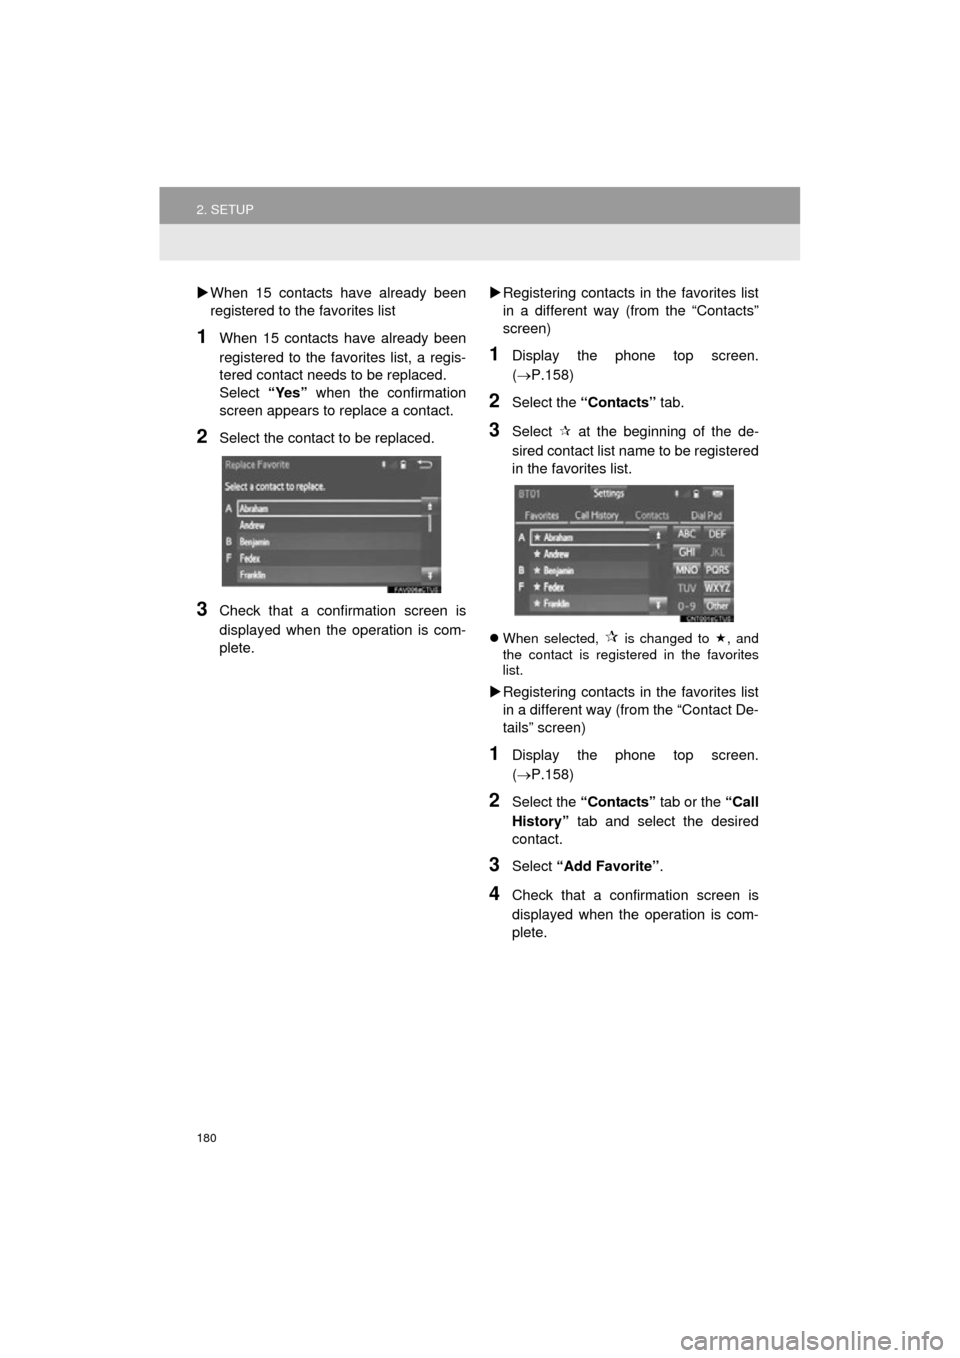
2Select the contact to be replaced.
3Check that a confirmation screen is
displayed when the operation is com-
plete.
Registering contacts in the favorites list
in a different way (from the “Contacts”
screen)
1Display the phone top screen.
( P.158)
2Select the “Contacts” tab.
3Select at the beginning of the de-
sired contact list name to be registered
in the favorites list.
When selected, is changed to , and
the contact is registered in the favorites
list.
Registering contacts in the favorites list
in a different way (from the “Contact De-
tails” screen)
1Display the phone top screen.
( P.158)
2Select the “Contacts” tab or the “Call
History” tab and select the desired
contact.
3Select “Add Favorite” .
4Check that a confirmation screen is
displayed when the operation is com-
plete.
Page 181 of 292
181
2. SETUP
COROLLA_13CY_Navi_U
PHONE
7
■DELETING THE CONTACTS IN THE
FAVORITES LIST
1Select “Remove Favorite” .
2Select the desired contacts and select
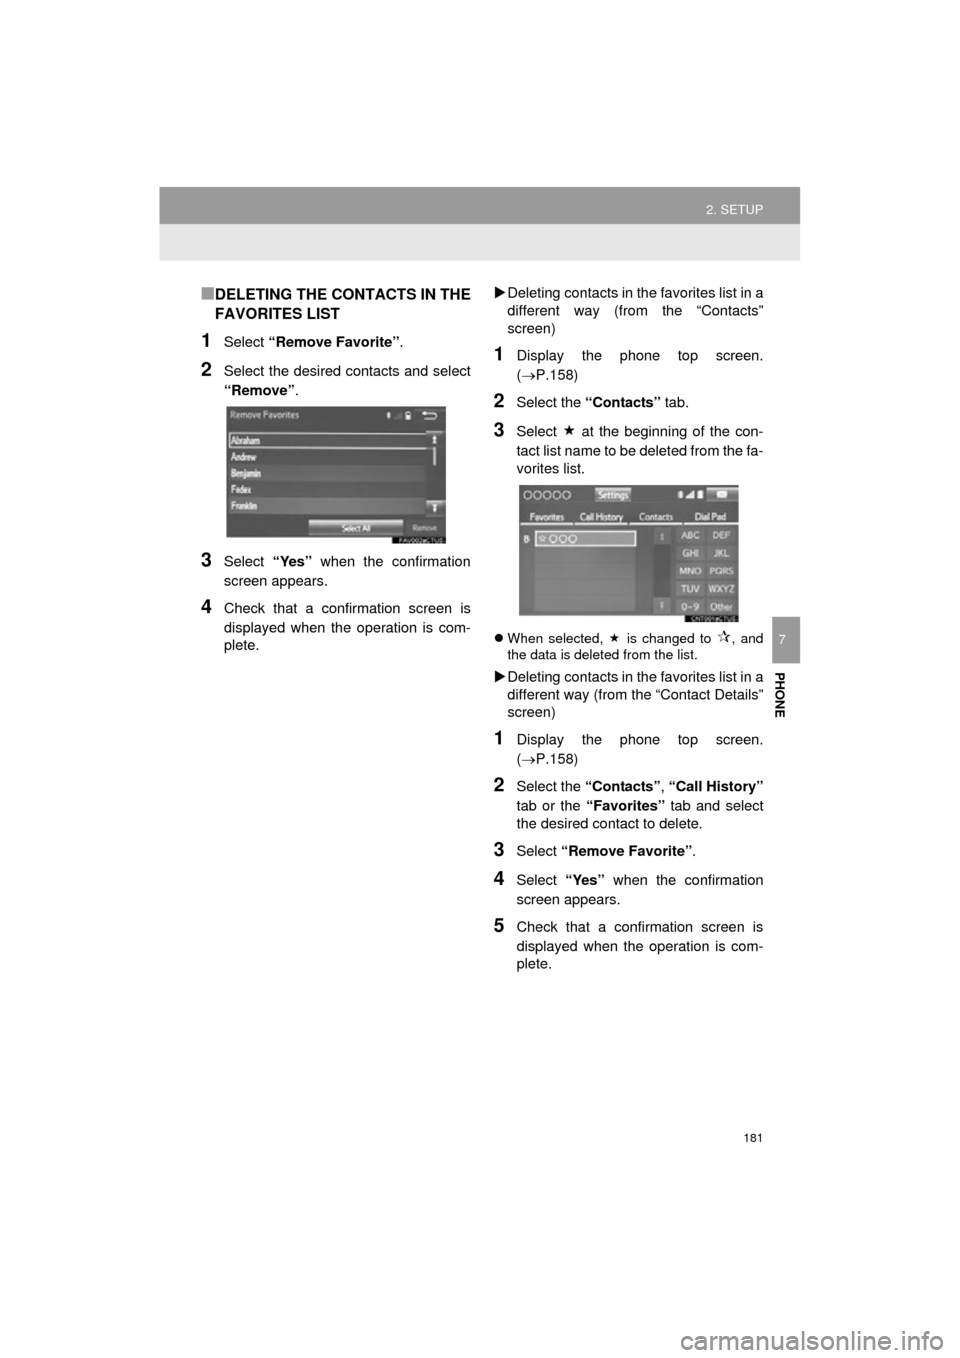
“Remove”.
3Select “Yes” when the confirmation
screen appears.
4Check that a confirmation screen is
displayed when the operation is com-
plete.
Deleting contacts in the favorites list in a
different way (from the “Contacts”
screen)
1Display the phone top screen.
(P.158)
2Select the “Contacts” tab.
3Select at the beginning of the con-
tact list name to be deleted from the fa-
vorites list.
When selected, is changed to , and
the data is deleted from the list.
Deleting contacts in the favorites list in a
different way (from the “Contact Details”
screen)
1Display the phone top screen.
(P.158)
2Select the “Contacts” , “Call History”
tab or the “Favorites” tab and select
the desired contact to delete.
3Select “Remove Favorite” .
4Select “Yes” when the confirmation
screen appears.
5Check that a confirmation screen is
displayed when the operation is com-
plete.
Page 182 of 292
182
2. SETUP
COROLLA_13CY_Navi_U
1Display the “Phone/Message Settings”
screen. (P.172)
2Select “Messaging Settings” .
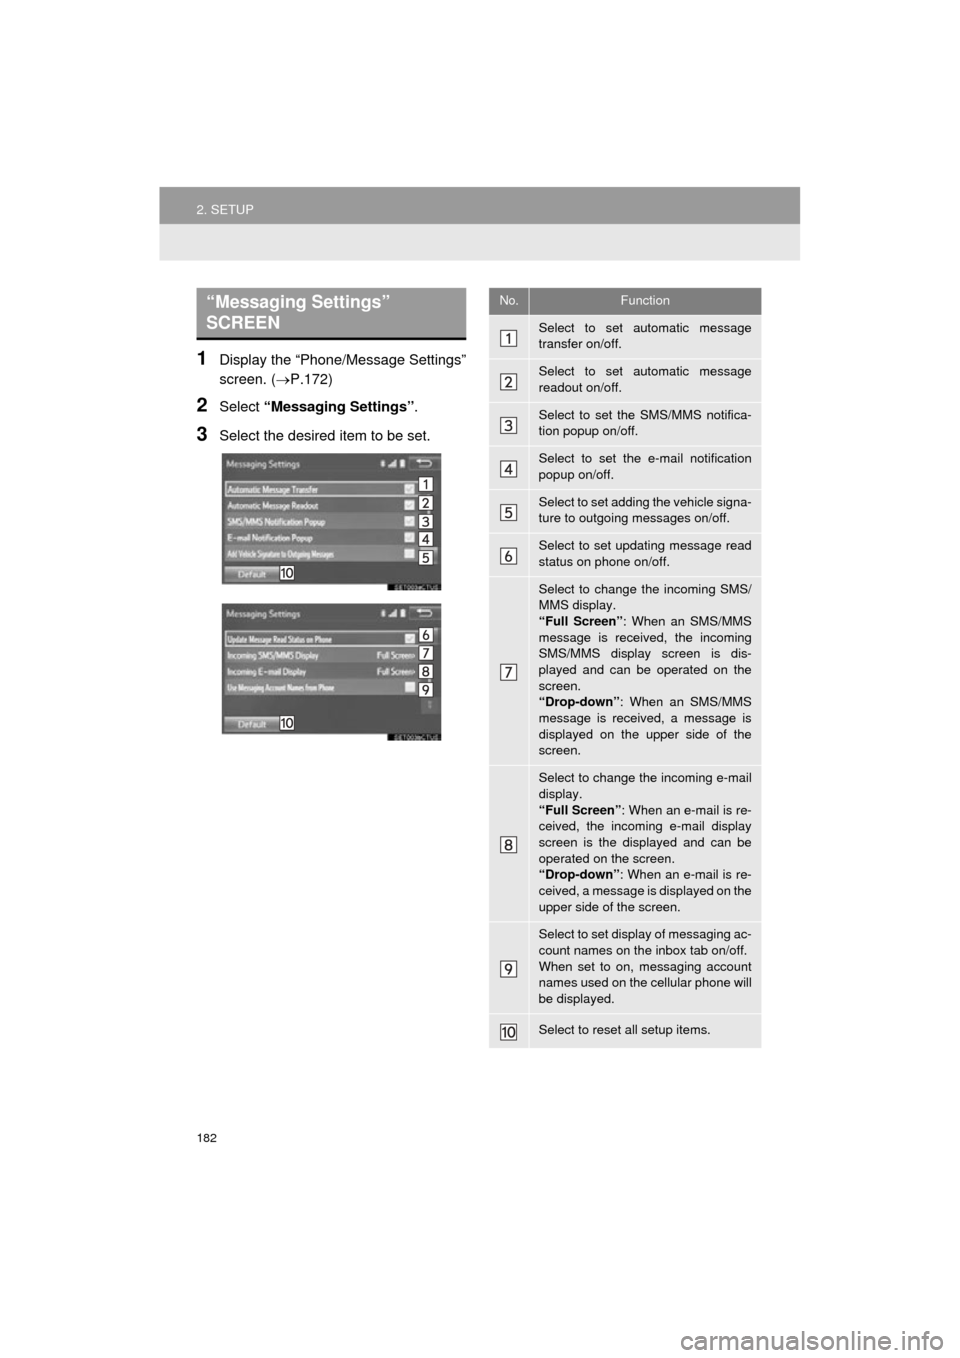
3Select the desired item to be set.
“Messaging Settings”
SCREEN No.Function
Select to set automatic message
transfer on/off.
Select to set automatic message
readout on/off.
Select to set the SMS/MMS notifica-
tion popup on/off.
Select to set the e-mail notification
popup on/off.
Select to set adding the vehicle signa-
ture to outgoing messages on/off.
Select to set updating message read
status on phone on/off.
Select to change the incoming SMS/
MMS display.
“Full Screen”: When an SMS/MMS
message is received, the incoming
SMS/MMS display screen is dis-
played and can be operated on the
screen.
“Drop-down” : When an SMS/MMS
message is received, a message is
displayed on the upper side of the
screen.
Select to change the incoming e-mail
display.
“Full Screen” : When an e-mail is re-
ceived, the incoming e-mail display
screen is the displayed and can be
operated on the screen.
“Drop-down” : When an e-mail is re-
ceived, a message is displayed on the
upper side of the screen.
Select to set display of messaging ac-
count names on the inbox tab on/off.
When set to on, messaging account
names used on the cellular phone will
be displayed.
Select to reset all setup items.
Page 183 of 292
183
2. SETUP
COROLLA_13CY_Navi_U
PHONE
7
1Display the phone top screen.
(P.158)
2Press the switch.
3Select .
1Display the “Phone/Message Settings”
screen. (P.172)
2Select “Phone Display Settings” .
3Select the desired item to be set.
INFORMATION
●Depending on the phone, these func-
tions may not be available.
DISPLAYING THE “Messaging
Settings” SCREEN IN A
DIFFERENT WAY
“Phone Display Settings”
SCREEN
No.Function
Select to change the incoming call
display.
“Full Screen” : When a call is re-
ceived, the hands-free screen is dis-
played and can be operated on the
screen.
“Drop-down” : A message is dis-
played on the upper side of the
screen.
Select to set display of the contact/
history transfer completion message
on/off.
Select to reset all setup items.
INFORMATION
● Depending on the phone, these func-
tions may not be available.
Page 188 of 292
188
3. WHAT TO DO IF...
COROLLA_13CY_Navi_U
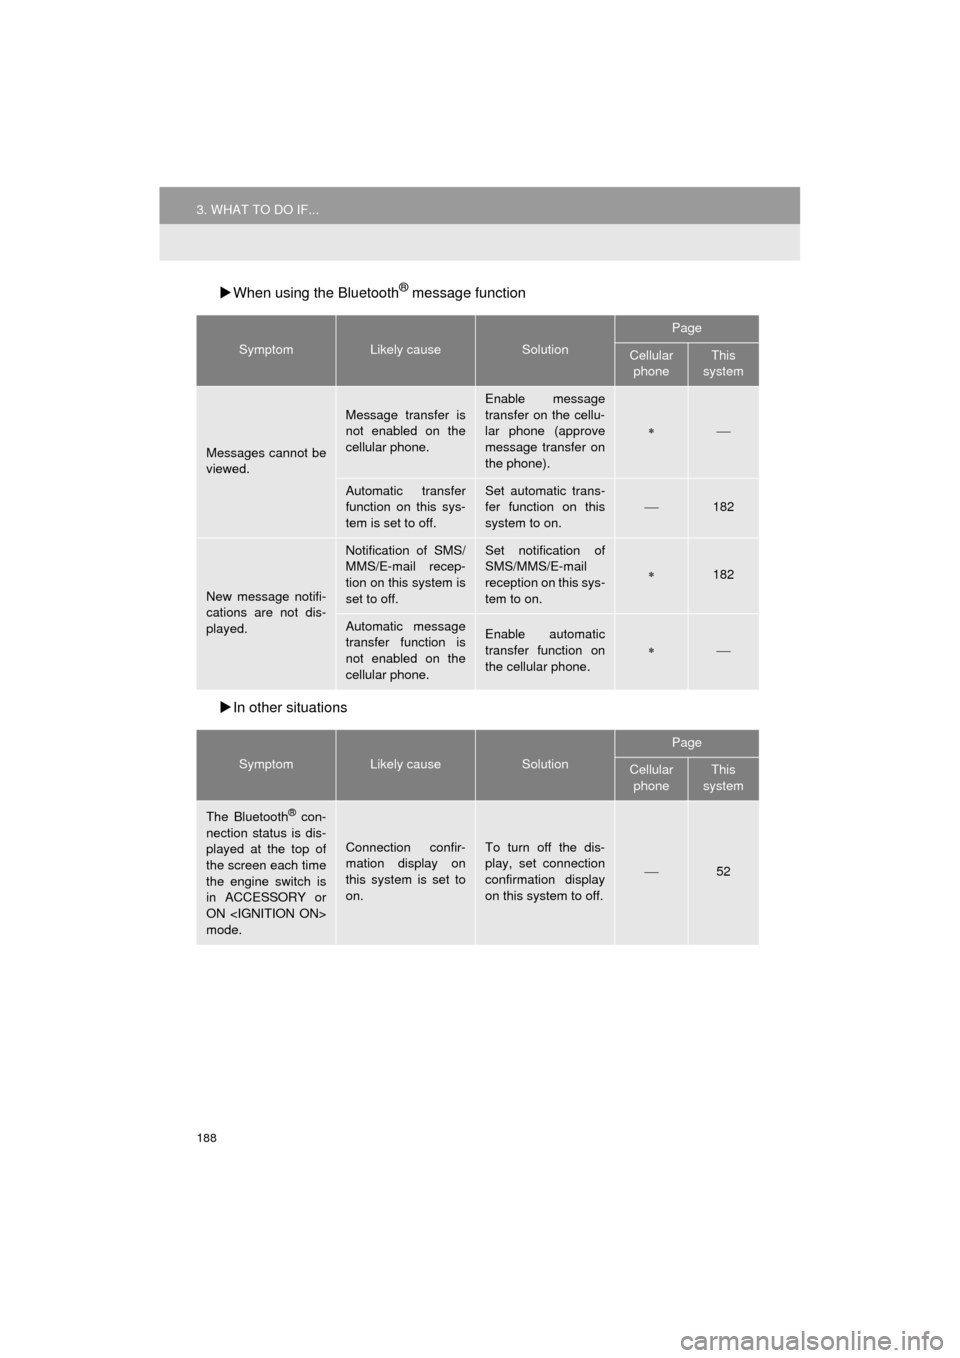
When using the Bluetooth® message function
In other situations
SymptomLikely causeSolution
Page
Cellular
phoneThis
system
Messages cannot be
viewed.
Message transfer is
not enabled on the
cellular phone.
Enable message
transfer on the cellu-
lar phone (approve
message transfer on
the phone).
Automatic transfer
function on this sys-
tem is set to off.Set automatic trans-
fer function on this
system to on.
182
New message notifi-
cations are not dis-
played.
Notification of SMS/
MMS/E-mail recep-
tion on this system is
set to off.Set notification of
SMS/MMS/E-mail
reception on this sys-
tem to on.
182
Automatic message
transfer function is
not enabled on the
cellular phone.Enable automatic
transfer function on
the cellular phone.
SymptomLikely causeSolution
Page
Cellular phoneThis
system
The Bluetooth® con-
nection status is dis-
played at the top of
the screen each time
the engine switch is
in ACCESSORY or
ON
mode.
Connection confir-
mation display on
this system is set to
on.To turn off the dis-
play, set connection
confirmation display
on this system to off.
52
Page 190 of 292
190
COROLLA_13CY_Navi_U
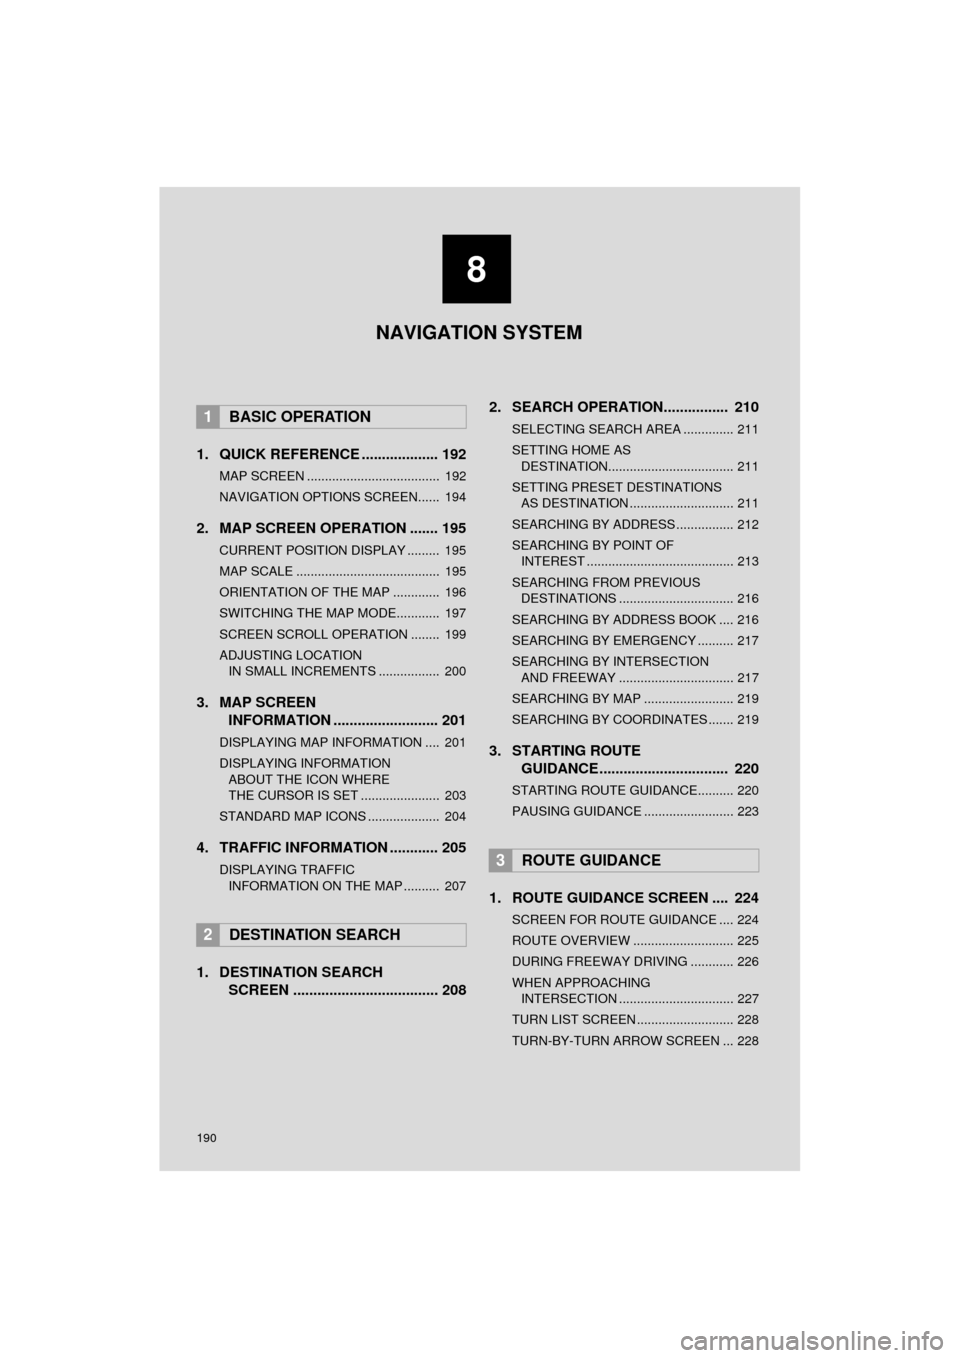
1. QUICK REFERENCE ................... 192
MAP SCREEN ..................................... 192
NAVIGATION OPTIONS SCREEN...... 194
2. MAP SCREEN OPERATION ....... 195
CURRENT POSITION DISPLAY ......... 195
MAP SCALE ........................................ 195
ORIENTATION OF THE MAP ............. 196
SWITCHING THE MAP MODE............ 197
SCREEN SCROLL OPERATION ........ 199
ADJUSTING LOCATION IN SMALL INCREMENTS ................. 200
3. MAP SCREEN INFORMATION .......................... 201
DISPLAYING MAP INFORMATION .... 201
DISPLAYING INFORMATION
ABOUT THE ICON WHERE
THE CURSOR IS SET ...................... 203
STANDARD MAP ICONS .................... 204
4. TRAFFIC INFORMATION ............ 205
DISPLAYING TRAFFIC INFORMATION ON THE MAP .......... 207
1. DESTINATION SEARCH SCREEN .................................... 208 2. SEARCH OPERATION..
.............. 210
SELECTING SEARCH AREA .............. 211
SETTING HOME AS
DESTINATION................................... 211
SETTING PRESET DESTINATIONS AS DESTINATION ............................. 211
SEARCHING BY ADDRESS ................ 212
SEARCHING BY POINT OF INTEREST ......................................... 213
SEARCHING FROM PREVIOUS DESTINATIONS ................................ 216
SEARCHING BY ADDRESS BOOK .... 216
SEARCHING BY EMERGENCY .......... 217
SEARCHING BY INTERSECTION AND FREEWAY ................................ 217
SEARCHING BY MAP ......................... 219
SEARCHING BY COORDINATES ....... 219
3. STARTING ROUTE GUIDANCE ....... ......................... 220
STARTING ROUTE GUIDANCE.......... 220
PAUSING GUIDANCE ......................... 223
1. ROUTE GUIDANCE SCREEN .... 224
SCREEN FOR ROUTE GUIDANCE .... 224
ROUTE OVERVIEW ............................ 225
DURING FREEWAY DRIVING ............ 226
WHEN APPROACHING
INTERSECTION ................................ 227
TURN LIST SCREEN ........................... 228
TURN-BY-TURN ARROW SCREEN ... 228
1BASIC OPERATION
2DESTINATION SEARCH
3ROUTE GUIDANCE
8
NAVIGATION SYSTEM