Page 71 of 100

2D - Two-dimensional map display
3D - Three-dimensional map display
Turn on / off the automatic change of scale
POI on the map
The device offers the possibility of up to 10 POI categories to be display on the
map.
Switch display on/off
›
Press in the Navigation menu the function key
→ POIs .
Select the displayed category
›
Switch on show POIs.
›
Press in the Navigation menu the function key
→ Map → Select catego-
ries for POIs .
›
Select the desired POI category.
Guidance to the POI
›
Press the function key with the symbol of a POI in the map.
The following POI details are displayed.
If the function key includes several POIs, then they will be listed. Select the de-
sired destination from the list, then POI details will be shown.
›
Press the function key Start.
Then a route to the destination is calculated and the route guidance starts.
If the navigation menu for setting the alternative routes is turned on, the guid-
ance for this route type (economic / fast / short) must be selected before start-
ing.
Road sign
The device offers the possibility of displaying the traffic signs stored in the
navigation data or detected by the front camera during guidance in the device
screen
F
» Fig. 51 on page 67 .
Turn on / off the display traffic signs » page 78.
For some vehicles it is possible to set an alert when exceeding the permitted
speed limited set by a road sign -
→ Driver assistance → Dynamic Road
Sign Display → Warning .
For trailer operation, we recommend that you activate the recognition of trailer
relevant traffic signs
→ → Driver assistance → Dynamic Road Sign Dis-
play → Trailer recognition (show road signs) .
Map Orientation
The map in the 3D display is aligned only with respect to the direction of travel.
The map in the 2D display can be oriented to the north or in relation to the di-
rection of travel.
A change of map orientation is only possible when the map is centred on the
vehicle position (the function key
or is not displayed).
Change the map orientation
›
Press in the Navigation menu the function key
in the area
D
» Fig. 51 on
page 67 .
The map is oriented to the north or in relation to the direction of travel.
The arrow in symbol always points to the north.
The map is oriented to the north
The map does not rotate, the vehicle position symbol rotates.
Map oriented to the direction of travel
The map rotates, the vehicle position symbol does not rotate.
Map scale
It is possible to change the map scale manually or to turn on the automatic
change of scale.
Symbols of the scale function keys
In the map area
D
» Fig. 51 on page 67 the following context-dependent func-
tion keys and information is displayed.
Manually set scaleAutomatically adjusted scale
Turn on / off the automatic change of scale
Map view in reduced scale
Current elevation
Manual change of scale
Map scale can be change in the following ways.
68Navigation
Page 79 of 100

Route guidance
During the guidance along a waypoint tour, no navigation announcements are
made by the device. When driving along the waypoint tour shown, follow as
closely as possible the information shown on the device screen.
While driving along a waypoint tour the split screen shows the Waypoints and
the direction to drive as well as the distance to the next waypoint, the se-
quence number of the next waypoint and the total number of waypoints 1
» Fig. 62 -
.
The waypoint tour from the vehicle location to the next waypoint “reduces”
continuously while driving “ ”
2
» Fig. 62 -
.
If you drive past but very close to the next waypoint, the route guidance will
continue with the subsequent waypoint.
If you drive past a waypoint and this does “not disappear” from the waypoint tour (e.g. because the distance to this waypoint is too large), then there is the
possibility to “skip” over this waypoint and continue the guidance to the next
waypoint.
› Press the function key
→ Skip waypoint .
Exit navigation
› Press the function key
→ Stop route guidance .
The guidance also stops when the waypoint mode is exited.
Manage waypoint tour memory
Fig. 63
Waypoint tour memory
›
Press the function key
→ Waypoint memory .
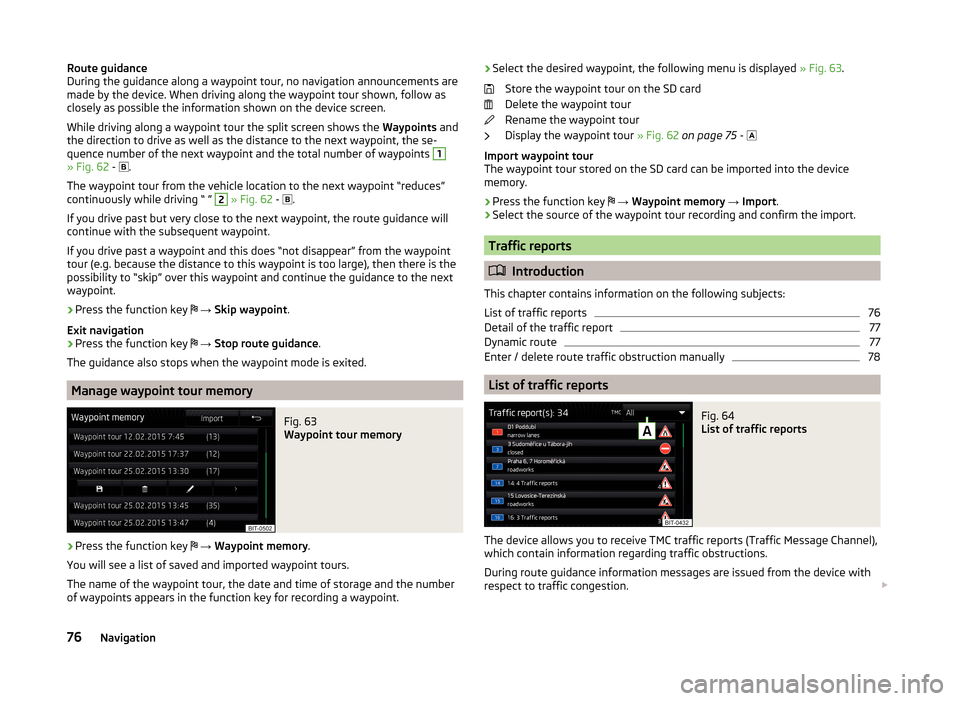
You will see a list of saved and imported waypoint tours.
The name of the waypoint tour, the date and time of storage and the number
of waypoints appears in the function key for recording a waypoint.
› Select the desired waypoint, the following menu is displayed
» Fig. 63.
Store the waypoint tour on the SD card
Delete the waypoint tour
Rename the waypoint tour
Display the waypoint tour » Fig. 62 on page 75 -
Import waypoint tour
The waypoint tour stored on the SD card can be imported into the device
memory.
› Press the function key
→ Waypoint memory → Import .
› Select the source of the waypoint tour recording and confirm the import.
Traffic reports
Introduction
This chapter contains information on the following subjects:
List of traffic reports
76
Detail of the traffic report
77
Dynamic route
77
Enter / delete route traffic obstruction manually
78
List of traffic reports
Fig. 64
List of traffic reports
The device allows you to receive TMC traffic reports (Traffic Message Channel),
which contain information regarding traffic obstructions.
During route guidance information messages are issued from the device with
respect to traffic congestion.
76Navigation
Page 84 of 100

Driving dataFig. 67
Driving data
›
Press the key
→
→ Driving data .
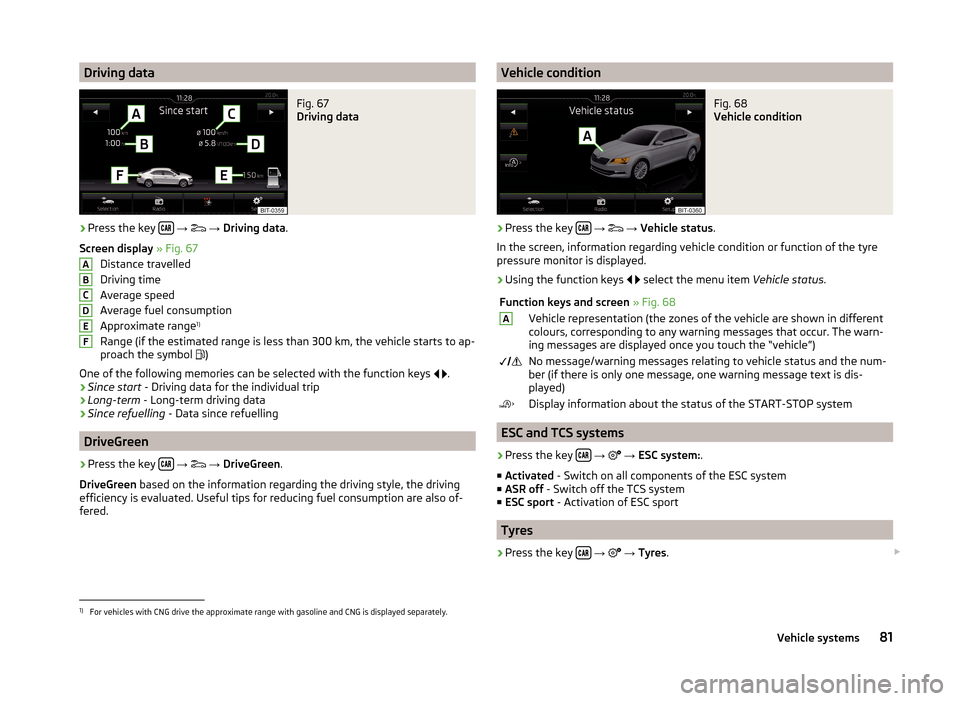
Screen display » Fig. 67
Distance travelled
Driving time
Average speed
Average fuel consumption
Approximate range 1)
Range (if the estimated range is less than 300 km, the vehicle starts to ap-
proach the symbol )
One of the following memories can be selected with the function keys
.
› Since start
- Driving data for the individual trip
› Long-term
- Long-term driving data
› Since refuelling
- Data since refuelling
DriveGreen
›
Press the key
→
→ DriveGreen .
DriveGreen based on the information regarding the driving style, the driving
efficiency is evaluated. Useful tips for reducing fuel consumption are also of-
fered.
ABCDEFVehicle conditionFig. 68
Vehicle condition
›
Press the key
→
→ Vehicle status .
In the screen, information regarding vehicle condition or function of the tyre
pressure monitor is displayed.
›
Using the function keys
select the menu item
Vehicle status.
Function keys and screen » Fig. 68AVehicle representation (the zones of the vehicle are shown in different
colours, corresponding to any warning messages that occur. The warn-
ing messages are displayed once you touch the “vehicle”) No message/warning messages relating to vehicle status and the num-
ber (if there is only one message, one warning message text is dis-
played)Display information about the status of the START-STOP system
ESC and TCS systems
›
Press the key
→
→ ESC system: .
■ Activated - Switch on all components of the ESC system
■ ASR off - Switch off the TCS system
■ ESC sport - Activation of ESC sport
Tyres
›
Press the key
→
→ Tyres .
1)
For vehicles with CNG drive the approximate range with gasoline and CNG is displayed separately.
81Vehicle systems
Page:
< prev 1-8 9-16 17-24