Page 229 of 416

227
308_en_Chap06_securite_ed01-2015
Child seatsInstalling a booster
cushion
Recommendations
the legislation on carrying a child on the
front passenger seat is specific to each
country. Refer to the legislation in force in
the country in which you are driving.
Deactivate the passenger's front airbag
when a rear ward facing child seat is installed
on the front passenger seat. Otherwise, the
child would risk being seriously injured or
killed if the airbag were deployed.
For optimum installation of the forward facing
child seat, ensure that the back of the child
seat is as close as possible to the backrest
of the vehicle's seat, or in contact if possible.
th
e head restraint must be removed before
installing a child seat with a backrest on the
passenger seat.
en
sure that the head restraint is stowed or
attached securely so that it is not thrown
around the vehicle in the event of sharp
braking.
Refit the head restraint as soon as the child
seat is removed.
th
e incorrect installation of a child seat in a
vehicle compromises the child's protection in
the event of an accident.
Check that there is no seat belt or seat belt
buckle under the child seat as this could
destabilise it.
Remember to fasten the seat belts or the
child seat harnesses keeping the slack in
relation to the child's body to a minimum ,
even for short journeys.
For the installation of a child seat using a
seat belt, ensure that this is well tensioned
on the child seat and that it is holding the
child seat firmly against the seat of your
vehicle. If your front passenger seat is
adjustable, move it forward if necessary.
At the rear seats, always leave sufficient
space between the front seat and:
-
a r
ear ward facing child seat,
-
t
he feet of a child seated in a for ward
facing child seat.
For this, move the front seat for ward and if
necessary straighten its backrest.
Children at the front
the chest part of the seat belt must be
positioned on the child's shoulder without
touching the neck.
en
sure that the lap part of the seat belt
passes correctly over the child's thighs.
P
e
uge
Ot
recommends the use of a booster
seat which has a back, fitted with a seat belt
guide at shoulder level.
As a safety precaution, do not leave:
-
o
ne or more children alone and
unsupervised in a vehicle,
-
a c
hild or an animal in a vehicle which
is exposed to the sun, with the windows
closed,
-
t
he keys within reach of children inside
the vehicle.
to p
revent accidental opening of the doors,
use the child lock.
ta
ke care not to open the rear windows by
more than one third.
to p
rotect young children from the rays of
the sun, fit side blinds on the rear windows.
6
Safety
Page 230 of 416
228
308_en_Chap06_securite_ed01-2015
Child lock
this mechanical system prevents opening of the rear door using its interior control.the control is located on the edge of each rear door and locking is independent for each door.
Locking
F using the integral ignition key, turn the control as far as it will go:
-
t
o the left on the left-hand rear door,
-
t
o the right on the right-hand rear door.
Unlocking
F using the integral ignition key, turn the control as far as it will go:
-
t
o the right on the left-hand rear door,
-
t
o the left on the right-hand rear door.
Safety
Page 237 of 416
235
308_en_Chap07_info-pratiques_ed01-2015
Changing a wheel
the tools are installed in the boot under
t h e f l o o r.
Access to the tools
List of tools
these tools are specific to your vehicle and can
vary according to the level of equipment. Do
not use them for other purposes.
1.
Wheelbrace.
F
or removing the wheel trim and removing
the wheel bolts.
2.
J
ack with integral handle.
F
or raising the vehicle. 3.
"
Bolt cover" tool.
F
or removing the bolt protectors (covers)
on alloy wheels.
4.
S
ocket for the security bolts (located in the
glove box).
F
or adapting the wheelbrace to the special
"security" bolts.
5.
t
o
wing eye.
S
ee "
to
wing the vehicle".
Procedure for changing a faulty wheel for the spare wheel using the tools provided with the vehicle.
7
Practical information
Page 240 of 416

238
308_en_Chap07_info-pratiques_ed01-2015
F Remove the bolt cover from each of the bolts using the tool 3 (according to
equipment).
F
F
it the security socket 4 on the
wheelbrace
1 to slacken the security bolt
(if
fitted).
F
S
lacken the other bolts using the
wheelbrace 1 o n l y. F
P osition the foot of the jack on the ground,
ensuring that it is directly below the
vehicle's jacking point A or B , the one
closest to the wheel to be changed.
Removing a wheel
Parking the vehicle
Immobilise the vehicle where it does not
block traffic: the ground must be level,
stable and not slippery.
Apply the parking brake unless it has
been programmed to automatic mode,
switch off the ignition and engage first
gear to block the wheels.
Check that the braking warning lamp
and the P warning lamp in the parking
brake control lever come on.
th
e occupants must get out of the
vehicle and wait where they are safe.
Never go underneath a vehicle raised
using a jack; use an axle stand.
Do not use:
-
t
he jack for any other purpose than lifting
the vehicle,
-
a j
ack other than the one supplied by the
manufacturer.
en
sure that the jack is stable. If the ground is slippery or loose, the jack may slip or drop -
Risk of injury!
en
sure that the jack is positioned only at one of the jacking points A or B under the vehicle,
making sure that the vehicle's contact sur face is centred on the head of the jack. Other wise
there is a risk of damage to the vehicle and/or of the jack dropping - Risk of injury!
Practical information
Page 242 of 416
240
308_en_Chap07_info-pratiques_ed01-2015
Fitting a wheel
Fitting the "space-saver"
spare wheel
If your vehicle is fitted with alloy wheels,
when tightening the bolts on fitting, it
is normal to notice that the washers
do not come into contact with the
"space-saver" spare wheel. t
h
e wheel
is secured by the conical sur face of
each bolt. F
P
ut the wheel in place on the hub.
F
S
crew in the bolts fully by hand.
F P re-tighten the security bolt using the
wheelbrace 1 fitted with the security
socket 4 (according to equipment).
F
P
re-tighten the other bolts using the
wheelbrace 1 o n l y. F
L
ower the vehicle fully.
F
F
old the jack 2 and detach it.
Practical information
Page 243 of 416
241
308_en_Chap07_info-pratiques_ed01-2015
F tighten the security bolt using the wheelbrace 1 fitted with the security
socket
4 (according to equipment).
F
t
i
ghten the other bolts using the
wheelbrace 1 o n l y.
F
R
efit the bolt covers on each of the bolts
(according to equipment).
F
S
tore the tools in the box.
th
e tyre inflation pressures are given on
this
label.
After changing a wheel
to store the punctured wheel in the boot
correctly, first remove the central cover.
When using the "space-saver" type
spare wheel, do not exceed 50 mph
(80
km/h).
Have the tightening of the bolts and the
pressure of the spare wheel checked
by a P
e
uge
Ot
dealer or a qualified
workshop without delay.
Have the punctured wheel repaired
and refitted to the vehicle as soon as
possible.
If your vehicle has tyre under-inflation
detection, check the tyre pressures then
refer to the corresponding section.
7
Practical information
Page 261 of 416

259
308_en_Chap07_info-pratiques_ed01-2015
12 V battery
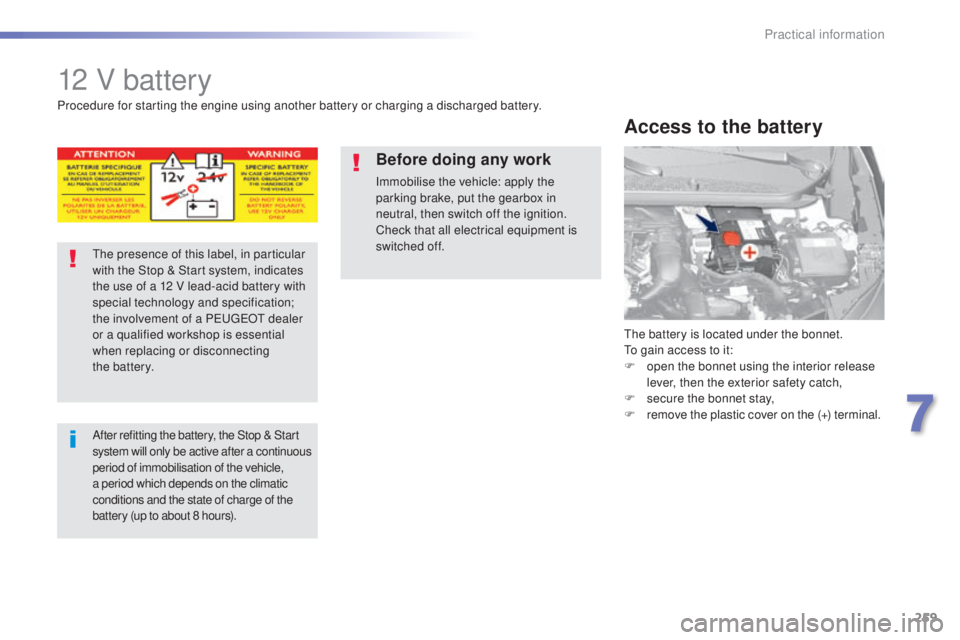
the battery is located under the bonnet.to gain access to it:
F
o
pen the bonnet using the interior release
lever, then the exterior safety catch,
F
s
ecure the bonnet stay,
F
r
emove the plastic cover on the (+) terminal.
Access to the battery
Procedure for starting the engine using another battery or charging a discharged battery.
th
e presence of this label, in particular
with the Stop & Start system, indicates
the use of a 12 V lead-acid battery with
special technology and specification;
the involvement of a P
e
uge
Ot
dealer
or a qualified workshop is essential
when replacing or disconnecting
the
battery.
After refitting the battery, the Stop & Start
s ystem will only be active after a continuous
period of immobilisation of the vehicle,
a period which depends on the climatic
conditions and the state of charge of the
battery (up to about 8 hours).
Before doing any work
Immobilise the vehicle: apply the
parking brake, put the gearbox in
neutral, then switch off the ignition.
Check that all electrical equipment is
switched off.
7
Practical information
Page 273 of 416
271
308_en_Chap07_info-pratiques_ed01-2015
Do not fit an accessory carrier to the
tailgate.
Bicycle / accessory
carrier
Recommendations
- For safety reasons and to avoid damaging the roof, it is essential to use the transverse
bars listed for your vehicle.
-
D
istribute the load evenly, avoiding
overloading on one side.
-
A
rrange the heaviest part of the load as
close as possible to the roof.
-
A
nchor the load securely and fit a warning
flag if part of it overhangs the vehicle.
-
D
rive gently, as the vehicle will be more
susceptible to the effects of side winds
(vehicle stability may be affected).
-
R
emove the roof bars as soon as they are
no longer needed.
7
Practical information