2015 MITSUBISHI OUTLANDER III door lock
[x] Cancel search: door lockPage 5 of 446

Interior 1-3 Overview
1
N00100302314
Interior
Sun visors P.5-209 Vanity mirror P.5-209Card holder P.5-209
Supplemental restraint system (SRS) - side airbag (for front seats) P.4-44
Front seat P.4-4
Adjustable seat belt shoulder anchor P.4-23 Seat belts P.4-17
Cargo room light P.5-213, 9-32
Electric remote-controlled outside rear-view mirrors switch P.5-54
Lock switch P.5-49
Power door lock switch P.5-33
Power window switch P.5-47
Second row seat P.4-8
Third row seat (7 persons) P. 4 - 1 0
Dome light (rear) P.5-212
Inside rear-view mirror P.5-53
BK0211800US.book 3 ページ 2014年3月12日 水曜日 午後2時42分
Page 14 of 446

If this problem occurs...
Quick index 2-5
2
N00200901880
If this problem occurs...
Problem
Do this
Ref. Page
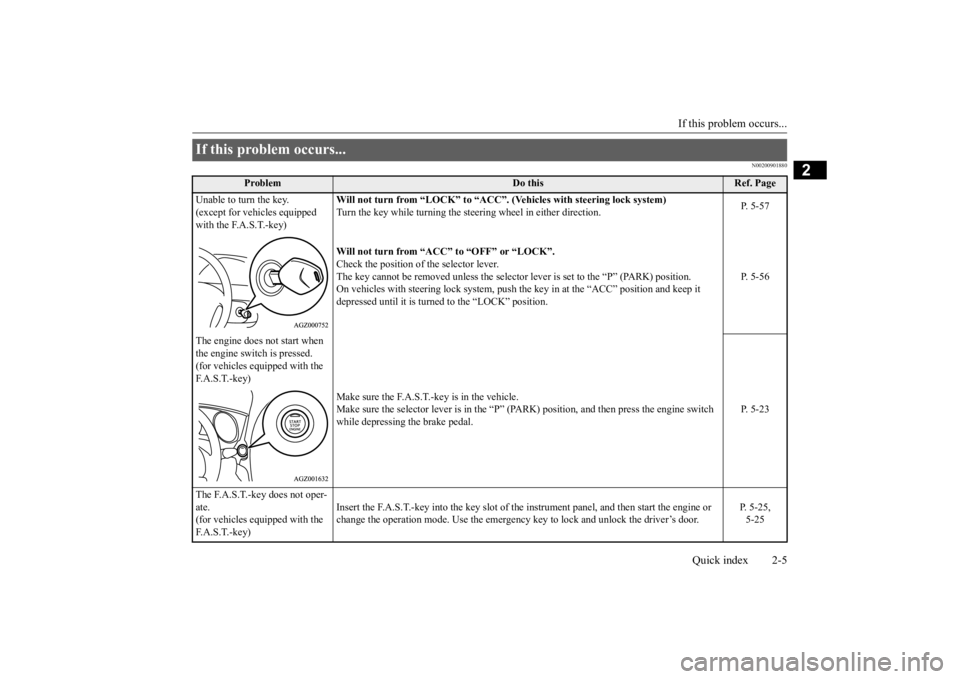
Unable to turn the key. (except for vehicles equipped with the F.A.S.T.-key)
Will not turn from “LOCK” to “ACC”.
(Vehicles with steering lock system)
Turn the key while turning the steering wheel in either direction.
P. 5-57
Will not turn from “ACC” to “OFF” or “LOCK”. Check the position of the selector lever. The key cannot be removed unless the selector
lever is set to the “P” (PARK) position.
On vehicles with stee
ring lock system, push the key in
at the “ACC” posi
tion and keep it
depressed until it is turned to the “LOCK” position.
P. 5-56
The engine does not start when the engine switch is pressed. (for vehicles equipped with the F. A . S . T. - k e y )
Make sure the F.A.S.T.-key is in the vehicle. Make sure the selector lever is in the “P” (P
ARK) position, and then press the engine switch
while depressing the brake pedal.
P. 5-23
The F.A.S.T.-key does not oper- ate. (for vehicles equipped with the F. A . S . T. - k e y )
Insert the F.A.S.T.-key into the key slot of the instrument panel, and then start the engine or change the operation mode. Use the emergency
key to lock and unlock the driver’s door.
P. 5-25, 5-25
BK0211800US.book 5 ページ 2014年3月12日 水曜日 午後2時42分
Page 23 of 446

Filling the fuel tank 3-4 General information
3
All-wheel drive vehicles: 15.8 gal (60 L) Front-wheel drive vehi
cles: 16.6 gal (63 L)
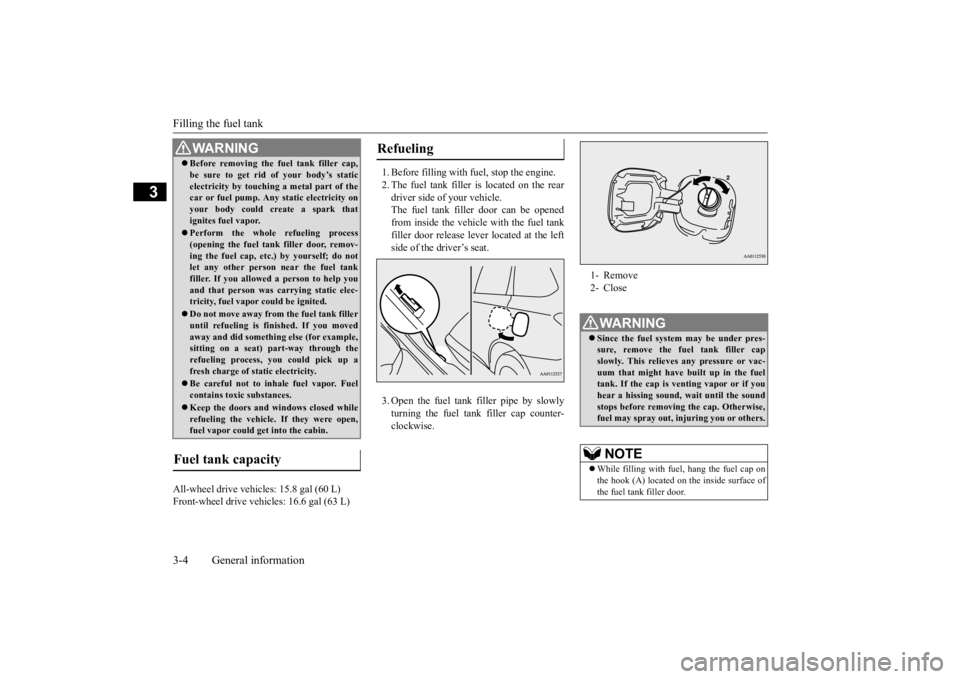
1. Before filling with fuel, stop the engine. 2. The fuel tank filler is located on the rear driver side of your vehicle. The fuel tank filler door can be openedfrom inside the vehicle with the fuel tank filler door release lever located at the left side of the driver’s seat. 3. Open the fuel tank filler pipe by slowly turning the fuel tank filler cap counter- clockwise.
Before removing the fuel tank filler cap, be sure to get rid of your body’s staticelectricity by touching a metal part of thecar or fuel pump. Any
static electricity on
your body could create a spark that ignites fuel vapor. Perform the whole
refueling process
(opening the fuel tank filler door, remov-ing the fuel cap, etc.) by yourself; do not let any other
person near the fuel tank
filler. If you allowed
a person to help you
and that person was ca
rrying static elec-
tricity, fuel vapor could be ignited. Do not move away from
the fuel tank filler
until refueling is fi
nished. If you moved
away and did somethin
g else (for example,
sitting on a seat) part-way through the refueling process, you could pick up a fresh charge of st
atic electricity.
Be careful not to inhale fuel vapor. Fuel contains toxic substances. Keep the doors and wi
ndows closed while
refueling the vehicle. If they were open,fuel vapor could ge
t into the cabin.
Fuel tank capacity
WA R N I N G
Refueling
1- Remove 2- CloseWA R N I N G Since the fuel system may be under pres- sure, remove the fuel tank filler capslowly. This relieves
any pressure or vac-
uum that might have built up in the fuel tank. If the cap is venting vapor or if youhear a hissing sound, wait until the sound stops before removing the cap. Otherwise, fuel may spray out, in
juring you or others.
NOTE
While filling with fuel
, hang the fuel cap on
the hook (A) located on the inside surface ofthe fuel tank filler door.
BK0211800US.book 4 ページ 2014年3月12日 水曜日 午後2時42分
Page 24 of 446

Modifications to and racing of your vehicle
General information 3-5
3
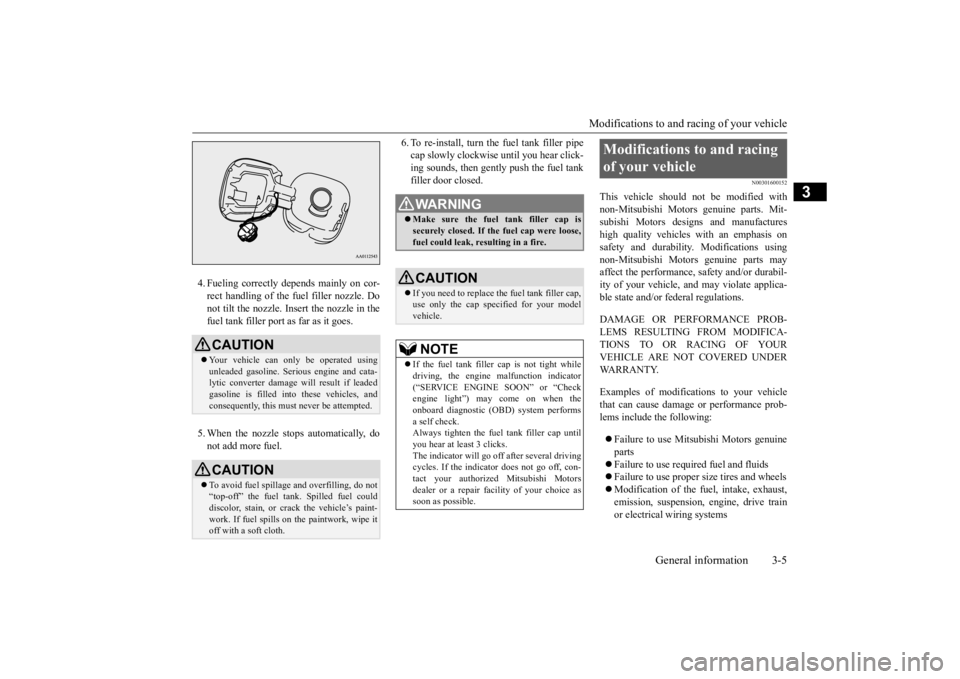
4. Fueling correctly depends mainly on cor- rect handling of the fuel filler nozzle. Donot tilt the nozzle. Insert the nozzle in the fuel tank filler port as far as it goes. 5. When the nozzle stops automatically, do not add more fuel.
6. To re-install, turn the fuel tank filler pipe cap slowly clockwise until you hear click-ing sounds, then gently push the fuel tank filler door closed.
N00301600152
This vehicle should not be modified withnon-Mitsubishi Motors
genuine parts. Mit-
subishi Motors desi
gns and manufactures
high quality vehicles
with an emphasis on
safety and durability.
Modifications using
non-Mitsubishi Motors genuine parts mayaffect the performance,
safety and/or durabil-
ity of your vehicle, a
nd may violate applica-
ble state and/or fe
deral regulations.
DAMAGE OR PERFORMANCE PROB- LEMS RESULTING FROM MODIFICA- TIONS TO OR RACING OF YOURVEHICLE ARE NOT COVERED UNDER WA R R A N T Y. Examples of modifications to your vehicle that can cause damage or performance prob-lems include the following: Failure to use Mits
ubishi Motors genuine
parts Failure to use required fuel and fluids Failure to use proper
size tires and wheels
Modification of the fu
el, intake, exhaust,
emission, suspension,
engine, drive train
or electrical wiring systems
CAUTION Your vehicle can only be operated using unleaded gasoline. Seri
ous engine and cata-
lytic converter damage will result if leaded gasoline is filled into these vehicles, andconsequently, this must
never be attempted.
CAUTIONTo avoid fuel spillage
and overfilling, do not
“top-off” the fuel tank. Spilled fuel could discolor, stain, or cr
ack the vehicle’s paint-
work. If fuel spills on the paintwork, wipe it off with a soft cloth.
WA R N I N G Make sure the fuel tank filler cap is securely closed. If the fuel cap were loose,fuel could leak, re
sulting in a fire.
CAUTIONIf you need to replace th
e fuel tank filler cap,
use only the cap specified for your model vehicle.NOTE
If the fuel tank filler cap is not tight while driving, the engine
malfunction indicator
(“SERVICE ENGINE SOON” or “Check engine light”) may come on when theonboard diagnostic (OBD) system performs a self check. Always tighten the fu
el tank filler cap until
you hear at least 3 clicks. The indicator will go of
f after several driving
cycles. If the indicato
r does not go off, con-
tact your authorized
Mitsubishi Motors
dealer or a repair faci
lity of your choice as
soon as possible.
Modifications to and racing of your vehicle
BK0211800US.book 5 ページ 2014年3月12日 水曜日 午後2時42分
Page 31 of 446

Seats and restraint systems 4-4 Seat and restraint systems
4
N00401601219
Your vehicle has seat
belts and other safety
features that help protect you and your pas- sengers in an accident.Seat belts are the most important safety device. When worn properly, seat belts can reduce the chance of serious injury or deathin various types of crashes. For added protec- tion during a severe fr
ontal collision, your
vehicle has a Supplemental Restraint System (SRS) with airbags for the driver and passen- gers. The seats, head restraints, and doorlocks also are safety equipment, which must be used correctly. Always check the following before you drive: That everyone in your vehicle is properly wearing their seat belt. That infants and small children are prop- erly secured in an appropriate child restraint system in the rear seat. That all doors are fully closed and locked. That seatbacks are upright, with head restraints properly adjusted.
Safety equipment cannot prevent injury or death in all motor ve
hicle accidents. How-
ever, you can help reduce the risk of injury or death, by following the instructions in thismanual.
N00401801426
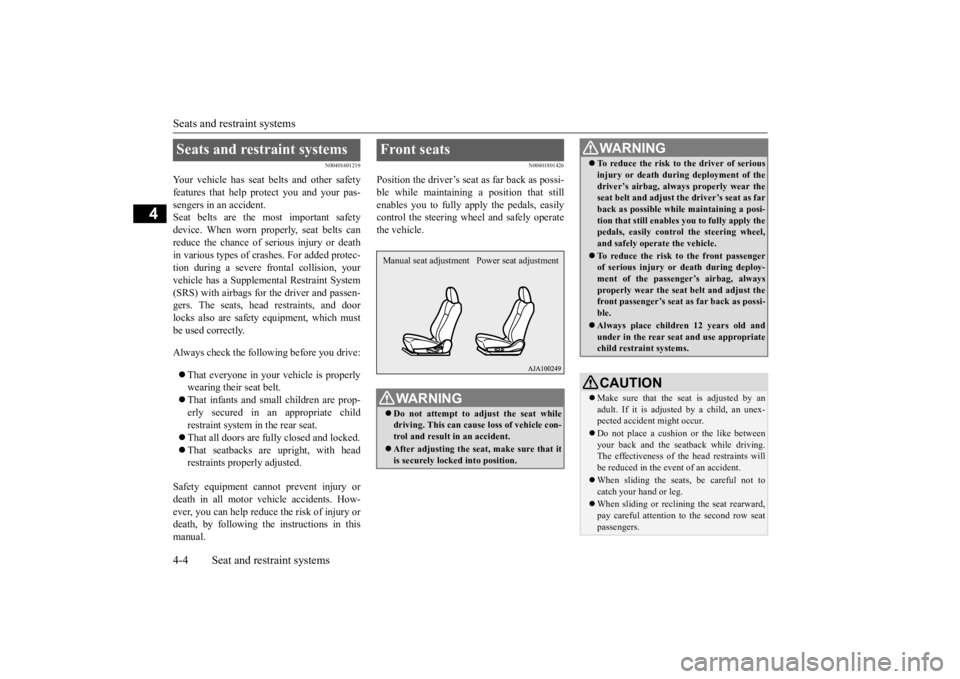
Position the driver’s seat
as far back as possi-
ble while maintaining a position that still enables you to fully apply the pedals, easilycontrol the steering wh
eel and safely operate
the vehicle.
Seats and restraint systems
Front seats
WA R N I N G Do not attempt to adjust the seat while driving. This can cause loss of vehicle con-trol and result
in an accident.
After adjusting the seat, make sure that it is securely locked into position.Manual seat adjustment Power seat adjustment
To reduce the risk to the driver of serious injury or death duri
ng deployment of the
driver’s airbag, always
properly wear the
seat belt and adjust th
e driver’s seat as far
back as possible while maintaining a posi- tion that still enables
you to fully apply the
pedals, easily control the steering wheel, and safely operate the vehicle. To reduce the risk to the front passenger of serious injury or
death during deploy-
ment of the passeng
er’s airbag, always
properly wear the seat
belt and adjust the
front passenger’s seat as far back as possi- ble. Always place childr
en 12 years old and
under in the rear seat
and use appropriate
child restraint systems.CAUTION Make sure that the seat is adjusted by an adult. If it is adjusted by a child, an unex- pected accident might occur. Do not place a cushion
or the like between
your back and the seatback while driving. The effectiveness of the head restraints willbe reduced in the event of an accident. When sliding the seat
s, be careful not to
catch your hand or leg. When sliding or reclin
ing the seat rearward,
pay careful attention
to the second row seat
passengers.WA R N I N G
BK0211800US.book 4 ページ 2014年3月12日 水曜日 午後2時42分
Page 78 of 446

5
Features and controlsBreak-in recommendations ..............................................................5-3 Keys .................................................................................................5-3 Electronic immobilizer (Anti-theft starting system) ........................5-4Keyless entry system (if so equipped) ..............................................5-7 Free-hand Advanced Security Tr
ansmitter (F.A.S.T.-key) (if so
equipped).....................................................................................5-12Door locks ......................................................................................5-31 Power door locks ......
...........
...........
...........
...........
...........
.........
.....5-33
Child safety locks for rear door ..........
...........
.........
.........
.........
.....5-35
Liftgate (except for vehi
cles equipped with the
power liftgate) ....5-35
Power liftgate (if so equipped) .......................................................5-36 Inside liftgate release .....................................................................5-43Theft-alarm system ........................................................................5-44 Power window control ...................................................................5-47 Sunroof (if so equipped) .................................................................5-50Parking brake .................................................................................5-52 Steering wheel height and reach adjustment ..................................5-53 Inside rearview mirror ...................................................................5-53Outside rearview mirrors ...............................................................5-54 Ignition switch ...............................................................................5-55 Steering wheel lock (if so equipped) ..............................................5-57Starting the engine .........................................................................5-58 Automatic transaxle (if so equipped)..............................................5-60 Continuously variable transmission
(CVT) (if so equipped)..........5-67
Electronically controlled
4WD system (if so equipped).................5-74
S-AWC (Super-All Wheel Control) (if
so equipped) .....................5-77
4-wheel drive operation .................................................................5-80Inspection and maintenance followi
ng rough road operation ........5-82
Cautions on the handling of 4-wheel dr
ive vehicles ..................... 5-83
Service brake ................................................................................. 5-84 Hill start assist (if so equipped) ...................................................... 5-85Brake assist system ........................................................................ 5-86 Anti-lock braking system .............................................................. 5-86 Electric power steering system (EPS) ........................................... 5-88Active stability control (ASC) ....................................................... 5-89 Cruise control ................................................................................ 5-92 Adaptive Cruise Control System (ACC) (if so equipped) .............. 5-96Forward Collision Mitigation System
(FCM) (if so equipped) .... 5-106
Lane Departure Warning System (LDW
) (if so equipped)........... 5-111
Tire pressure monitoring system ................................................. 5-114Rear-view camera (if so equipped)............................................... 5-118 Instrument cluster ........................................................................ 5-120 Multi Information display - Type 1 ............................................. 5-122Multi Information display - Type 2 ............................................. 5-140 Indicator light, warning light, and
information screen display list
(multi information display - Type 1) ....................................... 5-148Indicator and warning light package
(multi information display - Type
2) .............................................................................................. 5-165 Indicators ..................................................................................... 5-166Warning lights .............................................................................. 5-167 Information screen display (Vehicle equipped with the multi informa- tion display - Type 1) ............................................................... 5-169Combination headlights and dimmer switch ............................... 5-171 Headlight leveling switch (if so equipped)................................... 5-176 Turn signal lever .......................................................................... 5-176Hazard warning flasher switch .................................................... 5-177
BK0211800US.book 1 ページ 2014年3月12日 水曜日 午後2時42分
Page 81 of 446
![MITSUBISHI OUTLANDER III 2015 Owners Manual Electronic immobilizer (Anti-theft starting system) 5-4 Features and controls
5
N00509101790
[For vehicles equippe
d with the Free-hand
Advanced Security Transmitter (F.A.S.T.-key)] For information MITSUBISHI OUTLANDER III 2015 Owners Manual Electronic immobilizer (Anti-theft starting system) 5-4 Features and controls
5
N00509101790
[For vehicles equippe
d with the Free-hand
Advanced Security Transmitter (F.A.S.T.-key)] For information](/manual-img/19/58145/w960_58145-80.png)
Electronic immobilizer (Anti-theft starting system) 5-4 Features and controls
5
N00509101790
[For vehicles equippe
d with the Free-hand
Advanced Security Transmitter (F.A.S.T.-key)] For information on ope
rations for vehicles
equipped with the Free-hand Advanced Secu-rity Transmitter (F.A
.S.T.-key), refer to
“Free-hand Advanced
Security Transmitter
(F.A.S.T.-key): Electr
onic immobilizer (Anti-
theft starting system)” on page 5-16. [Except for vehicles e
quipped with the Free-
hand Advanced Secu
rity Transmitter
(F.A.S.T.-key)]The electronic immobilize
r is designed to sig-
nificantly reduce the
possibility of vehicle
theft. The purpose of the system is to immo-bilize the vehicle if an invalid start is
attempted. A valid st
art attempt can only be
achieved (subject to ce
rtain conditions) using
a key “registered” to the immobilizer system. All of the keys provided with your new vehi- cle have been program
med to the vehicle’s
electronics.
• Keep away from devi
ces that produce mag-
netism, such as audio systems, computersand televisions. • Keep away from devices that emit strong electromagneti
c waves, such as cellular
phones, wireless devices and high fre- quency equipment (i
ncluding medical
devices). • Do not clean with
ultrasonic cleaners.
• Do not leave the key where it may be exposed to high temperature or high humid- ity.
If you lose your key, to prevent the theft of the vehicle immediatel
y contact an autho-
rized Mitsubishi Motors dealer. If you notify an authorized Mitsubishi Motors dealer of the key number, they canmake a new key. The key number is stamped on the key number plate. Keep the key num- ber plate in a safe pl
ace separate from the
key itself. No keys other than those registered in advance can be used to start the engine. Refer to “Electronic immobilizer (Anti-theft starting system)” on page 5-4.Refer to “Free-hand Advanced Security Transmitter (F.A.S.T.-key): “Electronic immobilizer (Anti-theft starting system)” onpage 5-16.NOTE
When the theft-alarm is in the system opera- tional status, the alarm operates if a door orliftgate is opened after using the key, thedoor lock knob or the power door lock switch to unlock the vehicle. The system does not enter the preparation status if the keyless entry system or the F.A.S.T.-key operation was not used to lockthe vehicle.
Electronic immobilizer (Anti-theft starting system)
NOTE
NOTE
In the following cases, the vehicle may not be able to recognize
the registered ID code
from the key. This mean
s the engine will not
start even when the key is turned to the “START” position. • When the key contacts a key ring or other metallic or ma
gnetic object
BK0211800US.book 4 ページ 2014年3月12日 水曜日 午後2時42分
Page 84 of 446

Keyless entry system (if so equipped)
Features and controls 5-7
5
N00562301094
Your electronic immo
bilizer operates on a
radio frequency subject to Federal Communi- cations Commission (FCC)
Rules (For vehi-
cles sold in U.S.A.
) and Industry Canada
Rules (For vehicles so
ld in Canada). This
device complies with part 15 of FCC Rulesand Industry Canada
licence-exempt RSS
standard(s). Operation is subject to the following two con- ditions. This device may not
cause harmful inter-
ference. This device must ac
cept any interference
received, including interference that may cause undesired operation.
N00509001920
Press the remote control transmitter buttonsto lock or unlock the doors and the liftgate.It can also help you signal for attention by setting off the panic alarm. Press the LOCK button (1) to lock all the doors and the liftgate. The turn signal lights will also blink once.
Press the UNLOCK button (2) to unlock the driver’s door only.Within about 2 seconds, press the UNLOCK button one more time to unlock all the doors and liftgate.The dome light will turn on for 30 seconds. The turn signal lights will also blink twice. The front side-marker
and parking lights will
also turn on for about 30 seconds. Refer to “Welcome light” on page 5-175.
General information
CAUTION Changes or modifica
tions not expressly
approved by the manufacturer for compli- ance could void the user’s authority to oper-ate the equipment.
Keyless entry system
(if so
equipped)1-
LOCK ( ) button
2-
UNLOCK ( ) button
3- PANIC button 4- Indicator lightTo l o c k
NOTE
If you press the LOCK button (1) twice the horn will sound once.
To unlock
NOTE
On a vehicle equipped with a Mitsubishi Multi-Communication System, the functionscan be adjusted on the screen. For details, refer to the separa
te operation manual.
The door and liftgate unlock function can be set so that all doors and liftgate unlock when the UNLOCK button (2) is pressed once. Refer to “Setting of door
and liftgate unlock
function” on page 5-8.
BK0211800US.book 7 ページ 2014年3月12日 水曜日 午後2時42分