Page 6 of 452
1. Audio system* p. 7-12MITSUBISHI Multi-Communication System*
DISPLAY AUDIO*
Refer to the separate owner’s manual
2. Centre ventilators p. 7-02
3. Key slot* p. 3-20
4. Side ventilators p. 7-02
5. Front passenger’s airbag ON-OFF switch p. 4-27 Glove box p. 7-78
6. Hazard warning flasher switch p. 5-55
7. Rear window demister switch p. 5-63
8. Accessory Socket* p. 7-74 Cigarette lighter* p. 7-73
9. Gearshift or selector lever p. 6-23, 6-26, 6-32
10. Parking brake lever p. 6-06
11. Cup holder p. 7-81
12. Drive mode selector* p. 6-39
13. Fuel tank filler door release lever p. 2-03
14. Ashtray* p. 7-72
15. Heated seat switch* p. 4-06
16. Bonnet release lever p. 10-03
17. Fuse box p. 10-20
18. Multi-information meter switch p. 5-05
19. Air conditioning* p. 7-03
Instruments and controls
1-04OGAE15E5Overview1LHD
Page 8 of 452
InteriorE001002062531. Lock switch p. 3-402. Electric remote-controlled outside rear-view mirrors switch p. 6-10
3. Central door lock switch p. 3-26
4. Electric window control switch p. 3-40
5. Sunshade illumination dimming control switch* p. 7-76
6. Inside rear-view mirror p. 6-08
7. Supplemental restraint system - side airbag (for front seats)* p. 4-33
8. Front seat p. 4-03 Heated seat* p. 4-06
9. Heated seat switch* p. 4-06
10. Head restraints p. 4-07
11. Luggage room lamp p. 7-76
12. Luggage floor box* p. 7-81
13. Tether anchorages for child restraint system p. 4-22
14. Seat belts p. 4-09 Adjustable seat belt anchor p. 4-11
15. Supplemental restraint system - curtain airbag* p. 4-33
Interior
1-06OGAE15E5Overview1LHD
Page 10 of 452
1. Supplemental restraint system - curtain airbag* p. 4-33
2. Seat belts p. 4-09 Adjustable seat belt anchor p. 4-11
3. Luggage room lamp p. 7-76
4. Luggage floor box* p. 7-81
5. Tether anchorages for child restraint system p. 4-22
6. Head restraints p. 4-07
7. Heated seat switch* p. 4-06
8. Front seat p. 4-03 Heated seat* p. 4-06
9. Supplemental restraint system - side airbag (for front seats)* p. 4-33
10. Inside rear-view mirror p. 6-08
11. Sunshade illumination dimming control switch* p. 7-76
12. Electric window control switch p. 3-40
13. Lock switch p. 3-40
14. Electric remote-controlled outside rear-view mirrors switch p. 6-10
15. Central door lock switch p. 3-26
Interior
1-08OGAE15E5Overview1RHD
Page 68 of 452
SeatE004001032251-Front seat
lTo adjust forward or backward
® p. 4-03
l To recline the seatback
® p. 4-04
l To adjust seat height (driver’s seat only)
® p. 4-05
l Armrest*
® p. 4-05
l Heated seats*
® p. 4-06
2-Rear seat
l Armrest*
® p. 4-06
Seat
4-02OGAE15E5Seat and seat belts4
Page 72 of 452

Heated seats*
E00401102195
The heated seats can be operated with the ig-
nition switch or the operation mode in ON.
The indication lamp (A) will illuminate while the heater is on.
1 (HI)- Heater high (for quick heating).2- Heater off.3 (LO)- Heater low (to keep the seat
warm).CAUTIONl Switch off seat heaters when not in use.
l Operate in the high position for quick heat-
ing. Once the seat is warm, set the heater to low to keep it warm. Slight variations in seat
temperature may be felt while using the heated seats. This is caused by the operation
of the heater’s internal thermostat and does not indicate a malfunction.
l If the following types of persons use the
heated seats, they might become too hot or receive minor burns (red skin, heat blisters,
etc.):
• Children, elderly or ill people
• People with sensitive skin
• Excessively tired people
• People under the influence of alcohol or
sleep inducing medication (cold medicine, etc.)
l Do not place heavy objects on the seat or
stick pins, needles, or other pointed objects into it.
l Do not use a blanket, cushion, or other mate-
rial with high heat insulation properties on the seat while using the heater; this might
cause the heater element to overheatCAUTIONl Do not use benzine, kerosene, petrol, alcohol
or other organic solvents when cleaning the seats. Doing so could damage not only the seat cover, but also the heater element.
l If water or any other liquid is spilled on the
seat, allow it to dry thoroughly before at-tempting to use the heater.
l Turn the heater off immediately if it appears
to be malfunctioning during use.Rear seat
E00401300412WARNINGlWhen a person sits in the rear seat, pull
up the head restraint to a height at which it locks in position. Be sure to make thisadjustment before starting to drive. Seri-
ous injuries could otherwise be suffered as the result of an impact.Armrest*
E00401700650
To use the armrest, fold it down.
Rear seat
4-06OGAE15E5Seat and seat belts4Type 1 Type 2
Page 140 of 452
Screen type 1Screen type 2CauseSolution (Reference)lThe engine is overheated.lStop the vehicle in a safe
place and take corrective measures.
Refer to “Engine overheat-
ing” on page 8-04.l The automatic transmission
(A/T or CVT) fluid tempera-
ture is too high.l Refer to “Automatic transmis-
sion INVECS-II Sports Mode
6A/T (Intelligent & Innova-
tive Vehicle Electronic Con-
trol System II)” on page 6-26.
l Refer to “Automatic transmis-
sion INVECS-III Sports
Mode 6CVT (Intelligent & Innovative Vehicle Electronic
Control System III)” on page 6-32.l You turned the ignition
switch to the “ON” positionor put the operation mode in
ON without fastening your
seat belt.l Fasten your seat belt properly.
“Seat belt warning” on page
4-11.l There is a fault in the fuel
system.l We recommend you to con-
sult a MITSUBISHI
MOTORS Authorized Service
Point.
Indication lamp, warning lamp, and information screen display list
5-36OGAE15E5Instruments and controls5
Page 151 of 452

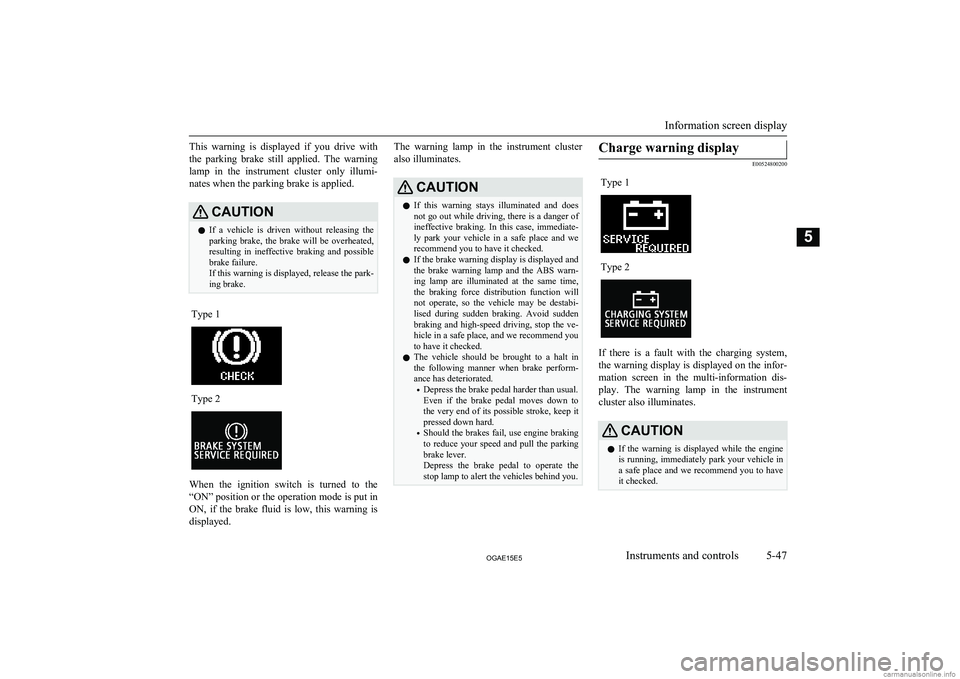
This warning is displayed if you drive withthe parking brake still applied. The warning lamp in the instrument cluster only illumi-
nates when the parking brake is applied.CAUTIONl If a vehicle is driven without releasing the
parking brake, the brake will be overheated, resulting in ineffective braking and possiblebrake failure.
If this warning is displayed, release the park-
ing brake.Type 1Type 2
When the ignition switch is turned to the
“ON” position or the operation mode is put in
ON, if the brake fluid is low, this warning is displayed.
The warning lamp in the instrument cluster
also illuminates.CAUTIONl If this warning stays illuminated and does
not go out while driving, there is a danger of
ineffective braking. In this case, immediate- ly park your vehicle in a safe place and we
recommend you to have it checked.
l If the brake warning display is displayed and
the brake warning lamp and the ABS warn- ing lamp are illuminated at the same time,
the braking force distribution function will not operate, so the vehicle may be destabi-
lised during sudden braking. Avoid sudden
braking and high-speed driving, stop the ve- hicle in a safe place, and we recommend you
to have it checked.
l The vehicle should be brought to a halt in
the following manner when brake perform-
ance has deteriorated.
• Depress the brake pedal harder than usual.
Even if the brake pedal moves down to the very end of its possible stroke, keep it
pressed down hard.
• Should the brakes fail, use engine braking
to reduce your speed and pull the parking
brake lever.
Depress the brake pedal to operate the
stop lamp to alert the vehicles behind you.Charge warning display
E00524800200
Type 1Type 2
If there is a fault with the charging system,
the warning display is displayed on the infor- mation screen in the multi-information dis-
play. The warning lamp in the instrument cluster also illuminates.
CAUTIONl If the warning is displayed while the engine
is running, immediately park your vehicle in
a safe place and we recommend you to have it checked.
Information screen display
5-47OGAE15E5Instruments and controls5
Page 167 of 452

lPeriodically check the level of washer
fluid in the reservoir and refill if re-quired.
During cold weather, add a recommen-
ded washer solution that will not freeze
in the washer reservoir. Failure to do so could result in loss of washer functionand frost damage to the system compo-
nents.Rear window demister
switch E00507901186
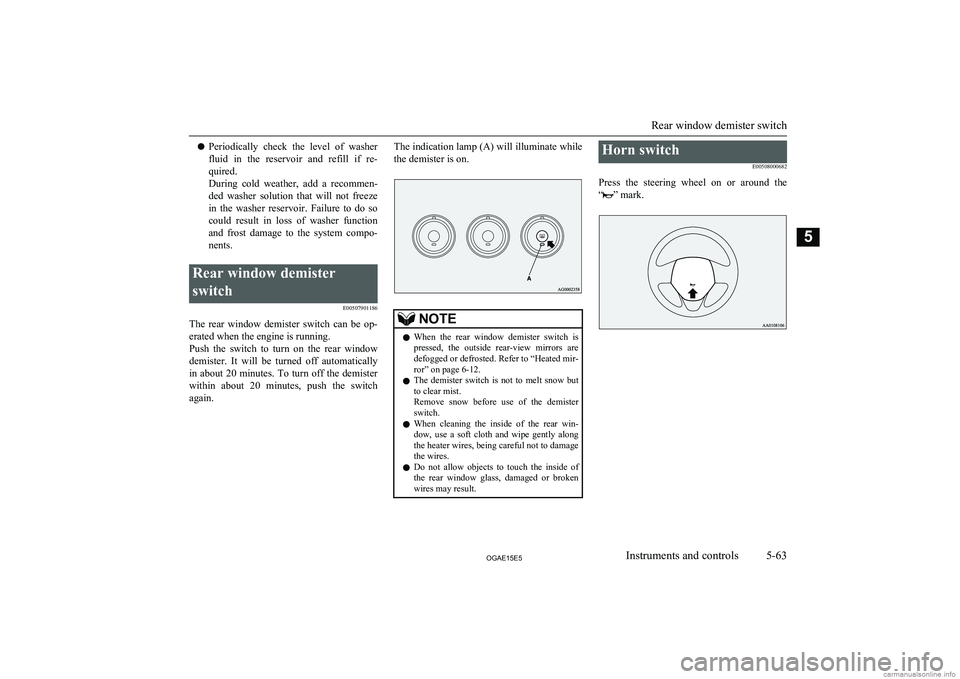
The rear window demister switch can be op-erated when the engine is running.
Push the switch to turn on the rear window
demister. It will be turned off automatically
in about 20 minutes. To turn off the demister
within about 20 minutes, push the switch again.
The indication lamp (A) will illuminate while
the demister is on.NOTEl When the rear window demister switch is
pressed, the outside rear-view mirrors are
defogged or defrosted. Refer to “Heated mir-
ror” on page 6-12.
l The demister switch is not to melt snow but
to clear mist.
Remove snow before use of the demister
switch.
l When cleaning the inside of the rear win-
dow, use a soft cloth and wipe gently along
the heater wires, being careful not to damage the wires.
l Do not allow objects to touch the inside of
the rear window glass, damaged or broken wires may result.Horn switch
E00508000682
Press the steering wheel on or around the
“
” mark.
Rear window demister switch
5-63OGAE15E5Instruments and controls5