2015 MINI COUPE ROADSTER CONVERTIBLE battery
[x] Cancel search: batteryPage 6 of 231
Addendum
ate for use in your vehicle and that can be
properly fixed in place.”
9. At page 122, under the heading: “Have
maintenance carried out,” the sentence be-
ginning, “Have the maintenance carried
out …” should be disregarded and the fol-
lowing text should be read in lieu thereof:
“MINI recommends that you have the main-
tenance carried out by your service center.”
10. At page 156, under the heading “Pressure
specifications,” the sentence beginning,
“The inflation pressures apply to the tire si-
zes approved … .” should be disregarded.
11. At page 165, under the heading: “Approved
wheels and tires,” the term “Approved”
should be disregarded and in lieu thereof,
the term “Recommended” should be read in
its place. In addition, the text of that section
should be disregarded and the following
text should be read in lieu thereof:
The manufacturer of your vehicle strongly
suggests that you use wheels and tires that
have been recommended by the vehicle
manufacturer for your vehicle type; other-
wise, for example, despite having the same
official size ratings, variations can lead to
body contact and with it, the risk of severe
accidents.
The manufacturer of your vehicle does not
evaluate non-recommended wheels and ti-
res to determine if they are suitable for use
on your vehicle.
12. At page 171, under the heading “Hood,” the
sentence beginning, “If you are unfamiliar”
should be disregarded.
13. At page 175, under the heading: “Service
and Warranty Information Booklet for US
Models and Warranty and Service Guide
Booklet for Canadian Models,” the second
paragraph should be disregarded and the
following text read in lieu thereof:
The manufacturer of your vehicle recom-
mends that you have maintenance and re-
pair performed by your MINI dealer's service
center or another service center or repair
shop that employs trained personnel that
can perform maintenance and repair work
on your vehicle in accordance with MINI
specifications. The manufacturer of your ve-
hicle recommends that you maintain re-
cords of all maintenance and repair work
performed on your vehicle.
14. At page 187, under the “Battery replace-
ment” section, the text should be disregar-
ded and in lieu thereof the following text
should be read:
Use of recommended vehicle batteries
The manufacturer of your vehicle recom-
mends that you use vehicle batteries that it
has tested and recommends for use in your
vehicle; otherwise the vehicle could be da-
maged and systems or functions may not be
fully available.
After a battery replacement, the manufactu-
rer of your vehicle recommends that you
have the battery registered on your vehicle
by a service center to ensure that all comfort
functions are fully available, and that any
“check control” messages of these comfort
functions are no longer displayed.
Online Edition for Part no. 01 40 2 961 029 - II/15
Page 9 of 231
sary to adapt your vehicle to potentially differ‐
ing operating conditions and permit
requirements. If your vehicle does not comply
with the homologation requirements in a cer‐
tain country you cannot lodge warranty claims
for your vehicle there. Further information can
be obtained from your Service Center.
Maintenance and repairs Advanced technology, e.g., the use of modern
materials and high-performance electronics,
requires suitable maintenance and repair
methods.
Therefore, have this work performed only by a
MINI service center or a workshop that works
according to MINI repair procedures with ap‐
propriately trained personnel.
If this work is not carried out properly, there is
the danger of subsequent damage and related
safety hazards.
Parts and accessories
For your own safety, it is recommended that
you use genuine parts and accessories ap‐
proved by MINI. When you purchase accesso‐
ries tested and approved by MINI and Genuine
MINI Parts, you simultaneously acquire the as‐
surance that they have been thoroughly tested
by MINI to ensure optimum performance when
installed on your vehicle. MINI warrants these
parts to be free from defects in material and
workmanship. MINI will not accept any liability
for damage resulting from installation of parts
and accessories not approved by MINI. MINI
cannot test every product made by other man‐
ufacturers to verify if it can be used on a MINI
safely and without risk to either the vehicle, its
operation, or its occupants. Genuine MINI Parts,
MINI Accessories and other products approved
by MINI, together with professional advice on
using these items, are available from all MINI
centers. Installation and operation of non MINI
approved accessories such as alarms, radios,
amplifiers, radar detectors, wheels, suspension
components, brake dust shields, telephones,including operation of any mobile phone from
within the vehicle without using an externally
mounted antenna, or transceiver equipment,
for instance, CBs, walkie-talkies, ham radios or
similar accessories, may cause extensive dam‐
age to the vehicle, compromise its safety, inter‐
fere with the vehicle's electrical system or af‐
fect the validity of the MINI Limited Warranty.
See your MINI center for additional informa‐
tion. Maintenance, replacement, or repair of
the emission control devices and systems may
be performed by any automotive repair estab‐
lishment or individual using any certified auto‐
motive part.
California Proposition 65 Warning California laws require us to state the following
warning:
Engine exhaust and a wide variety of automo‐
bile components and parts, including compo‐
nents found in the interior furnishings in a vehi‐
cle, contain or emit chemicals known to the
State of California to cause cancer and birth de‐
fects and reproductive harm. In addition, cer‐
tain fluids contained in vehicles and certain
products of component wear contain or emit
chemicals known to the State of California to
cause cancer and birth defects or other repro‐
ductive harm. Battery posts, terminals and re‐
lated accessories contain lead and lead com‐
pounds. Wash your hands after handling. Used
engine oil contains chemicals that have caused
cancer in laboratory animals. Always protect
your skin by washing thoroughly with soap and
water.
Service and warranty
We recommend that you read this publication
thoroughly. Your vehicle is covered by the fol‐
lowing warranties:▷New Vehicle Limited Warranty.▷Rust Perforation Limited Warranty.▷Federal Emissions System Defect Warranty.▷Federal Emissions Performance Warranty.Seite 7Notes7
Online Edition for Part no. 01 40 2 961 029 - II/15
Page 22 of 231
Opening and closingVehicle equipmentThis chapter describes all series equipment as
well as country-specific and special equipment
offered for this model series. Therefore, it also
describes equipment that may not be found in
your vehicle, for instance due to the selected
special equipment or the country version. This
also applies to safety-related functions and sys‐
tems.
When using the features and systems described
here, adhere to local regulations.
Remote control/key
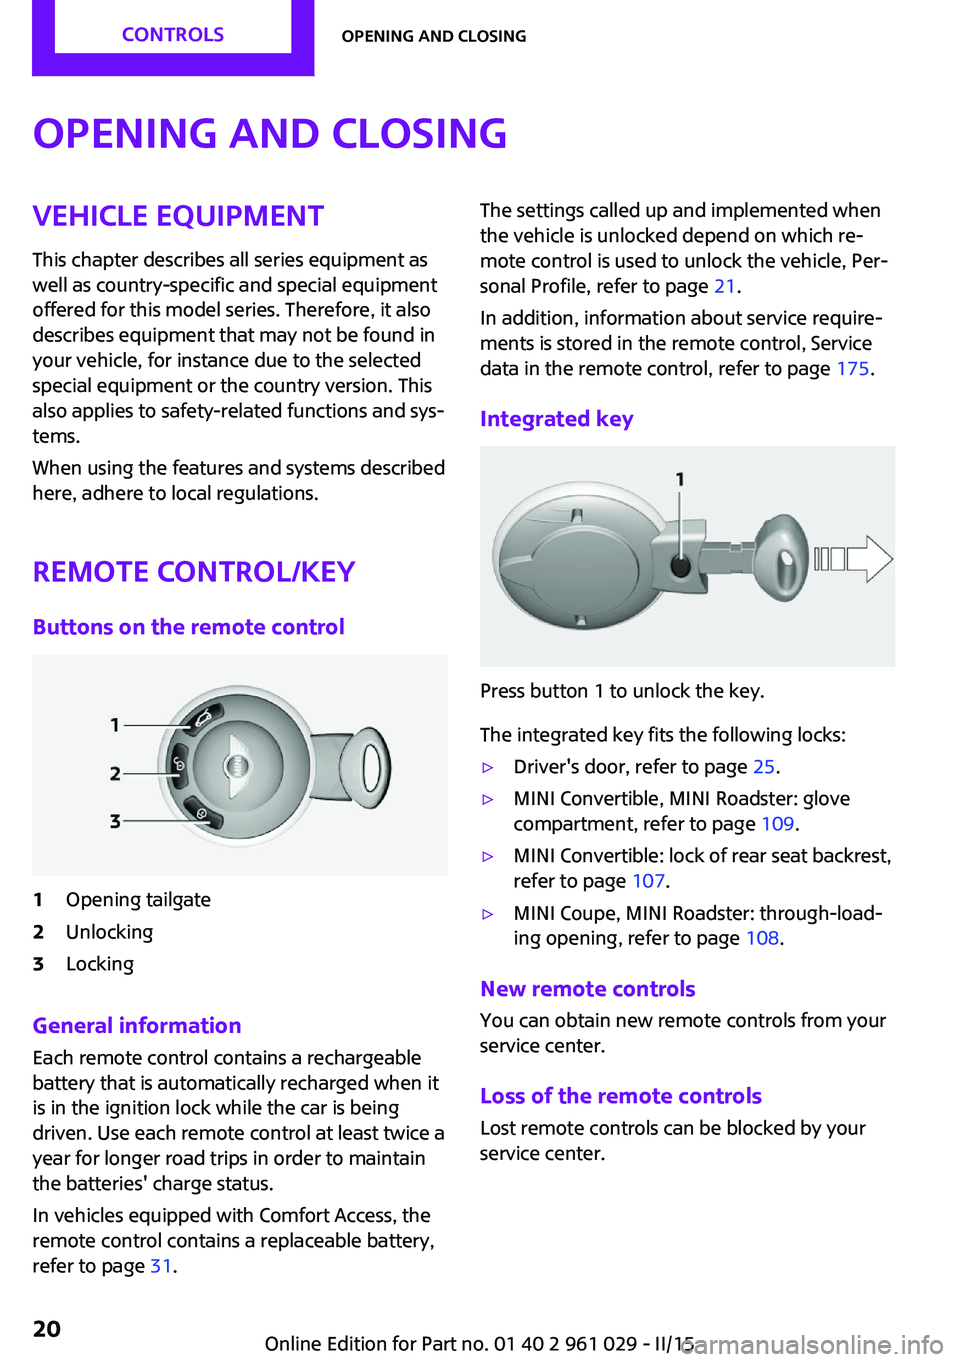
Buttons on the remote control1Opening tailgate2Unlocking3Locking
General information
Each remote control contains a rechargeable
battery that is automatically recharged when it
is in the ignition lock while the car is being
driven. Use each remote control at least twice a
year for longer road trips in order to maintain
the batteries' charge status.
In vehicles equipped with Comfort Access, the
remote control contains a replaceable battery,
refer to page 31.
The settings called up and implemented when
the vehicle is unlocked depend on which re‐
mote control is used to unlock the vehicle, Per‐
sonal Profile, refer to page 21.
In addition, information about service require‐
ments is stored in the remote control, Service
data in the remote control, refer to page 175.
Integrated key
Press button 1 to unlock the key.
The integrated key fits the following locks:
▷Driver's door, refer to page 25.▷MINI Convertible, MINI Roadster: glove
compartment, refer to page 109.▷MINI Convertible: lock of rear seat backrest,
refer to page 107.▷MINI Coupe, MINI Roadster: through-load‐
ing opening, refer to page 108.
New remote controls
You can obtain new remote controls from your
service center.
Loss of the remote controls Lost remote controls can be blocked by your
service center.
Seite 20CONTROLSOpening and closing20
Online Edition for Part no. 01 40 2 961 029 - II/15
Page 27 of 231

MalfunctionsThe function of the remote control may be im‐
paired by local radio waves. If this occurs, un‐ lock and lock the vehicle at the door lock with
the integrated key.
If it should become impossible to lock the vehi‐
cle with a remote control, the battery in the re‐
mote control is discharged. Use this remote control on an extended trip to recharge the
battery, refer to page 20.
For US owners only The transmitter and receiver units comply with
part 15 of the FCC/Federal Communication
Commission regulations. Operation is governed
by the following:
FCC ID:
LX8766S
LX8766E
LX8CAS
Compliance statement:
This device complies with part 15 of the FCC
Rules. Operation is subject to the following two
conditions:▷This device may not cause harmful interfer‐
ence, and▷this device must accept any interference re‐
ceived, including interference that may
cause undesired operation.
Any unauthorized modifications or changes to
these devices could void the user's authority to
operate this equipment.
Using the door lock
Sets how the vehicle is to be unlocked, refer to
page 22.
In some vehicle equipment versions, only the
driver's door can be unlocked and locked via
the door lock.
Locking from the outside
Do not lock the vehicle from the outside if
there are people in it, as the vehicle cannot be
unlocked from inside without special knowl‐
edge. ◀
Unlocking the doors and tailgate at
once
To lock all doors, the fuel filler flap, and the tail‐
gate at once:
1.With the doors closed, lock the vehicle us‐
ing the button for the central locking sys‐
tem in the interior, refer to page 26.2.Unlock and open the driver's or front pas‐
senger door, refer to page 26.3.To lock the vehicle:▷Lock the driver's door using the
integrated key in the door lock, or▷Press down the lock button of the front
passenger door and close the door
from the outside.
Convenient opening and closing
In vehicles with an alarm system or Comfort Ac‐
cess, the windows can be operated via the door
lock.
Seite 25Opening and closingCONTROLS25
Online Edition for Part no. 01 40 2 961 029 - II/15
Page 33 of 231

The indicator lamp lights up: replace
the remote control battery.
Replacing the battery
The remote control for Comfort Access contains
a battery that will need to be replaced from
time to time.1.Remove the cover.2.Insert a new battery with the positive side
facing upwards.3.Press the cover closed.
Return used battery to a recycling center
or to your service center.
Alarm system
The concept
The enabled alarm system reacts to the follow‐
ing:
▷Opening of a door, the hood or the tailgate.▷Movements inside the vehicle.▷Changes in the vehicle tilt, e.g., during at‐
tempts to steal a wheel or tow the car.▷Interruptions in battery voltage.
Depending on the market-specific version, the
alarm system briefly signals unauthorized entry
attempts by:
▷By sounding an acoustic alarm.▷By switching on the hazard warning system.Arming and disarming the alarm system
General information
When the vehicle is locked and unlocked, the
alarm system is armed and disarmed at the
same time.
Door lock and armed alarm systemUnlocking via the door lock will trigger the
alarm on some market-specific versions.
To stop this alarm, unlock the vehicle with the
remote control or switch on the ignition.
Tailgate with armed alarm system The tailgate, refer to page 24, can also be
opened when the alarm system is armed.
Press the button on the remote con‐
trol.
When you subsequently close the tailgate, it is
again locked and monitored.
Unlocking via the door lock will trigger the
alarm on some market-specific versions.
Switching off the alarm
▷Unlock the vehicle using the remote con‐
trol, refer to page 22.▷Insert the remote control all the way into
the ignition lock.▷With Comfort Access and if you are carrying
the remote control with you, push the but‐
ton on the door lock.
Display on the tachometer
When the alarm system is being armed, all LEDs
pulse like a heartbeat. One LED flashes after
approx. 16 minutes.
Seite 31Opening and closingCONTROLS31
Online Edition for Part no. 01 40 2 961 029 - II/15
Page 35 of 231

Power windowsGeneral information Take the remote control with you
Take the remote control with you when
leaving the vehicle so that children, for exam‐
ple, cannot operate the power windows and in‐
jure themselves. ◀
If, after having been opened and closed a num‐
ber of times in close succession, a window can
only be closed, the system is overheated. Let
the system cool down for several minutes with
the ignition switched on or the engine running.
Opening▷Press the switch downward.
The window opens until the switch is re‐
leased.▷Press the switch downward briefly.
In the radio ready state and higher, the
window opens automatically. Press again
briefly to stop the opening procedure.
To open the window by a crack, briefly press
the switch downward twice in close succession.
Closing Danger of pinching
Monitor the closing process and make
sure that the closing path of the window is
clear; otherwise, injuries may result. ◀
To close, press the switch upward. The window
closes until the switch is released.
Initializing the power windows
If the battery was disconnected, for example to
change the battery or to put the vehicle into
storage, reinitialize the power windows; other‐
wise, the windows will not be lowered.1.Close the doors.2.Open both windows.3.Close both windows.
Please contact your service center in the event
of a malfunction.
MINI Convertible: central power
windows switch
▷Press the switch downward.
The rear and front windows open consecu‐
tively until the switch is released.▷Press the switch downward briefly.
With the ignition switched on: the rear and
front windows open automatically. Press
again briefly to stop the opening proce‐
dure.
To close the windows, press the switch upward
and hold it.
Do not close the windows until the closing pro‐
cedure of the convertible top is completed;
otherwise, it cannot be ensured that the side
windows will form a tight seal with the rubber
seals of the convertible top. Convertible top, re‐
fer to page 35.
Seite 33Opening and closingCONTROLS33
Online Edition for Part no. 01 40 2 961 029 - II/15
Page 36 of 231
After the ignition is switched off
The windows can be operated for approx. 1 mi‐
nute after the remote control is removed or the
ignition is switched off.
Take the remote control with you
Take the remote control with you when
leaving the vehicle so that children, for exam‐
ple, cannot operate the power windows and in‐
jure themselves. ◀
MINI Convertible:
convertible top with
integrated sliding sun‐ roof
If possible, conserve the battery by only operat‐
ing the convertible top while the engine is run‐
ning.
Before closing the convertible top, remove all
foreign objects from the windshield frame as
these could prevent the top from closing prop‐
erly.
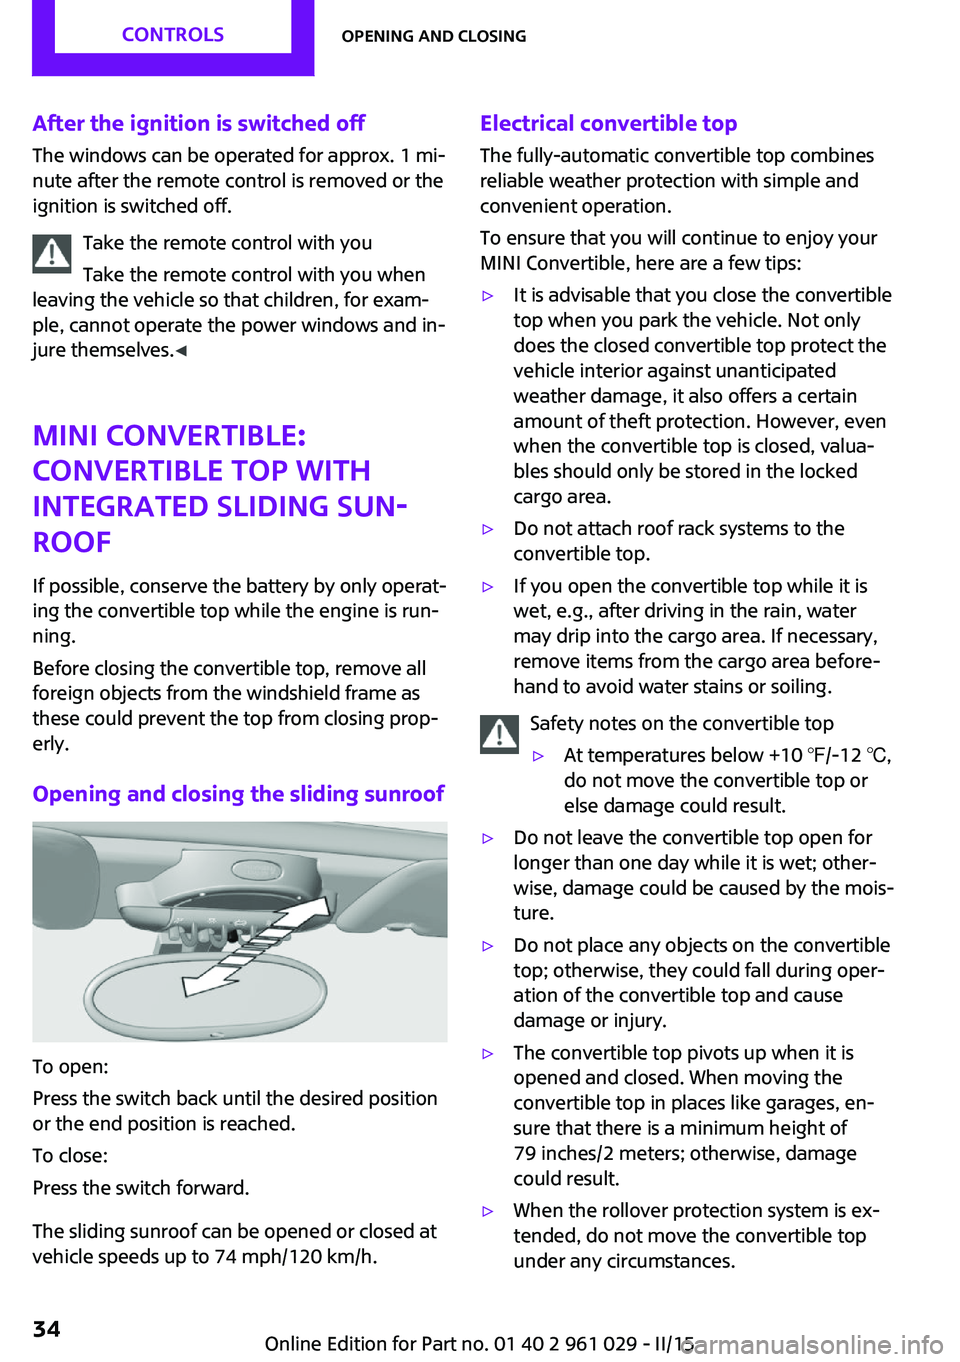
Opening and closing the sliding sunroof
To open:
Press the switch back until the desired position
or the end position is reached.
To close:
Press the switch forward.
The sliding sunroof can be opened or closed at
vehicle speeds up to 74 mph/120 km/h.
Electrical convertible top
The fully-automatic convertible top combines
reliable weather protection with simple and
convenient operation.
To ensure that you will continue to enjoy your
MINI Convertible, here are a few tips:▷It is advisable that you close the convertible
top when you park the vehicle. Not only
does the closed convertible top protect the
vehicle interior against unanticipated
weather damage, it also offers a certain
amount of theft protection. However, even
when the convertible top is closed, valua‐
bles should only be stored in the locked
cargo area.▷Do not attach roof rack systems to the
convertible top.▷If you open the convertible top while it is
wet, e.g., after driving in the rain, water
may drip into the cargo area. If necessary,
remove items from the cargo area before‐
hand to avoid water stains or soiling.
Safety notes on the convertible top
▷At temperatures below +10 ℉/-12 ℃,
do not move the convertible top or
else damage could result.▷Do not leave the convertible top open for
longer than one day while it is wet; other‐
wise, damage could be caused by the mois‐
ture.▷Do not place any objects on the convertible
top; otherwise, they could fall during oper‐
ation of the convertible top and cause
damage or injury.▷The convertible top pivots up when it is
opened and closed. When moving the
convertible top in places like garages, en‐
sure that there is a minimum height of
79 inches/2 meters; otherwise, damage
could result.▷When the rollover protection system is ex‐
tended, do not move the convertible top
under any circumstances.Seite 34CONTROLSOpening and closing34
Online Edition for Part no. 01 40 2 961 029 - II/15
Page 38 of 231
moves to a stable position. The sequence can
be continued using the switch.
The opening or closing procedure is also inter‐
rupted when it is blocked mechanically. To be
able to reactivate the convertible top in this
case:1.Switch the ignition off and on again.2.Press the switch to continue the sequence
in the desired direction.
Opening and closing procedure
Do not interrupt the closing procedure
Do not interrupt and resume the closing
procedure several times in close succession as
this could damage the convertible top mecha‐
nism. ◀
If, after having been activated a number of
times in close succession, the convertible top
can only be moved in one direction, the
convertible top system is overheated. Let the
system cool for approx. 4 minutes.
If the battery was disconnected, for example to
change the battery or to put the vehicle into
storage, reinitialize, refer to page 33, the power
windows; otherwise, the windows will not be
lowered, and it will not be possible to open the
convertible top.
Convenient opening and closing Convenient operation is possible via the remote
control, refer to page 22, and the door lock, re‐
fer to page 25.
Manual closing in case of electrical
malfunction
Only close the convertible top manually if
there is an electrical malfunction
Only close the convertible top manually if this is
absolutely necessary; never open it manually.
Damage may occur if incorrectly operated. The
closing procedure must be fully completed;
otherwise, there is a risk of injury or damage. ◀
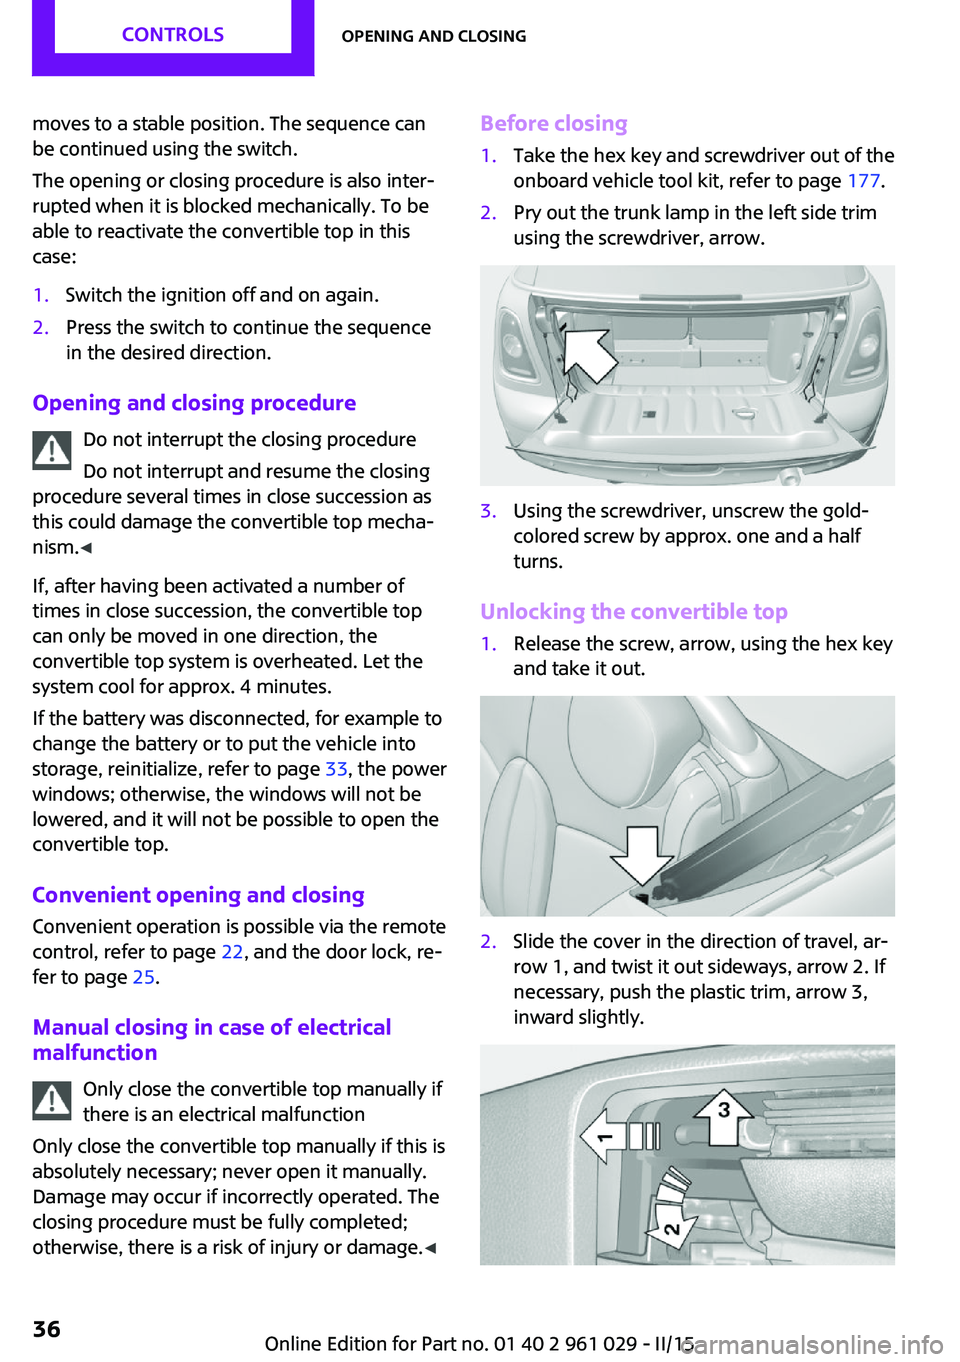
Before closing1.Take the hex key and screwdriver out of the
onboard vehicle tool kit, refer to page 177.2.Pry out the trunk lamp in the left side trim
using the screwdriver, arrow.3.Using the screwdriver, unscrew the gold-
colored screw by approx. one and a half
turns.
Unlocking the convertible top
1.Release the screw, arrow, using the hex key
and take it out.2.Slide the cover in the direction of travel, ar‐
row 1, and twist it out sideways, arrow 2. If
necessary, push the plastic trim, arrow 3,
inward slightly.Seite 36CONTROLSOpening and closing36
Online Edition for Part no. 01 40 2 961 029 - II/15