2015 MINI COUPE ROADSTER CONVERTIBLE turn signal bulb
[x] Cancel search: turn signal bulbPage 61 of 231
Excessive application of the parking brake can
block the rear wheels and lead to fishtailing of
the vehicle. ◀
The brake lights do not light up when the park‐
ing brake is pulled.
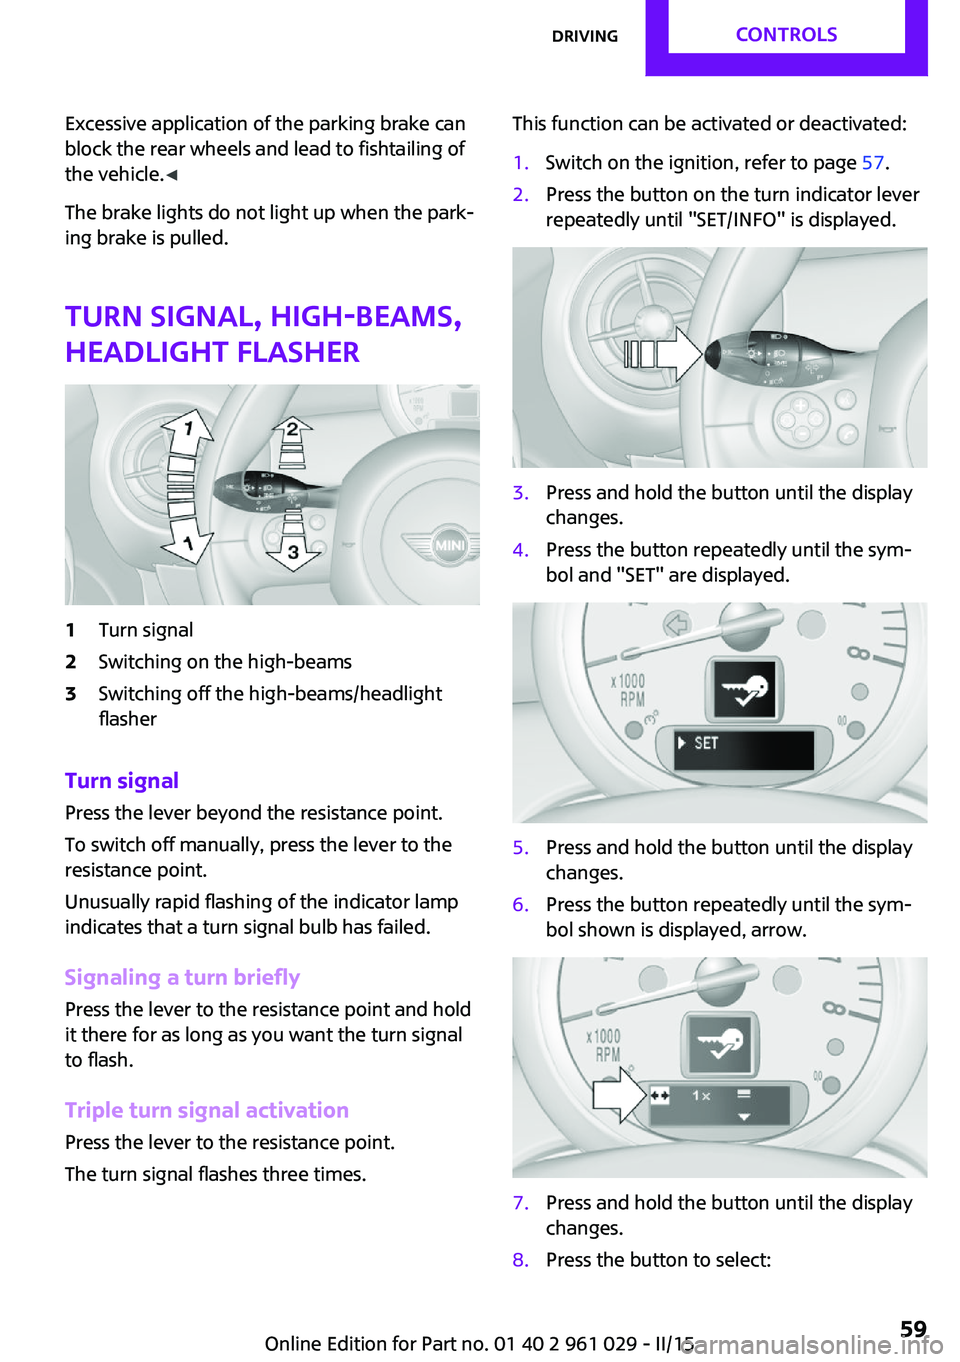
Turn signal, high-beams,
headlight flasher1Turn signal2Switching on the high-beams3Switching off the high-beams/headlight
flasher
Turn signal
Press the lever beyond the resistance point.
To switch off manually, press the lever to the
resistance point.
Unusually rapid flashing of the indicator lamp
indicates that a turn signal bulb has failed.
Signaling a turn briefly Press the lever to the resistance point and hold
it there for as long as you want the turn signal
to flash.
Triple turn signal activation Press the lever to the resistance point.
The turn signal flashes three times.
This function can be activated or deactivated:1.Switch on the ignition, refer to page 57.2.Press the button on the turn indicator lever
repeatedly until "SET/INFO" is displayed.3.Press and hold the button until the display
changes.4.Press the button repeatedly until the sym‐
bol and "SET" are displayed.5.Press and hold the button until the display
changes.6.Press the button repeatedly until the sym‐
bol shown is displayed, arrow.7.Press and hold the button until the display
changes.8.Press the button to select:Seite 59DrivingCONTROLS59
Online Edition for Part no. 01 40 2 961 029 - II/15
Page 181 of 231

Use a clean tissue, cloth or something similar,
or hold the bulb by its base. ◀
Caring for the headlights, refer to page 195.
For bulb replacement that is not described
here, please contact the service center or a
workshop that works according to the repair
procedures of the manufacturer with corre‐
spondingly trained personnel.
For checking and adjusting headlight aim,
please contact your MINI dealer.
Light-emitting diodes LEDs In some equipment, the light source is provided
by light-emitting diodes behind a cover.
These light-emitting diodes, which operate us‐
ing a concept similar to that applied in conven‐
tional lasers, are designated as Class 1 light-
emitting diodes.
Do not remove the covers
Do not remove the covers, and never
stare into the unfiltered light for several hours;
otherwise, irritation of the retina could result. ◀
Headlight glass Condensation can form on the inside of the
headlights in cool or humid weather. When the
light is switched on, the condensation evapo‐
rates after a short time. The headlights do not
need to be changed.
If the condensation in the headlights does not
evaporate after trips with the lights switched
on, and the amount of moisture in the head‐
lights increases, for example if water droplets
form, have them checked by your service cen‐
ter.
Bi-xenon headlights
These bulbs have a very long life and the likeli‐
hood of failure is very low, provided that they
are not switched on and off excessively. If a
bulb should nevertheless fail, you can continue
driving cautiously with the front fog lights, pro‐
vided this is permitted by local laws.Do not perform work/bulb replacement
on xenon headlamps
Have any work on the xenon lighting system,
including bulb replacement, performed only by
a service center.
Due to the high voltage present in the system,
there is the danger of fatal injuries if work is
carried out improperly. ◀
Front lights, bulb replacement
At a glance
Headlights1Low beams/high-beams2Turn signal
Lower front lights
1Parking lights2Daytime running lights or fog lightsSeite 179Replacing componentsMOBILITY179
Online Edition for Part no. 01 40 2 961 029 - II/15
Page 183 of 231
3.Insert the new bulb and attach the cover in
reverse order.
LED parking lights/LED fog lights/LED
daytime running lights
Follow the general instructions on lamps and
bulbs, refer to page 178.
Lights are implemented using LED technology.
Contact your service center in the event of a
malfunction.
Turn signals/parking lights/roadside
parking lights/fog lights/and daytime
running lights
Access to the bulbs via the wheel housing
Follow the general instructions on lamps and
bulbs, refer to page 178.
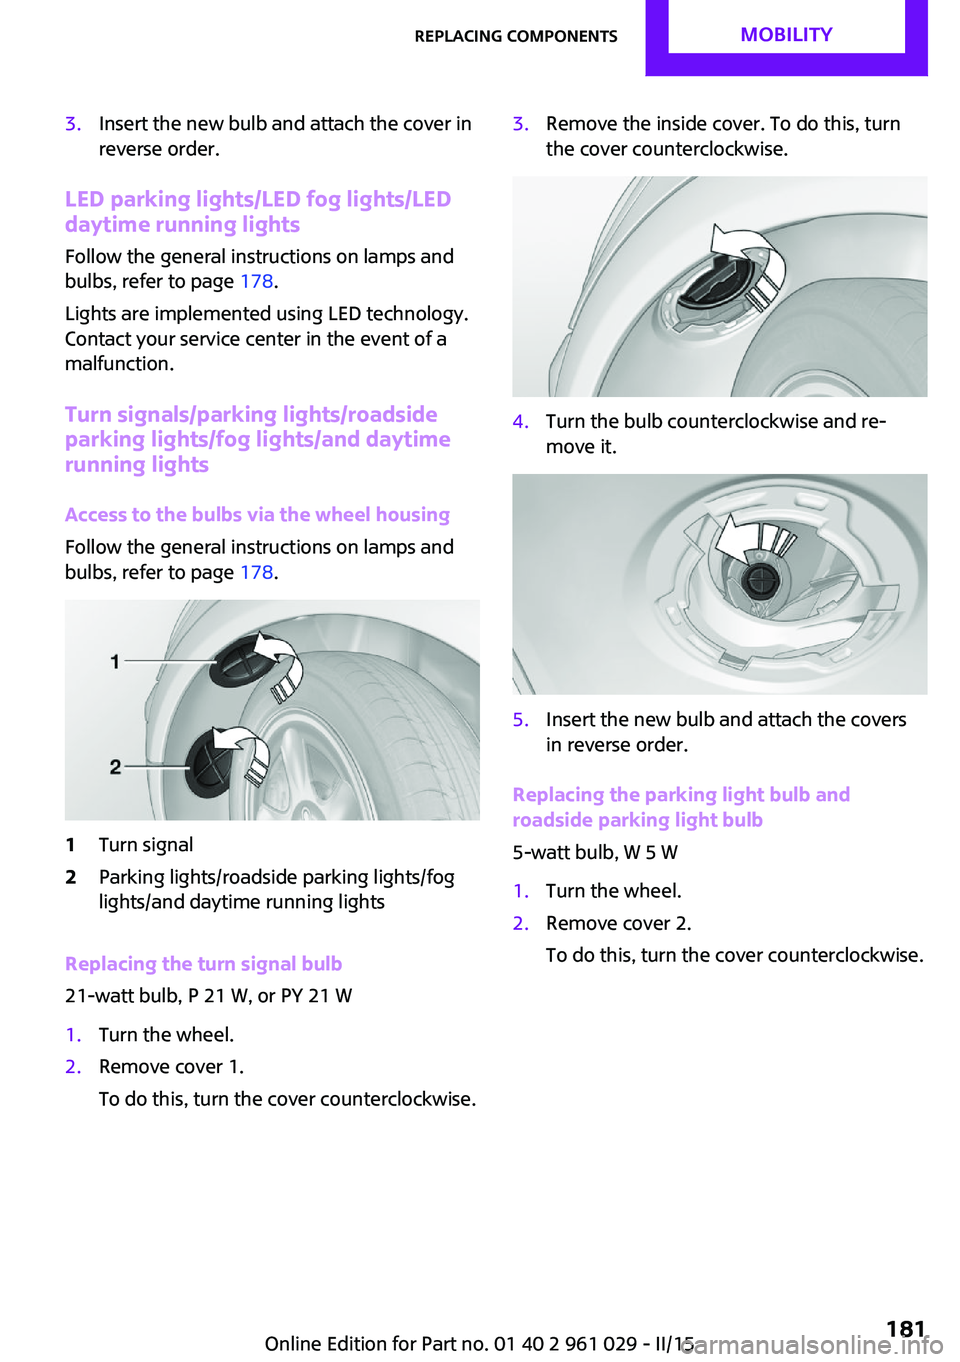
1Turn signal2Parking lights/roadside parking lights/fog
lights/and daytime running lights
Replacing the turn signal bulb
21-watt bulb, P 21 W, or PY 21 W
1.Turn the wheel.2.Remove cover 1.
To do this, turn the cover counterclockwise.3.Remove the inside cover. To do this, turn
the cover counterclockwise.4.Turn the bulb counterclockwise and re‐
move it.5.Insert the new bulb and attach the covers
in reverse order.
Replacing the parking light bulb and
roadside parking light bulb
5-watt bulb, W 5 W
1.Turn the wheel.2.Remove cover 2.
To do this, turn the cover counterclockwise.Seite 181Replacing componentsMOBILITY181
Online Edition for Part no. 01 40 2 961 029 - II/15
Page 184 of 231
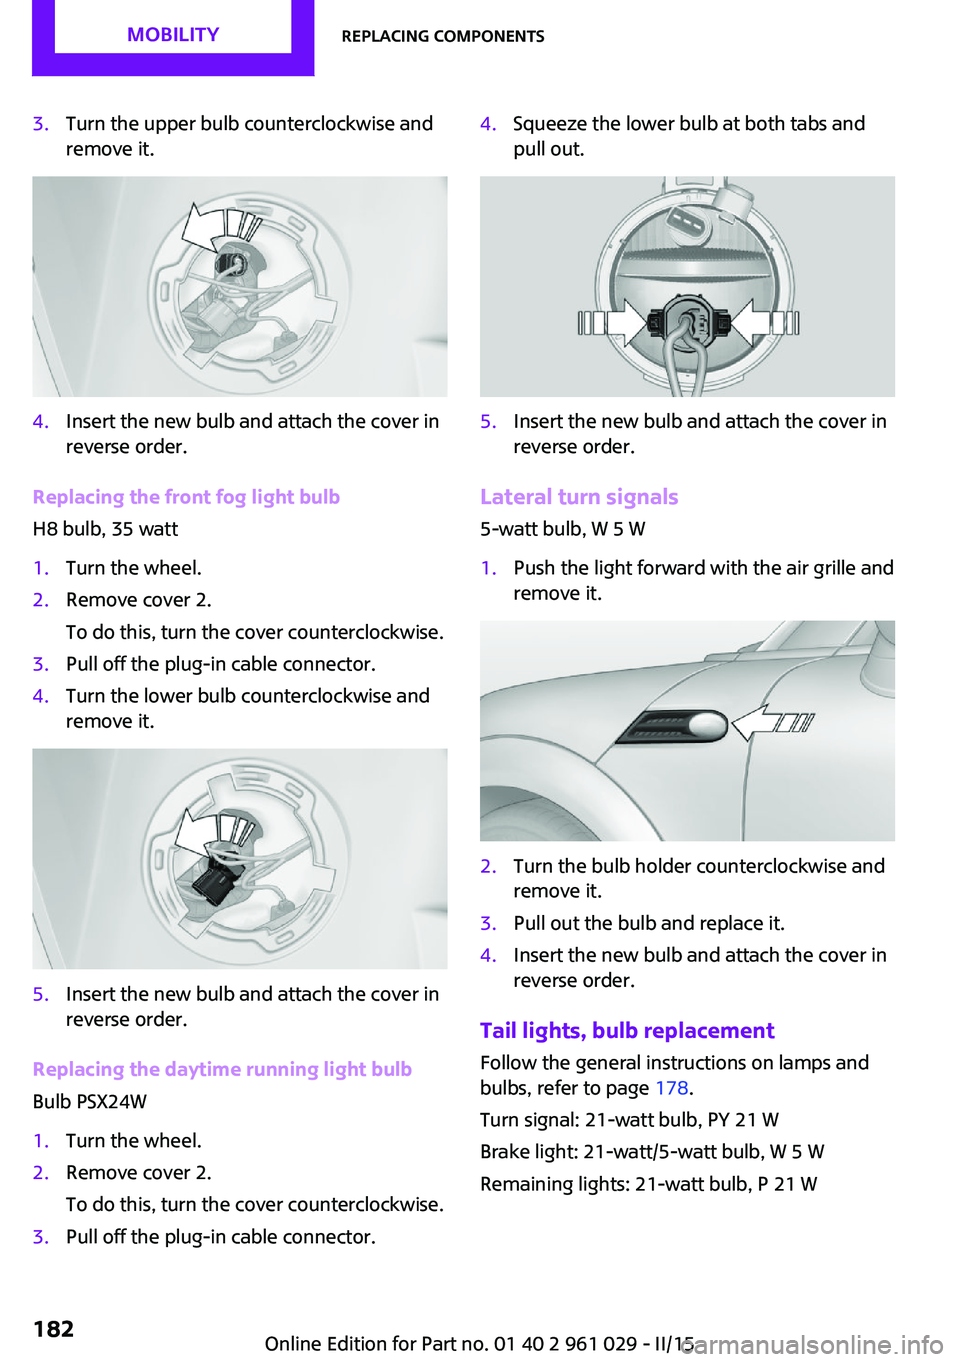
3.Turn the upper bulb counterclockwise and
remove it.4.Insert the new bulb and attach the cover in
reverse order.
Replacing the front fog light bulb
H8 bulb, 35 watt
1.Turn the wheel.2.Remove cover 2.
To do this, turn the cover counterclockwise.3.Pull off the plug-in cable connector.4.Turn the lower bulb counterclockwise and
remove it.5.Insert the new bulb and attach the cover in
reverse order.
Replacing the daytime running light bulb
Bulb PSX24W
1.Turn the wheel.2.Remove cover 2.
To do this, turn the cover counterclockwise.3.Pull off the plug-in cable connector.4.Squeeze the lower bulb at both tabs and
pull out.5.Insert the new bulb and attach the cover in
reverse order.
Lateral turn signals
5-watt bulb, W 5 W
1.Push the light forward with the air grille and
remove it.2.Turn the bulb holder counterclockwise and
remove it.3.Pull out the bulb and replace it.4.Insert the new bulb and attach the cover in
reverse order.
Tail lights, bulb replacement
Follow the general instructions on lamps and
bulbs, refer to page 178.
Turn signal: 21-watt bulb, PY 21 W
Brake light: 21-watt/5-watt bulb, W 5 W
Remaining lights: 21-watt bulb, P 21 W
Seite 182MOBILITYReplacing components182
Online Edition for Part no. 01 40 2 961 029 - II/15
Page 185 of 231
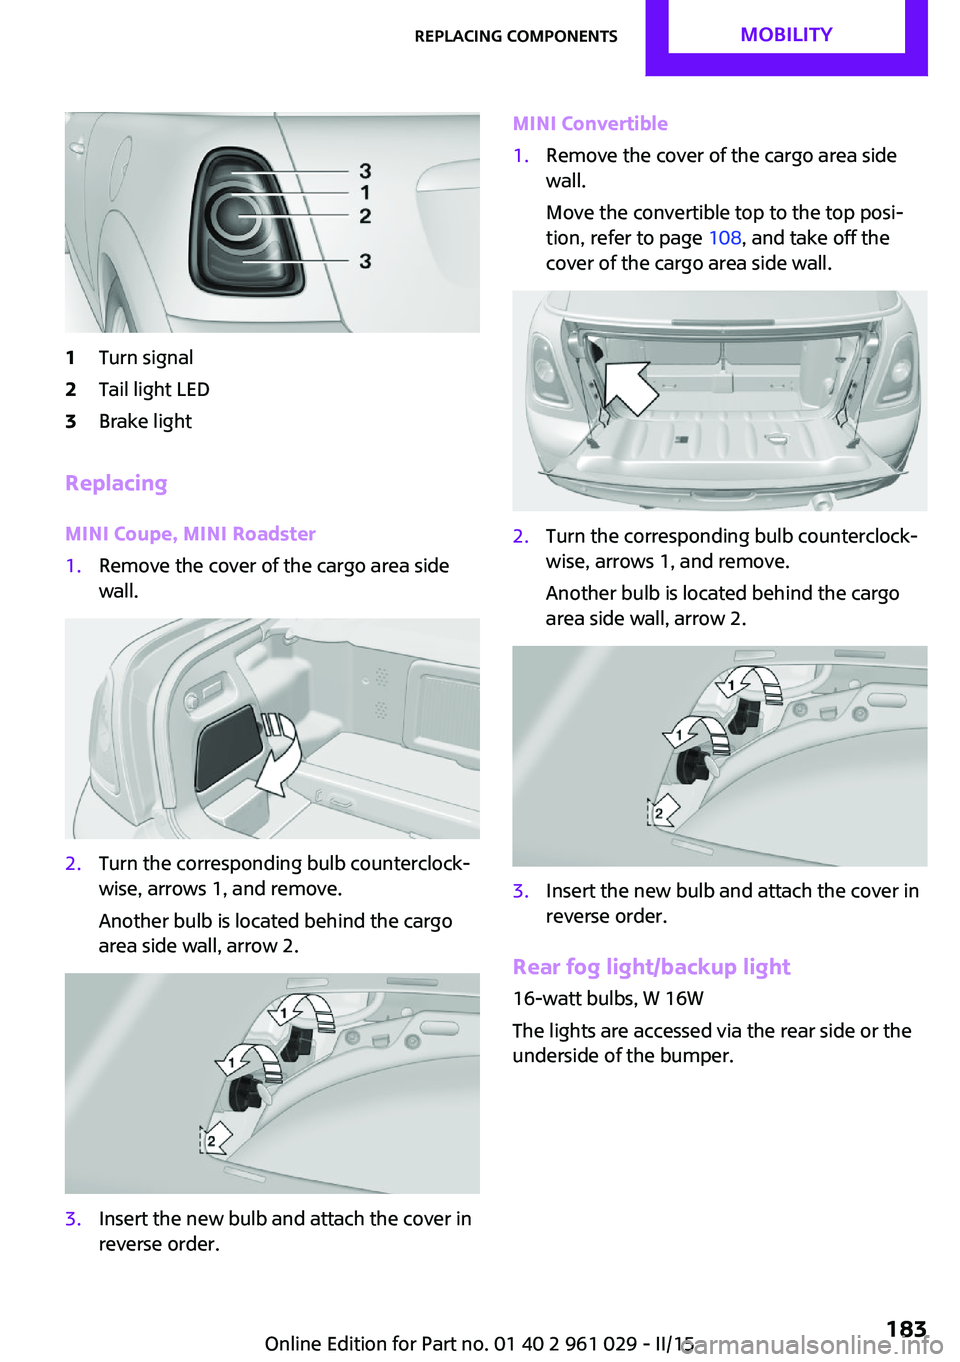
1Turn signal2Tail light LED3Brake light
Replacing
MINI Coupe, MINI Roadster
1.Remove the cover of the cargo area side
wall.2.Turn the corresponding bulb counterclock‐
wise, arrows 1, and remove.
Another bulb is located behind the cargo
area side wall, arrow 2.3.Insert the new bulb and attach the cover in
reverse order.MINI Convertible1.Remove the cover of the cargo area side
wall.
Move the convertible top to the top posi‐
tion, refer to page 108, and take off the
cover of the cargo area side wall.2.Turn the corresponding bulb counterclock‐
wise, arrows 1, and remove.
Another bulb is located behind the cargo
area side wall, arrow 2.3.Insert the new bulb and attach the cover in
reverse order.
Rear fog light/backup light
16-watt bulbs, W 16W
The lights are accessed via the rear side or the
underside of the bumper.
Seite 183Replacing componentsMOBILITY183
Online Edition for Part no. 01 40 2 961 029 - II/15
Page 228 of 231
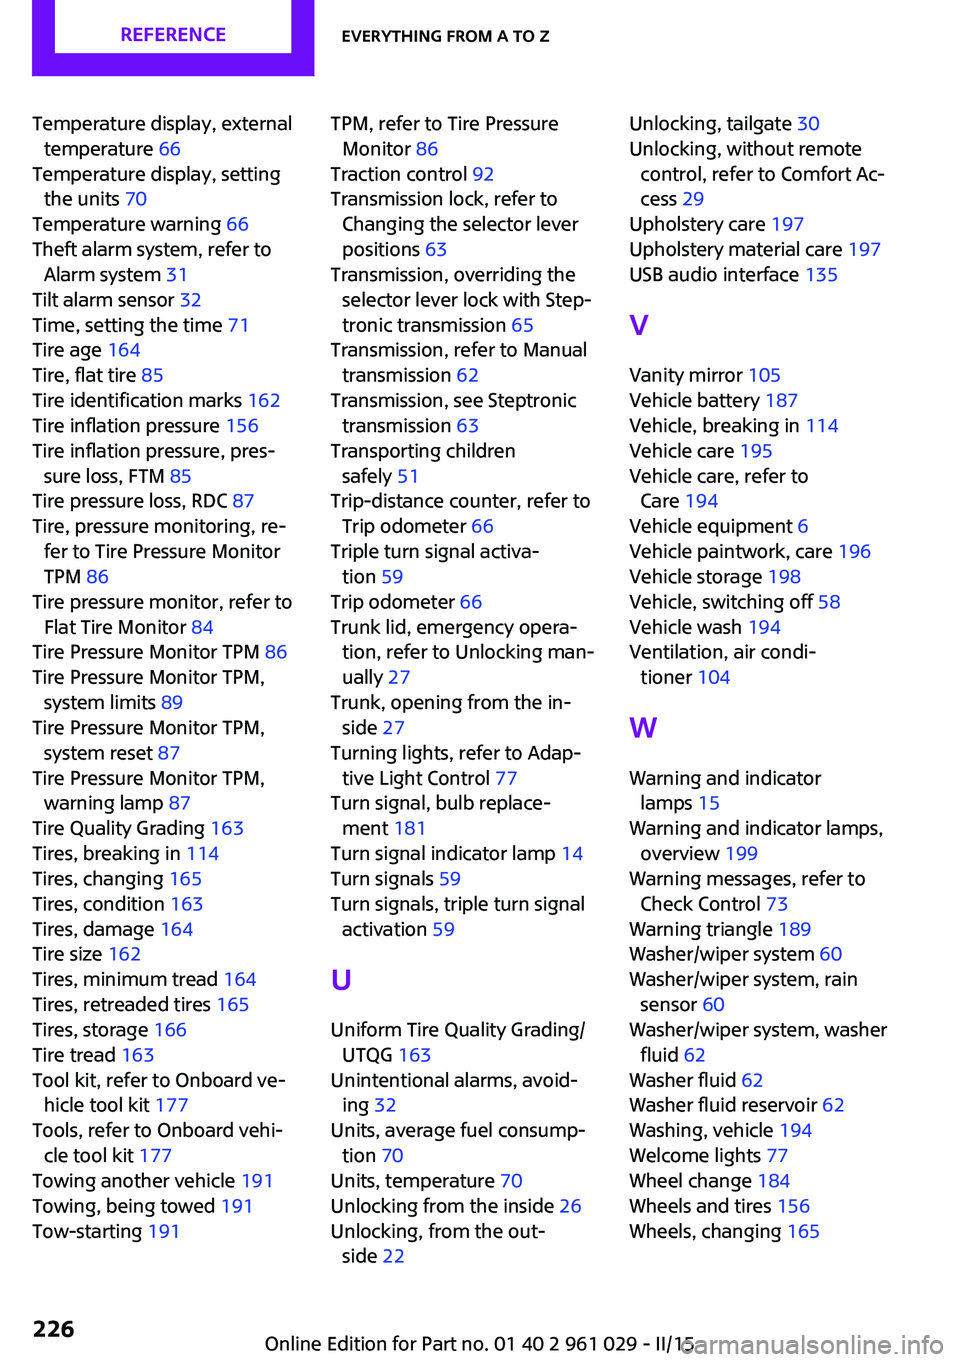
Temperature display, externaltemperature 66
Temperature display, setting the units 70
Temperature warning 66
Theft alarm system, refer to Alarm system 31
Tilt alarm sensor 32
Time, setting the time 71
Tire age 164
Tire, flat tire 85
Tire identification marks 162
Tire inflation pressure 156
Tire inflation pressure, pres‐ sure loss, FTM 85
Tire pressure loss, RDC 87
Tire, pressure monitoring, re‐ fer to Tire Pressure Monitor
TPM 86
Tire pressure monitor, refer to Flat Tire Monitor 84
Tire Pressure Monitor TPM 86
Tire Pressure Monitor TPM, system limits 89
Tire Pressure Monitor TPM, system reset 87
Tire Pressure Monitor TPM, warning lamp 87
Tire Quality Grading 163
Tires, breaking in 114
Tires, changing 165
Tires, condition 163
Tires, damage 164
Tire size 162
Tires, minimum tread 164
Tires, retreaded tires 165
Tires, storage 166
Tire tread 163
Tool kit, refer to Onboard ve‐ hicle tool kit 177
Tools, refer to Onboard vehi‐ cle tool kit 177
Towing another vehicle 191
Towing, being towed 191
Tow-starting 191 TPM, refer to Tire Pressure
Monitor 86
Traction control 92
Transmission lock, refer to Changing the selector lever
positions 63
Transmission, overriding the selector lever lock with Step‐
tronic transmission 65
Transmission, refer to Manual transmission 62
Transmission, see Steptronic transmission 63
Transporting children safely 51
Trip-distance counter, refer to Trip odometer 66
Triple turn signal activa‐ tion 59
Trip odometer 66
Trunk lid, emergency opera‐ tion, refer to Unlocking man‐
ually 27
Trunk, opening from the in‐ side 27
Turning lights, refer to Adap‐ tive Light Control 77
Turn signal, bulb replace‐ ment 181
Turn signal indicator lamp 14
Turn signals 59
Turn signals, triple turn signal activation 59
U
Uniform Tire Quality Grading/ UTQG 163
Unintentional alarms, avoid‐ ing 32
Units, average fuel consump‐ tion 70
Units, temperature 70
Unlocking from the inside 26
Unlocking, from the out‐ side 22 Unlocking, tailgate 30
Unlocking, without remote control, refer to Comfort Ac‐
cess 29
Upholstery care 197
Upholstery material care 197
USB audio interface 135
V Vanity mirror 105
Vehicle battery 187
Vehicle, breaking in 114
Vehicle care 195
Vehicle care, refer to Care 194
Vehicle equipment 6
Vehicle paintwork, care 196
Vehicle storage 198
Vehicle, switching off 58
Vehicle wash 194
Ventilation, air condi‐ tioner 104
W Warning and indicator lamps 15
Warning and indicator lamps, overview 199
Warning messages, refer to Check Control 73
Warning triangle 189
Washer/wiper system 60
Washer/wiper system, rain sensor 60
Washer/wiper system, washer fluid 62
Washer fluid 62
Washer fluid reservoir 62
Washing, vehicle 194
Welcome lights 77
Wheel change 184
Wheels and tires 156
Wheels, changing 165 Seite 226REFERENCEEverything from A to Z226
Online Edition for Part no. 01 40 2 961 029 - II/15