2015 MINI COOPER CONVERTIBLE heating
[x] Cancel search: heatingPage 18 of 231
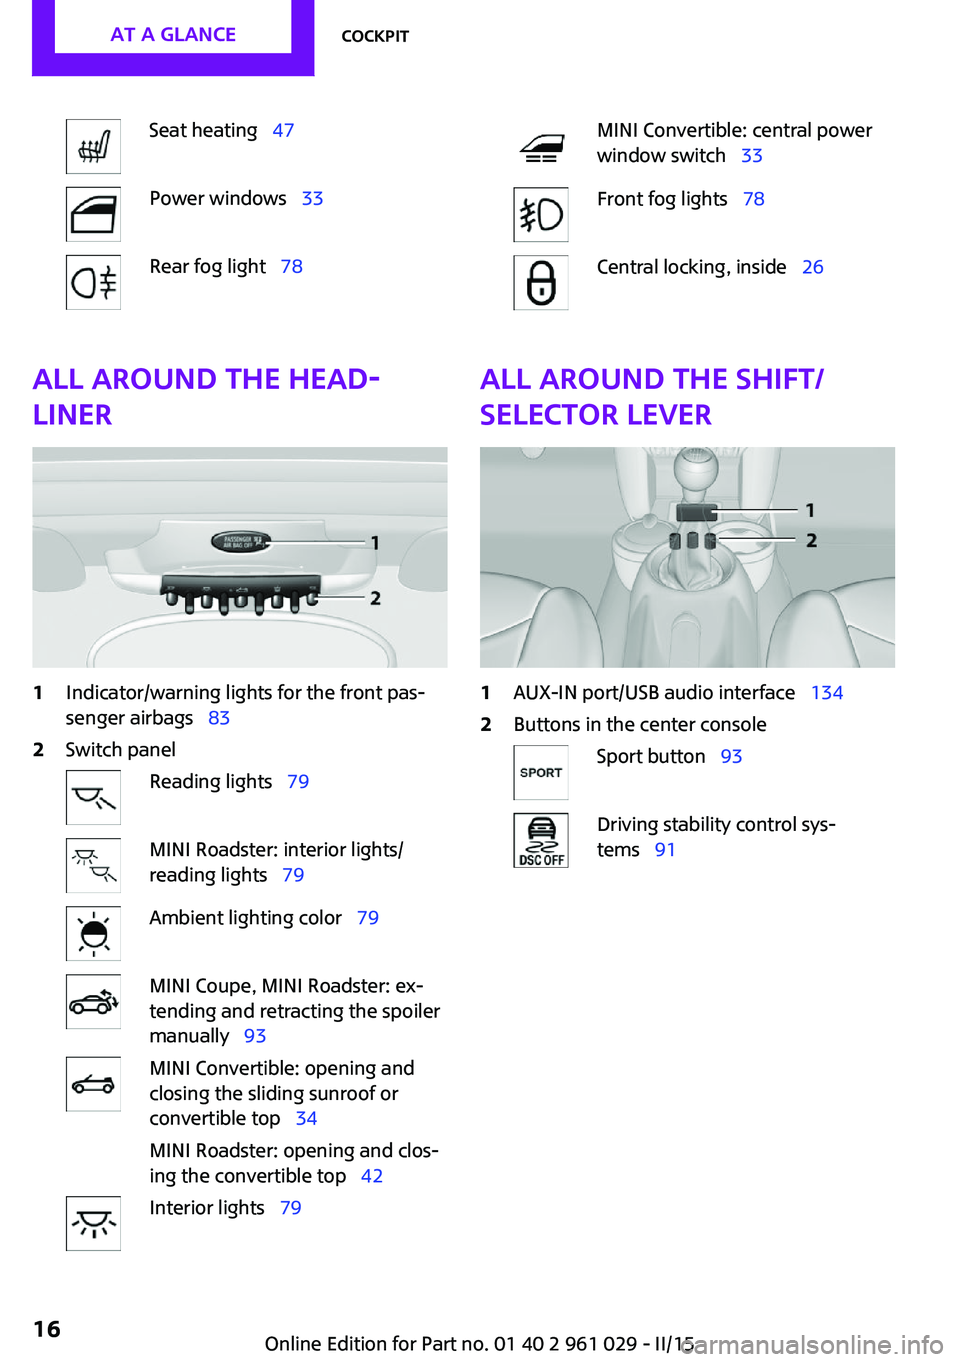
Seat heating 47Power windows 33Rear fog light 78MINI Convertible: central power
window switch 33Front fog lights 78Central locking, inside 26All around the head‐
liner1Indicator/warning lights for the front pas‐
senger airbags 832Switch panelReading lights 79MINI Roadster: interior lights/
reading lights 79Ambient lighting color 79MINI Coupe, MINI Roadster: ex‐
tending and retracting the spoiler
manually 93MINI Convertible: opening and
closing the sliding sunroof or
convertible top 34
MINI Roadster: opening and clos‐
ing the convertible top 42Interior lights 79All around the shift/
selector lever1AUX-IN port/USB audio interface 1342Buttons in the center consoleSport button 93Driving stability control sys‐
tems 91Seite 16AT A GLANCECockpit16
Online Edition for Part no. 01 40 2 961 029 - II/15
Page 29 of 231

6.Press the button repeatedly until the sym‐
bol shown is displayed, arrow.7.Press and hold the button until the display
changes.8.Press the button to select:▷
The central locking system locks auto‐
matically after some time if no door is
opened.▷
The vehicle locks automatically after
you drive away.▷
The vehicle locks automatically after a
short period of time if a door is not
opened or after you drive away.▷
The central locking system remains un‐
locked.9.Press and hold the button until the display
changes. The setting is stored.
Tailgate
Opening
The tailgate pivots back and up when it opens.
Ensure that adequate clearance is available be‐
fore opening.
Provide edge protection
Sharp or angular objects can hit the rear
window while driving and damage the heating
wires of the rear window. Provide edge protec‐
tion. ◀
In some market-specific versions, the tailgate
can only be unlocked using the remote control
if the vehicle was unlocked first.
Press and hold the button on the re‐
mote control or the button in the handle, ar‐
row. The tailgate is unlocked and can be
opened.
MINI Convertible
The open tailgate can be loaded with a maxi‐
mum weight of 175 lbs/80 kg.
Manual release In the event of an electrical malfunction, the
tailgate can be unlocked manually.
MINI Coupe, MINI Roadster:
Seite 27Opening and closingCONTROLS27
Online Edition for Part no. 01 40 2 961 029 - II/15
Page 49 of 231
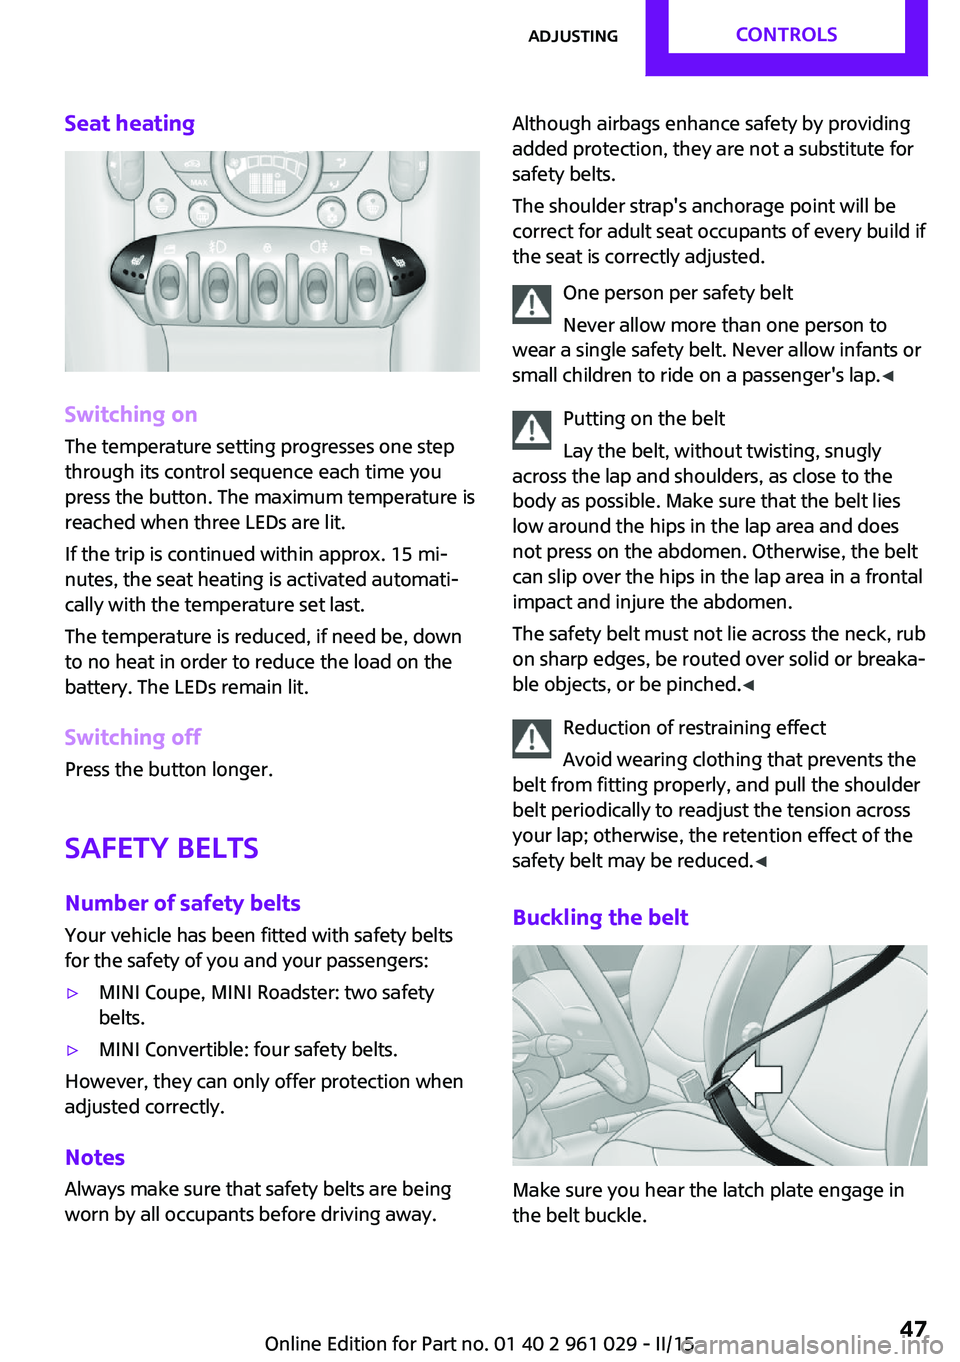
Seat heating
Switching on
The temperature setting progresses one step
through its control sequence each time you
press the button. The maximum temperature is
reached when three LEDs are lit.
If the trip is continued within approx. 15 mi‐
nutes, the seat heating is activated automati‐
cally with the temperature set last.
The temperature is reduced, if need be, down
to no heat in order to reduce the load on the
battery. The LEDs remain lit.
Switching off
Press the button longer.
Safety beltsNumber of safety belts
Your vehicle has been fitted with safety belts
for the safety of you and your passengers:
▷MINI Coupe, MINI Roadster: two safety
belts.▷MINI Convertible: four safety belts.
However, they can only offer protection when
adjusted correctly.
Notes
Always make sure that safety belts are being worn by all occupants before driving away.
Although airbags enhance safety by providing
added protection, they are not a substitute for
safety belts.
The shoulder strap's anchorage point will be
correct for adult seat occupants of every build if
the seat is correctly adjusted.
One person per safety belt
Never allow more than one person to
wear a single safety belt. Never allow infants or
small children to ride on a passenger's lap. ◀
Putting on the belt
Lay the belt, without twisting, snugly
across the lap and shoulders, as close to the
body as possible. Make sure that the belt lies
low around the hips in the lap area and does
not press on the abdomen. Otherwise, the belt
can slip over the hips in the lap area in a frontal
impact and injure the abdomen.
The safety belt must not lie across the neck, rub
on sharp edges, be routed over solid or breaka‐
ble objects, or be pinched. ◀
Reduction of restraining effect
Avoid wearing clothing that prevents the
belt from fitting properly, and pull the shoulder
belt periodically to readjust the tension across
your lap; otherwise, the retention effect of the
safety belt may be reduced. ◀
Buckling the belt
Make sure you hear the latch plate engage in
the belt buckle.
Seite 47AdjustingCONTROLS47
Online Edition for Part no. 01 40 2 961 029 - II/15
Page 51 of 231

Before transporting passengers
Reinstall the head restraint before trans‐
porting anyone in the seat; otherwise, the pro‐
tective function of the head restraint is unavail‐
able. ◀
Mirrors Exterior mirrors
General information
The mirror on the passenger side is more
curved than the driver's mirror.
Estimating distances correctly
Objects reflected in the mirror are closer
than they appear. Do not estimate the distance
to the traffic behind you based on what you see
in the mirror, as this will increase your risk of an
accident. ◀
At a glance1Setting the left or right exterior mirror2Folding the mirror in and outAdjusting electrically1.Select the mirror by turning the knob to the
respective position 1.2.To adjust the mirror, move the knob in the
desired direction: to the front, rear, left, or
right.
Adjusting manually
If an electrical malfunction occurs, for example,
press the edges of the mirror glass.
Folding the mirror in and out
Turn the knob past the resistance point in di‐
rection 2.
The mirror can be folded in up to a vehicle
speed of approx. 20 mph/30 km/h.
For example, this is advantageous
▷In car washes.▷In narrow streets.▷For folding back mirrors that were folded
away manually.
Fold in the mirror in a car wash
Before entering an automatic car wash,
fold in the exterior mirrors by hand or with the
button; otherwise, they could be damaged, de‐
pending on the width of the vehicle. ◀
Automatic heating Both exterior mirrors are heated automatically
while the engine is running or the ignition is
switched on when the external temperature is
below a certain value.
Seite 49AdjustingCONTROLS49
Online Edition for Part no. 01 40 2 961 029 - II/15
Page 59 of 231

Ignition onAll electrical consumers can operate. Most indi‐
cator and warning lights light up for different
lengths of time.
To save battery power when the engine is off,
switch off the ignition and any unnecessary electronic systems/power consumers.
Radio ready state and ignition off All indicator and warning lights in the displays
go out.
The ignition switches off automatically when
the driver's door is opened. Pressing the Start/
Stop button again switches the ignition back
on.
For example, the ignition is not switched off in
the following situations:▷Depress the clutch or brake pedal.▷The low beams are switched on.
Starting the engine
General information Enclosed areas
Do not let the engine run in enclosed
areas; otherwise, breathing of exhaust fumes
may lead to loss of consciousness and death.
The exhaust gases contain carbon monoxide,
an odorless and colorless but highly toxic gas. ◀
Unattended vehicle
Do not leave the car unattended with the
engine running; otherwise, it presents a poten‐
tial source of danger.
Before leaving the car with the engine running,
shift to neutral or engage transmission posi‐
tion P and set the parking brake firmly; other‐ wise, the vehicle may begin to roll. ◀
Frequent starting in quick succession
Avoid repeated futile attempts at starting
the car and avoid starting the car frequently in
quick succession. Otherwise, the fuel is not
burned or is inadequately burned, and there is
the danger of overheating and damaging the
catalytic converter. ◀
Do not wait for the engine to warm-up while
the vehicle remains stationary; start driving
right away, but at moderate engine speeds.
Do not depress the accelerator when starting
the engine.
Starting the engine
Manual transmission
Remote control in the ignition lock or with
Comfort Access inside the vehicle, refer to
page 29.
1.Depress the brake pedal.2.Depress the clutch pedal.3.Press the Start/Stop button.
The ignition is activated automatically for a cer‐
tain time and is stopped as soon as the engine
starts.
Steptronic transmission
Remote control in the ignition lock or, with
Comfort Access, inside the vehicle, refer to
page 29.
1.Depress the brake pedal.2.Move the selector lever to position P or N.Seite 57DrivingCONTROLS57
Online Edition for Part no. 01 40 2 961 029 - II/15
Page 101 of 231
ClimateVehicle equipment
This chapter describes all series equipment as
well as country-specific and special equipment
offered for this model series. Therefore, it also
describes equipment that may not be found in
your vehicle, for instance due to the selectedspecial equipment or the country version. This
also applies to safety-related functions and sys‐
tems.
When using the features and systems described
here, adhere to local regulations.
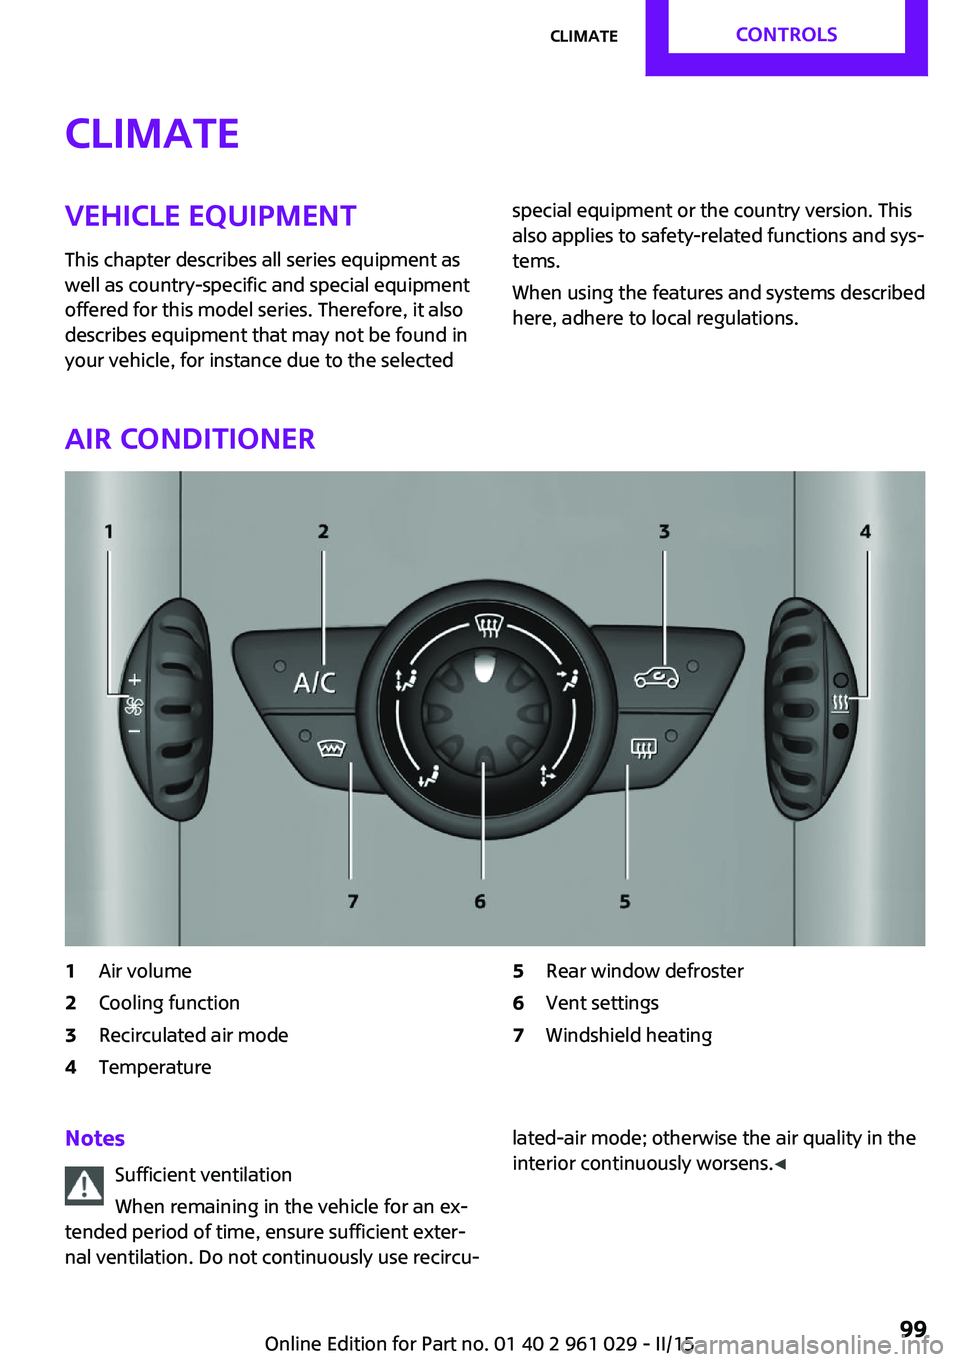
Air conditioner
1Air volume2Cooling function3Recirculated air mode4Temperature5Rear window defroster6Vent settings7Windshield heatingNotes
Sufficient ventilation
When remaining in the vehicle for an ex‐
tended period of time, ensure sufficient exter‐
nal ventilation. Do not continuously use recircu‐lated-air mode; otherwise the air quality in the
interior continuously worsens. ◀Seite 99ClimateCONTROLS99
Online Edition for Part no. 01 40 2 961 029 - II/15
Page 102 of 231
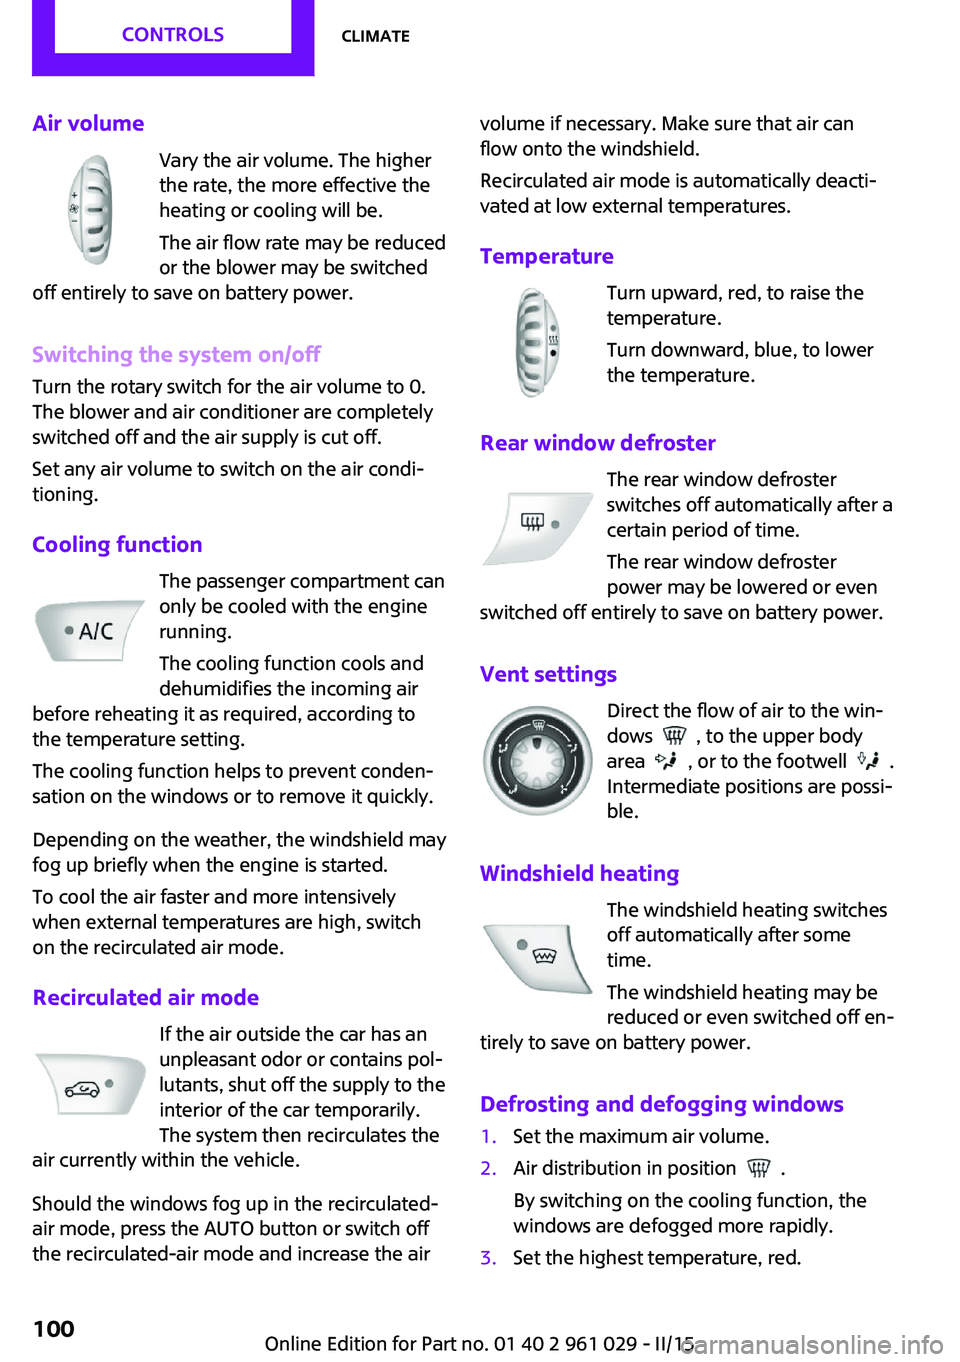
Air volumeVary the air volume. The higher
the rate, the more effective the
heating or cooling will be.
The air flow rate may be reduced
or the blower may be switched
off entirely to save on battery power.
Switching the system on/off
Turn the rotary switch for the air volume to 0.
The blower and air conditioner are completely
switched off and the air supply is cut off.
Set any air volume to switch on the air condi‐
tioning.
Cooling function The passenger compartment can
only be cooled with the engine
running.
The cooling function cools and
dehumidifies the incoming air
before reheating it as required, according to
the temperature setting.
The cooling function helps to prevent conden‐
sation on the windows or to remove it quickly.
Depending on the weather, the windshield may
fog up briefly when the engine is started.
To cool the air faster and more intensively
when external temperatures are high, switch
on the recirculated air mode.
Recirculated air mode If the air outside the car has an
unpleasant odor or contains pol‐
lutants, shut off the supply to the
interior of the car temporarily.
The system then recirculates the
air currently within the vehicle.
Should the windows fog up in the recirculated-
air mode, press the AUTO button or switch off
the recirculated-air mode and increase the airvolume if necessary. Make sure that air can
flow onto the windshield.
Recirculated air mode is automatically deacti‐
vated at low external temperatures.
Temperature Turn upward, red, to raise thetemperature.
Turn downward, blue, to lower
the temperature.
Rear window defroster The rear window defroster
switches off automatically after a
certain period of time.
The rear window defroster
power may be lowered or even
switched off entirely to save on battery power.
Vent settings Direct the flow of air to the win‐
dows
, to the upper body
area
, or to the footwell .
Intermediate positions are possi‐
ble.
Windshield heating The windshield heating switches
off automatically after some
time.
The windshield heating may be
reduced or even switched off en‐
tirely to save on battery power.
Defrosting and defogging windows
1.Set the maximum air volume.2.Air distribution in position .
By switching on the cooling function, the
windows are defogged more rapidly.3.Set the highest temperature, red.Seite 100CONTROLSClimate100
Online Edition for Part no. 01 40 2 961 029 - II/15
Page 103 of 231
4.Deactivate recirculated air mode.5.Switch on the windshield heating if neces‐
sary.6.Switch on the rear window defroster if nec‐
essary.
Microfilter
The microfilter traps dust and pollen. The mi‐
crofilter is changed by the service center during
routine maintenance work.
Microfilter/activated-charcoal filter
The microfilter traps dust and pollen. The acti‐
vated-charcoal filter provides additional protec‐
tion by filtering gaseous pollutants from the
outside air. The service center replaces this
combined filter during routine maintenance.
Automatic climate control
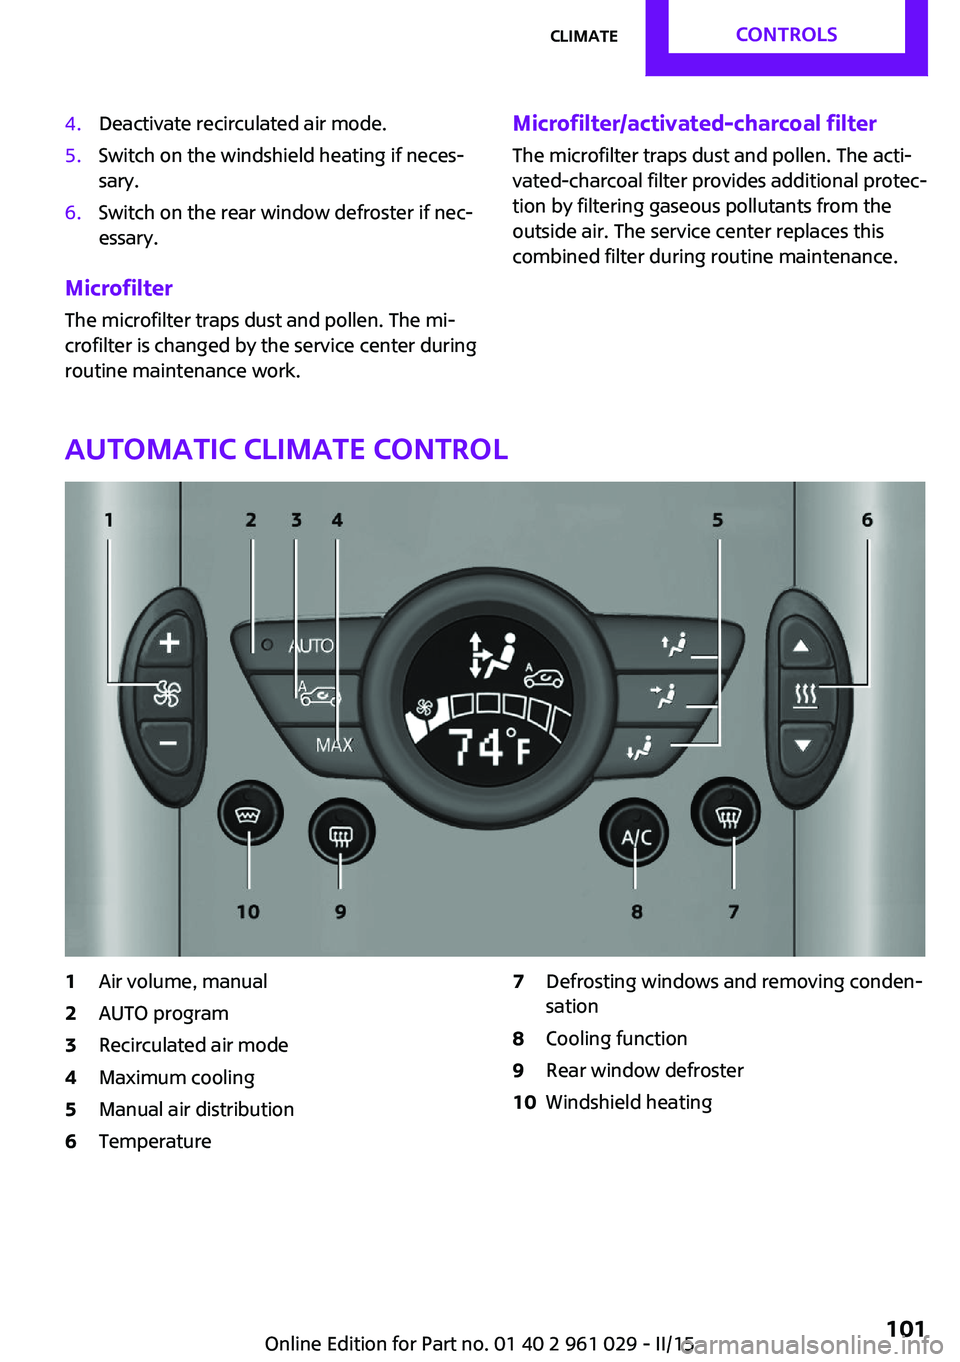
1Air volume, manual2AUTO program3Recirculated air mode4Maximum cooling5Manual air distribution6Temperature7Defrosting windows and removing conden‐
sation8Cooling function9Rear window defroster10Windshield heatingSeite 101ClimateCONTROLS101
Online Edition for Part no. 01 40 2 961 029 - II/15