Page 257 of 290

If the tire pressure is not set correctly, this
can leadtoane xcessive build up of heat and
as udden loss of pressure.
For more information, contact aqualified spe-
cialist workshop. Important notes on tire pressure
G
WARNING
If the tire pressure drops repeatedly,t he
wheel, valve or tire may be damaged. Tire
pressure that is too low may resultina tire
blow-out. There is arisk of an accident.
R Check the tire for foreign objects.
R Check whether the wheelisl osing air or the
valve is leaking.
If you are unabletor ectify the damage, con-
tact aqualifieds pecialist workshop. G
WARNING
If you fit unsuitable accessorie sonto tire
valves ,the tire valves may be overloaded and
malfunction, which can cause tire pressure
loss. Due to their design, retrofitted tire pres- sure monitors keep the tire valve open. This
can also resultint ire pressure loss. There is a
risk of an accident.
Only screw the standard valve cap or other
valve caps approved by Mercedes-Benz for
yourv ehicle onto the tire valve.
Use asuitable pressure gauge to check the
tire pressure. The outer appearance of atire
does not permit any reliable conclusion about the tire pressure. On vehicle sequippedw ith
the electronic tire pressure monitor, the tire
pressure can be checked in the on-board
computer.
The tire temperature and pressure increase
when the vehicle is in motion. This is depend-
ent on the driving speed and the load.
Therefore ,you shouldo nly correct tire pres-
sures when the tires are cold. The tires are cold:
R if the vehicle has been parked without
direct sunlight on the tires for at least three
hours and
R if the vehicle has not been driven further
than 1mile (1.6 km)
The tire temperature changes depending on
the outsid etemperature ,the vehicle speed
and the tire load. If the tire temperature
changes by 18 ‡(10 †), the tire pressure
changes by approximately 10 kPa (0.1 bar/
1.5 psi).T ake this into account when check-
ing the pressure of warm tires. Only correct
the tire pressure if it is too low for the current
operating conditions. If you check the tire
pressure when the tires are warm, the result- ing valuew illbeh igherthan if the tires were
cold. This is normal. Do not reduce the tire
pressure to the values pecified for cold tires.
The tire pressure would otherwis ebetoo low.
Observe the recommended tire pressures for
cold tires:
R on the Tire and Loading Information placard
on the B-pilla ronthe driver's side
R in the tire pressure table on the inside of the
fuel filler flap Underinflated or overinflated tires
Underinflated tires G
WARNING
Tires with pressure that is too low can over-
heat and burst as aconsequence. In addition,
they also suffer from excessive and/or irreg-
ularw ear, which can severel yimpair the brak-
ing propertie sand the driving characteristics.
There is arisk of an accident.
Avoid tire pressures that are too low in all the
tires, including the spare wheel.
Underinflated tires may:
R overheat, leading to tire defects
R adversely affect handling Tire pressure
255Wheelsand tires Z
Page 258 of 290

R
wear excessively and/or unevenly
R have an adverse effect on fuel consumption
Overinflated tires G
WARNING
Tires with excessively high pressure can burst
because they are damage dmoree asily by
road debris, potholes etc .Inaddition ,they
also suffer fro mirregular wear, whic hcan
severely impair th ebraking properties and the
driving characteristics. Ther eisarisk of an
accident.
Avoid tir epressures that are to ohigh in all the
tires, including th espare wheel.
Overinflated tires may: R increase th ebraking distance
R adversely affect handling
R wear excessively and/or unevenly
R have an adverse effect on ride comfort
R be mor esusceptible to damage
Maximum tir epressures 0043
Example: maximum permissible tir epres-
sure
Never exceed th emaximum permissible tire
inflatio npressure. Always observe th erec-
ommended tir epressure for your vehicle
when adjustin gthe tirep ressure
(Y page 253).
i The actual values for tires are vehicle-
specific and may deviat efromt hevalues in
th ei llustration. Checkin
gthe tirep ressures
Important safety notes Observe th
enotes on tir epressure
(Y page 253).
Information on air pressure for th etires on
your vehicle can be found:
R on th evehicle' sTire and Loadin gInforma-
tio np lacar dont heB-pillar (Y page 260)
R on th etirep ressure label on th efuel filler
flap (Y page 129)
R in th e"Tire pressure" sectio n(Ypage 253).
Checkin gtirep ressures manually To determine and set th
ecorrec ttirep res-
sure, proceed as follows:
X Remov ethe valve cap of th etiret hatisto
be checked.
X Pres sthe tirep ressure gauge securely onto
th ev alve.
X Read th etirep ressure and compare it with
th er ecommended value on th eTire and
Loadin gInformation placar dontheB-pillar
on th edriver' sside of your vehicle.
X If necessary, increase th etirep ressure to
th er ecommended value (Y page 253).
X If th etirep ressure is to ohigh, releas eair by
pressin gdown th emetal pin in th evalve
usin gthe tip of apen,for example. Then
check th etirep ressure again usin gthe tire
pressure checker.
X Screw th evalve cap ont othe valve.
X Repeat these steps for th eother tires. Tir
ep ressur emonitor
General notes If
at irep ressure monito risinstalled, th evehi-
cle' swheels have sensor sthatm onito rthe
tir ep ressures in all four tires. The tir epres-
sure monito rwarn syou if th epressure drops
in one or mor eofthetires. The tir epressure 256
Tir
ep ressureWheels and tires
Page 259 of 290

monitor only functions if the correct sensors
are installed on all wheels.
Information on tire pressures is displayed in
the multifunction display.A fterafew minutes
of driving, the current tire pressure of each
tire is show nintheService Service menu of the mul-
tifunction display. Example
For informatio nonthe message display,r efer
to the "Checking the tire pressure electroni-
cally" section (Y page258).
Important safety notes G
WARNING
Each tire, including the spare (if provided),
should be checked at least once every two
weeks when cold and inflated to the pressure recommended by the vehicl emanufacturer
on the Tire and Loading Information placard
on the driver' sdoor B-pillar or the tire pres-
sure label on the inside of the fuel filler flap .If
yourv ehiclehas tires of adifferent size than
the size indicated on the Tire and Loading
Information placard or, if available, the tire
pressure label, you should determine the
prope rtire pressure for those tires.
As an added safety feature ,you rv ehicl ehas
been equippe dwithatire pressure monitoring
system (TPMS) that illuminates alow tire pres-
sure telltal ewhen one or more of yourt ires
are significantly underinflated. Accordingly,
when the low tire pressure telltal elights up,
you should stop and check yourt ires as soon
as possible, and inflate them to the proper
pressure. Driving on asignificantly underin-
flated tire cause sthe tire to overhea tand can
leadtot ire failure. Underinflation alsor
educes fuel efficiency
and tire tread life ,and may affect the vehicle's
handling and stopping ability .Please note that
the TPMS is not asubstitute for prope rtire
maintenance, and it is the driver' sresponsi-
bility to maintai ncorrect tire pressure, even if
underinflation has not reache dthe level to
trigger illumination of the TPMS low tire pres-
sure telltale.
Yourv ehiclehas alsob een equippe dwith a
TPMS malfunction indicator to indicate when
the system is not operating properly. The
TPMS malfunction indicator is combined with
the low tire pressure telltale. When the sys-
tem detects amalfunction, the warning lamp
willf lashf or approximatel yaminute and then
remai ncontinuously illuminated. This
sequence willber epeated every time the vehi-
cle is started as long as the malfunction
exists. When the malfunction indicator is illu-
minated, the system may not be abletod etect
or signa llow tire pressure as intended.
TPMS malfunctions may occur for avariety of
reasons, including the installation of incom-
patible replacement or alternate tires or
wheels on the vehicl ethat prevent the TPMS
from functioning properly. Always check the
TPMS malfunction telltal eafter replacing one
or more tires or wheels on yourv ehicleto
ensure that the replacement or alternate Tires
and wheels allow the TPMS to continue to
function properly.
It is the driver' sresponsibility to set the tire
pressure to that recommended for cold tires
which is suitable for the operating situation
(Y page2 53).Note that the correct tire pres-
sure for the current operating situation must
first be taught-in to the tire pressure monitor.
If there is asubstantial loss of pressure, the
warning threshol dfor the warning message is
aligned to the reference values taught-in.
Restart the tire pressure monitor after adjust-
ing the pressure of the cold tires
(Y page2 59).The current pressures are
saved as new reference values. As aresult, a Tire pressure
257Wheelsand tires Z
Page 260 of 290

warning message will appear if th
etirep res-
sure drop ssignificantly.
The tir epressure monito rdoes not warn you
of an incorrectly set tir epressure. Observe
th en otes on th erecommended tir epressure
(Y page 253).
The tir epressure monito risnot able to warn
you of asudden loss of pressure, e.g .ifthe
tir eisp enetrated by aforeign object .Inthe
even tofas udden loss of pressure, brin gthe
vehicle to ahalt by braking carefully. Avoid
abrupt steerin gmaneuvers.
The tir epressure monito rhas ay ellow warn-
ing lamp in th einstrumen tcluster for indicat-
ing apressure loss or malfunction .Whether
th ew arning lamp flashes or light supindi-
cates whether atirep ressure is to olow or the
tir ep ressure monito rismalfunctioning:
R if th ewarning lamp is lit continuously, the
tir ep ressure on one or mor etires is signif-
icantly to olow. The tir epressure monito ris
not malfunctioning.
R if th ewarning lamp flashes for aroun da
minute and then remains lit constantly, the tir ep ressure monito rismalfunctioning.
i In addition to th
ewarning lamp, ames-
sage appears in th emultifunction display.
Further informatio ncan be foun don
( Ypage 182).
If th etirep ressure monito rismalfunctioning,
it may tak emoret hant en minutes for th etire
pressure warning lamp to inform you of the
malfunction by flashing for approximately one
minute and then remainin glit. When th emal-
function has been rectified, th etirep ressure
warning lamp goes out after afew minutes of
driving.
The tir epressure values indicated by th eon-
board compute rmay differ fro mthose meas-
ured at agas statio nwithapressure gauge.
The tir epressures shown by th eon-board
compute rrefer to those measured at sea
level. At high altitudes, th etirep ressure val-
ues indicated by apressure gauge are higher than those shown by th
eon-board computer.
In this case ,donot reduc ethe tirep ressures.
The operatio nofthetirep ressure monito rcan
be affected by interference fro mradio trans-
mittin gequipment (e.g .radio headphones,
two-way radios )tha tm ay be bein goperated
in or near th evehicle.
Checkin gthe tirep ressur eelectroni-
cally X
Make sure that th eSmartKey is in position
2 in th eignitio nlock (Y page 119).
X Pres sthe 0059 or0065 button on th esteer-
ing wheel to selec tthe Serv. Serv. menu.
X Pres sthe 0063 or0064 button to select
Tir eP ressure
Tir eP ressure.
X Pres sthe 0076 button.
The curren ttirep ressure of each tir eis
shown in th emultifunction display.
If th evehicle has been parked for over
20 minutes ,the Tir ep ressure wil lbe
Tir ep ressure wil lbe
displayed after drivin gafew
displayed after drivin gafew
minutes
minutes message appears.
After ateach-in process, th etirep ressure
monito rautomatically detect snew wheels or
new sensors. As lon gasaclear allocation of
th et irep ressure value to th eindividual
wheels is not possible, the TireP ressure
Tir eP ressure
Monito rActive
Monito rActive display message is shown
instead of th etirep ressure display. The tire
pressures are already bein gmonitored.
i If an emergency spare wheel is mounted,
th es ystem may continue to show th etire
pressure of th ewheel that has been
removed for afew minutes .Ifthiso ccurs,
not ethatthe value displayed for th eposi-
tio nw here th espare wheel is mounted is
not th esame as th ecurren ttirep ressure of
th ee mergency spare wheel. 258
Tir
ep ressureWheels and tires
Page 261 of 290

Tire pressure monito
rwarning mes-
sages If the tire pressure monitor detects
apressure
loss in one or mor etires, awarnin gm essage
is shown in the multifunctio ndisplay and the
yellow tire pressure monitor warnin glamp
come son.
R If the Correc tTireP ressure
Correc tTireP ressure message
appear sinthe multifunctio ndisplay ,the
tire pressure in at leas tone tire is too low
and must be correcte datthe next oppor-
tunity.
R If the Check Tir ePressure
Check Tir ePressure message
appear sinthe multifunctio ndisplay ,the
tire pressure in one or mor etire sh asdrop-
pe ds ignificantl yand the tire smustbe
checked.
R If the TirePressure Warnin gTire
Tir ePressure Warnin gTire
Malfunction
Malfunction message appear sinthe mul-
tifunctio ndisplay ,the tire pressure in one
or mor etire sh asdropped suddenl yand the
tire sm ustbec hecked.
Observe the instructions and safety note sin
the displa ymessage sinthe "Tires" section
(Y page 182).
i If the whee
lposit ions on the vehicl eare
rotated ,the tire pressures ma ybedis-
played for the wrong positions for ashort
time .Thisisr ectifie dafter afew minute sof
driving ,and the tire pressures ar edisplayed
for the correct positions.
Restartin gthe tire pressure monitor When yo
urestar tthe tire pressure monitor, all
existing warnin gmessage saredeleted and
the warnin glam ps go out. The monitor uses
the currentl yset tire pressures as the refer-
ence values for monitoring. In mos tcases, the
tire pressure monitor will automatically
detect the new reference values after you
have change dthe tire pressure. However, you
can also define reference values manuall yas
describe dhere. The tire pressure monitor
then monitors the new tire pressure values. X
Set the tire pressure to the valu erecom-
mended for the corresponding driving sit-
uatio nont he Tire and Loading Information
placard on the driver's side
B-pillar (Y page 253).
Additiona ltire pressure values for different
load scan also be found on the tire pressure
table on the insid eofthe fuel fille rflap
(Y page 253).
X Make sure tha tthe tire pressure is correct
on al lfou rw heels.
X Make sure tha tthe SmartKe yisinposition
2 in the ignition lock.
X Press the 0059or0065 button on the steer-
ing whee ltoselect theServ.
Serv. menu.
X Press the 0063or0064 button to select
Tir ePressure
Tir ePressure.
X Press the 0076button.
The multifunctio ndisplay shows the cur-
rent tire pressure for the individual tire sor
the Tire Tire pressure
pressure will
willbe
bedisplayed
displayed
after drivin gafew minutes
after drivin gafew minutes mes-
sage.
X Press the 0064button.
The Use Curren tPressures as New
Use Curren tPressures as New
Reference Values
Reference Values message appearsin
the multifunctio ndisplay.
If yo uwishtoc onfirm the restart:
X Press the 0076button.
The TirePress. Monito rRestarted
Tir ePress. Monito rRestarted
message appear sinthe multifunctio ndis-
play.
After driving for afew minutes, the system
checks whether the current tire pressures
ar ew ithi nt he specifie drange.The new tire
pressures ar ethena ccepted as reference
values and monitored.
If yo uwishtoc ancel the restart:
X Press the 0038button.
The tire pressure values stored at the last
restar twillc ontinue to be monitored. Tire pressure
259Wheelsand tires Z
Page 262 of 290

Loading th
evehicle Instruction labels for tires and loads
G
WARNING
Overloade dtires can overheat ,causing a
blowout .Overloade dtires can also impair the
steerin gand driving characteristic sand lead
to brak efailure. Ther eisarisk of accident.
Observe th eload rating of th etires. The load
rating must be at least half of th eGAWR of
your vehicle .Never overload th etires by
exceedin gthe maximum load.
Two instruction labels on your vehicle show
th em aximum possible load.
(1) The Tire and Loadin gInformation placard
is on th eB-pillar on th edriver' sside. The
Tire and Loadin gInformation placard
shows th emaximum permissibl enumber
of occupant sand th emaximum permis-
sible vehicle load. It also contain sdetails
of th etires izes and corresponding pres-
sures for tires mounte datthefactory.
(2) The vehicle identification plat eisonthe
B-pillar on th edriver' sside. The vehicle
identification plat einform syou of the
gross vehicle weight rating .Itismade up
of th evehicle weight ,all vehicle occu-
pants, th efuel and th ecargo. You can
also fin dinformatio nabout th emaximum
gross axle weight rating on th efront and
rear axle.
The maximum gross axle weight rating is th em aximum weight that can be carried
by on eaxle (fron torrear axle) .Never
exceed th emaximum load or th emaxi-
mum gross axle weight rating for the
fron torr ear axle. 0043
B-pillar ,driver' sside Maximum permissible gros
svehicle
weight rating X
Specification for maximum gross vehicle
weight 0043is listed in th eTire and Loading
Information placard: "The combine dweight
of occupant sand cargo should never
exceed XXX kilogram sorXXX lbs."
The gross weight of all vehicle occupants,
cargo, luggage and trailer load/noseweight (if
applicable) must no texceed th especified
value.
i The specifications shown on th
eTire and
Loadin gInformation placar dintheillustra-
tio na re examples. The maximum permis-
sible gross vehicle weight rating is vehicle-
specific and may differ from that in the
illustration .You can fin dthe valid maximum
permissibl egross vehicle weight rating for
your vehicle on th eTire and Loadin gInfor-
mation placard. 260
Loading th
evehicleWheels and tires
Page 263 of 290

Numbe
rofseats Maximum numbe
rofseats 0043 indicates the
maximum numbe rofoccupants allowe dto
travel in the vehicle. This information can be
found on the Tire and Loading Information
placard.
i Th
es pecifications shown on the Tire and
Loading Informatio nplacard in the illustra-
tio na reexamples .The numbe rofseats is
vehicle-specific and can diffe rfromt he
details shown. Th enumbe rofseats in your
vehicl ecan be found on the Tire and Load-
ing Informatio nplacard. Determining the correc
tloa dl im it
Step-by-ste pinstructions Th
ef ollowing steps have been developed as
required of al lmanufacturer sunder Title 49,
Code of U.S. Federa lRegulat ions, Part 575
pursuant to the "Nationa lTraffi cand Motor
Vehicle Safety Act of 1966".
X Ste p1: Locate the statement "The com-
bined weight of occupants and cargo
shoul dneve rexceed XXX kg or XXX lbs." on
your vehicle' sTirea nd Loading Information
placard.
X Ste p2: Determine the combined weight of
the driver and passengers tha twillber iding
in your vehicle.
X Ste p3:Subtract the combined weight of
the driver and passengers fro mXXX kilo-
grams or XXX lbs. X
Ste p4:Th eresulting figure equals the
availabl eamount of cargo and luggag eload
capacity. For example, if the "XXX" amount
equals 1400 lb sand there will be five 150
lb sp assengers in your vehicle, the amount
of availabl ecargo and luggag eloa dc apa-
city is 650 lb s(1400-750 (5 x150) =650
lbs).
X Ste p5:Determine the combined weight of
luggag eand cargo being loaded on the
vehicle. That weight ma ynot safel yexceed
the availabl ecargo and luggag eloa dc apa-
city calculated in ste p4. Loading the vehicle
261Wheelsand tires Z
Page 264 of 290

Example: steps
1to3The followin
gtable show sexamples on how to calculate total and cargo load capacities with
varying seating configurations and number and siz eofoccupants. The followin gexamples use
al oad limit of 1500lbs (68 0kg). This is for illustration purposes only. Makesure you are
usin gthe actual load limit for your vehicle state donyour vehicle's Tire and Loading Information
placar d(Ypage 261).
The greate rthe combined weight of th eoccupants, th elower th emaximum luggage load.
Step 1 Example 1 Example 2
Combined maximum weight of
occupant
sand cargo (data from
th eT irea nd Loading Information
placard) 1500 lbs (68
0kg) 1500 lbs (68
0kg) Step 2
Example 1 Example 2
Number of people in th
evehicle
(driver and occupants) 1 2
Weigh
toftheoccupants Occupan
t1:175lbs
(80 kg) Occupan
t1:175lbs
(80 kg)
Occupan t2:195lbs
(88 kg) Gross weight of all occupants
17
5lbs (80 kg) 37
0lbs (16 8kg) Step 3
Example 1 Example 2
Permissible load (maximum
gross vehicle weight ratin
gfrom
th eT irea nd Loading Information
placar dminus th egross weight
of all occupants) 1500 lbs (68
0kg)
00F817 5lbs (80 kg) =
1325 lbs (60 0kg) 1500 lbs (68
0kg)
00F837 0lbs (16 8kg) =
1130 lbs (51 2kg) Vehicle identification plate
Even if you have calculate dthe total cargo
carefully, you shoul dstill mak esure that the
gross vehicle weight rating and th egross axle
weight rating are no texceeded .Detail sc an
be foun donthevehicle identification plat eonth
eB -pillar on th edriver' sside of th evehicle
(Y page 260).
Gross vehicle weight: theg ross weight of
th ev ehicle ,all passengers ,cargo and trailer
load/noseweight (if applicable) must not
exceed th epermissible gross vehicle weight. 262
Loading th
evehicleWheels and tires
 1
1 2
2 3
3 4
4 5
5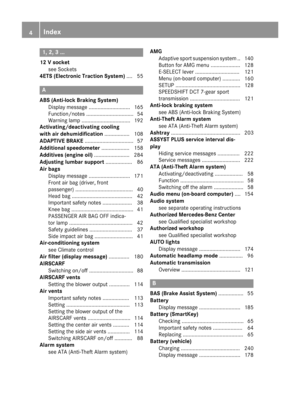 6
6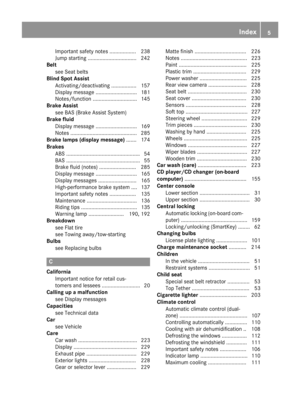 7
7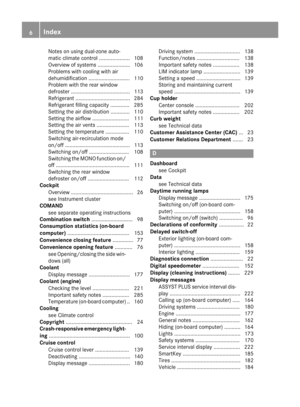 8
8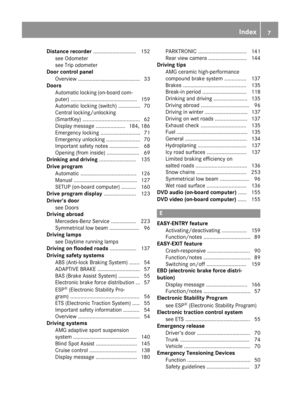 9
9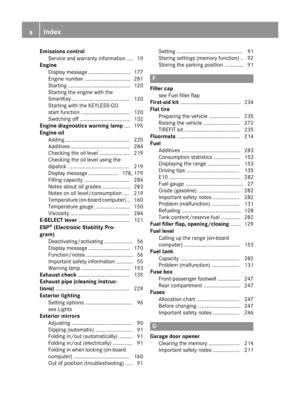 10
10 11
11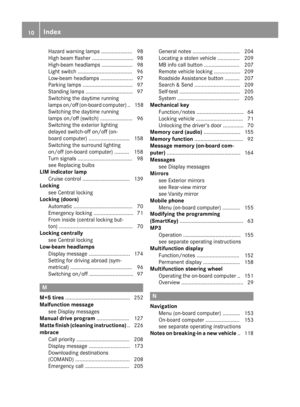 12
12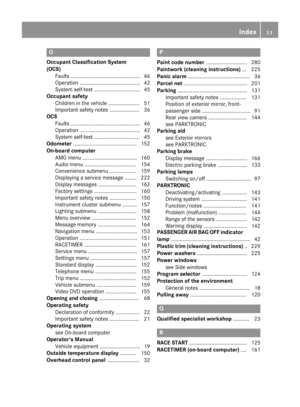 13
13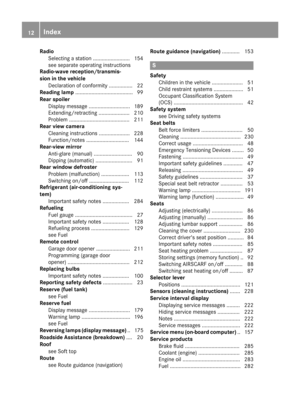 14
14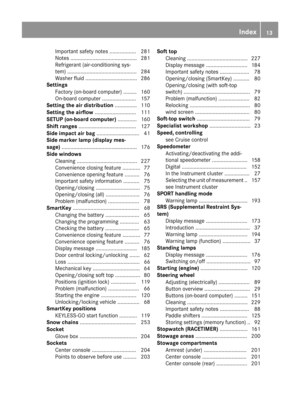 15
15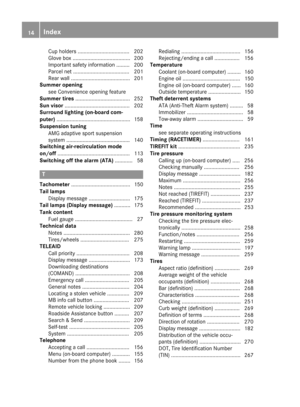 16
16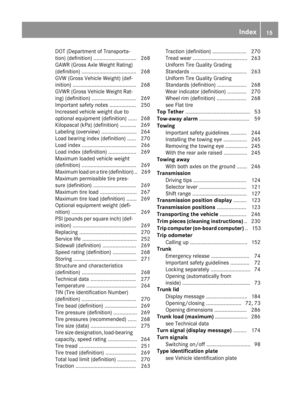 17
17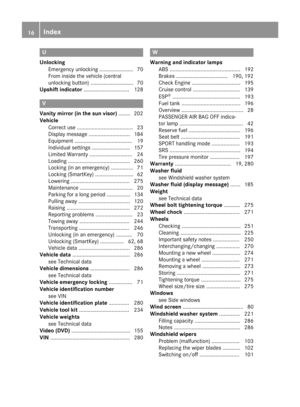 18
18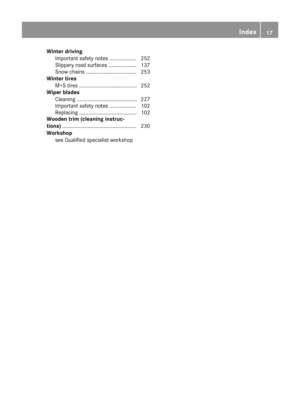 19
19 20
20 21
21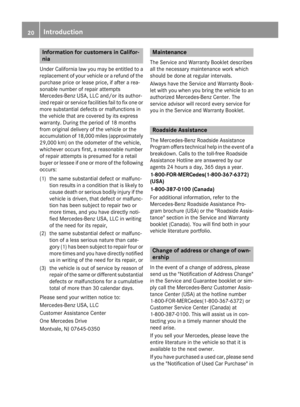 22
22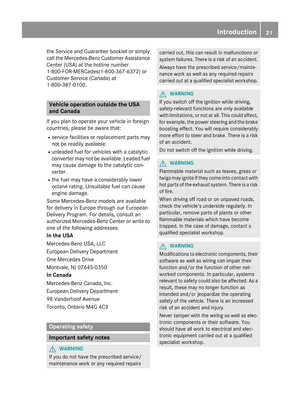 23
23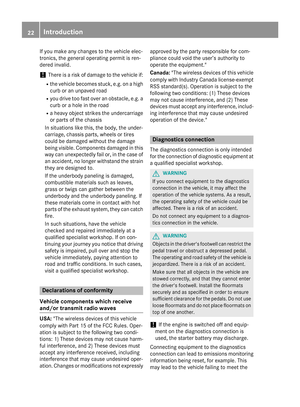 24
24 25
25 26
26 27
27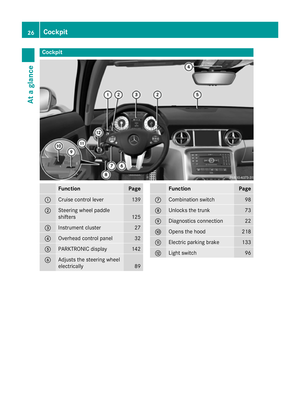 28
28 29
29 30
30 31
31 32
32 33
33 34
34 35
35 36
36 37
37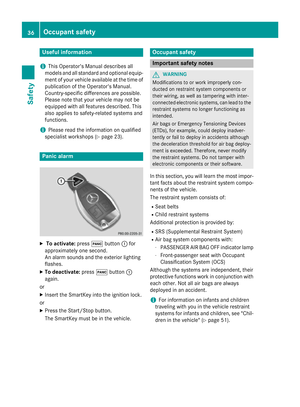 38
38 39
39 40
40 41
41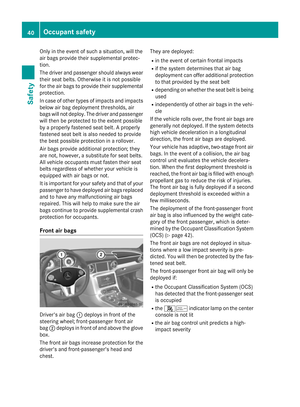 42
42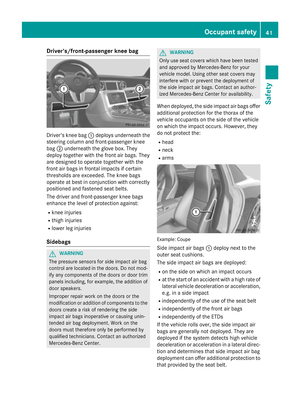 43
43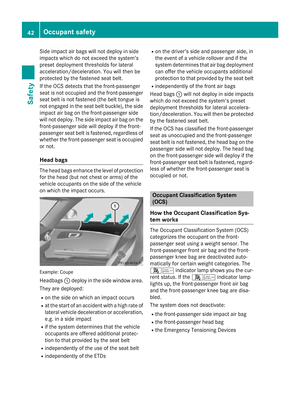 44
44 45
45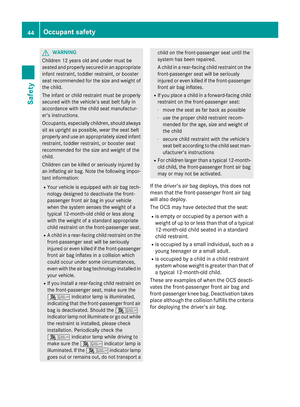 46
46 47
47 48
48 49
49 50
50 51
51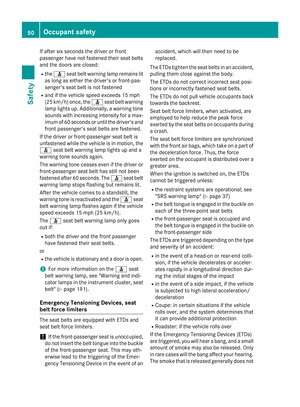 52
52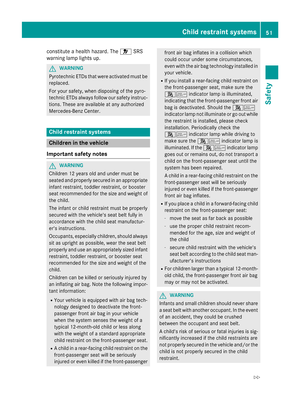 53
53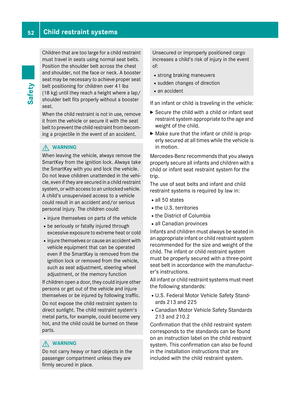 54
54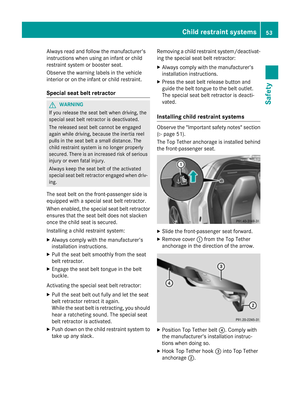 55
55 56
56 57
57 58
58 59
59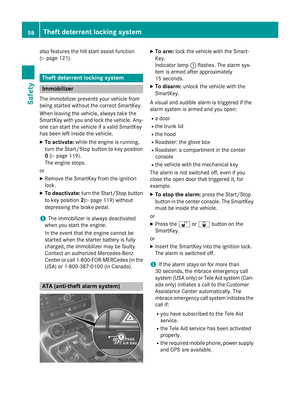 60
60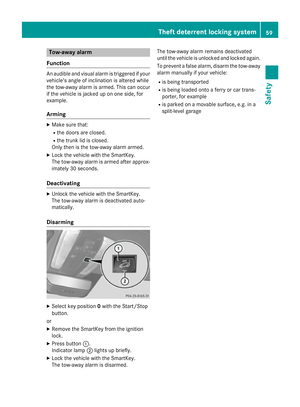 61
61 62
62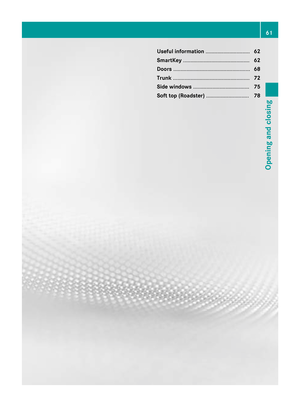 63
63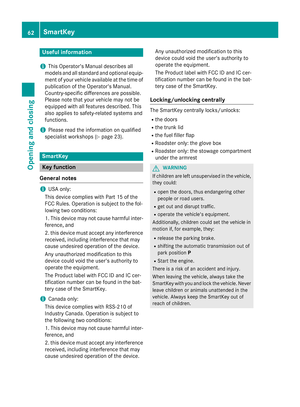 64
64 65
65 66
66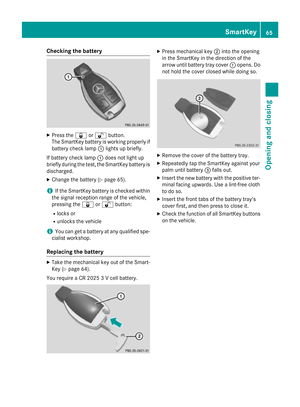 67
67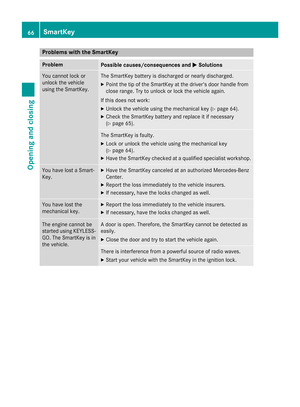 68
68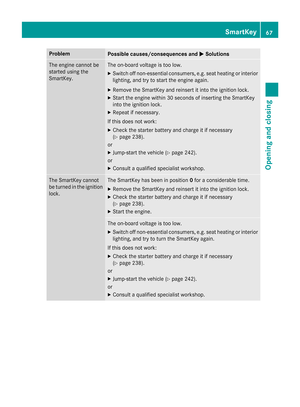 69
69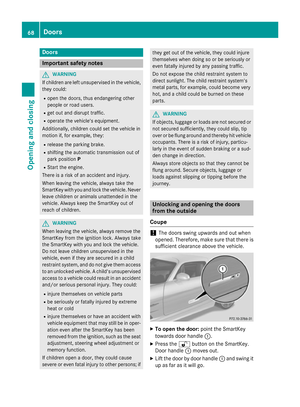 70
70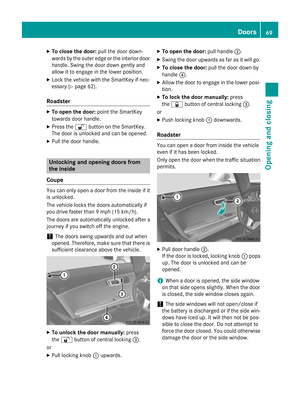 71
71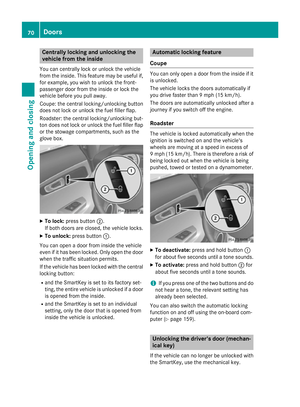 72
72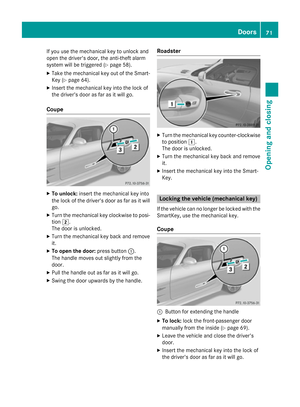 73
73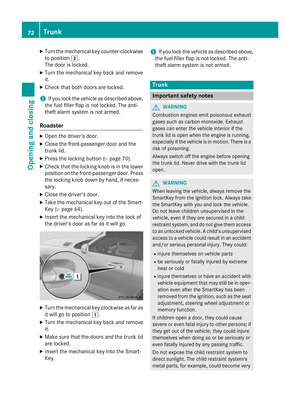 74
74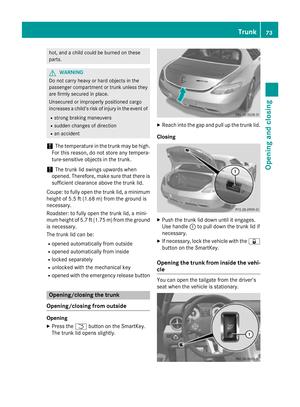 75
75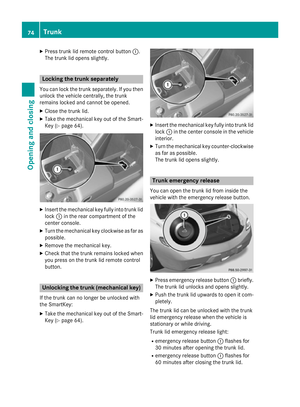 76
76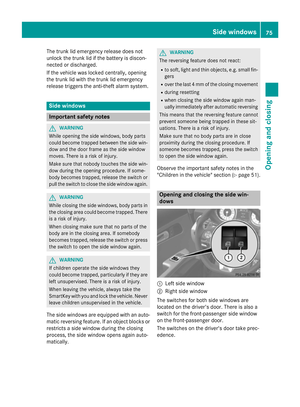 77
77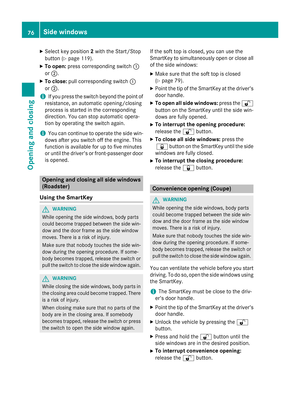 78
78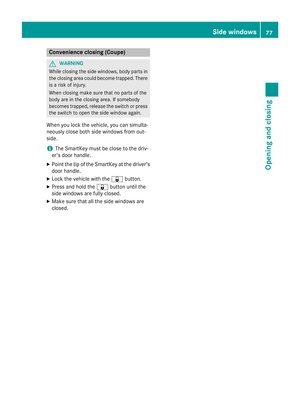 79
79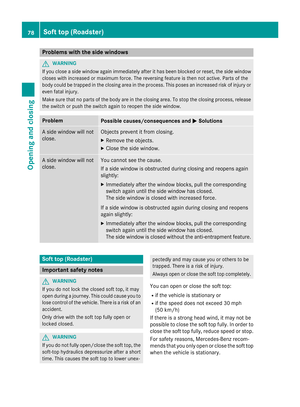 80
80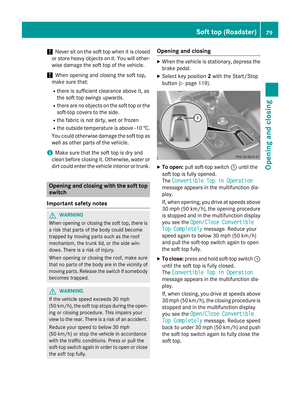 81
81 82
82 83
83 84
84 85
85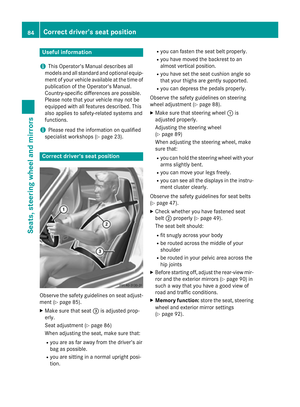 86
86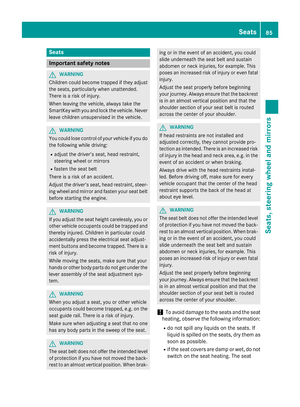 87
87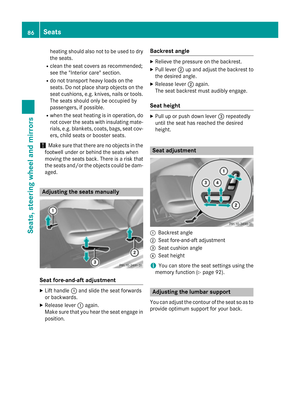 88
88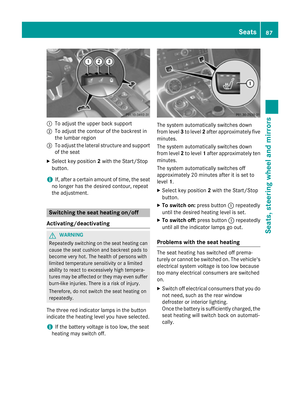 89
89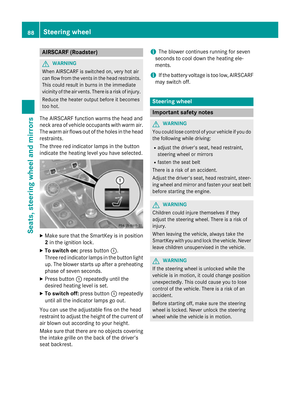 90
90 91
91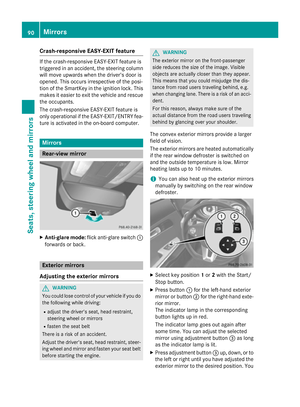 92
92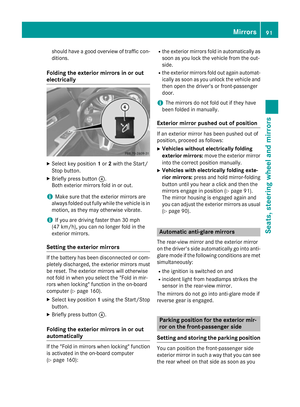 93
93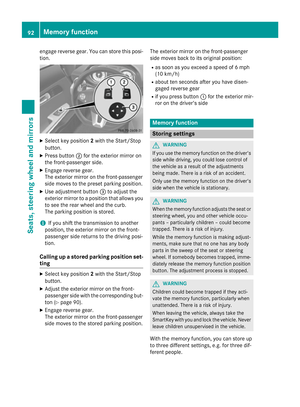 94
94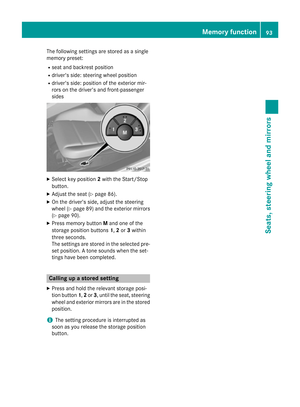 95
95 96
96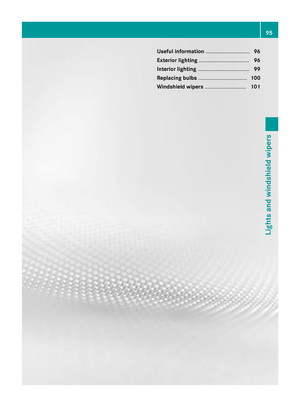 97
97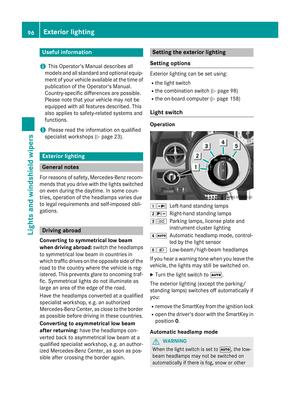 98
98 99
99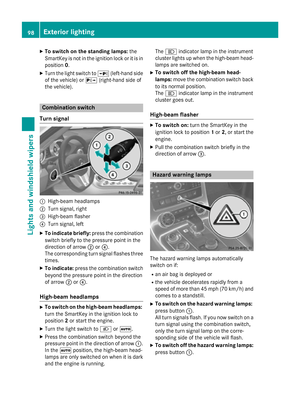 100
100 101
101 102
102 103
103 104
104 105
105 106
106 107
107 108
108 109
109 110
110 111
111 112
112 113
113 114
114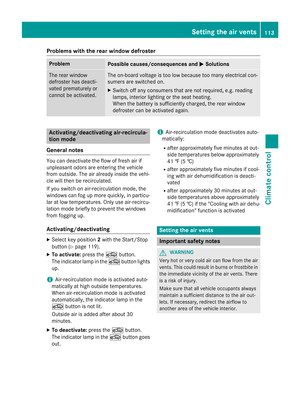 115
115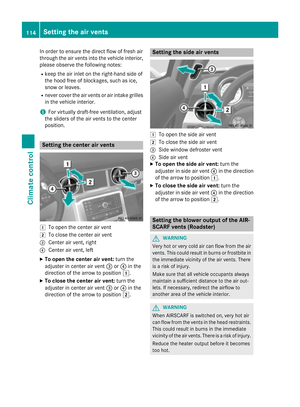 116
116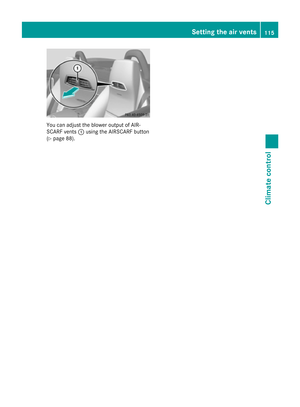 117
117 118
118 119
119 120
120 121
121 122
122 123
123 124
124 125
125 126
126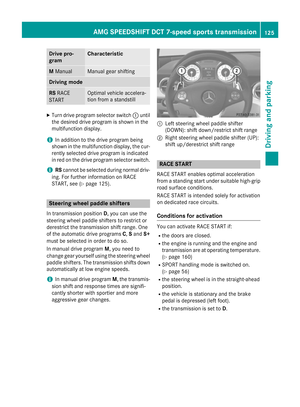 127
127 128
128 129
129 130
130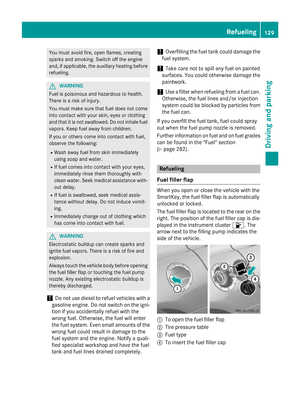 131
131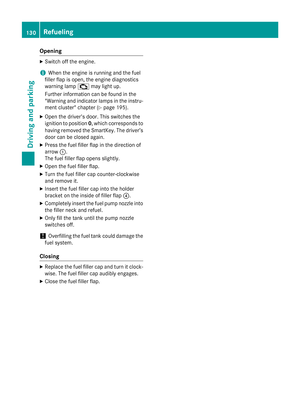 132
132 133
133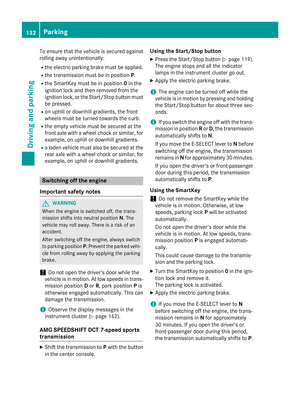 134
134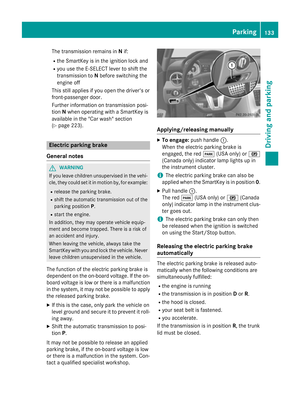 135
135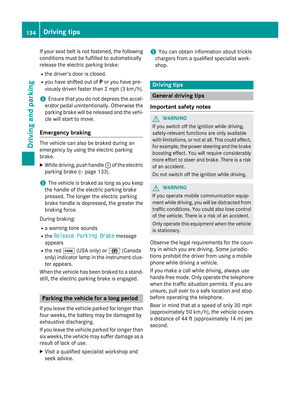 136
136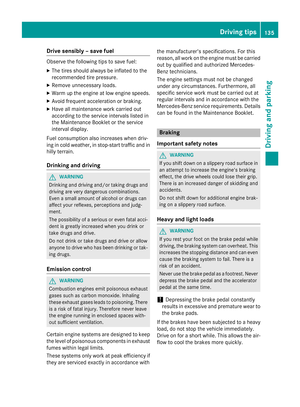 137
137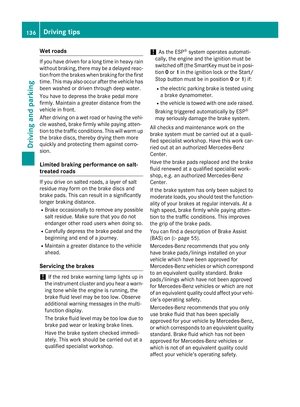 138
138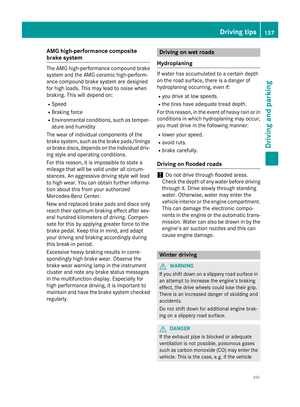 139
139 140
140 141
141 142
142 143
143 144
144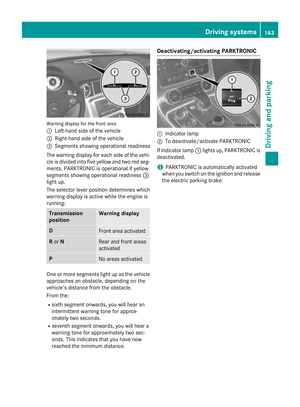 145
145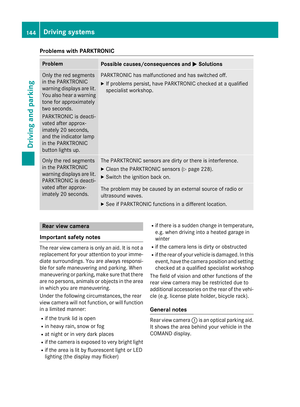 146
146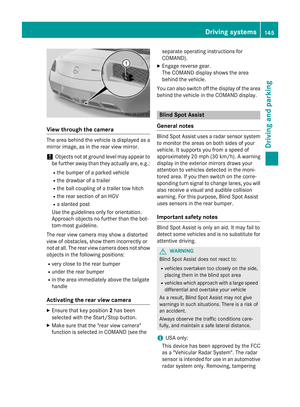 147
147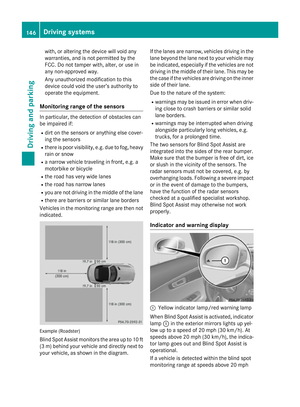 148
148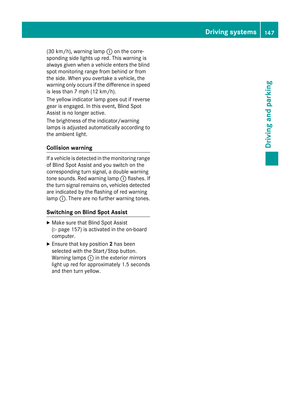 149
149 150
150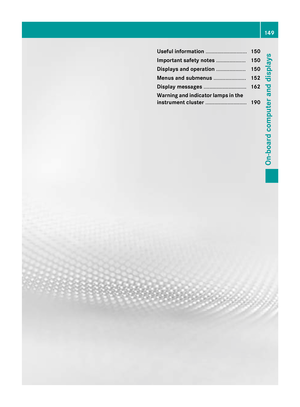 151
151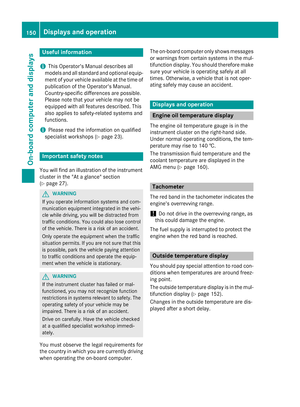 152
152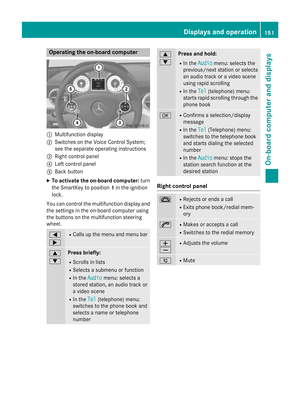 153
153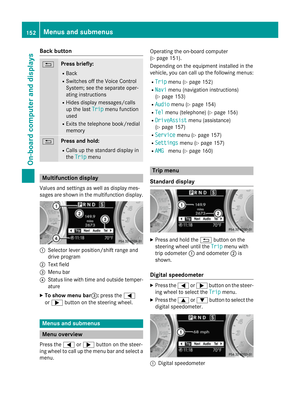 154
154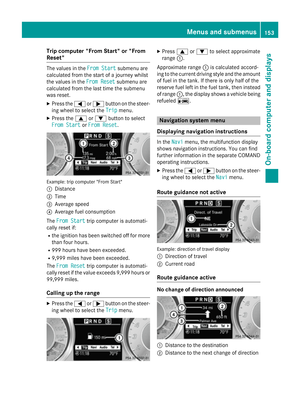 155
155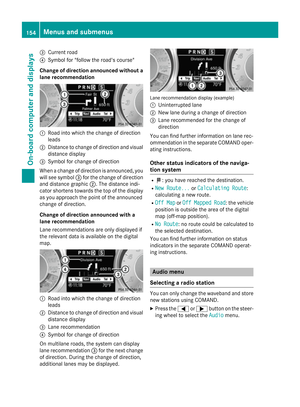 156
156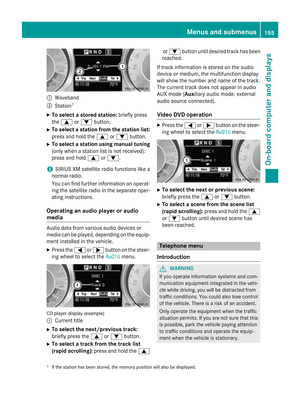 157
157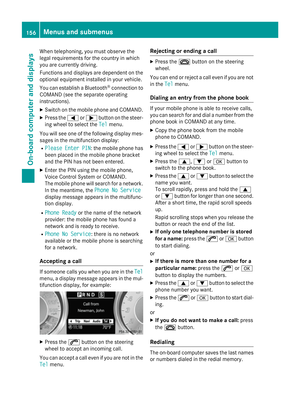 158
158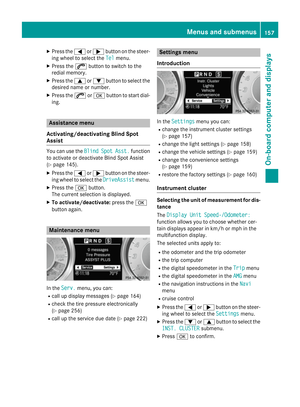 159
159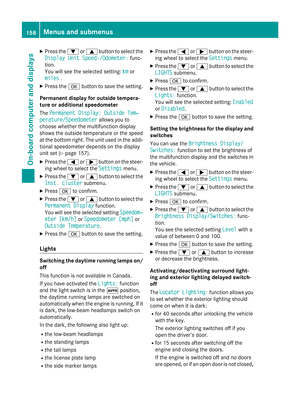 160
160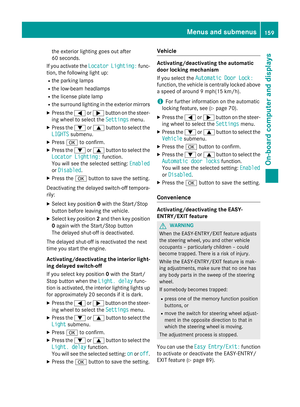 161
161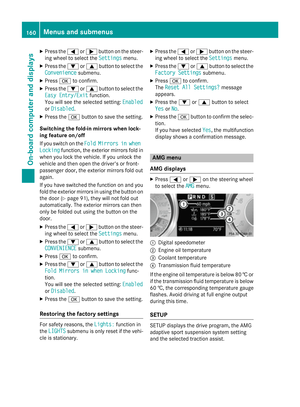 162
162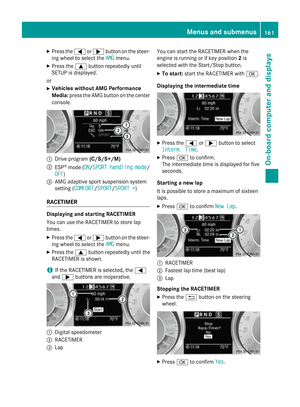 163
163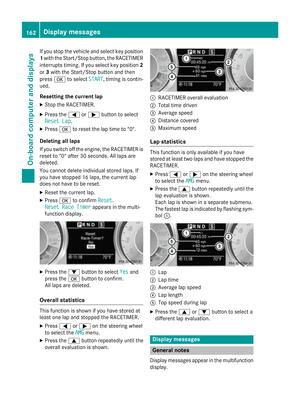 164
164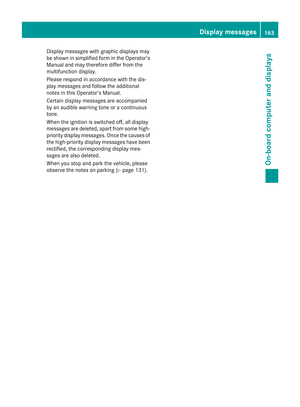 165
165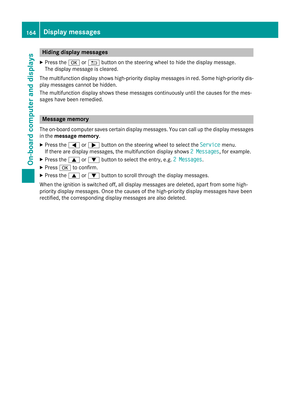 166
166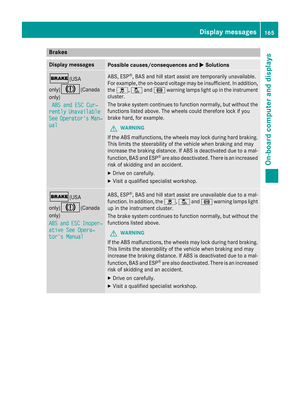 167
167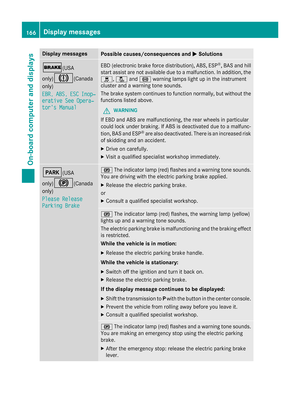 168
168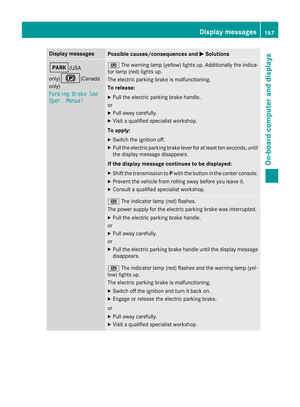 169
169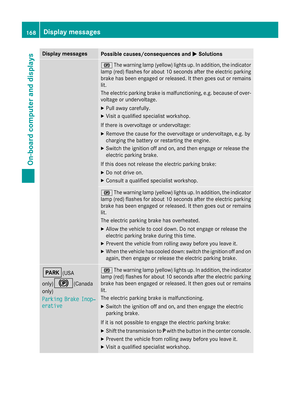 170
170 171
171 172
172 173
173 174
174 175
175 176
176 177
177 178
178 179
179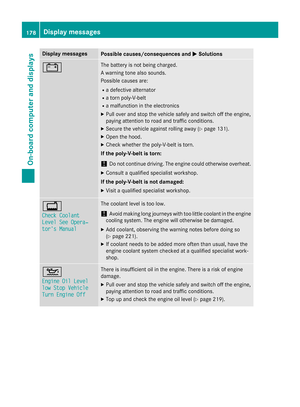 180
180 181
181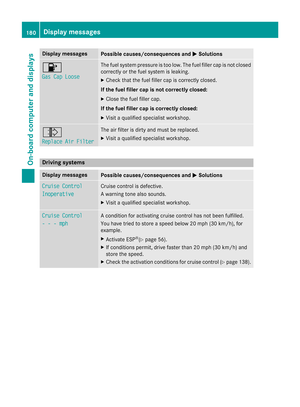 182
182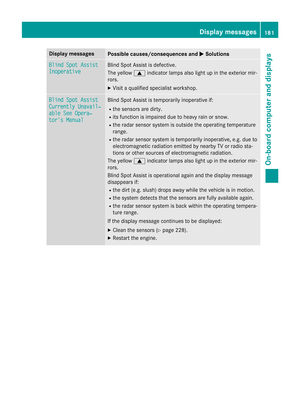 183
183 184
184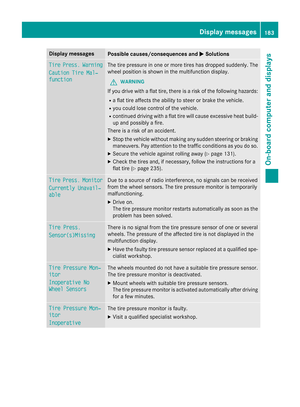 185
185 186
186 187
187 188
188 189
189 190
190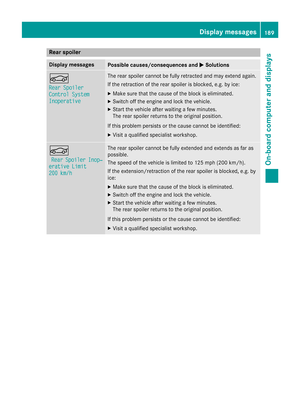 191
191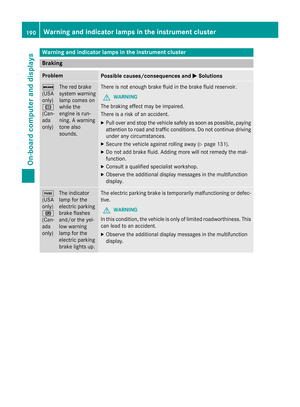 192
192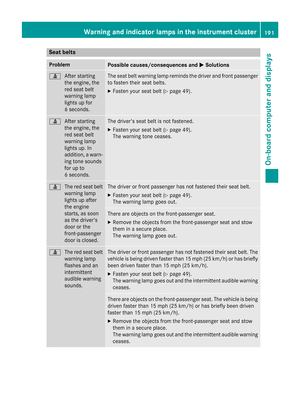 193
193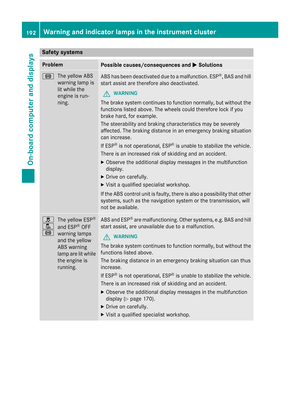 194
194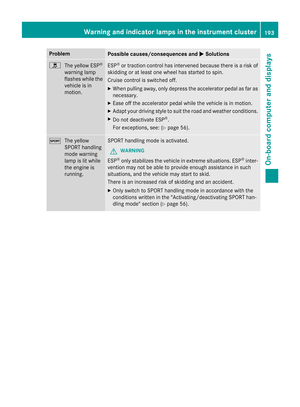 195
195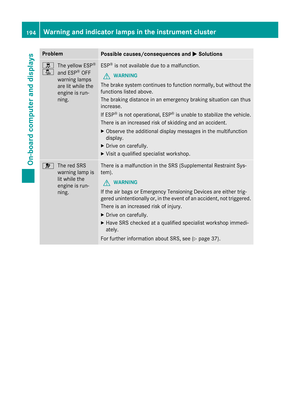 196
196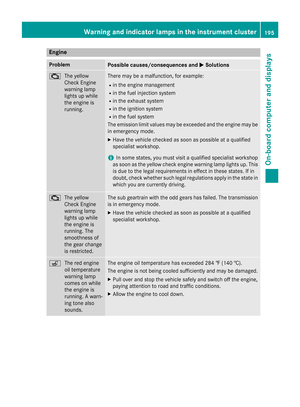 197
197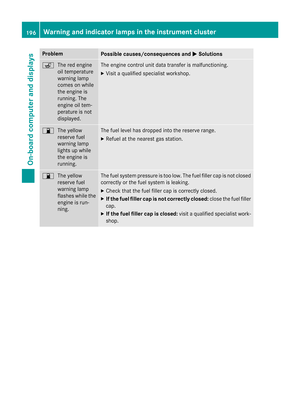 198
198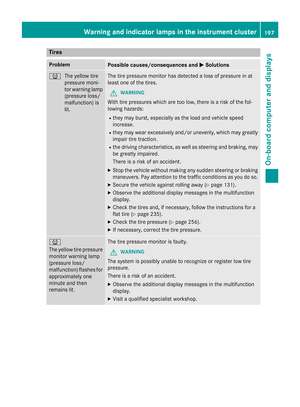 199
199 200
200 201
201 202
202 203
203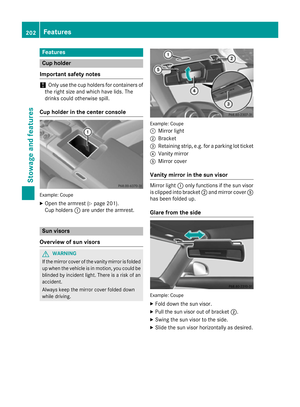 204
204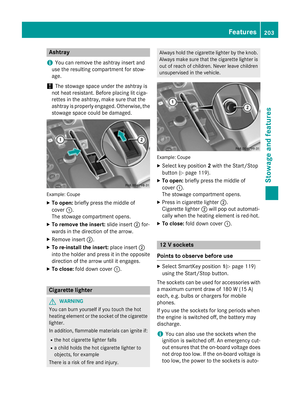 205
205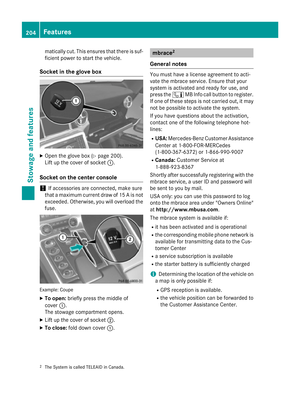 206
206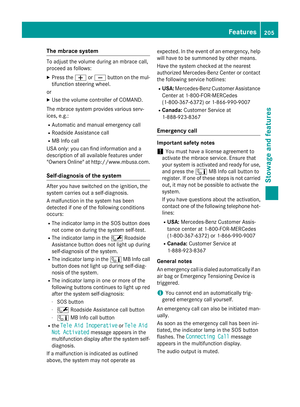 207
207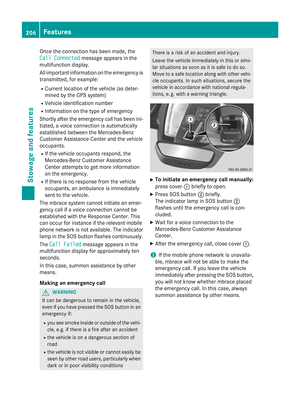 208
208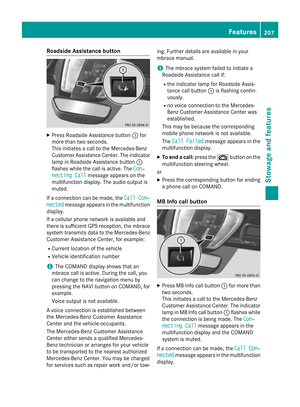 209
209 210
210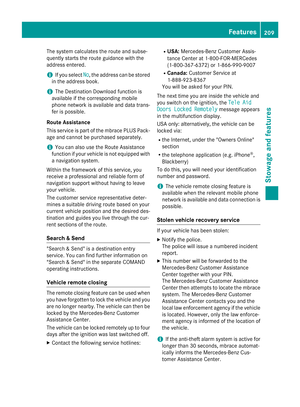 211
211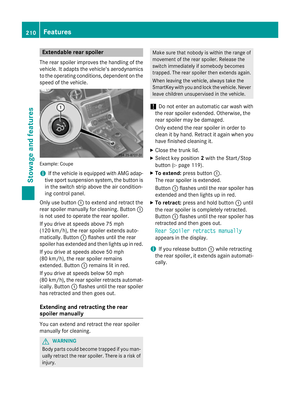 212
212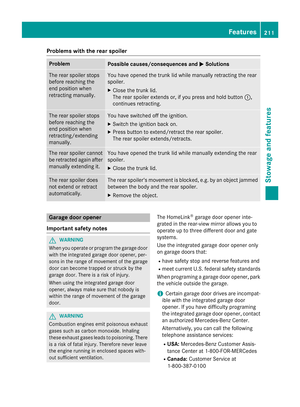 213
213 214
214 215
215 216
216 217
217 218
218 219
219 220
220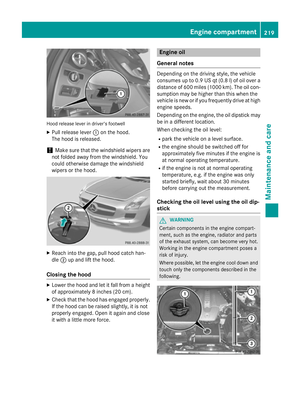 221
221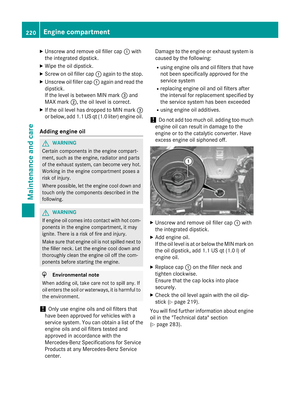 222
222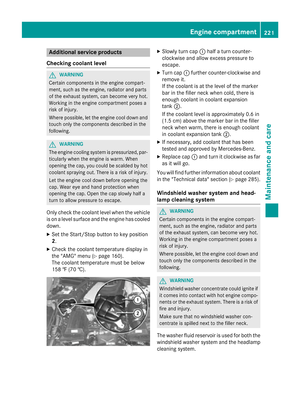 223
223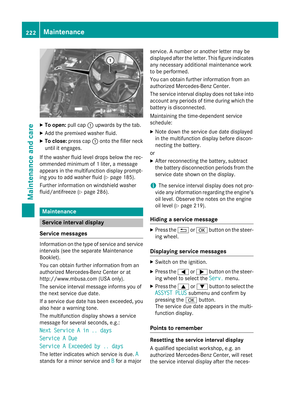 224
224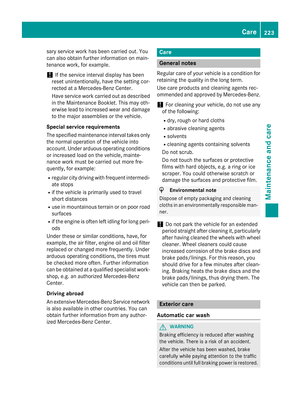 225
225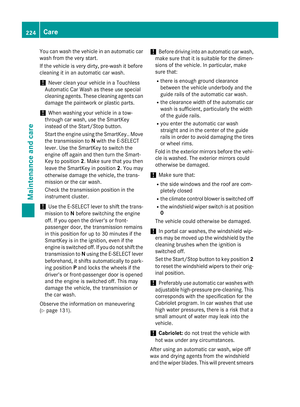 226
226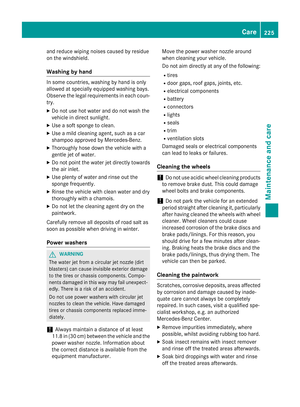 227
227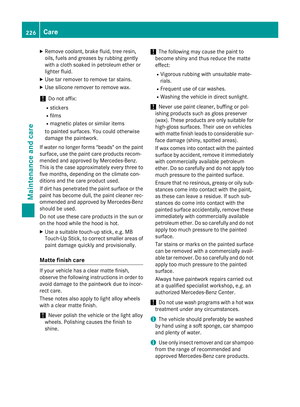 228
228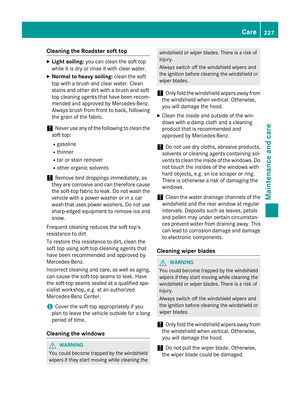 229
229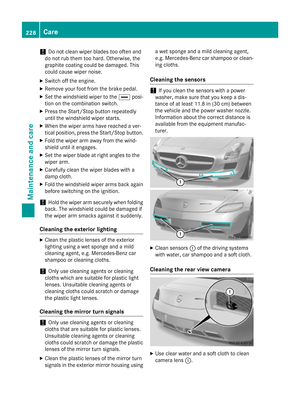 230
230 231
231 232
232 233
233 234
234 235
235 236
236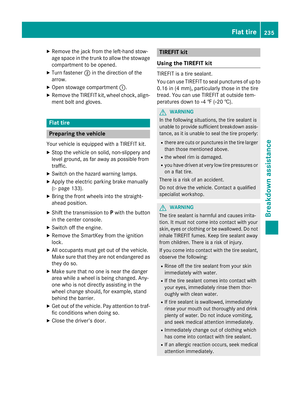 237
237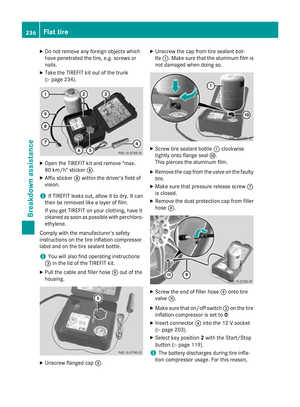 238
238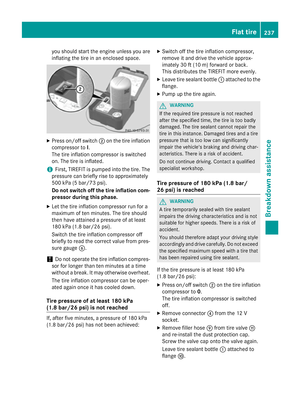 239
239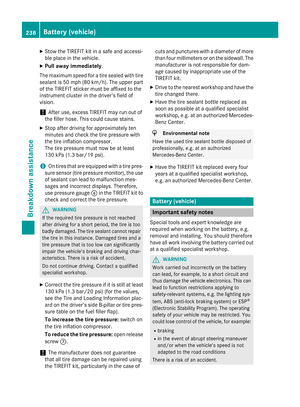 240
240 241
241 242
242 243
243 244
244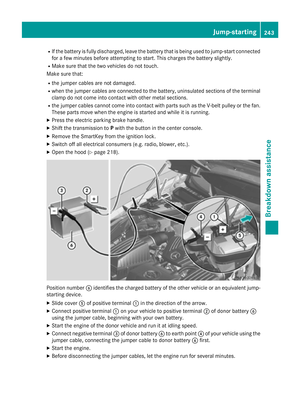 245
245 246
246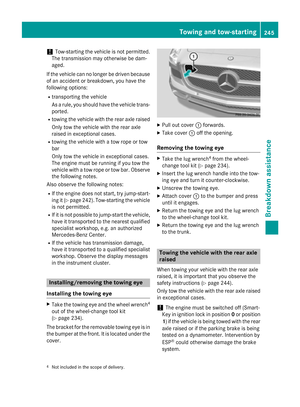 247
247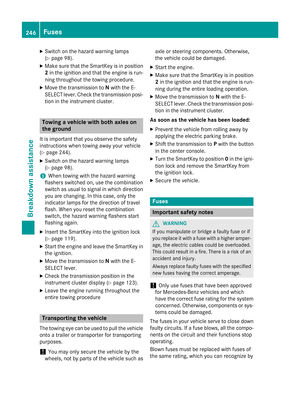 248
248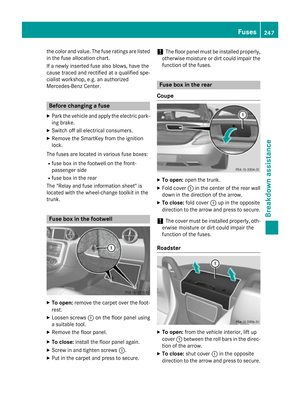 249
249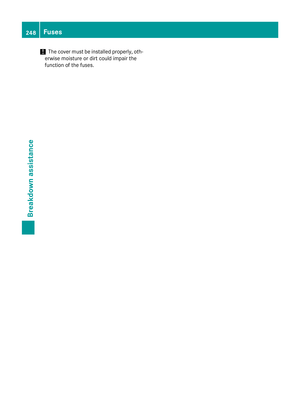 250
250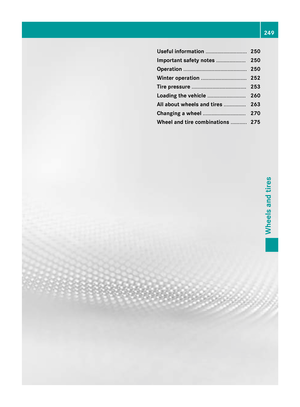 251
251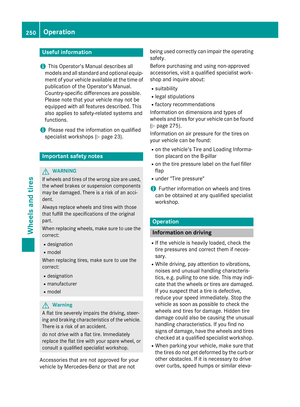 252
252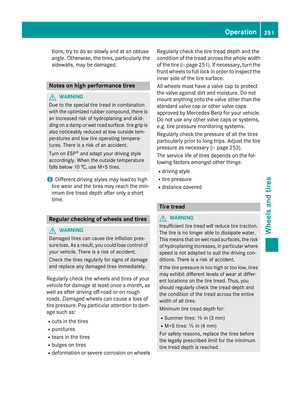 253
253 254
254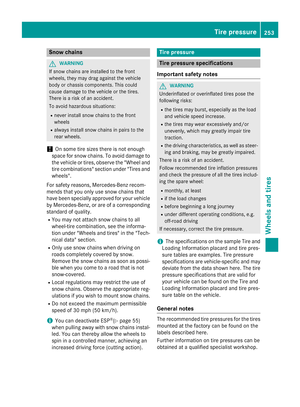 255
255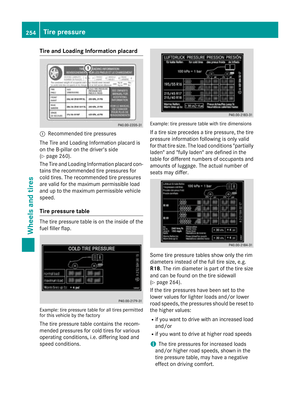 256
256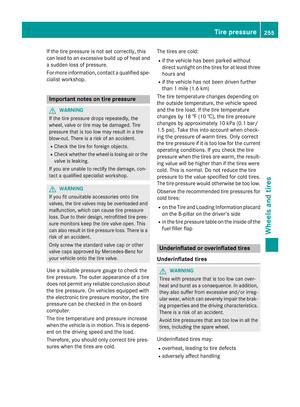 257
257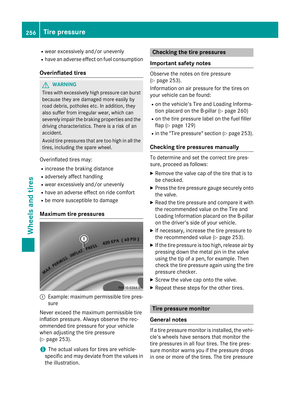 258
258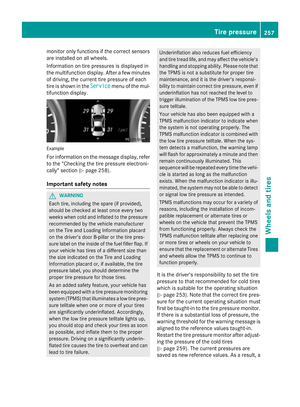 259
259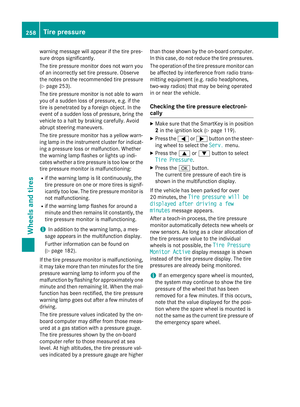 260
260 261
261 262
262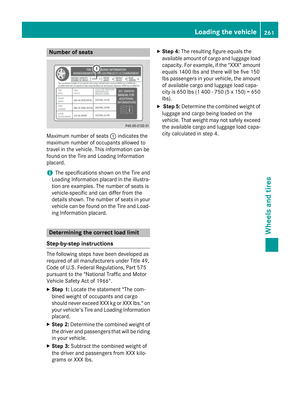 263
263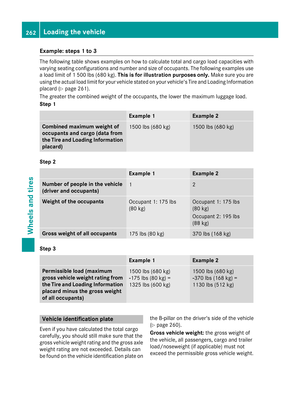 264
264 265
265 266
266 267
267 268
268 269
269 270
270 271
271 272
272 273
273 274
274 275
275 276
276 277
277 278
278 279
279 280
280 281
281 282
282 283
283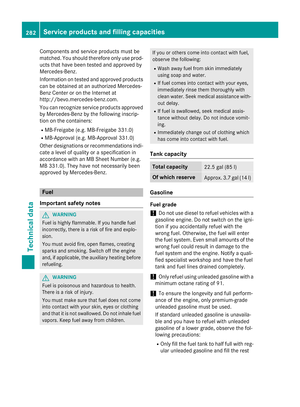 284
284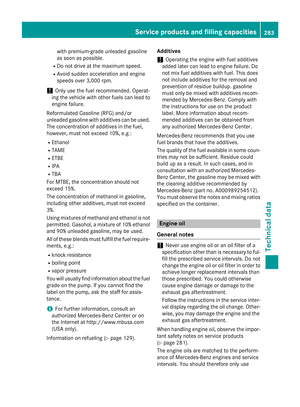 285
285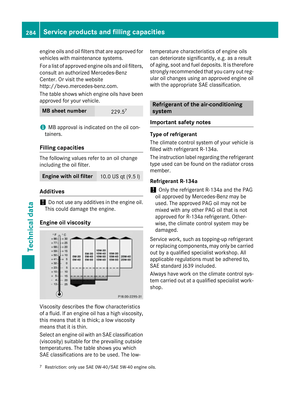 286
286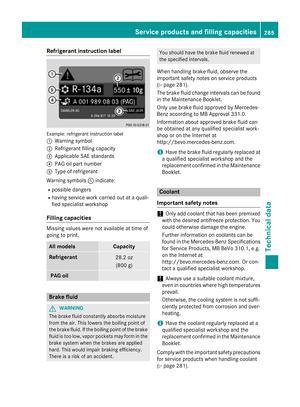 287
287 288
288 289
289