2015 MERCEDES-BENZ SLS AMG GT COUPE fuel pressure
[x] Cancel search: fuel pressurePage 257 of 290
If the tire pressure is not set correctly, this
can leadtoane xcessive build up of heat and
as udden loss of pressure.
For more information, contact aqualified spe-
cialist workshop. Important notes on tire pressure
G
WARNING
If the tire pressure drops repeatedly,t he
wheel, valve or tire may be damaged. Tire
pressure that is too low may resultina tire
blow-out. There is arisk of an accident.
R Check the tire for foreign objects.
R Check whether the wheelisl osing air or the
valve is leaking.
If you are unabletor ectify the damage, con-
tact aqualifieds pecialist workshop. G
WARNING
If you fit unsuitable accessorie sonto tire
valves ,the tire valves may be overloaded and
malfunction, which can cause tire pressure
loss. Due to their design, retrofitted tire pres- sure monitors keep the tire valve open. This
can also resultint ire pressure loss. There is a
risk of an accident.
Only screw the standard valve cap or other
valve caps approved by Mercedes-Benz for
yourv ehicle onto the tire valve.
Use asuitable pressure gauge to check the
tire pressure. The outer appearance of atire
does not permit any reliable conclusion about the tire pressure. On vehicle sequippedw ith
the electronic tire pressure monitor, the tire
pressure can be checked in the on-board
computer.
The tire temperature and pressure increase
when the vehicle is in motion. This is depend-
ent on the driving speed and the load.
Therefore ,you shouldo nly correct tire pres-
sures when the tires are cold. The tires are cold:
R if the vehicle has been parked without
direct sunlight on the tires for at least three
hours and
R if the vehicle has not been driven further
than 1mile (1.6 km)
The tire temperature changes depending on
the outsid etemperature ,the vehicle speed
and the tire load. If the tire temperature
changes by 18 ‡(10 †), the tire pressure
changes by approximately 10 kPa (0.1 bar/
1.5 psi).T ake this into account when check-
ing the pressure of warm tires. Only correct
the tire pressure if it is too low for the current
operating conditions. If you check the tire
pressure when the tires are warm, the result- ing valuew illbeh igherthan if the tires were
cold. This is normal. Do not reduce the tire
pressure to the values pecified for cold tires.
The tire pressure would otherwis ebetoo low.
Observe the recommended tire pressures for
cold tires:
R on the Tire and Loading Information placard
on the B-pilla ronthe driver's side
R in the tire pressure table on the inside of the
fuel filler flap Underinflated or overinflated tires
Underinflated tires G
WARNING
Tires with pressure that is too low can over-
heat and burst as aconsequence. In addition,
they also suffer from excessive and/or irreg-
ularw ear, which can severel yimpair the brak-
ing propertie sand the driving characteristics.
There is arisk of an accident.
Avoid tire pressures that are too low in all the
tires, including the spare wheel.
Underinflated tires may:
R overheat, leading to tire defects
R adversely affect handling Tire pressure
255Wheelsand tires Z
Page 258 of 290
R
wear excessively and/or unevenly
R have an adverse effect on fuel consumption
Overinflated tires G
WARNING
Tires with excessively high pressure can burst
because they are damage dmoree asily by
road debris, potholes etc .Inaddition ,they
also suffer fro mirregular wear, whic hcan
severely impair th ebraking properties and the
driving characteristics. Ther eisarisk of an
accident.
Avoid tir epressures that are to ohigh in all the
tires, including th espare wheel.
Overinflated tires may: R increase th ebraking distance
R adversely affect handling
R wear excessively and/or unevenly
R have an adverse effect on ride comfort
R be mor esusceptible to damage
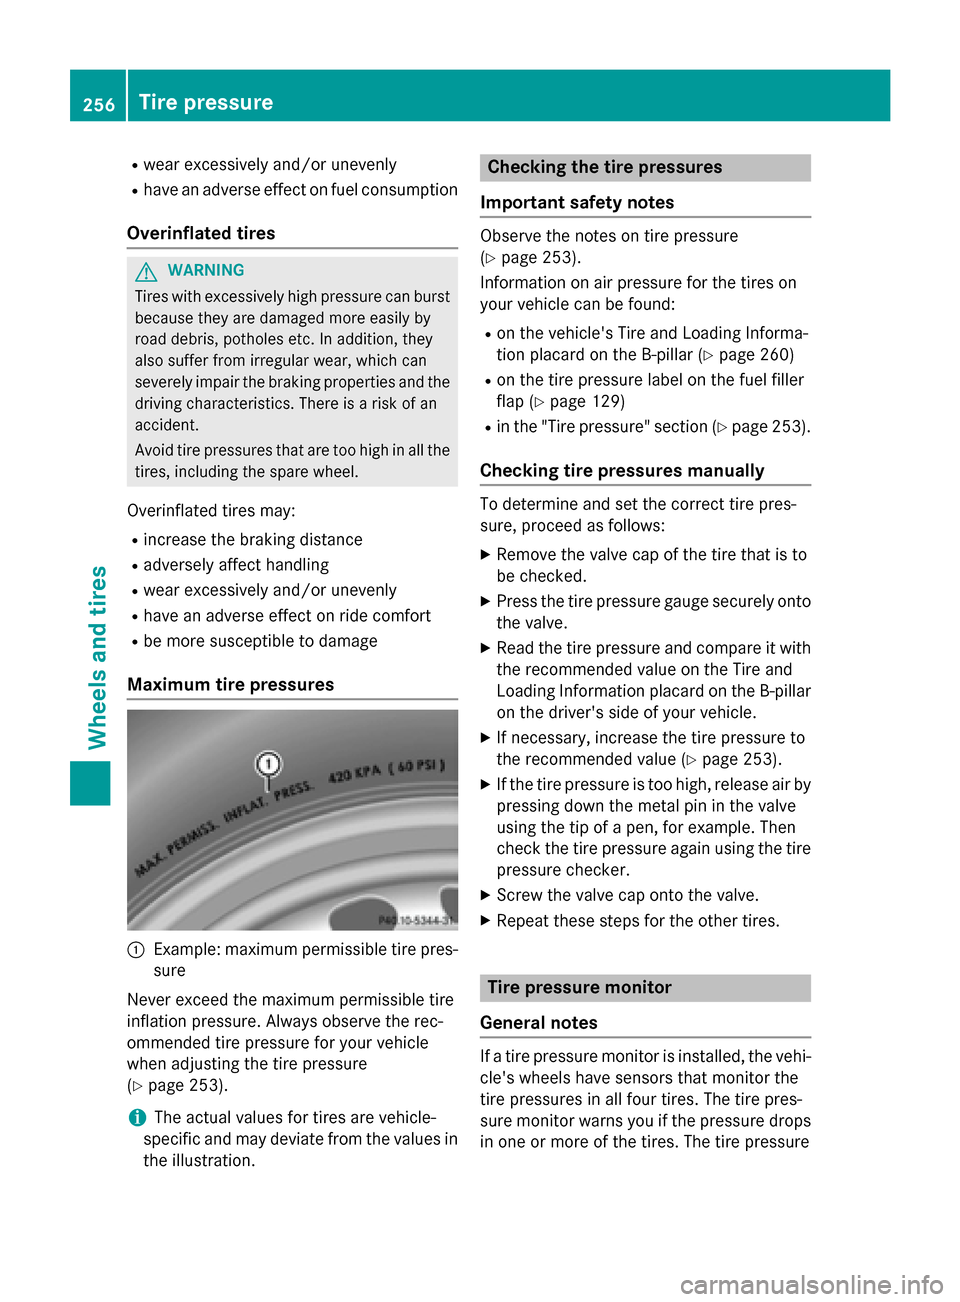
Maximum tir epressures 0043
Example: maximum permissible tir epres-
sure
Never exceed th emaximum permissible tire
inflatio npressure. Always observe th erec-
ommended tir epressure for your vehicle
when adjustin gthe tirep ressure
(Y page 253).
i The actual values for tires are vehicle-
specific and may deviat efromt hevalues in
th ei llustration. Checkin
gthe tirep ressures
Important safety notes Observe th
enotes on tir epressure
(Y page 253).
Information on air pressure for th etires on
your vehicle can be found:
R on th evehicle' sTire and Loadin gInforma-
tio np lacar dont heB-pillar (Y page 260)
R on th etirep ressure label on th efuel filler
flap (Y page 129)
R in th e"Tire pressure" sectio n(Ypage 253).
Checkin gtirep ressures manually To determine and set th
ecorrec ttirep res-
sure, proceed as follows:
X Remov ethe valve cap of th etiret hatisto
be checked.
X Pres sthe tirep ressure gauge securely onto
th ev alve.
X Read th etirep ressure and compare it with
th er ecommended value on th eTire and
Loadin gInformation placar dontheB-pillar
on th edriver' sside of your vehicle.
X If necessary, increase th etirep ressure to
th er ecommended value (Y page 253).
X If th etirep ressure is to ohigh, releas eair by
pressin gdown th emetal pin in th evalve
usin gthe tip of apen,for example. Then
check th etirep ressure again usin gthe tire
pressure checker.
X Screw th evalve cap ont othe valve.
X Repeat these steps for th eother tires. Tir
ep ressur emonitor
General notes If
at irep ressure monito risinstalled, th evehi-
cle' swheels have sensor sthatm onito rthe
tir ep ressures in all four tires. The tir epres-
sure monito rwarn syou if th epressure drops
in one or mor eofthetires. The tir epressure 256
Tir
ep ressureWheels and tires
Page 259 of 290
monitor only functions if the correct sensors
are installed on all wheels.
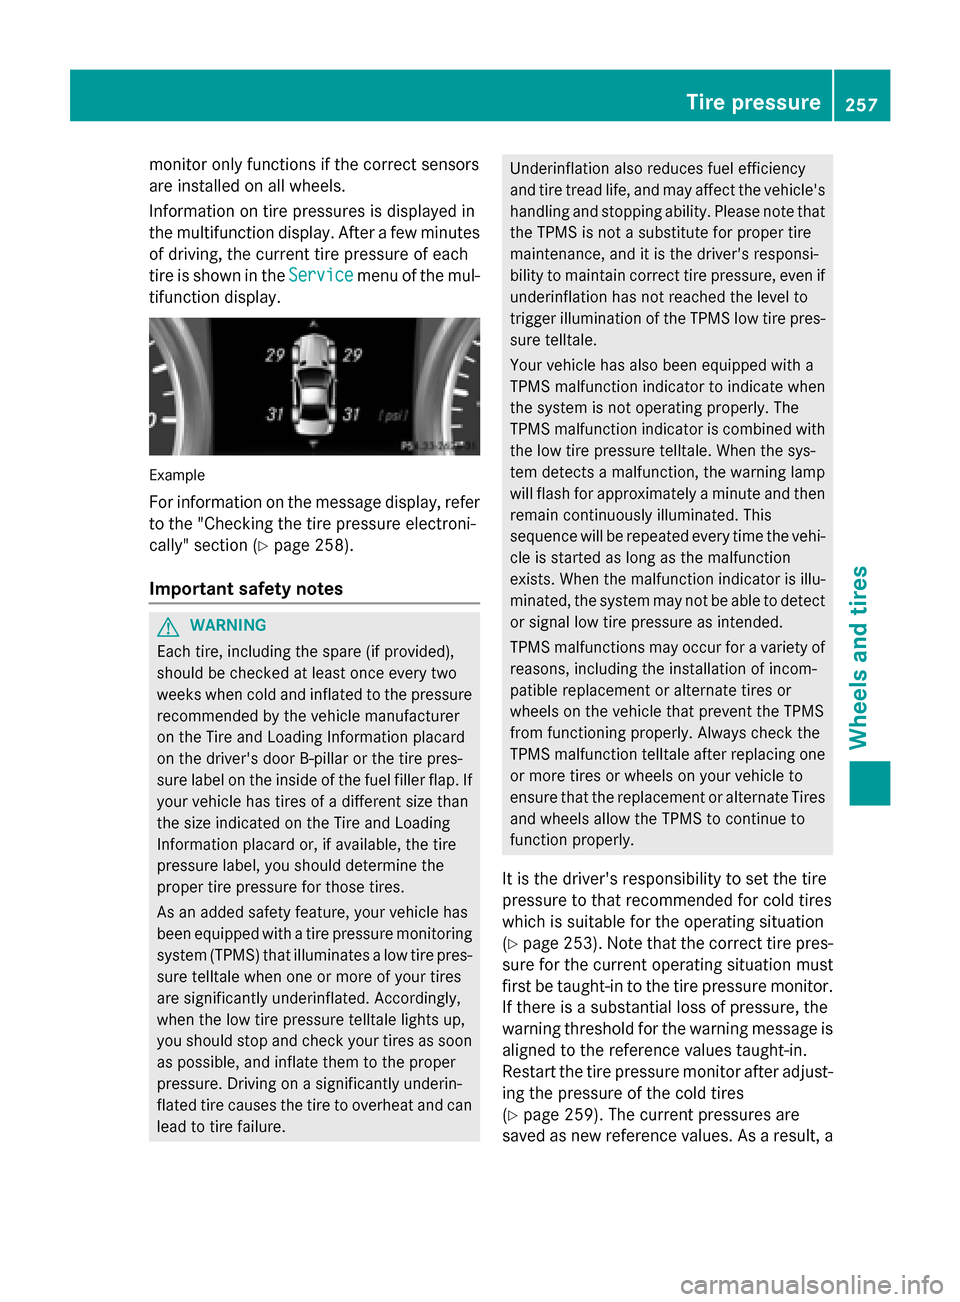
Information on tire pressures is displayed in
the multifunction display.A fterafew minutes
of driving, the current tire pressure of each
tire is show nintheService Service menu of the mul-
tifunction display. Example
For informatio nonthe message display,r efer
to the "Checking the tire pressure electroni-
cally" section (Y page258).
Important safety notes G
WARNING
Each tire, including the spare (if provided),
should be checked at least once every two
weeks when cold and inflated to the pressure recommended by the vehicl emanufacturer
on the Tire and Loading Information placard
on the driver' sdoor B-pillar or the tire pres-
sure label on the inside of the fuel filler flap .If
yourv ehiclehas tires of adifferent size than
the size indicated on the Tire and Loading
Information placard or, if available, the tire
pressure label, you should determine the
prope rtire pressure for those tires.
As an added safety feature ,you rv ehicl ehas
been equippe dwithatire pressure monitoring
system (TPMS) that illuminates alow tire pres-
sure telltal ewhen one or more of yourt ires
are significantly underinflated. Accordingly,
when the low tire pressure telltal elights up,
you should stop and check yourt ires as soon
as possible, and inflate them to the proper
pressure. Driving on asignificantly underin-
flated tire cause sthe tire to overhea tand can
leadtot ire failure. Underinflation alsor
educes fuel efficiency
and tire tread life ,and may affect the vehicle's
handling and stopping ability .Please note that
the TPMS is not asubstitute for prope rtire
maintenance, and it is the driver' sresponsi-
bility to maintai ncorrect tire pressure, even if
underinflation has not reache dthe level to
trigger illumination of the TPMS low tire pres-
sure telltale.
Yourv ehiclehas alsob een equippe dwith a
TPMS malfunction indicator to indicate when
the system is not operating properly. The
TPMS malfunction indicator is combined with
the low tire pressure telltale. When the sys-
tem detects amalfunction, the warning lamp
willf lashf or approximatel yaminute and then
remai ncontinuously illuminated. This
sequence willber epeated every time the vehi-
cle is started as long as the malfunction
exists. When the malfunction indicator is illu-
minated, the system may not be abletod etect
or signa llow tire pressure as intended.
TPMS malfunctions may occur for avariety of
reasons, including the installation of incom-
patible replacement or alternate tires or
wheels on the vehicl ethat prevent the TPMS
from functioning properly. Always check the
TPMS malfunction telltal eafter replacing one
or more tires or wheels on yourv ehicleto
ensure that the replacement or alternate Tires
and wheels allow the TPMS to continue to
function properly.
It is the driver' sresponsibility to set the tire
pressure to that recommended for cold tires
which is suitable for the operating situation
(Y page2 53).Note that the correct tire pres-
sure for the current operating situation must
first be taught-in to the tire pressure monitor.
If there is asubstantial loss of pressure, the
warning threshol dfor the warning message is
aligned to the reference values taught-in.
Restart the tire pressure monitor after adjust-
ing the pressure of the cold tires
(Y page2 59).The current pressures are
saved as new reference values. As aresult, a Tire pressure
257Wheelsand tires Z
Page 261 of 290
Tire pressure monito
rwarning mes-
sages If the tire pressure monitor detects
apressure
loss in one or mor etires, awarnin gm essage
is shown in the multifunctio ndisplay and the
yellow tire pressure monitor warnin glamp
come son.
R If the Correc tTireP ressure
Correc tTireP ressure message
appear sinthe multifunctio ndisplay ,the
tire pressure in at leas tone tire is too low
and must be correcte datthe next oppor-
tunity.
R If the Check Tir ePressure
Check Tir ePressure message
appear sinthe multifunctio ndisplay ,the
tire pressure in one or mor etire sh asdrop-
pe ds ignificantl yand the tire smustbe
checked.
R If the TirePressure Warnin gTire
Tir ePressure Warnin gTire
Malfunction
Malfunction message appear sinthe mul-
tifunctio ndisplay ,the tire pressure in one
or mor etire sh asdropped suddenl yand the
tire sm ustbec hecked.
Observe the instructions and safety note sin
the displa ymessage sinthe "Tires" section
(Y page 182).
i If the whee
lposit ions on the vehicl eare
rotated ,the tire pressures ma ybedis-
played for the wrong positions for ashort
time .Thisisr ectifie dafter afew minute sof
driving ,and the tire pressures ar edisplayed
for the correct positions.
Restartin gthe tire pressure monitor When yo
urestar tthe tire pressure monitor, all
existing warnin gmessage saredeleted and
the warnin glam ps go out. The monitor uses
the currentl yset tire pressures as the refer-
ence values for monitoring. In mos tcases, the
tire pressure monitor will automatically
detect the new reference values after you
have change dthe tire pressure. However, you
can also define reference values manuall yas
describe dhere. The tire pressure monitor
then monitors the new tire pressure values. X
Set the tire pressure to the valu erecom-
mended for the corresponding driving sit-
uatio nont he Tire and Loading Information
placard on the driver's side
B-pillar (Y page 253).
Additiona ltire pressure values for different
load scan also be found on the tire pressure
table on the insid eofthe fuel fille rflap
(Y page 253).
X Make sure tha tthe tire pressure is correct
on al lfou rw heels.
X Make sure tha tthe SmartKe yisinposition
2 in the ignition lock.
X Press the 0059or0065 button on the steer-
ing whee ltoselect theServ.
Serv. menu.
X Press the 0063or0064 button to select
Tir ePressure
Tir ePressure.
X Press the 0076button.
The multifunctio ndisplay shows the cur-
rent tire pressure for the individual tire sor
the Tire Tire pressure
pressure will
willbe
bedisplayed
displayed
after drivin gafew minutes
after drivin gafew minutes mes-
sage.
X Press the 0064button.
The Use Curren tPressures as New
Use Curren tPressures as New
Reference Values
Reference Values message appearsin
the multifunctio ndisplay.
If yo uwishtoc onfirm the restart:
X Press the 0076button.
The TirePress. Monito rRestarted
Tir ePress. Monito rRestarted
message appear sinthe multifunctio ndis-
play.
After driving for afew minutes, the system
checks whether the current tire pressures
ar ew ithi nt he specifie drange.The new tire
pressures ar ethena ccepted as reference
values and monitored.
If yo uwishtoc ancel the restart:
X Press the 0038button.
The tire pressure values stored at the last
restar twillc ontinue to be monitored. Tire pressure
259Wheelsand tires Z
Page 270 of 290
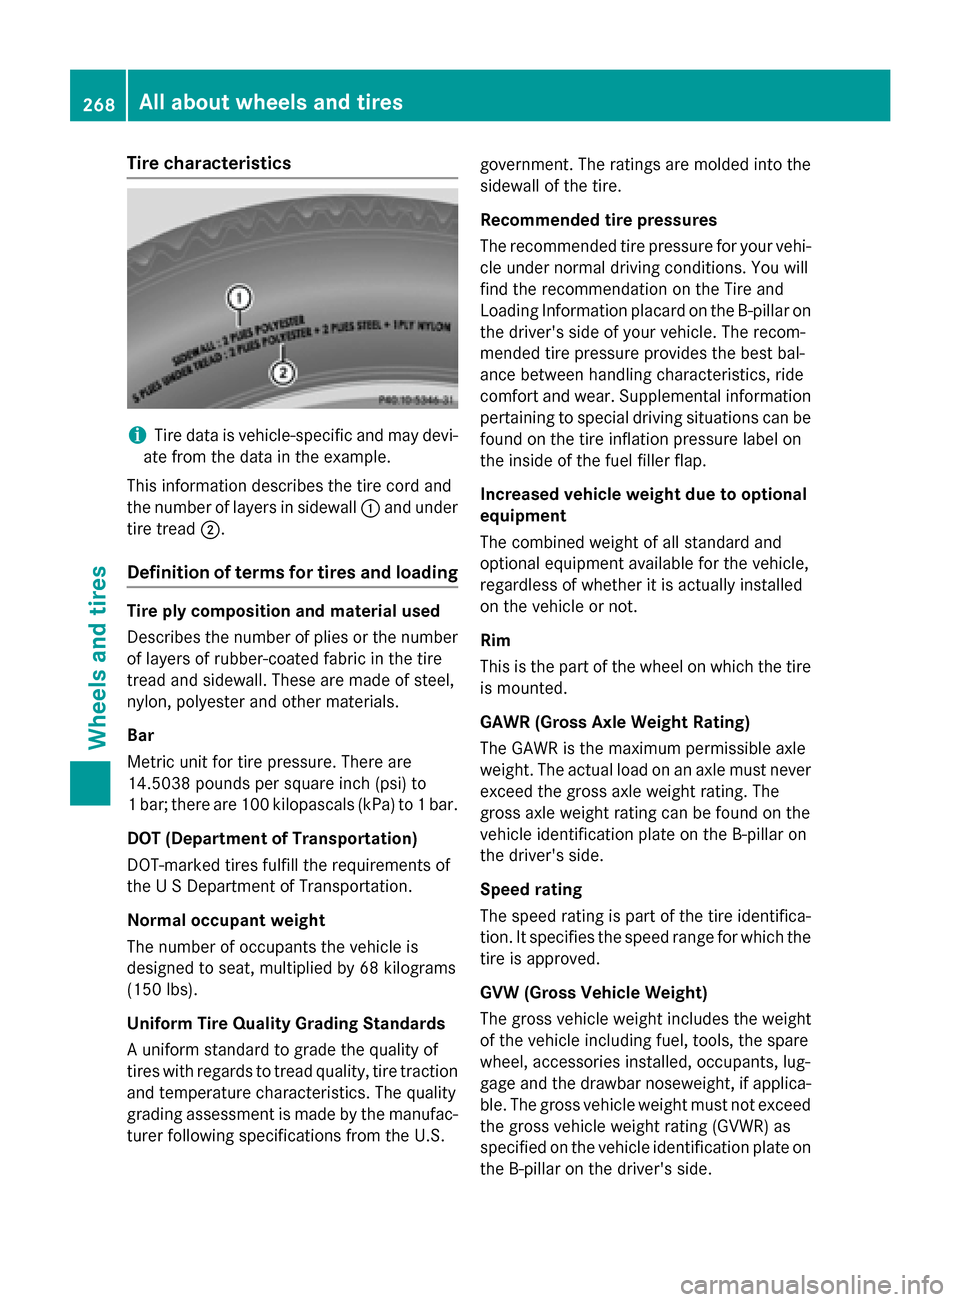
Tire characteristics
i
Tire data is vehicle-specific and ma
ydevi-
ate fro mthe data in the example.
Thi sinformatio ndescribe sthe tire cord and
the numbe roflayer sins idewall 0043and under
tire tread 0044.
Definition of terms fo rtire sa nd loading Tire ply composition and material used
Describes the numbe rofpliesor the number
of layers of rubber-coate dfabricint he tire
trea dand sidewall .These ar emadeofs teel,
nylon, polyeste rand othe rmaterials.
Bar
Metric uni tfor tire pressure. There are
14.503 8pound sp ersquare inch (psi )to
1b ar;ther eare100 kilopascal s(kPa) to 1bar.
DO T(De partmen tofTransportation)
DOT-marked tire sfulfill the requirements of
the USD epartment of Transportation.
Normal occupant weight
The numbe rofoccupants the vehicl eis
designe dtoseat, multiplied b y68k ilograms
(15 0lbs).
Uniform Tire Quality Grading Standards
Au nifor mstandard to grade the quality of
tire swithr egards to trea dquali ty,tire traction
and temperatur echaracteristics. The quality
grading assessment is made by the manufac-
turer following specifications fro mthe U.S. government. The rating
saremolde dinto the
sidewall of the tire.
Recommende dtire pressures
The recommende dtire pressure for your vehi-
cle under normal driving conditions. Yo uwill
find the recommendatio nonthe Tire and
Loading Informatio nplacard on the B-pillar on
the driver's side of your vehicle. The recom-
mended tire pressure provides the best bal-
ance between handling characteristics, ride
comfort and wear .Supplemental information
pertaining to special driving situations can be
found on the tire inflation pressure labe lon
the insid eofthe fuel fille rflap.
Increase dvehicle weight due to optional
equipment
The combine dweigh tofa llstandard and
optional equipment availabl efor the vehicle,
regardles sofwhether it is actually installed
on the vehicl eornot.
Rim
Thi sist he part of the whee lonwhich the tire
is mounted.
GAWR (Gros sAxleW eight Rating)
The GAW Risthe maximum permissibl eaxle
weight. The actual load on an axl emustn ever
exceed the gross axl eweigh trating .The
gross axl eweigh trating can be found on the
vehicl eide ntification plate on the B-pillar on
the driver's side.
Speed rating
The spee drating is part of the tire identifica-
tion. It specifie sthe spee drange for which the
tire is approved.
GVW (Gros sVehicle Weight)
The gross vehicl eweigh tincludes the weight
of the vehicl eincluding fuel ,tools, the spare
wheel, accessorie sinstalled, occupants, lug-
gage and the drawbar noseweight, if applica-
ble. The gross vehicl eweigh tmustn ot exceed
the gross vehicl eweigh trating (GVWR )as
specifie donthe vehicl eide ntification plate on
the B-pillar on the driver's side. 268
Al
la bout wheels an dtiresWheel sand tires
Page 271 of 290
GVWR (Gross Vehicl
eWeight Rating)
The GVWR is the maximu mpermitted gross
weight of the fullyl oaded vehicle (weight of
the vehicle including all accessories, occu-
pants, fuel,l uggage and the drawbar nose-
weight if applicable).T he gross vehicle weight
rating is specified on the vehicle identification plate on the B-pilla ronthe driver's side.
Maximum loaded vehicle weight
The maximu mweight is the sum of the curb
weight of the vehicle ,the weight of the acces-
sories ,the total loadl imitand the weight of
the optional equipment installed at the fac-
tory.
Kilopascal (kPa)
Metric unit for tire pressure. 6.9 kPa is the
equivalent of 1psi.A nother unit for tire pres-
sure is bar. There are 100 kilopascals (kPa) to
1b ar.
Load index
In addition to the load-bearing index, the load index may alsobei mprinted on the sidewallof
the tire. This specifies the load-bearing capa-
city more precisely.
Curb weight
The weight of avehicle with standard equip-
ment including the maximu mcapacity of fuel,
oil and coolant. It alsoi ncludes the air-condi-
tioning system and optional equipment if
these are installed in the vehicle ,but does not
includ epassengers or luggage.
Maximum load rating
The maximu mloadr ating in kilograms or
pounds is the maximu mweight for which a
tire is approved.
Maximum permissible tire pressure
Maximu mpermissibl etire pressure for one
tire.
Maximum load on one tire
Maximu mloadono ne tire. This is calculated
by dividing the maximu maxle loadofo ne axle
by two. PSI (pounds per square inch)
As
tandard unit of measure for tire pressure.
Aspec tratio
Relationshi pbetwee ntire heigh tand tire
width in percent.
tire pressure
This is pressure inside the tire applying an
outward force to each square inch of the tire's surface. The tire pressure is specified in
pounds per square inch (psi), in kilopascal
(kPa) or in bar. The tire pressure shoul donly
be corrected when the tires are cold. For this,
the vehicle must have been stationary for at
least three hours or not have traveled more
than 1.6 km (1 mile)int his time.
Tire pressure of coldt ires
The tires are cold:
R if the vehicle has been parked without
direct sunlight on the tires for at least three
hours and
R if the vehicle has not been driven more than
1m ile (1.6 km)
Tread
The part of the tire that comes into contact
with the road.
Bead
The tire beade nsures that the tire sits
securel yonthe wheel. There are severa lsteel
wiresint he beadtop revent the tire from
coming loose from the wheelr im.
Sidewall
The part of the tire betwee nthe tread and the
bead.
Weight of optional extras
The combined weight of those optional extras
that weigh more than the replaced standard
part and more than 2.3 kilograms (5 lbs).
These optional extras, such as high-perform-
ance brakes, level control, aroof rack or a
high-performance battery, are not included in Alla
bout wheels and tires
269Wheelsand tires Z
Page 277 of 290
X
Tighten the wheel bolts until they are fin-
ger-tight.
X Unscrew the alignment bolt.
X Tighten the last wheel bolt until it is finger-
tight.
Lowering the vehicle G
WARNING
The wheels could work loose if the wheel nuts and bolts are not tightened to the specified
tightening torque. There is arisk of accident.
Have the tightening torque immediately
checked at aqualified specialist workshop
after awheel is changed.
X Turn the crank of the jack counter-clock-
wise until the vehicle is once again standing
firmly on the ground.
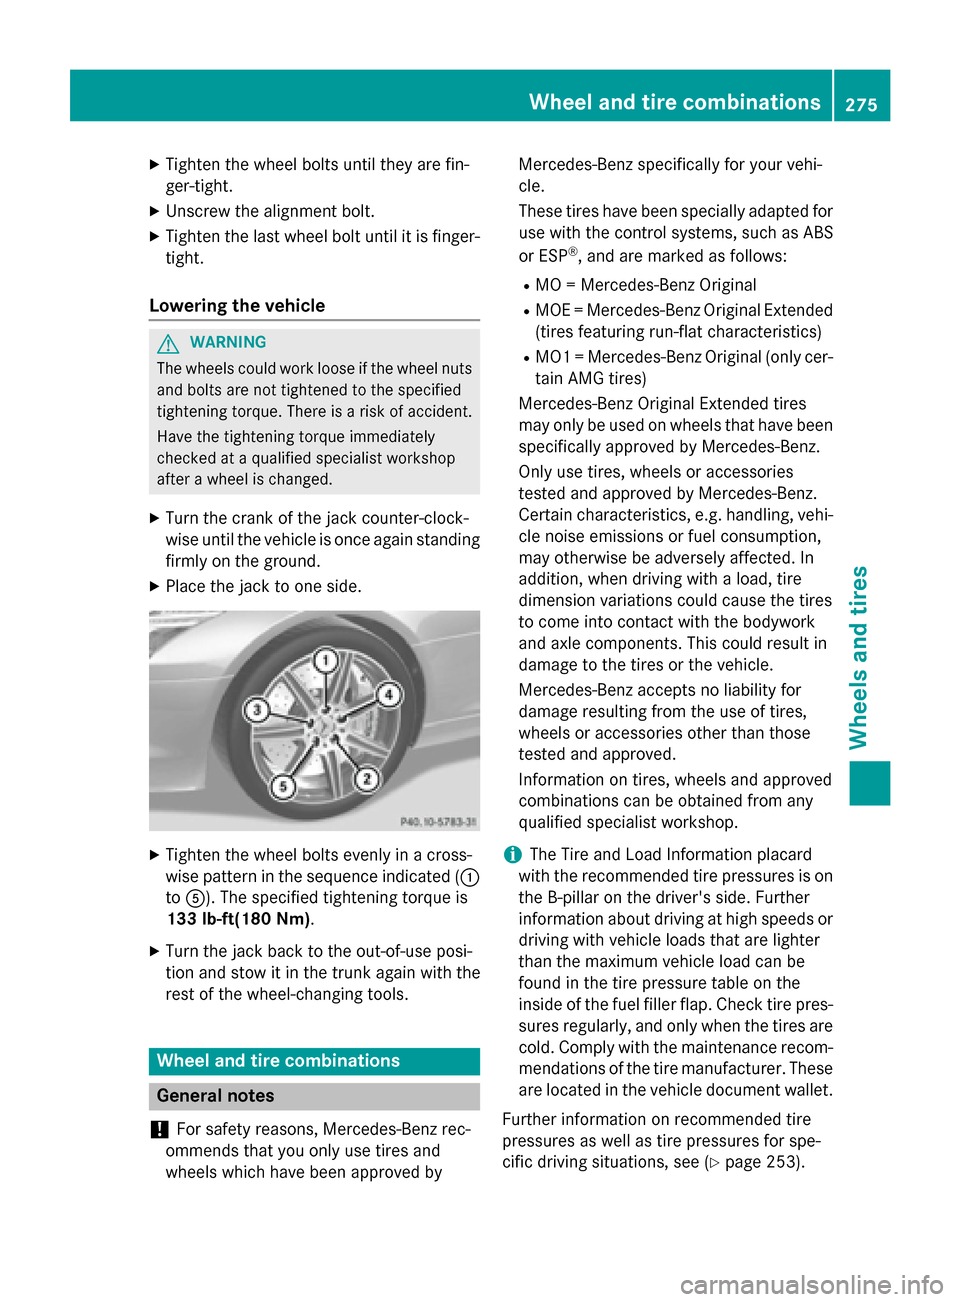
X Place the jack to one side. X
Tighten the wheel bolts evenly in across-
wise pattern in the sequence indicated ( 0043
to 0083). The specified tightening torque is
133 lb-ft(180 Nm).
X Turn the jack back to the out-of-use posi-
tion and stow it in the trunk again with the
rest of the wheel-changin gtools. Wheel and tire combinations
General notes
! For safety reasons, Mercedes-Benz rec-
ommends that you only use tires and
wheels which have been approved by Mercedes-Benz specifically for your vehi-
cle.
These tires have been specially adapted for
use with the control systems, such as ABS
or ESP ®
,a nd are marked as follows:
R MO =Mercedes-Benz Original
R MOE =Mercedes-Benz Original Extended
(tires featuring run-flat characteristics)
R MO1 =Mercedes-Benz Original (only cer-
tain AMG tires)
Mercedes-Benz Original Extended tires
may only be used on wheels that have been
specifically approved by Mercedes-Benz.
Only use tires, wheels or accessories
tested and approved by Mercedes-Benz.
Certain characteristics, e.g. handling, vehi-
cle noise emissions or fuel consumption,
may otherwise be adversely affected. In
addition, when driving with aload, tire
dimension variations could cause the tires
to come into contact with the bodywork
and axle components. This could result in
damage to the tires or the vehicle.
Mercedes-Benz accepts no liability for
damage resulting from the use of tires,
wheels or accessories other than those
tested and approved.
Information on tires, wheels and approved
combinations can be obtained from any
qualified specialist workshop.
i The Tire and Load Information placard
with the recommended tire pressures is on the B-pillar on the driver's side. Further
information about driving at high speeds or driving with vehicle loads that are lighter
than the maximum vehicle load can be
found in the tire pressure table on the
inside of the fuel filler flap. Check tire pres- sures regularly, and only when the tires arecold. Comply with the maintenance recom-
mendation softhe tire manufacturer. These
are located in the vehicle document wallet.
Further information on recommended tire
pressures as well as tire pressures for spe-
cific driving situations, see (Y page 253). Wheel and tirec
ombinations
275Wheels and tires Z
Page 285 of 290
with premium-grade unleade
dgasoline
as soon as possible.
R Do not driv eatthemaximum speed.
R Avoid sudden acceleration and engine
speed sover 3,000 rpm.
! Only use th
efuel recommended. Operat-
ing th evehicle with other fuels can lead to
engine failure.
Reformulated Gasolin e(RFG) and/or
unleade dgasolin ewith additives can be used.
The concentratio nofadditives in th efuel,
however, must not exceed 10%, e.g.:
R Ethanol
R TAME
R ETBE
R IPA
R TBA
For MTBE, th econcentratio nshould not
exceed 15%.
The concentratio nofmethano lingasoline,
including other additives ,must not exceed
3%.
Usin gmixtures of methano land ethanol is not
permitted. Gasohol, amixtur eof10% ethanol
and 90% unleade dgasolin e, maybeu sed.
All of these blend smustfulfill the fuel require-
ments ,e.g.:
R knock resistance
R boiling point
R vapo rpressure
Yo uw illu sually find information abou tthe fuel
grade on the pump. If yo ucannot find the
labe lont he pump, as kthe staff for assis-
tance.
i For furthe
rinformation, consul tan
authorized Mercedes-Benz Center or on
the Internet at http://www.mbusa.com
(USA only).
Informatio nonrefueling (Y page 129). Additives
! Operating the engine with fuel additives
adde dlater can lead to engine failure. Do
not mi xfue laddit ives with fuel .Thisd oes
not includ eaddit ives for the remova land
prevention of residue buildup. gasoline
must onl ybemixed with additives recom-
mended by Mercedes-Benz. Compl ywith
the instructions for us eonthe product
label. More information abou trecom-
mended additives can be obtained from
any authorized Mercedes-Benz Center.
Mercedes-Benz recommend sthaty ou use
fuel brands tha thavet he additives.
Th eq uali ty of the fuel availabl einsomecoun-
tries ma ynot be sufficient. Residu ecould
buil dupasar esult. In such cases ,and in
consultation with an authorized Mercedes-
Benz Center, the gasoline ma ybemixed with
the cleaning additiv erecommended by
Mercedes-Benz (par tno. A000989254512).
Yo um usto bser ve the note sand mixing ratios
specified on the container. Engine oil
General notes !
Never us
eengine oi lorano ilfilte rofa
specification other tha nisn ecessary to ful-
fill the prescribe dservice intervals .Donot
change the engine oi loroilfilte rino rder to
achieve longe rreplacement intervals than
those prescribed. Yo ucould otherwise
cause engine damage or damage to the
exhaust ga saftertreatment.
Follo wthe instructions in the service inter-
va ld isplay regarding the oi lchange .Other-
wise ,you maydamag ethe engine and the
exhaust ga saftertreatment.
When handling engine oil, observe the impor- tant safety note sonservice products
(Y page 281).
Th ee ngine oils ar ematche dtot he perform-
anc eofM ercedes-Benz engine sand service
intervals .You shoul dtherefore onl yuse Service products and fillin
gcapacities
283Technicaldata Z