Page 342 of 358

Exception: it is permissible to install a dif-
ferent type or make in the event of a flat
tire. Observe the "MOExtended tires (tires
with run-flat characteristics" section(Y page 295).
Vehicles equipped with MOExtended tires are not equipped with a TIREFIT kit at the factory.
It is therefore recommended that you addi-
tionally equip your vehicle with a TIREFIT kit if
you mount tires that do not feature run-flat
properties, e.g. winter tires. A TIREFIT kit may
be obtained from a qualified specialist work-
shop.
iNot all wheel and tire combinations are
available at the factory for all countries.
iThe following pages contain information
on approved wheel rims and tire sizes for
equipping your vehicle with winter tires.
Winter tires are not available at the factory
as standard equipment or optional extras.
If you want to equip your vehicle with
approved winter tires, it may be necessary
to obtain wheel rims in the corresponding
size. The size of the approved winter tires
may differ from the standard tires. This is
dependent on the model and the equip-
ment installed at the factory.
The tires and wheel rims, as well as further information, can be obtained at a qualified
specialist workshop.
340Wheel and tire combinations
Wheels and tires
Page 346 of 358

found on the wheel or under "Technical data"( Y page 346).
An emergency spare wheel may also be
mounted against the direction of rotation.
Observe the time restriction on use as well as
the speed limitation specified on the emer-
gency spare wheel.
Replace the tires after six years at the latest,
regardless of wear. This also applies to the
emergency spare wheel.
iWhen you are driving with the collapsible
spare wheel mounted, the tire pressure
loss warning system or the tire pressure
monitor cannot function reliably. Only
restart the tire pressure loss warning sys-
tem/the tire pressure monitor when the
damaged wheel has been replaced with a
new wheel.
Vehicles with tire pressure monitor:
after mounting an emergency spare wheel,
the system may still display the tire pres-
sure of the removed wheel for a few
minutes. The value displayed for the moun- ted emergency spare wheel is not the sameas the current tire pressure of the emer-
gency spare wheel.
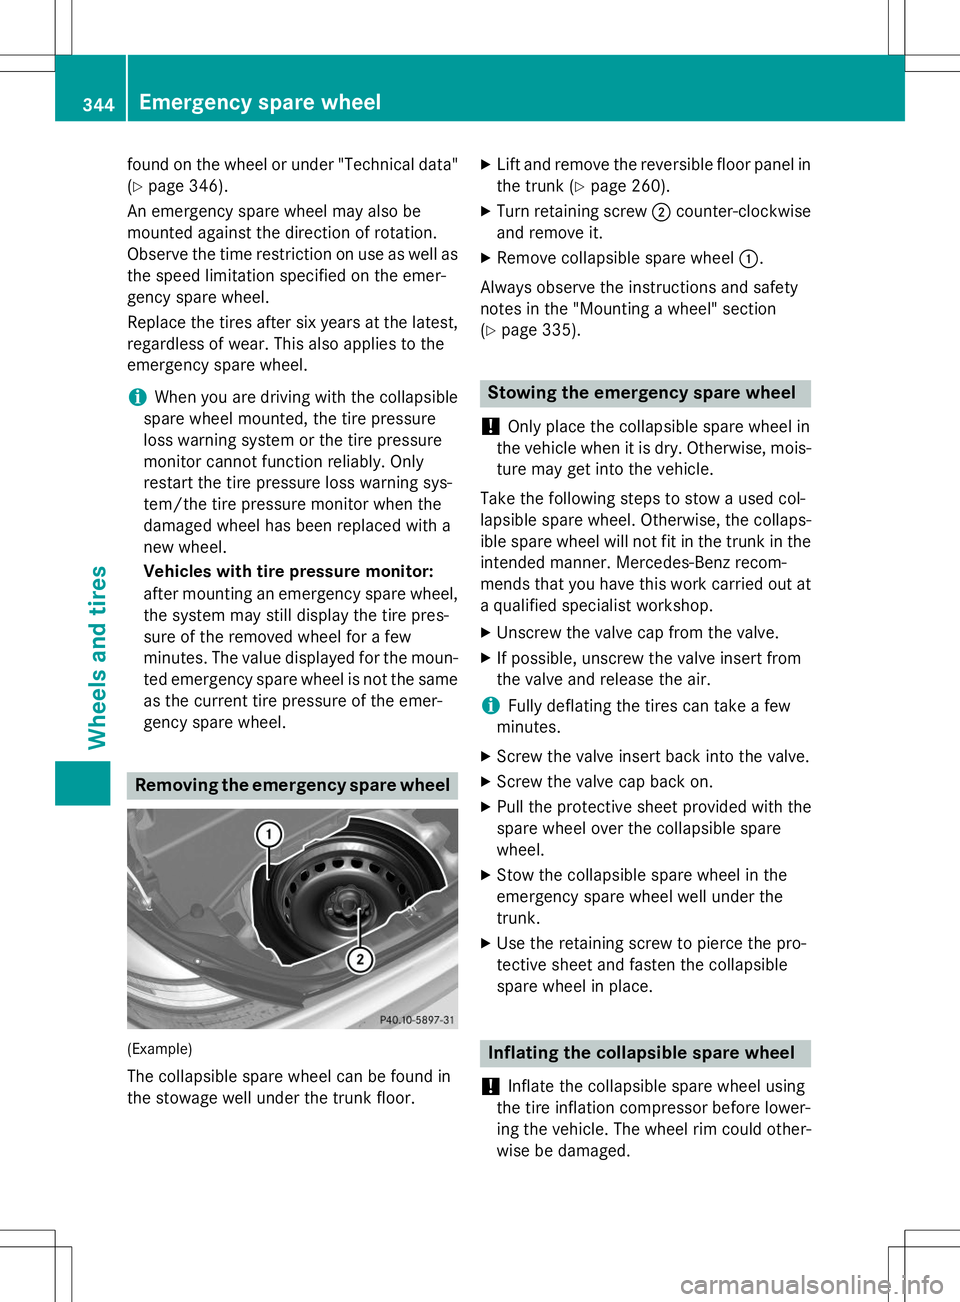
Removing the emergency spare wheel
(Example)
The collapsible spare wheel can be found in
the stowage well under the trunk floor. X
Lift and remove the reversible floor panel in
the trunk ( Ypage 260).
X Turn retaining screw ;counter-clockwise
and remove it.
X Remove collapsible spare wheel :.
Always observe the instructions and safety
notes in the "Mounting a wheel" section( Y page 335).
Stowing the emergency spare wheel
!
Only place the collapsible spare wheel in
the vehicle when it is dry. Otherwise, mois-
ture may get into the vehicle.
Take the following steps to stow a used col-
lapsible spare wheel. Otherwise, the collaps-
ible spare wheel will not fit in the trunk in the
intended manner. Mercedes-Benz recom-
mends that you have this work carried out at
a qualified specialist workshop.
X Unscrew the valve cap from the valve.
X If possible, unscrew the valve insert from
the valve and release the air.
iFully deflating the tires can take a few
minutes.
X Screw the valve insert back into the valve.
X Screw the valve cap back on.
X Pull the protective sheet provided with the
spare wheel over the collapsible spare
wheel.
X Stow the collapsible spare wheel in the
emergency spare wheel well under thetrunk.
X Use the retaining screw to pierce the pro-
tective sheet and fasten the collapsible
spare wheel in place.
Inflating the collapsible spare wheel
!
Inflate the collapsible spare wheel using
the tire inflation compressor before lower-
ing the vehicle. The wheel rim could other-
wise be damaged.
344Emergency spare wheel
Wheels and tires
Page 347 of 358

!Do not operate the tire inflation compres-
sor for longer than ten minutes at a time
without a break. It may otherwise overheat.
The tire inflation compressor can be oper-
ated again once it has cooled down.
X Mount the collapsible spare wheel as
described ( Ypage 335).
The collapsible spare wheel must be moun-
ted before it is inflated.
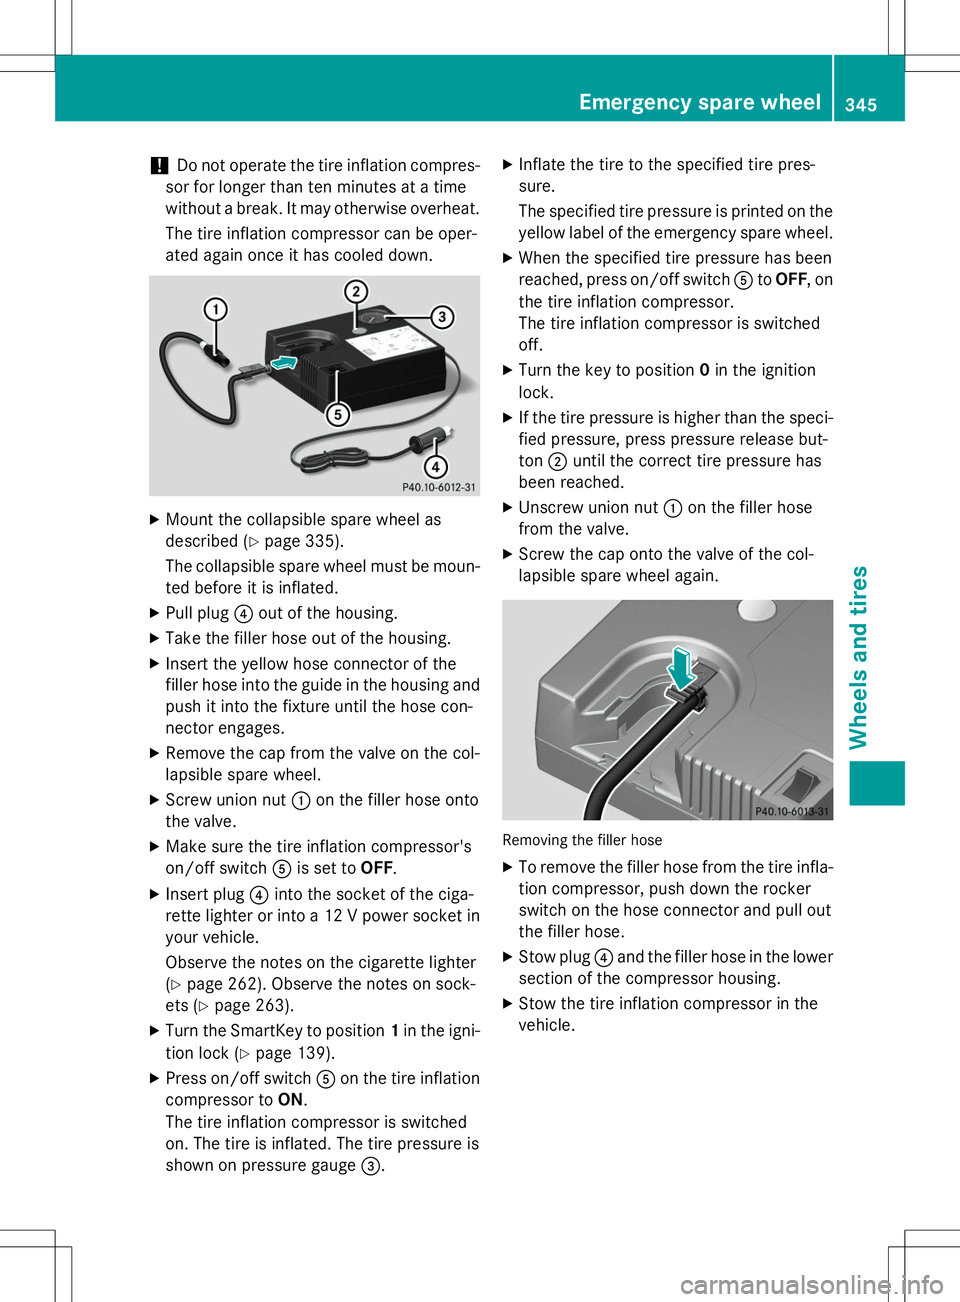
X Pull plug ?out of the housing.
X Take the filler hose out of the housing.
X Insert the yellow hose connector of the
filler hose into the guide in the housing and
push it into the fixture until the hose con-
nector engages.
X Remove the cap from the valve on the col-
lapsible spare wheel.
X Screw union nut :on the filler hose onto
the valve.
X Make sure the tire inflation compressor's
on/off switch Ais set to OFF.
X Insert plug ?into the socket of the ciga-
rette lighter or into a 12 V power socket in
your vehicle.
Observe the notes on the cigarette lighter ( Y page 262). Observe the notes on sock-
ets ( Ypage 263).
X Turn the SmartKey to position 1in the igni-
tion lock ( Ypage 139).
X Press on/off switch Aon the tire inflation
compressor to ON.
The tire inflation compressor is switched
on. The tire is inflated. The tire pressure is
shown on pressure gauge =. X
Inflate the tire to the specified tire pres-sure.
The specified tire pressure is printed on the
yellow label of the emergency spare wheel.
X When the specified tire pressure has been
reached, press on/off switch AtoOFF , on
the tire inflation compressor.
The tire inflation compressor is switchedoff.
X Turn the key to position 0in the ignition
lock.
X If the tire pressure is higher than the speci-
fied pressure, press pressure release but-ton ;until the correct tire pressure has
been reached.
X Unscrew union nut :on the filler hose
from the valve.
X Screw the cap onto the valve of the col-
lapsible spare wheel again.
Removing the filler hose
XTo remove the filler hose from the tire infla-
tion compressor, push down the rocker
switch on the hose connector and pull out
the filler hose.
X Stow plug ?and the filler hose in the lower
section of the compressor housing.
X Stow the tire inflation compressor in thevehicle.
Emergency spare wheel345
Wheels and tires
Z