2015 MERCEDES-BENZ SLK-Class warning lights
[x] Cancel search: warning lightsPage 111 of 358
Automatic headlamp mode
G
WARNING
When the light switch is set to 0058, the low-
beam headlamps may not be switched on
automatically if there is fog, snow or other
causes of poor visibility due to the weather
conditions such as spray. There is a risk of an
accident.
In such situations, turn the light switch to
0058.
The automatic headlamp feature is only an
aid. The driver is responsible for the vehicle's lighting at all times.
0058 is the favored light switch setting. The
light setting is automatically selected accord- ing to the brightness of the ambient light
(exception: poor visibility due to weather con-
ditions such as fog, snow or spray):
R SmartKey in position 1in the ignition lock:
the parking lamps are switched on or off
automatically depending on the brightness of the ambient light.
R With the engine running: if you have acti-
vated the daytime running lamps function
via the on-board computer, the daytime
running lamps or the low-beam headlamps
and parking lamps are switched on or off
automatically depending on the brightnessof the ambient light.
X To switch on automatic headlamp
mode: turn the light switch to 0058.
Only for Canada:
The daytime running lamps improve the visi-
bility of your vehicle during the day. The day-
time running lamps function is required by law in Canada. It cannot therefore be deactivated.
When the engine is running and the vehicle is
stationary: if you move the selector lever from
a drive position to P, the daytime running
lamps/low-beam headlamps go out after
three minutes.
When the engine is running, the vehicle is
stationary and in bright ambient light: if you turn the light switch to
0060, the daytime
running lamps and parking lamps switch on.
If the engine is running and you turn the light switch to 0058, the manual settings take
precedence over the daytime running lamps.
USA only:
The daytime running lamps improve the visi-
bility of your vehicle during the day. To do this,
the daytime running lamps function must be
switched on using the on-board computer
(Y page 205).
If the engine is running and you turn the light
switch to 0060or0058, the manual settings
take precedence over the daytime running
lamps.
Low-beam headlamps G
WARNING
When the light switch is set to 0058, the low-
beam headlamps may not be switched on
automatically if there is fog, snow or other
causes of poor visibility due to the weather
conditions such as spray. There is a risk of an
accident.
In such situations, turn the light switch to
0058.
Even if the light sensor does not detect that it is dark, the parking lamps and low-beam
headlamps switch on when the ignition is
switched on and the light switch is set to the 0058 position. This is a particularly useful
function in the event of rain and fog.
X To switch on the low-beam headlamps:
turn the SmartKey in the ignition lock to
position 2or start the engine.
X Turn the light switch to 0058.
The green 0058indicator lamp in the instru-
ment cluster lights up.
Front fog lamps
In conditions where visibility is poor due to
fog, snow or rain, the fog lamps improve vis-
ibility as well as making it easier for other road
users to see you. They can be operated
together with the parking lamps or together Exterior lighting
109Lights and windshield wipers Z
Page 113 of 358
High-beam headlamps
X
To switch on the high-beam headlamps:
turn the SmartKey in the ignition lock to
position 2or start the engine.
X Turn the light switch to 0058or0058.
X Press the combination switch beyond the
pressure point in the direction of arrow 0043.
In the 0058position, the high-beam head-
lamps are only switched on when it is dark
and the engine is running.
The 0057 indicator lamp in the instrument
cluster lights up when the high-beam head-
lamps are switched on.
X To switch off the high-beam head-
lamps: move the combination switch back
to its normal position.
The 0057 indicator lamp in the instrument
cluster goes out.
High-beam flasher X
To switch on: turn the SmartKey in the
ignition lock to position 1or 2or start the
engine.
X Pull the combination switch in the direction
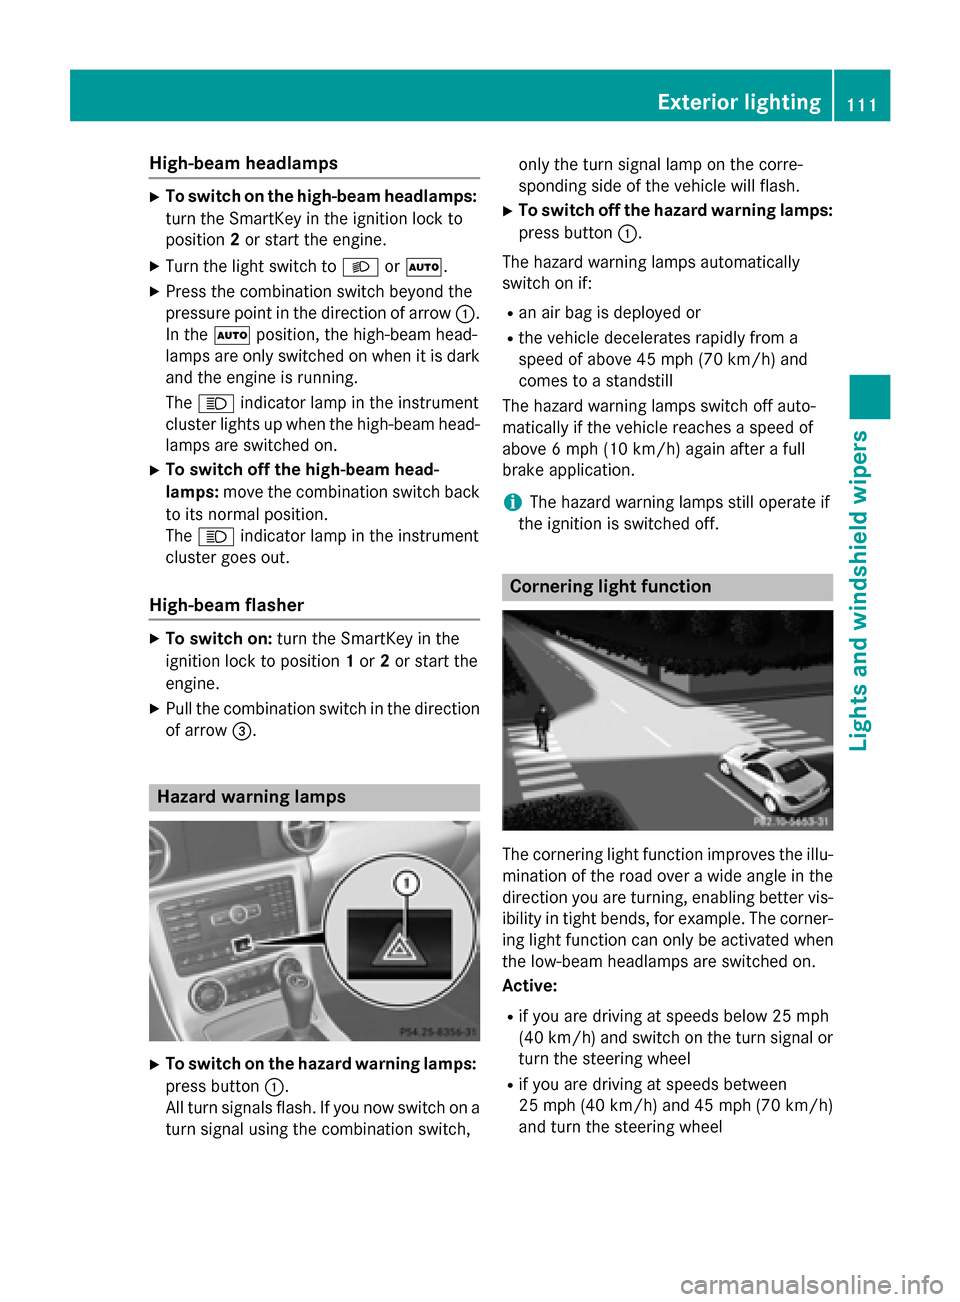
of arrow 0087. Hazard warning lamps
X
To switch on the hazard warning lamps:
press button 0043.
All turn signals flash. If you now switch on a turn signal using the combination switch, only the turn signal lamp on the corre-
sponding side of the vehicle will flash.
X To switch off the hazard warning lamps:
press button 0043.
The hazard warning lamps automatically
switch on if:
R an air bag is deployed or
R the vehicle decelerates rapidly from a
speed of above 45 mph (70 km/h) and
comes to a standstill
The hazard warning lamps switch off auto-
matically if the vehicle reaches a speed of
above 6 mph (10 km/h) again after a full
brake application.
i The hazard warning lamps still operate if
the ignition is switched off. Cornering light function
The cornering light function improves the illu-
mination of the road over a wide angle in the direction you are turning, enabling better vis-
ibility in tight bends, for example. The corner- ing light function can only be activated when
the low-beam headlamps are switched on.
Active:
R if you are driving at speeds below 25 mph
(40 km/h) and switch on the turn signal or
turn the steering wheel
R if you are driving at speeds between
25 mph (40 km/h) and 45 mph (70 km/h)
and turn the steering wheel Exterior lighting
111Lights and windshield wipers Z
Page 114 of 358

The cornering lamp may remain lit for a short
time, but is automatically switched off after
no more than three minutes. Active light function
The active light function is a system that
moves the headlamps according to the steer-
ing movements of the front wheels. In this
way, relevant areas remain illuminated while
driving. This allows you to identify pedes-
trians, cyclists and animals.
Active: when the lights are switched on. Adaptive Highbeam Assist
General notes You can use this function to set the head-
lamps to change between low beam and high beam automatically. The system recognizes
vehicles with their lights on, either approach-
ing from the opposite direction or traveling in front of your vehicle, and consequently
switches the headlamps from high beam to
low beam.
The system automatically adapts the low-
beam headlamp range depending on the dis-
tance to the other vehicle. Once the system
no longer detects any other vehicles, it reac-
tivates the high-beam headlamps.
The system's optical sensor is located behind
the windshield near the overhead control
panel.
Important safety notes G
WARNING
Adaptive Highbeam Assist does not recognize road users:
R who have no lights, e.g. pedestrians
R who have poor lighting, e.g. cyclists
R whose lighting is blocked, e.g. by a barrier
In very rare cases, Adaptive Highbeam Assist
may fail to recognize other road users that
have lights, or may recognize them too late. In this or similar situations, the automatic high-
beam headlamps will not be deactivated or
activated regardless. There is a risk of an acci-
dent.
Always carefully observe the traffic conditions and switch off the high-beam headlamps in
good time.
Adaptive Highbeam Assist cannot take into
account road, weather or traffic conditions.
Adaptive Highbeam Assist is only an aid. You are responsible for adjusting the vehicle's
lighting to the prevailing light, visibility and
traffic conditions.
In particular, the detection of obstacles can
be restricted if there is:
R poor visibility, e.g. due to fog, heavy rain or
snow
R dirt on the sensors or the sensors are
obscured 112
Exterior lightingLights and windshield wipers
Page 116 of 358
The interior lighting automatically switches
on if you:
R unlock the vehicle
R open a door
R remove the SmartKey from the ignition lock
The interior light is activated for a short while when the SmartKey is removed from the igni-
tion lock. You can activate this delayed
switch-off using the on-board computer
(Y page 206).
Manual interior lighting control X
To switch the interior lighting on/off:
press the 004Abutton.
X To switch the reading lamps on/off:
press the 003Dbutton. Crash-responsive emergency lighting
The interior lighting is activated automatically
if the vehicle is involved in an accident.
X To switch off the crash-responsive
emergency lighting: press the hazard
warning lamp button.
or X Lock and then unlock the vehicle using the
SmartKey. Replacing bulbs
Important safety notes
Xenon bulbs G
DANGER
Xenon bulbs carry a high voltage. You can get an electric shock if you remove the cover of
the Xenon bulb and touch the electrical con-
tacts. There is a risk of fatal injury.
Never touch the parts or the electrical con-
tacts of the Xenon bulb. Always have work on
the Xenon bulbs carried out at a qualified spe-
cialist workshop. If your vehicle is equipped with Xenon bulbs,
you can recognize this by the following: the
cone of light from the Xenon bulbs moves
from the top to the bottom and back again
when you start the engine. For this to be
observed, the lights must be switched on
before starting the engine.
Bulbs and lamps are an important aspect of
vehicle safety. You must therefore make sure that these function correctly at all times.
Have the headlamp setting checked regularly.
Other bulbs G
WARNING
Bulbs, lamps and connectors can get very hot when operating. If you change a bulb, you
could burn yourself on these components.
There is a risk of injury.
Allow these components to cool down before changing a bulb.
Do not use a bulb that has been dropped or if
its glass tube has been scratched.
The bulb may explode if:
R you touch it
R it is hot
R you drop it
R you scratch it
Only operate bulbs in enclosed lamps
designed for that purpose. Only install spare
bulbs of the same type and the specified volt- age.
Marks on the glass tube reduce the service
life of the bulbs. Do not touch the glass tube
with your bare hands. If necessary, clean the
glass tube when cold with alcohol or spirit and
rub it off with a lint-free cloth.
Protect bulbs from moisture during opera-
tion. Do not allow bulbs to come into contact
with liquids.
There are bulbs other than the Xenon bulbs
that you cannot replace. Replace only the
bulbs listed (Y page 115). Have the bulbs that
you cannot replace yourself changed at a
qualified specialist workshop. 114
Replacing bulbsLights and windshield wipers
Page 120 of 358
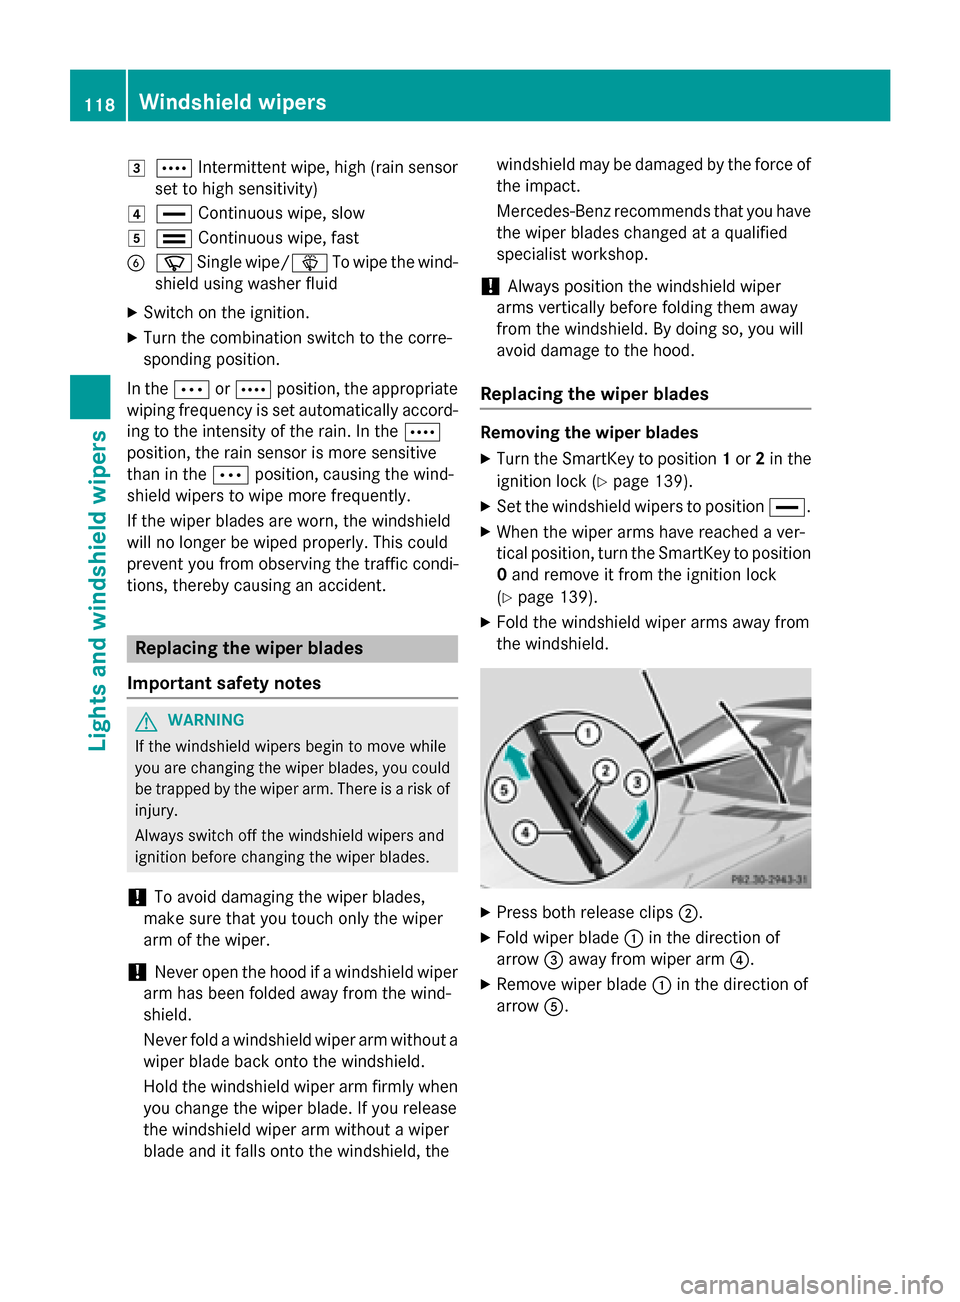
0049
0063 Intermittent wipe, high (rain sensor
set to high sensitivity)
004A 00AA Continuous wipe, slow
004B 00A9 Continuous wipe, fast
0084 00D3 Single wipe/00D4 To wipe the wind-
shield using washer fluid
X Switch on the ignition.
X Turn the combination switch to the corre-
sponding position.
In the 0062or0063 position, the appropriate
wiping frequency is set automatically accord-
ing to the intensity of the rain. In the 0063
position, the rain sensor is more sensitive
than in the 0062position, causing the wind-
shield wipers to wipe more frequently.
If the wiper blades are worn, the windshield
will no longer be wiped properly. This could
prevent you from observing the traffic condi-
tions, thereby causing an accident. Replacing the wiper blades
Important safety notes G
WARNING
If the windshield wipers begin to move while
you are changing the wiper blades, you could be trapped by the wiper arm. There is a risk of
injury.
Always switch off the windshield wipers and
ignition before changing the wiper blades.
! To avoid damaging the wiper blades,
make sure that you touch only the wiper
arm of the wiper.
! Never open the hood if a windshield wiper
arm has been folded away from the wind-
shield.
Never fold a windshield wiper arm without a
wiper blade back onto the windshield.
Hold the windshield wiper arm firmly when you change the wiper blade. If you release
the windshield wiper arm without a wiper
blade and it falls onto the windshield, the windshield may be damaged by the force of
the impact.
Mercedes-Benz recommends that you have the wiper blades changed at a qualified
specialist workshop.
! Always position the windshield wiper
arms vertically before folding them away
from the windshield. By doing so, you will
avoid damage to the hood.
Replacing the wiper blades Removing the wiper blades
X Turn the SmartKey to position 1or 2in the
ignition lock (Y page 139).
X Set the windshield wipers to position 00AA.
X When the wiper arms have reached a ver-
tical position, turn the SmartKey to position
0 and remove it from the ignition lock
(Y page 139).
X Fold the windshield wiper arms away from
the windshield. X
Press both release clips 0044.
X Fold wiper blade 0043in the direction of
arrow 0087away from wiper arm 0085.
X Remove wiper blade 0043in the direction of
arrow 0083. 118
Windshield wipersLights and windshield wipers
Page 136 of 358

Activating/deactivating
X
Turn the SmartKey to position 0in the igni-
tion lock or remove it (Y page 139).
X To activate: press the004Bor0056 but-
ton.
The indicator lamp in the 004Bor0056
button lights up.
i The blower will run at a low speed regard-
less of the airflow setting.
i If you activate the residual heat function
at high temperatures, only the ventilation
will be activated. The blower runs at
medium speed.
X To deactivate: press the004Bor0056
button.
The indicator lamp in the 004Bor0056
button goes out.
Residual heat is deactivated automatically: R after approximately 30 minutes
R when the ignition is switched on
R if the battery voltage drops Setting the air vents
Important safety notes
G
WARNING
Very hot or very cold air can flow from the air vents. This could result in burns or frostbite in the immediate vicinity of the air vents. There
is a risk of injury.
Make sure that all vehicle occupants always
maintain a sufficient distance to the air out-
lets. If necessary, redirect the airflow to
another area of the vehicle interior. G
WARNING
When AIRSCARF is switched on, very hot air
can flow from the vents in the head restraints. This could result in burns in the immediate
vicinity of the air vents. There is a risk of injury.
Reduce the heater output before it becomes
too hot. In order to ensure the direct flow of fresh air
through the air vents into the vehicle interior, please observe the following notes:
R keep the air inlet grille on the hood and in
the engine compartment on the front-
passenger side free of blockages, such as
ice, snow or leaves.
R never cover the air vents or air intake grilles
in the vehicle interior.
i You can move the adjusters for the air
vents vertically or horizontally to set the
direction of the airflow.
i For optimal climate control in the vehicle,
open the air vents completely and set the
adjusters to the central position. Setting the center air vents
X
To open the center air vent: turn the
adjuster in one of center air vents 0043coun-
ter-clockwise.
X To close the center air vent: turn the
adjuster in one of center air vents 0043clock-
wise until it engages. 134
Setting the air ventsClimate cont
rol
Page 169 of 358
Heavy and light loads
G
WARNING
If you rest your foot on the brake pedal while
driving, the braking system can overheat. This increases the stopping distance and can even
cause the braking system to fail. There is a
risk of an accident.
Never use the brake pedal as a footrest. Never
depress the brake pedal and the accelerator
pedal at the same time.
! Depressing the brake pedal constantly
results in excessive and premature wear to
the brake pads.
If the brakes have been subjected to a heavy load, do not stop the vehicle immediately, but
drive on for a short while. This allows the air- flow to cool the brakes more quickly.
Wet roads If you have driven for a long time in heavy rain
without braking, there may be a delayed reac- tion from the brakes when braking for the first
time. This may also occur after the vehicle has been washed or driven through deep water.
You then have to depress the brake pedal
more firmly. Maintain a greater distance from
the vehicle in front.
After driving on a wet road or having the vehi- cle washed, brake firmly while paying atten-
tion to the traffic conditions. This will warm upthe brake discs, thereby drying them more
quickly and protecting them against corro-
sion.
Limited braking performance on salt-
treated roads If you drive on salted roads, a layer of salt
residue may form on the brake discs and
brake pads. This can result in a significantly
longer braking distance. R
Brake occasionally to remove any possible
salt residue. Make sure that you do not
endanger other road users when doing so.
R Carefully depress the brake pedal and the
beginning and end of a journey.
R Maintain a greater distance to the vehicle
ahead.
Servicing the brakes !
If the red brake warning lamp lights up in
the instrument cluster and you hear a warn-
ing tone while the engine is running, the
brake fluid level may be too low. Observe
additional warning messages in the multi-
function display.
The brake fluid level may be too low due to brake pad wear or leaking brake lines.
Have the brake system checked immedi-
ately. This work should be carried out at a
qualified specialist workshop.
! As the ESP ®
system operates automati-
cally, the engine and the ignition must be
switched off (SmartKey in position 0or 1in
the ignition lock) if the electric parking
brake is being tested on a brake dynamom-
eter (maximum 10 seconds).
Braking triggered automatically by ESP ®
may seriously damage the brake system.
All checks and maintenance work on the
brake system must be carried out at a quali-
fied specialist workshop. Have this work car-
ried out at an authorized Mercedes-Benz Cen-
ter.
Have the brake pads replaced and the brake
fluid renewed at a qualified specialist work-
shop, e.g. an authorized Mercedes-Benz Cen- ter.
If the brake system has only been subject to
moderate loads, you should test the function- ality of your brakes at regular intervals. To doso, depress the brake pedal firmly when driv-
ing at a high speed. This improves the grip of
the brake pads.
A description of Brake Assist (BAS):
(Y page 62) Driving tips
167Driving and parking Z
Page 187 of 358

Problems with PARKTRONIC
Problem
Possible causes/consequences and
0050
0050Solutions Only the red segments
in the PARKTRONIC
warning displays are lit.
You also hear a warning
tone for approximately
two seconds.
PARKTRONIC is deacti-
vated after approx-
imately 20 seconds,
and the indicator lamp
in the PARKTRONIC
button lights up. PARKTRONIC has malfunctioned and has switched off.
X If problems persist, have PARKTRONIC checked at a qualified
specialist workshop. Only the red segments
in the PARKTRONIC
warning displays are lit.
PARKTRONIC is deacti-
vated after approx-
imately five seconds. The PARKTRONIC sensors are dirty or there is interference.
X Clean the PARKTRONIC sensors (Y page 287).
X Switch the ignition back on. The problem may be caused by an external source of radio or
ultrasound waves.
X See if PARKTRONIC functions in a different location. Parking Guidance
Important safety notes Parking Guidance is an electronic parking aid
with ultrasound. Ultrasound is used to meas- ure the road on both sides of the vehicle. A
suitable parking space is indicated by the
parking symbol. You receive steering instruc-
tions when parking. You may also use PARK-
TRONIC (Y page 182).
Parking Guidance is only an aid. It is not a
replacement for your attention to your imme-
diate surroundings. You are always responsi- ble for safe maneuvering, parking and exitinga parking space. When maneuvering, parking
or pulling out of a parking space, make sure
that there are no persons, animals or objects
in the area in which you are maneuvering. G
WARNING
If objects are located above the detection
range, Parking Guidance may provide steering instructions too soon. You may cause a colli-
sion as a result. There is a risk of an accident.
If objects are located above the detection
range, stop and switch off Parking Assist.
! If unavoidable, you should drive over
obstacles such as curbs slowly and not at a sharp angle. Otherwise, you may damage
the wheels or tires.
When PARKTRONIC is deactivated, Parking
Guidance is also unavailable.
Parking Guidance may also display spaces
not suitable for parking, e.g.:
R where parking or stopping is prohibited
R in front of driveways or entrances and exits
R on unsuitable surfaces Driving systems
185Driving and parking Z