2015 MERCEDES-BENZ SLK-Class heating
[x] Cancel search: heatingPage 135 of 358
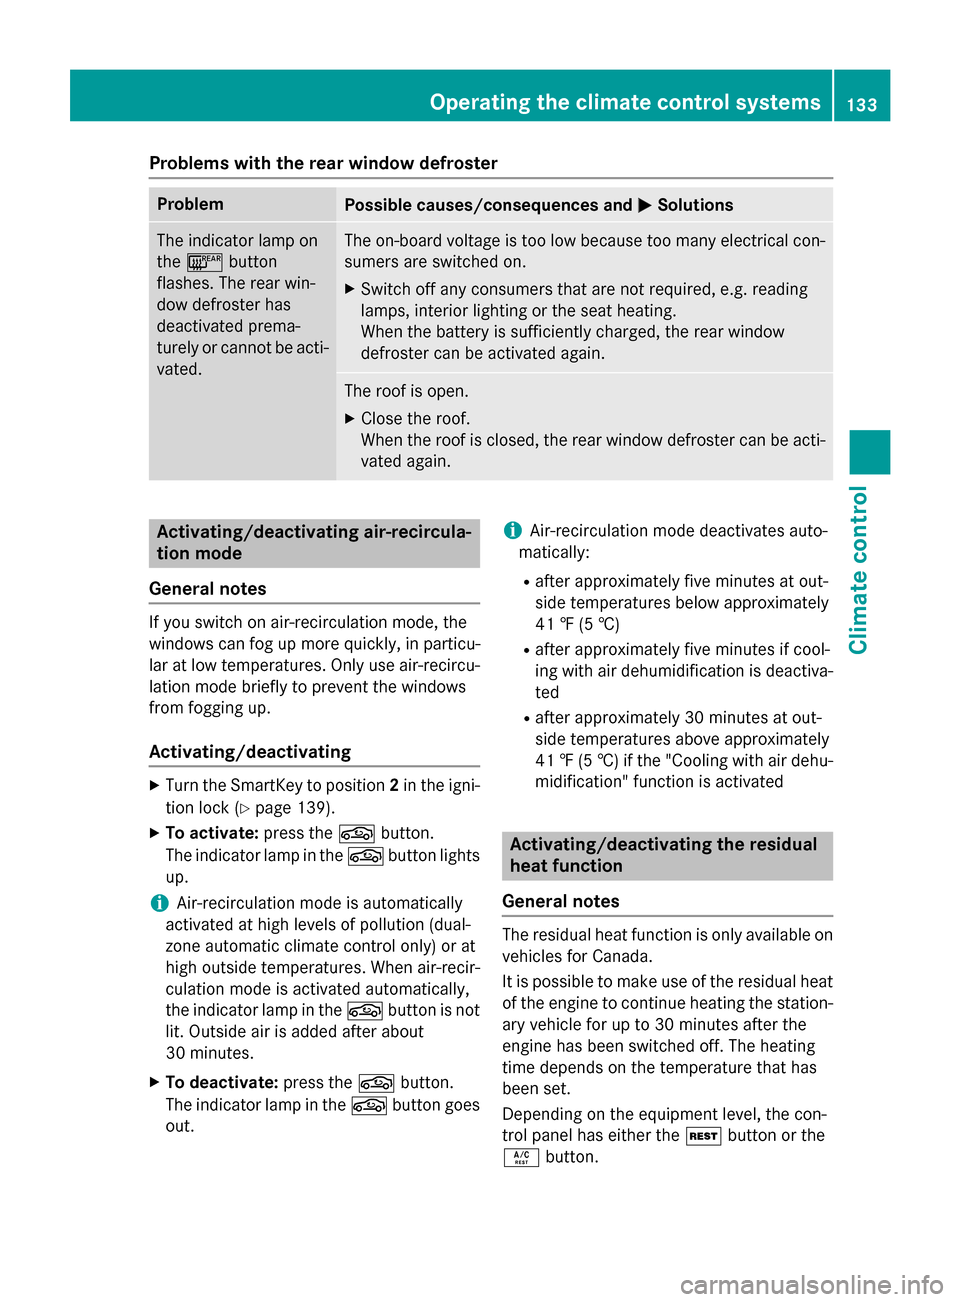
Problems with the rear window defroster
Problem
Possible causes/consequences and
0050
0050Solutions The indicator lamp on
the
006C button
flashes. The rear win-
dow defroster has
deactivated prema-
turely or cannot be acti- vated. The on-board voltage is too low because too many electrical con-
sumers are switched on.
X Switch off any consumers that are not required, e.g. reading
lamps, interior lighting or the seat heating.
When the battery is sufficiently charged, the rear window
defroster can be activated again. The roof is open.
X Close the roof.
When the roof is closed, the rear window defroster can be acti-
vated again. Activating/deactivating air-recircula-
tion mode
General notes If you switch on air-recirculation mode, the
windows can fog up more quickly, in particu-
lar at low temperatures. Only use air-recircu-
lation mode briefly to prevent the windows
from fogging up.
Activating/deactivating X
Turn the SmartKey to position 2in the igni-
tion lock (Y page 139).
X To activate: press the0072button.
The indicator lamp in the 0072button lights
up.
i Air-recirculation mode is automatically
activated at high levels of pollution (dual-
zone automatic climate control only) or at
high outside temperatures. When air-recir-
culation mode is activated automatically,
the indicator lamp in the 0072button is not
lit. Outside air is added after about
30 minutes.
X To deactivate: press the0072button.
The indicator lamp in the 0072button goes
out. i
Air-recirculation mode deactivates auto-
matically:
R after approximately five minutes at out-
side temperatures below approximately
41 ‡ (5 †)
R after approximately five minutes if cool-
ing with air dehumidification is deactiva-
ted
R after approximately 30 minutes at out-
side temperatures above approximately
41 ‡ (5 †) if the "Cooling with air dehu-
midification" function is activated Activating/deactivating the residual
heat function
General notes The residual heat function is only available on
vehicles for Canada.
It is possible to make use of the residual heat
of the engine to continue heating the station- ary vehicle for up to 30 minutes after the
engine has been switched off. The heating
time depends on the temperature that has
been set.
Depending on the equipment level, the con-
trol panel has either the 004Bbutton or the
0056 button. Operating the climate control systems
133Climate control
Page 161 of 358
and, if applicable, the auxiliary heating before
refueling. G
WARNING
Fuel is poisonous and hazardous to health.
There is a risk of injury.
You must make sure that fuel does not come into contact with your skin, eyes or clothing
and that it is not swallowed. Do not inhale fuel
vapors. Keep fuel away from children.
If you or others come into contact with fuel,
observe the following:
R Wash away fuel from skin immediately
using soap and water.
R If fuel comes into contact with your eyes,
immediately rinse them thoroughly with
clean water. Seek medical assistance with-
out delay.
R If fuel is swallowed, seek medical assis-
tance without delay. Do not induce vomit-
ing.
R Immediately change out of clothing which
has come into contact with fuel. G
WARNING
Electrostatic buildup can create sparks and
ignite fuel vapors. There is a risk of fire and
explosion.
Always touch the vehicle body before opening the fuel filler flap or touching the fuel pump
nozzle. Any existing electrostatic buildup is
thereby discharged.
! Do not use diesel to refuel vehicles with a
gasoline engine. Do not switch on the igni- tion if you accidentally refuel with the
wrong fuel. Otherwise, the fuel will enter
the fuel system. Even small amounts of the
wrong fuel could result in damage to the
fuel system and the engine. Notify a quali-
fied specialist workshop and have the fuel
tank and fuel lines drained completely.
! Overfilling the fuel tank could damage the
fuel system. !
Take care not to spill any fuel on painted
surfaces. You could otherwise damage the paintwork.
! Use a filter when refueling from a fuel can.
Otherwise, the fuel lines and/or injection
system could be blocked by particles from
the fuel can.
Do not get into the vehicle again during the
refueling process. Otherwise, electrostatic
charge could build up again.
If you overfill the fuel tank, fuel could spray
out when the fuel pump nozzle is removed.
For further information on fuel and fuel quality
(Y page 348). Refueling
General information The fuel filler flap is unlocked or locked auto-
matically when you open or close the vehicle
with the SmartKey or with KEYLESS-GO.
The position of the fuel filler cap is displayed
00B6 in the instrument cluster. The arrow
next to the filling pump indicates the side of
the vehicle.
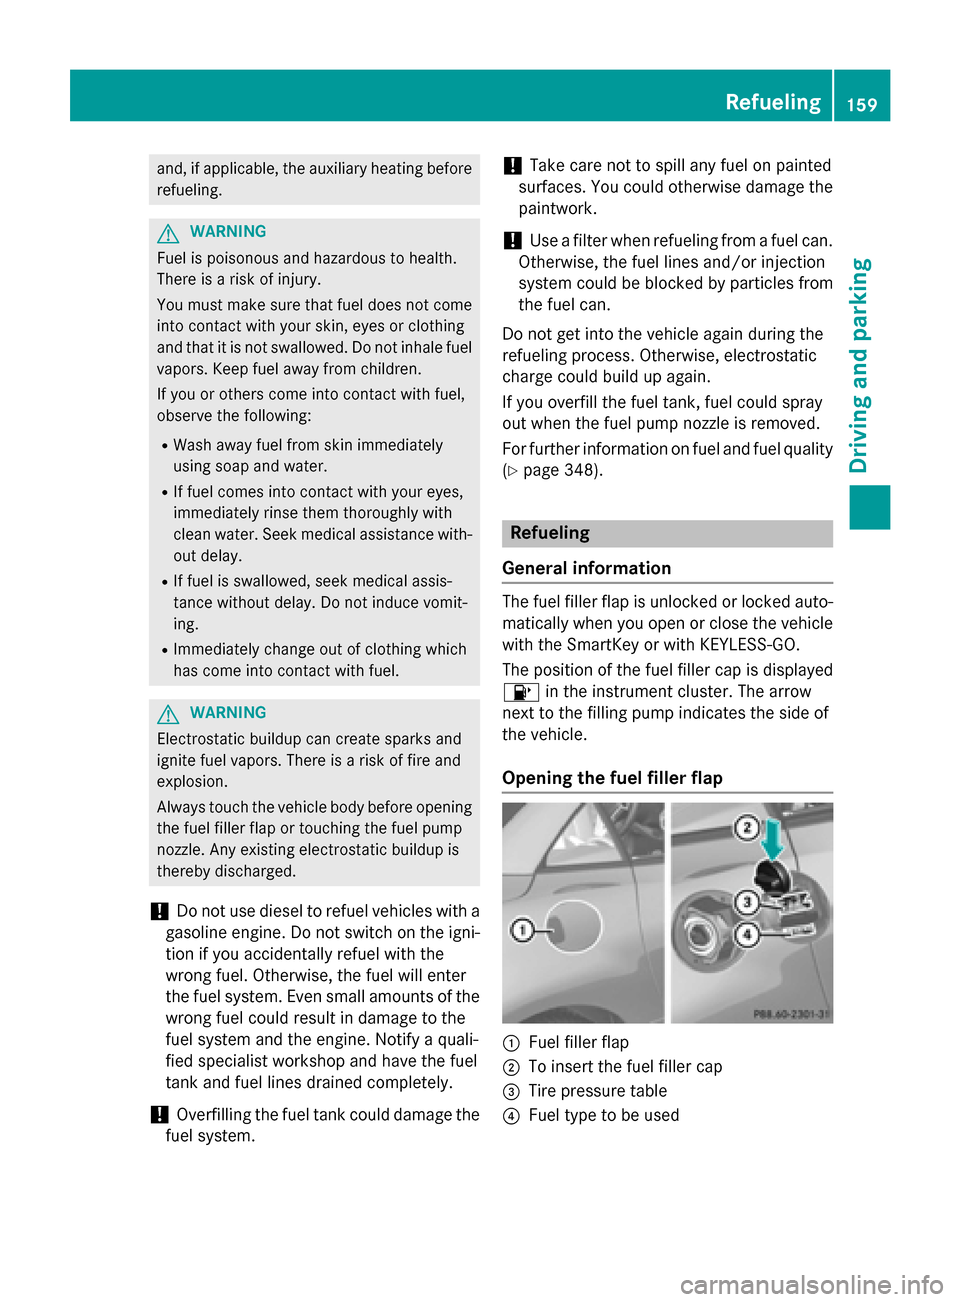
Opening the fuel filler flap 0043
Fuel filler flap
0044 To insert the fuel filler cap
0087 Tire pressure table
0085 Fuel type to be used Refueling
159Driving and parking Z
Page 168 of 358
in the ECO display does not indicate a fixed
consumption.
Apart from driving style, consumption is
dependent on many factors such as, e.g.:
R load
R tire pressure
R cold start
R choice of route
R electrical consumers switched on
These factors are not included in the ECO dis-
play.
The evaluation of your driving style is carried
out using the following three categories:
R Acceleration
Acceleration (evaluation of all accelera-
tion processes):
- The bar fills up: moderate acceleration,
especially at higher speeds
- The bar empties: sporty acceleration
R Constant
Constant (assessment of driving behavior
at all times):
- The bar fills up: constant speed and
avoidance of unnecessary acceleration
and deceleration
- The bar empties: fluctuations in speed
R Coasting Coasting (assessment of all deceleration
processes):
- The bar fills up: anticipatory driving,
keeping your distance and early release
of the accelerator. The vehicle can coast
without use of the brakes.
- The bar empties: frequent braking
i An economical driving style specially
requires driving at moderate engine
speeds.
To achieve a higher value in the categories
Acceleration
Acceleration andConstant Constant :
R observe the gearshift recommendations.
R drive in drive program E(vehicles with an
automatic transmission).
i On long journeys at a constant speed, e.g.
on the highway, only the bar for Constant
Constant
will change. i
The ECO display summarizes the driving
characteristics from the start of the journey
to its completion. For this reason, the bars change dynamically at the beginning of the
journey. On longer journeys, there are
fewer changes. For more dynamic changes, carry out a manual reset.
For further information on the ECO display,
see (Y page 198). Brakes
Important safety notes G
WARNING
If you shift down on a slippery road surface in an attempt to increase the engine's braking
effect, the drive wheels could lose their grip.
There is an increased danger of skidding and
accidents.
Do not shift down for additional engine brak-
ing on a slippery road surface.
Downhill gradients !
On long, steep gradients, you must
reduce the load on the brakes. To use
engine braking, shift to a lower gear in good time. This helps you to avoid overheating
the brakes and wearing them out exces-
sively.
When making use of the engine braking
effect, it is possible that a drive wheel may
not turn for some time, e.g. in the case of
suddenly changing or slippery road surface conditions. This could cause damage to the
drive train. This type of damage is not cov- ered by the Mercedes-Benz warranty.
Change into a lower gear in good time on long
and steep downhill gradients. This is espe-
cially important if the vehicle is laden. 166
Driving tipsDriving and parking
Page 171 of 358
Winter driving
G
WARNING
If you shift down on a slippery road surface in an attempt to increase the engine's braking
effect, the drive wheels could lose their grip.
There is an increased danger of skidding and
accidents.
Do not shift down for additional engine brak-
ing on a slippery road surface. G
DANGER
If the exhaust pipe is blocked or adequate
ventilation is not possible, poisonous gases
such as carbon monoxide (CO) may enter the vehicle. This is the case, e.g. if the vehicle
becomes trapped in snow. There is a risk of
fatal injury.
If you leave the engine or the auxiliary heating
running, make sure the exhaust pipe and area
around the vehicle are clear of snow. To
ensure an adequate supply of fresh air, open a window on the side of the vehicle that is not
facing into the wind.
Have your vehicle winter-proofed at a quali-
fied specialist workshop at the onset of win-
ter.
Drive particularly carefully on slippery road
surfaces. Avoid sudden acceleration, steering and braking maneuvers. Do not use cruise
control.
If the vehicle threatens to skid or cannot be
stopped when moving at low speed:
X Vehicles with manual transmission:
shift to neutral.
X Vehicles with automatic transmission:
shift the transmission to position N.
The outside temperature indicator is not
designed to serve as an ice-warning device
and is therefore unsuitable for that purpose.
Changes in the outside temperature are dis-
played after a short delay.
Indicated temperatures just above the freez-
ing point do not guarantee that the road sur-
face is free of ice. The road may still be icy, especially in wooded areas or on bridges. The
vehicle could skid if you fail to adapt your
driving style. Always adapt your driving style
and drive at a speed to suit the prevailing
weather conditions.
You should pay special attention to road con-
ditions when temperatures are around freez-
ing point.
For more information on driving with snow
chains, see (Y page 313).
For more information on driving with summer tires, see (Y page 312).
Observe the notes in the "Winter operation"
section (Y page 312). Driving systems
Cruise control
General notes Cruise control maintains a constant road
speed for you. It brakes automatically in order
to avoid exceeding the set speed. On long and
steep downhill gradients, especially if the
vehicle is laden, you must select a lower gear in good time. By doing so, you will make use of the braking effect of the engine. This relievesthe load on the brake system and prevents
the brakes from overheating and wearing too
quickly.
Use cruise control only if road and traffic con- ditions make it appropriate to maintain a
steady speed for a prolonged period. You canstore any road speed above 20 mph
(30 km/h).
Important safety notes If you fail to adapt your driving style, cruise
control can neither reduce the risk of an acci-
dent nor override the laws of physics. Cruise
control cannot take into account the road,
traffic and weather conditions. Cruise control
is only an aid. You are responsible for the dis-
tance to the vehicle in front, for vehicle speed, Driving systems
169Driving and parking Z
Page 174 of 358
TRONIC PLUS brakes automatically so that
the set speed is not exceeded.
On long and steep downhill gradients, espe-
cially if the vehicle is laden, you must select a lower gear in good time. By doing so, you will make use of the braking effect of the engine.
This relieves the load on the brake system and
prevents the brakes from overheating and
wearing too quickly.
If a slower-moving vehicle is detected in front, DISTRONIC PLUS brakes your vehicle. It
maintains the preset distance to the vehicle infront.
If DISTRONIC PLUS detects that there is a risk
of a collision, you will be warned visually and acoustically. DISTRONIC PLUS cannot pre-
vent a collision without your intervention. An
intermittent warning tone will then sound and
the distance warning lamp will light up in the instrument cluster. Brake immediately in
order to increase the distance to the vehicle
in front or take evasive action provided it is
safe to do so.
For DISTRONIC PLUS to assist you, the radar
sensor system must be operational.
If there is no vehicle in front, DISTRONIC
PLUS operates in the same way as cruise
control in the speed range between 20 mph
(Canada: 30 km/h) and 120 mph (Canada:
200 km/h). If a vehicle is driving in front of
you, it operates in the speed range between
0 mph (0 km/h) and 120 mph (Canada:
200 km/h).
Do not use DISTRONIC PLUS while driving on roads with steep gradients.
As DISTRONIC PLUS transmits radar waves, it
can resemble the radar detectors of the
responsible authorities. You can refer to the
relevant chapter in the Operator's Manual if
questions are asked about this.
i USA only: This device has been approved
by the FCC as a "Vehicular Radar System". The radar sensor is intended for use in an
automotive radar system only. Removal,
tampering, or altering of the device will void
any warranties, and is not permitted by the FCC. Do not tamper with, alter, or use in
any non-approved way.
Any unauthorized modification to this
device could void the user's authority to
operate the equipment.
i Canada only: This device complies with
RSS-210 of Industry Canada. Operation is
subject to the following two conditions:
1. This device may not cause harmful inter- ference, and
2. this device must accept any interference
received, including interference that may
cause undesired operation of the device.
Removal, tampering, or altering of the
device will void any warranties, and is not
permitted. Do not tamper with, alter, or use in any non-approved way.
Any unauthorized modification to this
device could void the user's authority to
operate the equipment.
Important safety notes G
WARNING
DISTRONIC PLUS does not react to:
R people or animals
R stationary obstacles on the road, e.g. stop-
ped or parked vehicles
R oncoming and crossing traffic
As a result, DISTRONIC PLUS may neither give
warnings nor intervene in such situations.
There is a risk of an accident.
Always pay careful attention to the traffic sit- uation and be ready to brake. G
WARNING
DISTRONIC PLUS cannot always clearly iden- tify other road users and complex traffic sit-
uations.
In such cases, DISTRONIC PLUS may:
R give an unnecessary warning and then
brake the vehicle
R neither give a warning nor intervene
R accelerate unexpectedly 172
Driving systemsDriving and parking
Page 262 of 358
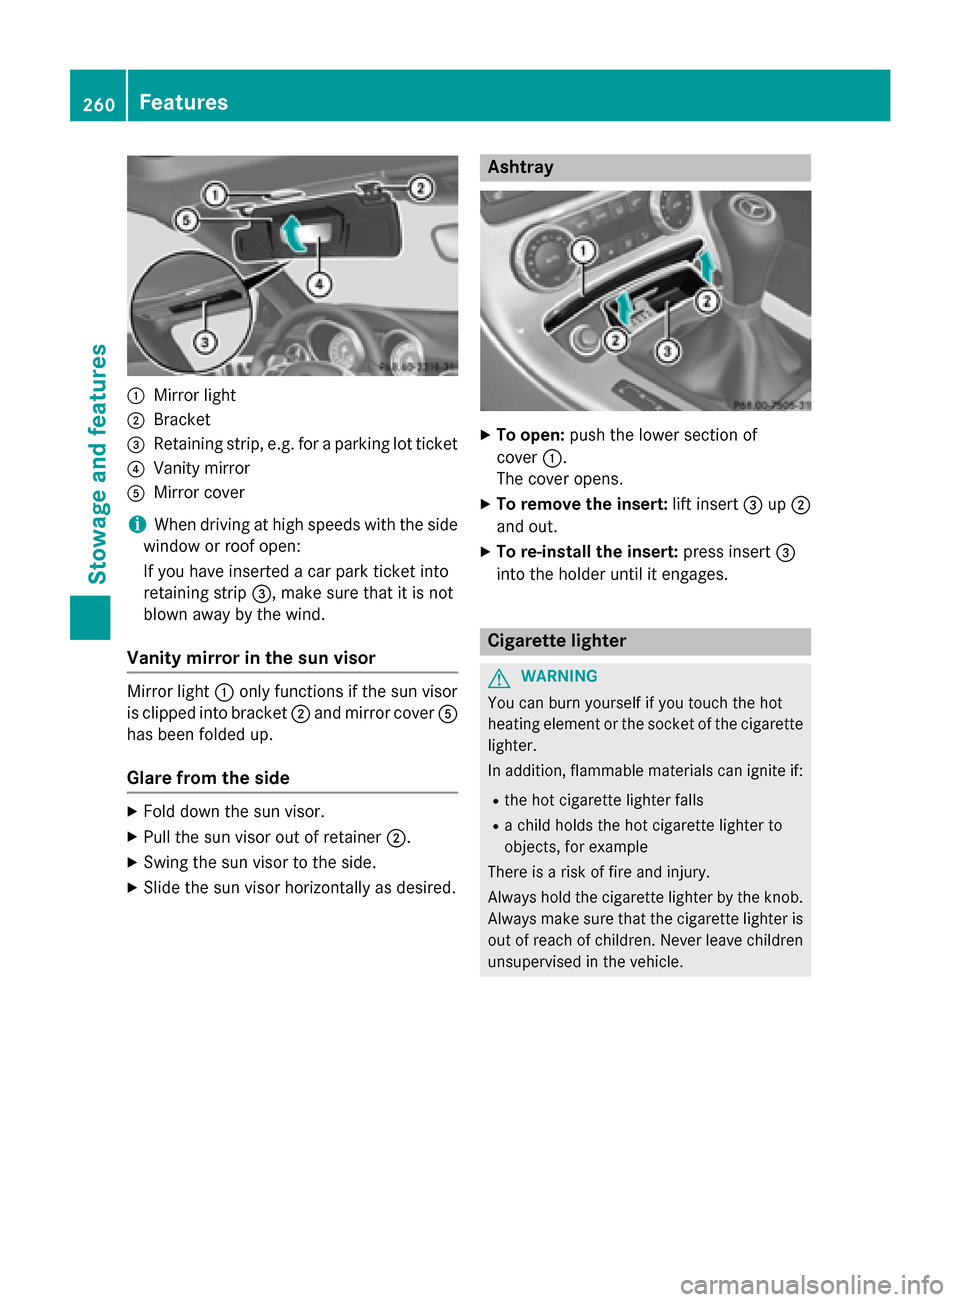
0043
Mirror light
0044 Bracket
0087 Retaining strip, e.g. for a parking lot ticket
0085 Vanity mirror
0083 Mirror cover
i When driving at high speeds with the side
window or roof open:
If you have inserted a car park ticket into
retaining strip 0087, make sure that it is not
blown away by the wind.
Vanity mirror in the sun visor Mirror light
0043only functions if the sun visor
is clipped into bracket 0044and mirror cover 0083
has been folded up.
Glare from the side X
Fold down the sun visor.
X Pull the sun visor out of retainer 0044.
X Swing the sun visor to the side.
X Slide the sun visor horizontally as desired. Ashtray
X
To open: push the lower section of
cover 0043.
The cover opens.
X To remove the insert: lift insert0087up0044
and out.
X To re-install the insert: press insert0087
into the holder until it engages. Cigarette lighter
G
WARNING
You can burn yourself if you touch the hot
heating element or the socket of the cigarette lighter.
In addition, flammable materials can ignite if:
R the hot cigarette lighter falls
R a child holds the hot cigarette lighter to
objects, for example
There is a risk of fire and injury.
Always hold the cigarette lighter by the knob.
Always make sure that the cigarette lighter is
out of reach of children. Never leave children unsupervised in the vehicle. 260
FeaturesStowage and features
Page 263 of 358

Your attention must always be focused on the
traffic conditions. Only use the cigarette
lighter when road and traffic conditions per-
mit.
X Turn the SmartKey to position 2in the igni-
tion lock (Y page 139).
X To open: push the lower section of
cover 0043.
The ashtray opens.
X Press in cigarette lighter 0044.
Cigarette lighter 0044will pop out automati-
cally when the heating element is red-hot. 12 V sockets
General notes !
If you are using all sockets in the vehicle,
make sure that you do not exceed the max- imum current draw of 55 A. Otherwise, you
will overload the fuses.
X Turn the SmartKey to position 1in the igni-
tion lock (Y page 139).
The sockets can be used for accessories with a maximum draw of 180 W (15 A). Accesso-
ries include such items as lamps or chargers
for mobile phones.
If you use the sockets for long periods when
the engine is switched off, the battery may
discharge.
i An emergency cut-out ensures that the
on-board voltage does not drop too low. If
the on-board voltage is too low, the power
to the sockets is automatically cut. This ensures that there is sufficient power to
start the engine.
Socket under the armrest X
Open the stowage compartment under the
armrest (Y page 257).
X Lift up the cover of socket 0043.
On vehicles without ashtrays or lighters, there
is an additional socket in the center console.
Socket in the front-compartment center
console X
To open: push the lower section of
cover 0043.
The stowage compartment opens.
X Lift up the cover of socket 0044. mbrace
General notes You must have a license agreement to acti-
vate the mbrace service. Make sure that your Features
261Stowage and features Z
Page 291 of 358
X
Wipe the wooden trim and trim pieces with
a damp, lint-free cloth, e.g. a microfiber
cloth.
X Heavy soiling: use car care and cleaning
products recommended and approved by
Mercedes-Benz.
Cleaning the seat covers General notes
! Do not use microfiber cloths to clean gen-
uine leather, artificial leather or DINAMICA
covers. If used often, these can damage the cover.
i Note that regular care is essential to
ensure that the appearance and comfort of the covers is retained over time.
Genuine leather seat covers
! To retain the natural appearance of the
leather, observe the following cleaning
instructions:
R Clean genuine leather covers carefully
with a damp cloth and then wipe the cov- ers down with a dry cloth.
R Make sure that the leather does not
become soaked. It may otherwise
become rough and cracked.
R Only use leather care agents that have
been tested and approved by Mercedes-
Benz. You can obtain these from a quali- fied specialist workshop.
Leather is a natural product.
It exhibits natural surface characteristics, for
example:
R differences in the texture
R marks caused by growth and injury
R slight nuances of color
These are characteristics of leather and not
material defects. Seat covers of other materials
! Observe the following when cleaning:
R Clean artificial leather covers with a cloth
moistened with a solution containing 1% detergent (e.g. dish washing liquid).
R Clean cloth covers with a microfiber
cloth moistened with a solution contain-
ing 1% detergent (e.g. dish washing liq-
uid). Rub carefully and always wipe entire
seat sections to avoid leaving visible
lines. Leave the seat to dry afterwards.
Cleaning results depend on the type of
dirt and how long it has been there.
R Clean Alcantara® covers with a damp
cloth. Make sure that you wipe entire
seat sections to avoid leaving visible
lines.
Cleaning the seat belts G
WARNING
Seat belts can become severely weakened if
bleached or dyed. This could cause the seat
belts to tear or fail, for instance, in the event of an accident. This poses an increased risk of
injury or fatal injury.
Never bleach or dye the seat belts.
! Do not clean the seat belts using chemical
cleaning agents. Do not dry the seat belts
by heating at temperatures above 176 ‡
(80 †) or in direct sunlight.
X Use clean, lukewarm water and soap solu-
tion.
Cleaning the headliner and carpets X
Headliner: if it is very dirty, use a soft brush
or dry shampoo.
X Carpets: use the carpet and textile clean-
ing agents recommended and approved by
Mercedes-Benz. Care
289Maintenance and care Z