2015 MERCEDES-BENZ S-COUPE wheel
[x] Cancel search: wheelPage 201 of 286
Information in the Digital Operator's
Manual
In the Digital Operator's Manual you will find
information on the following topics: RVanity mirror in the sun visor
R Glare from the side
mbrace
Information in the Digital Operator's
Manual
In the Digital Operator's Manual you will find
information on the following topics: R Downloading destinations in COMAND
R Search & Send
R Vehicle remote opening
R Vehicle remote closing
R Stolen vehicle recovery service
R Vehicle remote malfunction diagnosis
R Downloading routes
R Speed alert
R Geo fencing
R Triggering the vehicle alarm
iThe mbrace system is only available in the
USA.
General notes
The mbrace system is only available in the
USA.
You must have a license agreement to acti-
vate the mbrace service. Make sure that your system is activated and operational. To log in,
press the ïMB Info call button. If any of
the steps mentioned are not carried out, the
system may not be activated.
If you have questions about the activation,
contact one of the following telephone hot-
lines:
Mercedes-Benz Customer Assistance Center
at 1-800-FOR-MERCedes (1-800-367-6372)
or 1-866-990-9007 Shortly after successfully registering with the
mbrace service, a user ID and password will
be sent to you by mail. You can use this pass-
word to log onto the mbrace area under "Own-
ers Online" at http://www.mbusa.com .
The system is available if:
R it has been activated and is operational
R the corresponding mobile phone network is
available for transmitting data to the Cus-
tomer Center
R a service subscription is available
R the starter battery is sufficiently charged
Determining the location of the vehicle on a
map is only possible if:
R GPS reception is available.
R the vehicle position can be forwarded to
the Customer Assistance Center.
The mbrace system
To adjust the volume during a call, proceed as
follows:
X Press the WorX button on the mul-
tifunction steering wheel.
or
X Use the COMAND volume control.
The system offers various services, e.g.:
R Automatic and manual emergency call
R Roadside Assistance call
R MB Info call
You can find information and a description of all available features under "Owners Online"
at http://www.mbusa.com.
System self-test
After you have switched on the ignition, the
system carries out a self-diagnosis.
Features199
Stowage and featu res
Z
Page 204 of 286
If a mobile phone network and GPS receptionare available, the system transfers data to the
Mercedes-Benz Customer Assistance Center, for example:
R current location of the vehicle
R vehicle identification number
The COMAND display indicates that a call is
active. During the call, you can change to the
navigation menu by pressing the NAVI button
on COMAND, for example.
Voice output is not available in this case.
A voice connection is established between
the Mercedes-Benz Customer Assistance
Center and the vehicle occupants.
From the remote malfunction diagnosis, the
Mercedes-Benz Customer Assistance Center
can ascertain the nature of the problem. In
the Digital Operator's Manual, you will find
information on remote malfunction diagno-sis.
The Mercedes-Benz Customer Assistance
Center either sends a qualified Mercedes-
Benz technician or makes arrangements for
your vehicle to be transported to the nearest authorized Mercedes-Benz Center.
You may be charged for services such as
repair work and/or towing.
You can find more information in the separatembrace manual.
The system has not been able to initiate a
Roadside Assistance call, if:
R the indicator lamp for Roadside Assistance
call button Fis flashing continuously.
R no voice connection to the Mercedes-Benz
Customer Assistance Center was estab-
lished.
This can occur if the relevant mobile phone
network is not available, for example. The
Call Failedmessage appears in the
multifunction display. X
To end a call: press the~button on the
multifunction steering wheel.
or
X Press the corresponding COMAND button
for ending a phone call.
MB Info call button
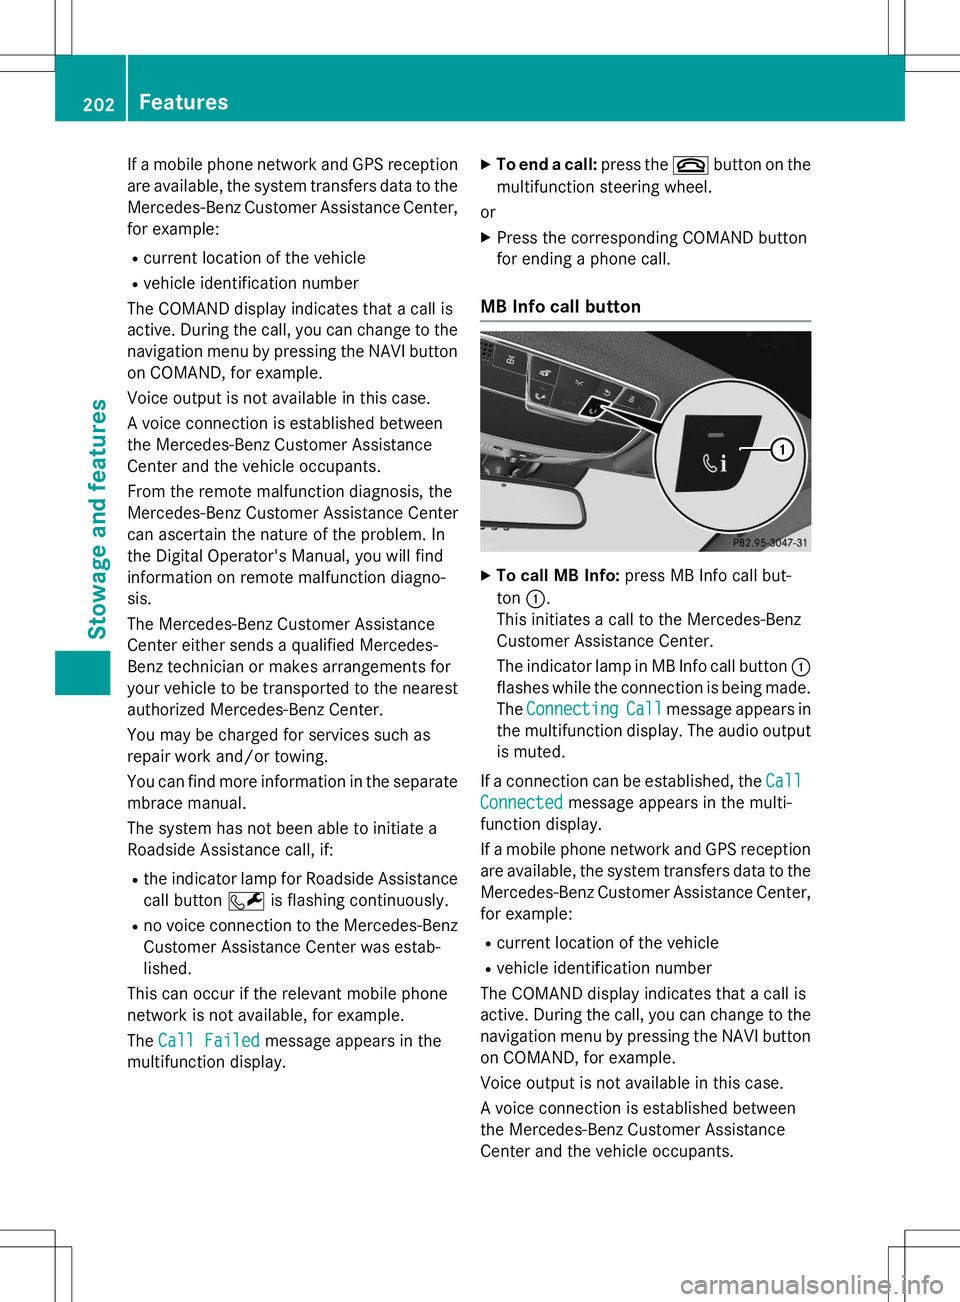
XTo call MB Info: press MB Info call but-
ton :.
This initiates a call to the Mercedes-Benz
Customer Assistance Center.
The indicator lamp in MB Info call button :
flashes while the connection is being made.
The
ConnectingCallmessage appears in
the multifunction display. The audio output
is muted.
If a connection can be established, the
Call
Connectedmessage appears in the multi-
function display.
If a mobile phone network and GPS reception are available, the system transfers data to the
Mercedes-Benz Customer Assistance Center, for example:
R current location of the vehicle
R vehicle identification number
The COMAND display indicates that a call is
active. During the call, you can change to the
navigation menu by pressing the NAVI button on COMAND, for example.
Voice output is not available in this case.
A voice connection is established between
the Mercedes-Benz Customer Assistance
Center and the vehicle occupants.
202Features
Stowage and features
Page 205 of 286
You receive information about operating yourvehicle, about the nearest authorized
Mercedes-Benz Center and about other prod-
ucts and services from Mercedes-Benz.
You can find further information on the
mbrace system under "Owners Online" at
http://www.mbusa.com.
The system has not been able to initiate an
MB Info call, if:
R the indicator lamp in MB Info call buttonï is flashing continuously.
R no voice connection to the Mercedes-Benz
Customer Assistance Center was estab-lished.
This can occur if the relevant mobile phone
network is not available, for example. The
Call Failedmessage appears in the
multifunction display.
X To end a call: press the~button on the
multifunction steering wheel.
or X Press the corresponding COMAND button
for ending a phone call.
Call priority
When service calls are active, e.g. Roadside
Assistance or MB Info calls, an emergency
call can still be initiated. In this case, an emer-
gency call will take priority and override all
other active calls.
The indicator lamp of the respective button
flashes until the call is ended.
An emergency call can only be terminated by the Mercedes-Benz Customer Assistance
Center.
All other calls can be ended by pressing:
R the ~ button on the multifunction steer-
ing wheel
R the corresponding button in COMAND to
end the voice call
When a call is initiated, the audio system is
muted. The mobile phone is no longer connected to
COMAND.
However, if you want to use your mobile
phone, do so only when the vehicle is station-
ary and in a safe location.
Garage door opener
General notes
The HomeLink ®
garage door opener integra-
ted in the rear-view mirror allows you to oper-
ate up to three different door and gate sys-
tems.
Use the integrated garage door opener only
on garage doors that:
R have safety stop and reverse features and
R meet current U.S. federal safety standards
Once programed, the integrated garage door opener in the rear-view mirror will assume the
function of the garage door system's remote
control. Please also read the operating
instructions for the garage door system.
When programming a garage door opener,
park the vehicle outside the garage. Do not
run the engine while programming.
Certain garage door drives are incompatible
with the integrated garage door opener. If you
have difficulty programing the integrated
garage door opener, contact an authorized
Mercedes-Benz Center.
Alternatively, you can call the following tele-
phone assistance services:
R USA: Mercedes-Benz Customer Assistance
Center at 1-800-FOR-MERCedes
R Canada: Customer Service at
1-800-387-0100
R HomeLink ®
hotline 1-800-355-3515 (free
of charge)
More information on HomeLink ®
and/or
compatible products is also available online
at http://www.homelink.com.
Notes on the declaration of conformity ( Y page 27).
Features203
Stowage and features
Z
Page 215 of 286
Checking the oil level using the on-board computer (S 65 AMG)
XMake sure that the SmartKey is in position 2in the ignition lock.
X Use ò on the steering wheel to call up the list of menus.
X Press the :or9 button on the steering wheel to select the
Servicemenu.
X Confirm by pressing aon the steering wheel.
X Use : or9 to select the
Engine Oil Levelsubmenu.
X Press ato confirm the selection.
The
Measuringengineoillevelaccurateonlywhenvehicleislevelmessage
appears in the multifunction display.
The measurement takes a few seconds. You will see one of the following messages in the
multifunction display:
Display messagesPossible causes/consequences and MSolutions
EngineOilLevelOKThe oil level is correct.
Check Engine Oil
Level(Add1Liter)
The oil level is too low.
X Top up 1.1 US qt (1.0 liter) of engine oil.
Reduce Engine Oil
Level
The engine oil level is too high.
X Have excess engine oil siphoned off.
For Engine Oil
Level Ignition
Must Be On
The ignition is switched off.
X Turn the SmartKey to position 2in the ignition lock.
Need More Time to
Check Engine Oil
Level
The required waiting period was not observed.
X If the engine is at normal operating temperature: repeat the
measurement after about five minutes.
If the engine is not at normal operating temperature, e.g. if the
engine was only started briefly: repeat the measurement after
approximately 30 minutes.
Engine Oil Level
Not Measurable
withEngineRunning
The engine is running; oil level measurement is not possible.
X Switch off the engine.
X If the engine is at normal operating temperature: wait about five
minutes before carrying out the measurement.
If the engine is not at normal operating temperature, e.g. if the
engine was only started briefly: wait approximately 30 minutes before carrying out the measurement.
Adding engine oil
GWARNING
Certain components in the engine compart-
ment, such as the engine, radiator and parts
of the exhaust system, can become very hot.
Working in the engine compartment poses a
risk of injury.
Engine compartment213
Maintenance and care
Z
Page 218 of 286
XAdd the premixed washer fluid.
X To close: press cap :onto the filler neck
until it engages.
If the washer fluid level drops below the rec-
ommended minimum of 1 liter, a message
appears in the multifunction display prompt-
ing you to add washer fluid.
Further information on windshield washer
fluid/antifreeze ( Ypage 280).
ASSYST PLUS
The Digital Operator's Manual contains more
information on the ASSYST PLUS service
interval display.
Care
General notes
HEnvironmental note
Dispose of empty packaging and cleaning
cloths in an environmentally responsible man-
ner.
!For cleaning your vehicle, do not use any
of the following:
R dry, rough or hard cloths
R abrasive cleaning agents
R solvents
R cleaning agents containing solvents
Do not scrub.
Do not touch the surfaces or protective
films with hard objects, e.g. a ring or ice
scraper. You could otherwise scratch or
damage the surfaces and protective film.
!Do not park the vehicle for an extended
period straight after cleaning it, particularly
after having cleaned the wheels with wheel
cleaner. Wheel cleaners could cause
increased corrosion of the brake discs and
brake pads/linings. For this reason, you
should drive for a few minutes after clean-
ing. Braking heats the brake discs and the brake pads/linings, thus drying them. The
vehicle can then be parked.
Regular care of your vehicle is a condition for
retaining the quality in the long term.
Use care products and cleaning agents rec-
ommended and approved by Mercedes-Benz.
Exterior care
Automatic car wash
GWARNING
Braking efficiency is reduced after washing
the vehicle. There is a risk of an accident.
After the vehicle has been washed, brake
carefully while paying attention to the traffic
conditions until full braking power is restored.
!If DISTRONIC PLUS or the HOLD function
is activated, the vehicle brakes automati-
cally in certain situations. To prevent dam-
age to the vehicle, deactivate DISTRONIC
PLUS and the HOLD function in the follow-
ing or other similar situations:
R when towing the vehicle
R in the car wash
!Never clean your vehicle in a Touchless
Automatic Car Wash as these use special
cleaning agents. These cleaning agents can
damage the paintwork or plastic parts.
!Make sure that:
R the side windows are fully closed.
R the ventilation/heating is switched off
(the OFF button has been pressed).
R the windshield wiper switch is at position0.
R the 360° camera or rear view camera is
switched off.
The vehicle may otherwise be damaged.
216Care
Maintenance and care
Page 219 of 286
!If the SmartKey is within the rear detec-
tion range of KEYLESS-GO, the following
situations, for example, could lead to the
unintentional opening of the trunk:
R using a car wash
R using a power washer
Make sure that the SmartKey is at least
10 ft (3 m) away from the vehicle.
!Make sure that the automatic transmis-
sion is in neutral position Nwhen washing
your vehicle in a tow-through car wash. The
vehicle may otherwise be damaged.
R Operating with the SmartKey:
Do not remove the SmartKey from the
ignition lock. Do not open the driver's
door when the engine is switched off or
at very low speeds. Otherwise, when in
transmission position Dor Rthe auto-
matic transmission will automatically
switch to park position Pand block the
wheels.
R Operating with the Start/Stop button:
Do not open the driver's door when the
engine is switched off or at very low
speeds. Otherwise, when in transmission
position Dor Rthe automatic transmis-
sion will automatically switch to parkposition Pand block the wheels.
Observe the following to make sure that the
automatic transmission stays in position N
neutral:
Operating with the SmartKey:
X Make sure that the ignition is switched on.
X Make sure that the vehicle is stationary.
X Depress and hold the brake pedal.
X Shift to neutral N.
X Release the brake pedal.
X Release the electric parking brake, if nec- essary.
X Switch off the ignition and leave the Smart-
Key in the ignition lock. Operating with the Start/Stop button:
X Make sure that the ignition is switched on.
X Make sure that the vehicle is stationary.
X Depress and hold the brake pedal.
X Engage park position P.
X Release the brake pedal.
X Remove Start/Stop button from ignition
lock ( Ypage 115).
X Insert the SmartKey into the ignition lock.
X Switch on the ignition.
X Depress and hold the brake pedal.
X Shift to neutral N.
X Release the brake pedal.
X Release the electric parking brake, if nec-essary.
X Switch off the ignition and leave the Smart-
Key in the ignition lock.
You can wash the vehicle in an automatic car
wash from the very start.
If the vehicle is very dirty, pre-wash it before
cleaning it in an automatic car wash.
After using an automatic car wash, wipe off
wax from the windshield and the wiper
blades. This will prevent smears and reduce
wiping noises caused by residue on the wind- shield.
Information in the Digital Operator'sManual
In the Digital Operator's Manual you will find
information on the following topics: R Washing by hand
R Power washers
R Cleaning the paintwork
R Matte finish care
R Cleaning the wheels
R Cleaning the windows
R Cleaning wiper blades
R Cleaning the exterior lighting
R Cleaning the mirror turn signals
R Cleaning the sensors
R Cleaning the rear view camera
Care217
Maintenance and care
Z
Page 220 of 286
RCleaning the 360° camera
R Cleaning the exhaust pipe
Interior care
In the Digital Operator's Manual you will find
information on the following topics: RCleaning the display
R Cleaning Night and Day View Assist
R Cleaning the plastic trim
R Cleaning the steering wheel and selector
lever
R Cleaning genuine wood and trim strips
R Cleaning the seat covers
R Cleaning the seat belts
R Cleaning the headliner and carpets
218Care
Maintenance and care
Page 222 of 286
Useful information
iThis Operator's Manual describes all
models and all standard and optional equip- ment of your vehicle available at the time of
publication of the Operator's Manual.
Country-specific differences are possible.
Please note that your vehicle may not be
equipped with all features described. This
also applies to safety-related systems and
functions.
iRead the information on qualified special-
ist workshops ( Ypage 27).
Where will I find...?
Vehicle tool kit
General notes
The towing eye is located in the stowage well under the trunk floor.
iApart from certain country-specific varia-
tions, the vehicles are not equipped with a
tire-change tool kit. If the vehicle is equip-
ped with tire-changing tools, these are
located in the stowage well under the trunk floor. Some tools for changing a wheel are
specific to the vehicle. For more informa-
tion on which tire changing tools are
required and approved to perform a wheel
change on your vehicle, consult a qualifiedspecialist workshop.
Tools required for changing a wheel may
include, for example:
R Jack
R Wheel chock
R Lug wrench
R Ratchet wrench
R Alignment bolt
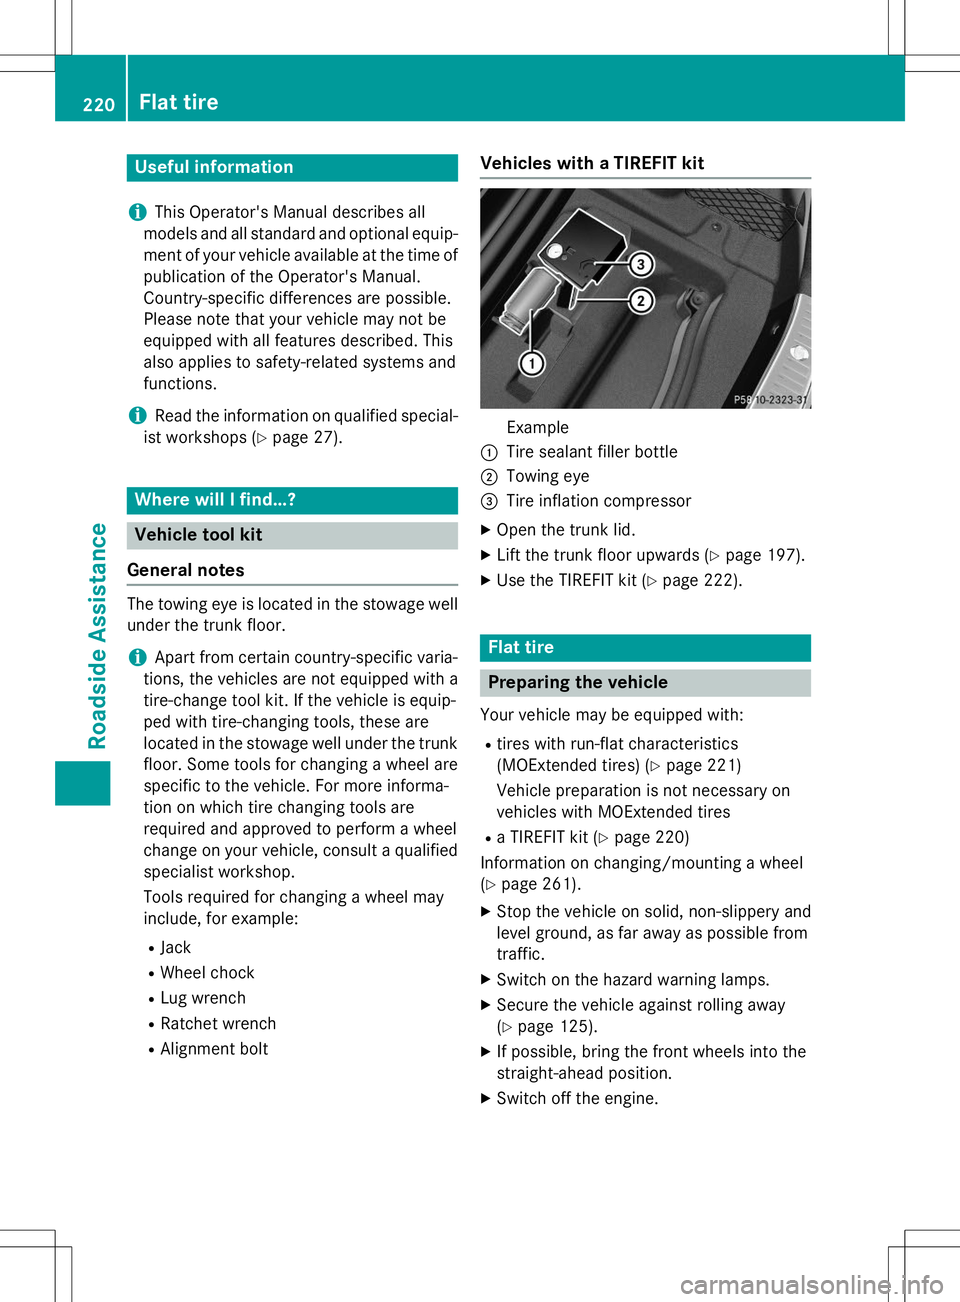
Vehicles with a TIREFIT kit
Example
:Tire sealant filler bottle
;Towing eye
=Tire inflation compressor
X Open the trunk lid.
X Lift the trunk floor upwards ( Ypage 197).
X Use the TIREFIT kit ( Ypage 222).
Flat tire
Preparing the vehicle
Your vehicle may be equipped with:
R tires with run-flat characteristics
(MOExtended tires) ( Ypage 221)
Vehicle preparation is not necessary on
vehicles with MOExtended tires
R a TIREFIT kit ( Ypage 220)
Information on changing/mounting a wheel( Y page 261).
X Stop the vehicle on solid, non-slippery and
level ground, as far away as possible from
traffic.
X Switch on the hazard warning lamps.
X Secure the vehicle against rolling away(Y page 125).
X If possible, bring the front wheels into the
straight-ahead position.
X Switch off the engine.
220Flat tire
Roadside Assistance