2015 MERCEDES-BENZ S-COUPE alarm
[x] Cancel search: alarmPage 82 of 286

XTo unlock the vehicle: touch the inner
surface of the door handle.
X To lock the vehicle: touch sensor sur-
face :or; .
Make sure that you do not touch the inner
surface of the door handle.
X Convenience closing feature: touch
recessed sensor surface ;for an exten-
ded period.
Deactivating
If you do not intend to use the vehicle for a
longer period of time, you can deactivate KEY-
LESS-GO. The SmartKey will then use very lit-
tle power, thereby conserving battery power.
For the purposes of activation/deactivation,
the vehicle must not be nearby. X To deactivate: press the&button on
the SmartKey twice in rapid succession.
The battery check lamp of the SmartKey
lights up twice briefly and KEYLESS-GO is
deactivated.
X To activate: press any button on the
SmartKey or insert the SmartKey into the
ignition lock.
KEYLESS-GO and all of its associated fea-
tures are available again.
KEYLESS-GO start function
Bear in mind that the engine can be started by any of the vehicle occupants if there is a
SmartKey in the vehicle.
Changing the settings of the locking
system
You can find information about this in the
Digital Operator's Manual.
Mechanical key
General notes
If the vehicle can no longer be locked or
unlocked with the SmartKey or KEYLESS-GO, use the mechanical key.
If you use the mechanical key to unlock and
open the driver's door, the anti-theft alarm
system will be triggered. Switch off the alarm
( Y page 76).
If you unlock the vehicle using the mechanical key, the fuel filler flap will not be unlocked
automatically.
X To unlock the fuel filler flap: insert the
SmartKey into the ignition lock.
Removing the mechanical key
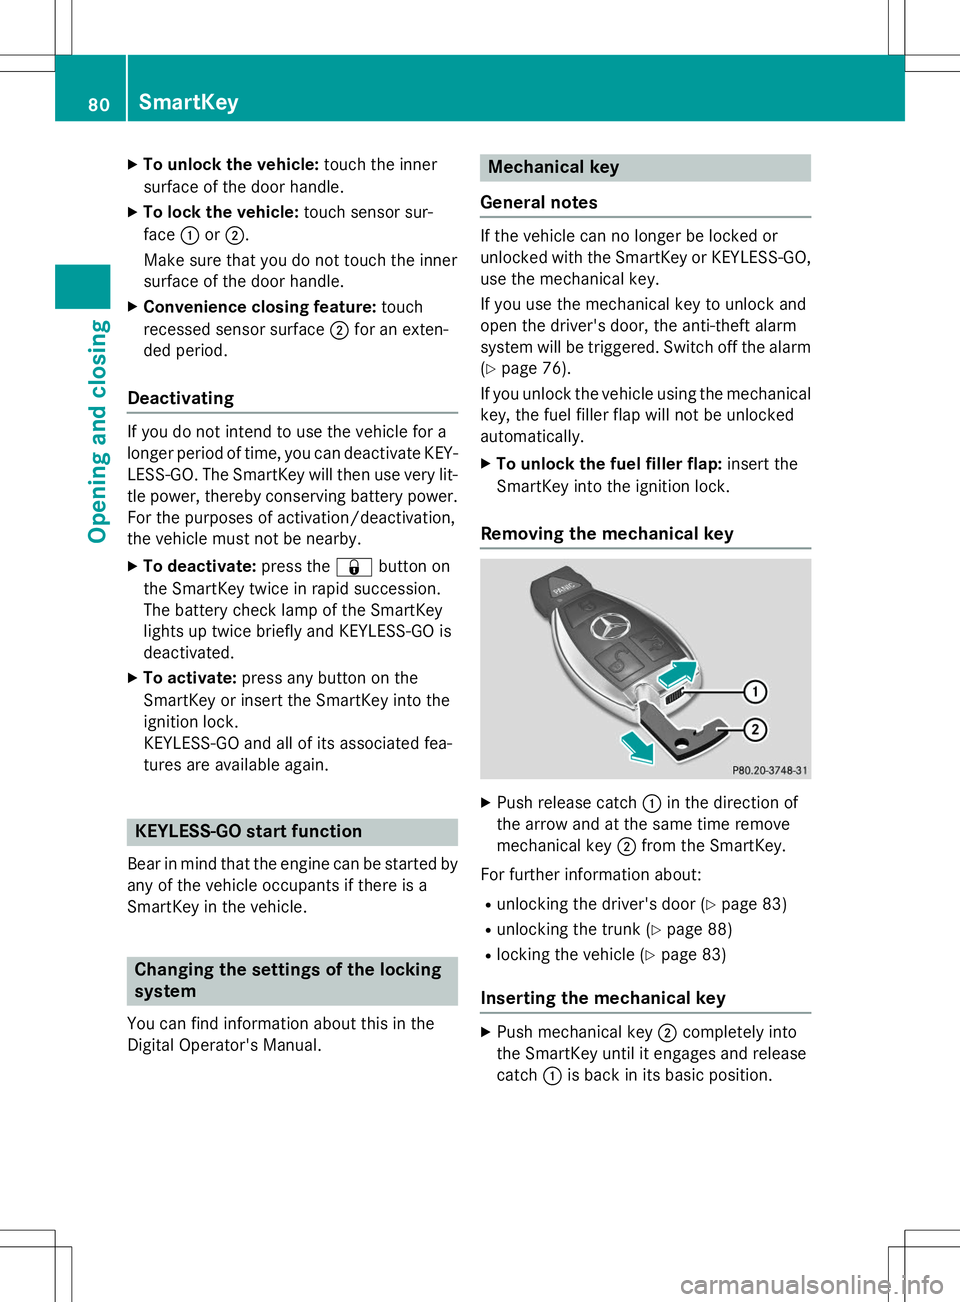
X Push release catch :in the direction of
the arrow and at the same time remove
mechanical key ;from the SmartKey.
For further information about: R unlocking the driver's door ( Ypage 83)
R unlocking the trunk ( Ypage 88)
R locking the vehicle ( Ypage 83)
Inserting the mechanical key
X
Push mechanical key ;completely into
the SmartKey until it engages and release catch :is back in its basic position.
80SmartKey
Opening and closing
Page 85 of 286

Unlocking the driver's door (mechan-
ical key)
If the vehicle can no longer be locked or
unlocked with the SmartKey or KEYLESS-GO,
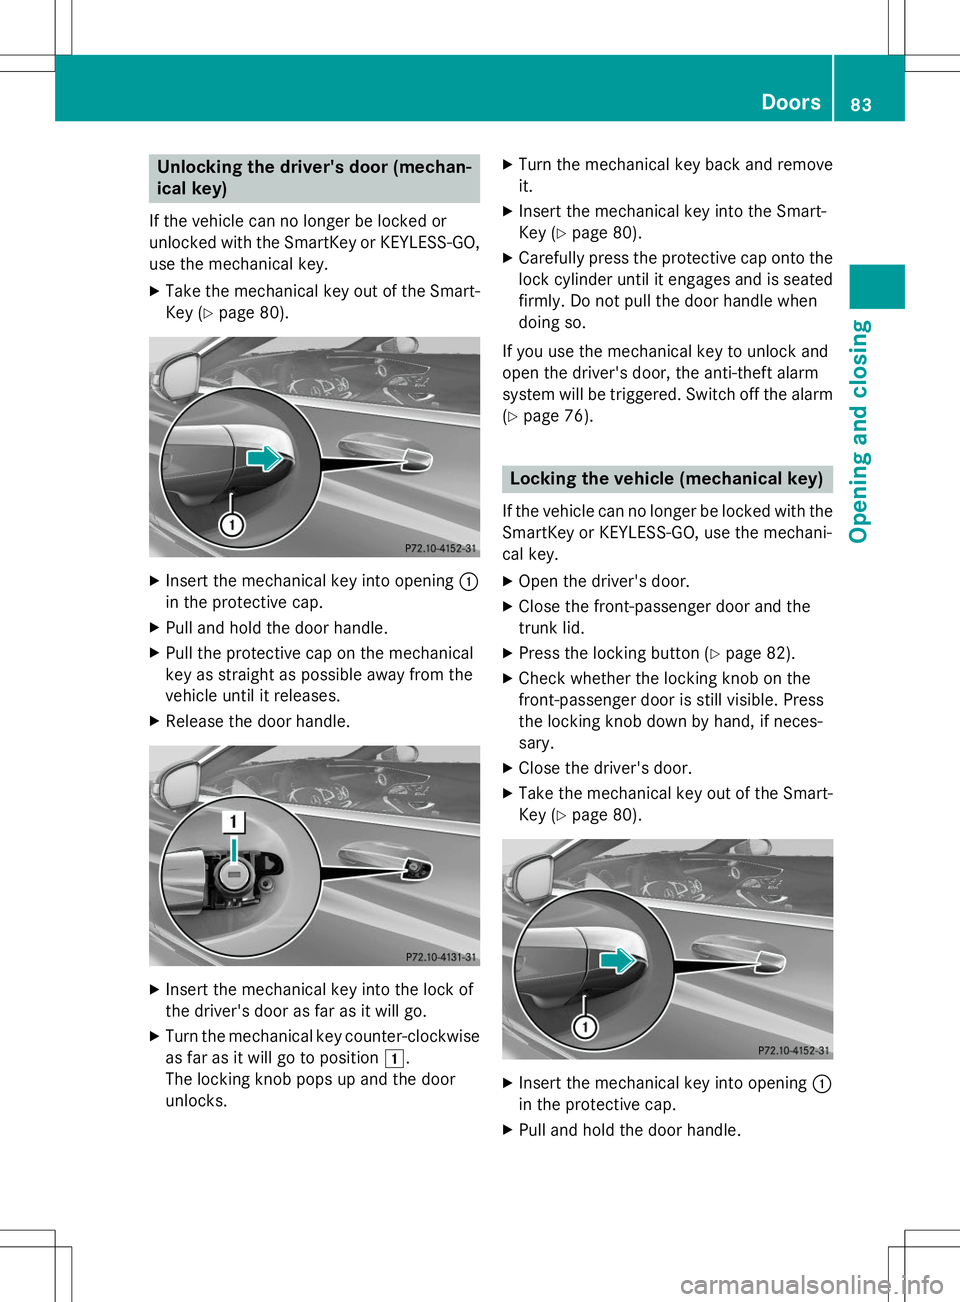
use the mechanical key. X Take the mechanical key out of the Smart-
Key ( Ypage 80).
X
Insert the mechanical key into opening :
in the protective cap.
X Pull and hold the door handle.
X Pull the protective cap on the mechanical
key as straight as possible away from the
vehicle until it releases.
X Release the door handle.
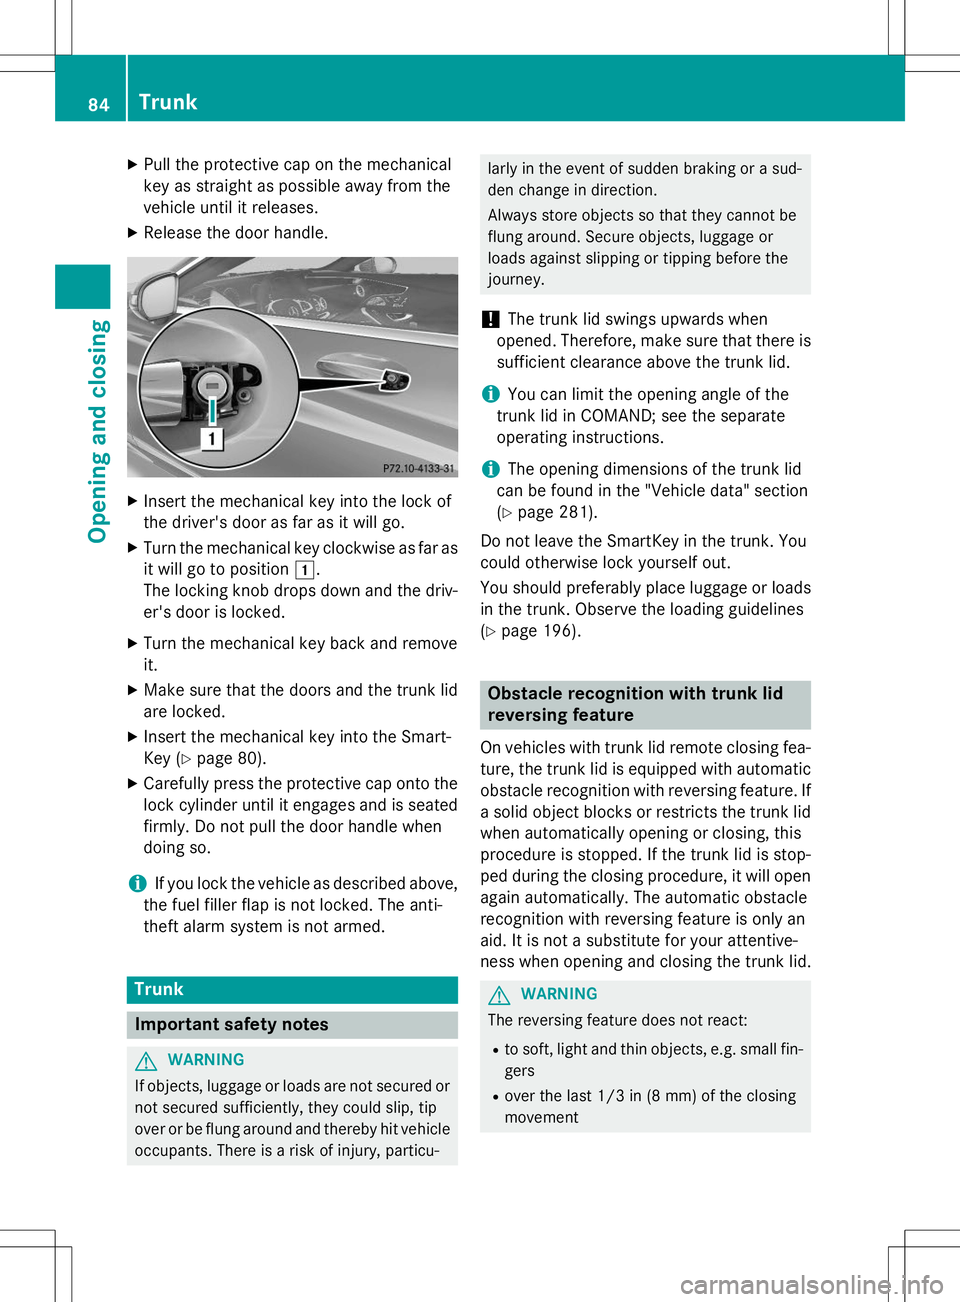
XInsert the mechanical key into the lock of
the driver's door as far as it will go.
X Turn the mechanical key counter-clockwise
as far as it will go to position 1.
The locking knob pops up and the door
unlocks. X
Turn the mechanical key back and removeit.
X Insert the mechanical key into the Smart-
Key ( Ypage 80).
X Carefully press the protective cap onto the
lock cylinder until it engages and is seated firmly. Do not pull the door handle when
doing so.
If you use the mechanical key to unlock and
open the driver's door, the anti-theft alarm
system will be triggered. Switch off the alarm
( Y page 76).
Locking the vehicle (mechanical key)
If the vehicle can no longer be locked with the
SmartKey or KEYLESS-GO, use the mechani-
cal key.
X Open the driver's door.
X Close the front-passenger door and the
trunk lid.
X Press the locking button ( Ypage 82).
X Check whether the locking knob on the
front-passenger door is still visible. Press
the locking knob down by hand, if neces-sary.
X Close the driver's door.
X Take the mechanical key out of the Smart-
Key ( Ypage 80).
X
Insert the mechanical key into opening :
in the protective cap.
X Pull and hold the door handle.
Doors83
Opening and closing
Z
Page 86 of 286

XPull the protective cap on the mechanical
key as straight as possible away from the
vehicle until it releases.
X Release the door handle.
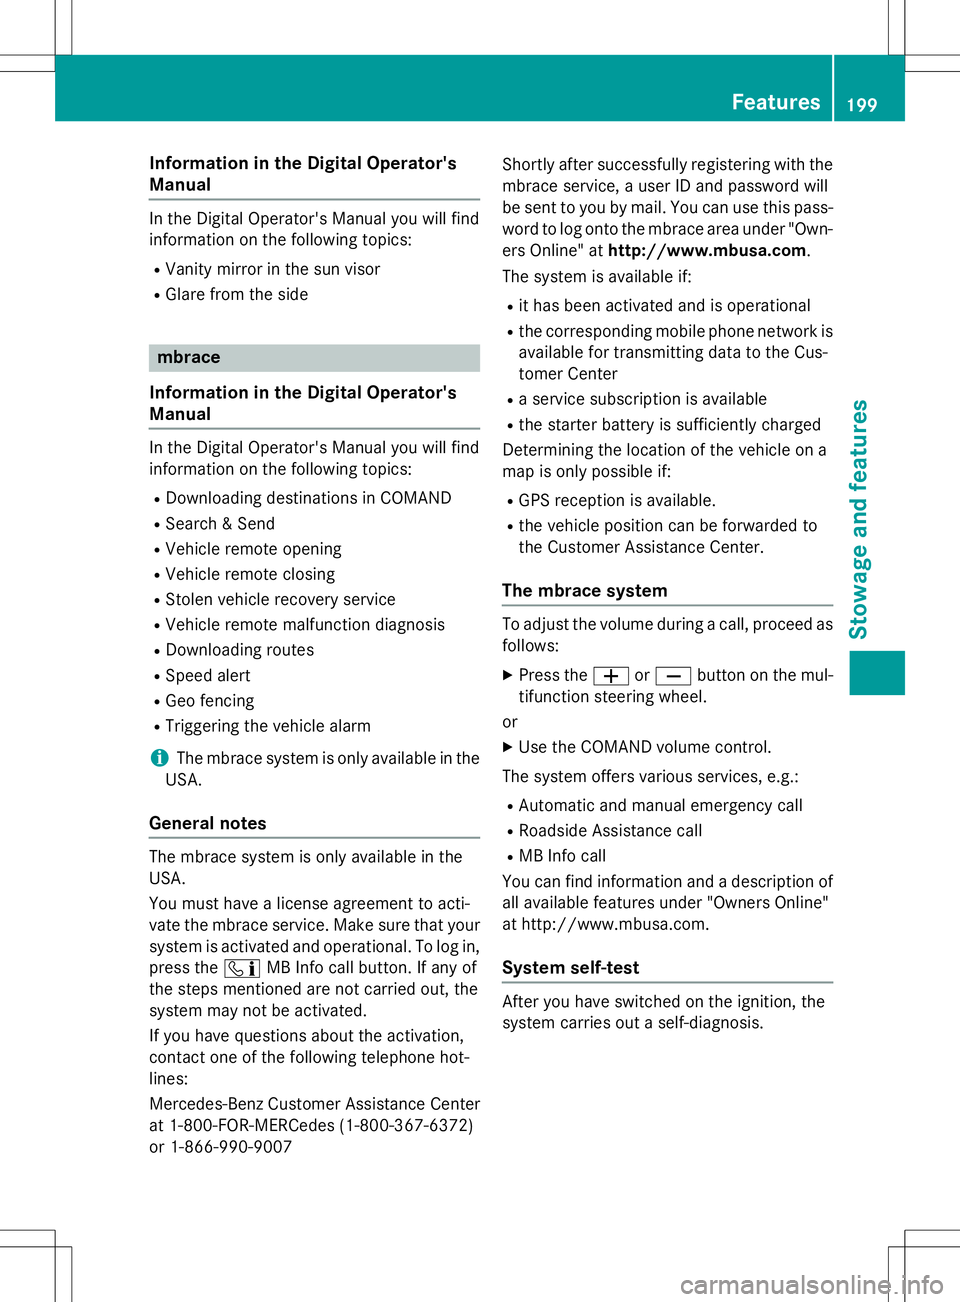
XInsert the mechanical key into the lock of
the driver's door as far as it will go.
X Turn the mechanical key clockwise as far as
it will go to position 1.
The locking knob drops down and the driv- er's door is locked.
X Turn the mechanical key back and removeit.
X Make sure that the doors and the trunk lid
are locked.
X Insert the mechanical key into the Smart-
Key ( Ypage 80).
X Carefully press the protective cap onto the
lock cylinder until it engages and is seated
firmly. Do not pull the door handle when
doing so.
iIf you lock the vehicle as described above,
the fuel filler flap is not locked. The anti-
theft alarm system is not armed.
Trunk
Important safety notes
GWARNING
If objects, luggage or loads are not secured or not secured sufficiently, they could slip, tip
over or be flung around and thereby hit vehicle
occupants. There is a risk of injury, particu-
larly in the event of sudden braking or a sud-
den change in direction.
Always store objects so that they cannot be
flung around. Secure objects, luggage or
loads against slipping or tipping before the
journey.
!The trunk lid swings upwards when
opened. Therefore, make sure that there is
sufficient clearance above the trunk lid.
iYou can limit the opening angle of the
trunk lid in COMAND; see the separate
operating instructions.
iThe opening dimensions of the trunk lid
can be found in the "Vehicle data" section ( Y page 281).
Do not leave the SmartKey in the trunk. You
could otherwise lock yourself out.
You should preferably place luggage or loads
in the trunk. Observe the loading guidelines ( Y page 196).
Obstacle recognition with trunk lid
reversing feature
On vehicles with trunk lid remote closing fea-
ture, the trunk lid is equipped with automatic obstacle recognition with reversing feature. If a solid object blocks or restricts the trunk lid
when automatically opening or closing, this
procedure is stopped. If the trunk lid is stop-
ped during the closing procedure, it will open
again automatically. The automatic obstacle
recognition with reversing feature is only an
aid. It is not a substitute for your attentive-
ness when opening and closing the trunk lid.
GWARNING
The reversing feature does not react:
R to soft, light and thin objects, e.g. small fin-
gers
R over the last 1/3 in (8 mm) of the closing
movement
84Trunk
Opening and closing
Page 201 of 286

Information in the Digital Operator's
Manual
In the Digital Operator's Manual you will find
information on the following topics: RVanity mirror in the sun visor
R Glare from the side
mbrace
Information in the Digital Operator's
Manual
In the Digital Operator's Manual you will find
information on the following topics: R Downloading destinations in COMAND
R Search & Send
R Vehicle remote opening
R Vehicle remote closing
R Stolen vehicle recovery service
R Vehicle remote malfunction diagnosis
R Downloading routes
R Speed alert
R Geo fencing
R Triggering the vehicle alarm
iThe mbrace system is only available in the
USA.
General notes
The mbrace system is only available in the
USA.
You must have a license agreement to acti-
vate the mbrace service. Make sure that your system is activated and operational. To log in,
press the ïMB Info call button. If any of
the steps mentioned are not carried out, the
system may not be activated.
If you have questions about the activation,
contact one of the following telephone hot-
lines:
Mercedes-Benz Customer Assistance Center
at 1-800-FOR-MERCedes (1-800-367-6372)
or 1-866-990-9007 Shortly after successfully registering with the
mbrace service, a user ID and password will
be sent to you by mail. You can use this pass-
word to log onto the mbrace area under "Own-
ers Online" at http://www.mbusa.com .
The system is available if:
R it has been activated and is operational
R the corresponding mobile phone network is
available for transmitting data to the Cus-
tomer Center
R a service subscription is available
R the starter battery is sufficiently charged
Determining the location of the vehicle on a
map is only possible if:
R GPS reception is available.
R the vehicle position can be forwarded to
the Customer Assistance Center.
The mbrace system
To adjust the volume during a call, proceed as
follows:
X Press the WorX button on the mul-
tifunction steering wheel.
or
X Use the COMAND volume control.
The system offers various services, e.g.:
R Automatic and manual emergency call
R Roadside Assistance call
R MB Info call
You can find information and a description of all available features under "Owners Online"
at http://www.mbusa.com.
System self-test
After you have switched on the ignition, the
system carries out a self-diagnosis.
Features199
Stowage and featu res
Z