Page 424 of 502

Useful information
i This Operator's Manual describes all
models and all standard and optional equip- ment of your vehicle available at the time of
publication of the Operator's Manual.
Country-specific differences are possible.
Please note that your vehicle may not be
equipped with all features described. This
also applies to safety-related systems and
functions.
i Read the information on qualified special-
ist workshops (Y page 29). Where will I find...?
Vehicle tool kit
General notes The towing eye is located in the stowage well
under the trunk floor.
i Apart from certain country-specific varia-
tions, the vehicles are not equipped with a
tire-change tool kit. Some tools for chang-
ing a wheel are specific to the vehicle. For
more information on which tire changing
tools are required and approved to perform
a wheel change on your vehicle, consult a
qualified specialist workshop.
Tools required for changing a wheel may
include, for example:
R Jack
R Wheel chock
R Lug wrench
R Ratchet wrench
R Alignment bolt Vehicles with a TIREFIT kit Example
: Tire sealant filler bottle
; Tire inflation compressor
= Towing eye
X Open the trunk lid.
X Lift the trunk floor upwards (Y page 377).
X Use the TIREFIT kit (Y page 424).
AMG vehicles Example: equipment and country-specific
variations possible
: Tire sealant filler bottle
; Jack
= Ratchet
? Alignment bolt
A Jacking support
B Socket
C Lug wrench
D Towing eye
E Folding wheel chock
F Tire inflation compressor 422
Where will I find...?Roadside Assistance
Page 471 of 502

X
Take the ratchet wrench out of the vehicle
tool kit and place it on the hexagon nut of
the jack so that the letters AUFare visible.
AMG vehicles and vehicles with AMG
equipment: to protect the vehicle body, the
vehicle has covers next to the jacking points
on the outer sills. X
AMG vehicles and vehicles with AMG
equipment: fold cover?upwards. X
Position jack Bat jacking point A. X
Make sure the foot of the jack is directly
beneath the jacking point. X
Turn ratchet wrench Cuntil jack Bsits
completely on jacking point Aand the
base of the jack lies evenly on the ground.
X Turn ratchet wrench Cuntil the tire is
raised a maximum of 1.2 in (3 cm) from the ground.
Removing a wheel !
AMG vehicles:
during removal and repo-
sitioning of the wheel, the wheel rim can
strike the ceramic-brake disc and damage
it. Therefore, you should proceed carefully
and get a second person assist to you.
Alternatively, you can use a second align-
ment bolt.
! Do not place wheel bolts in sand or on a
dirty surface. The bolt and wheel hub
threads could otherwise be damaged when you screw them in.
When mounting/removing wheels, and for as
long as the wheels are removed, avoid apply- ing any external force on the brake disks. This could impair the level of comfort when brak-
ing. X
Unscrew the uppermost wheel bolt com-
pletely.
X Screw alignment bolt :into the thread
instead of the wheel bolt.
X Unscrew the remaining wheel bolts fully.
X Remove the wheel. Changing a wheel
469Wheels and tires Z
Page 472 of 502

Mounting a new wheel
G
WARNING
Oiled or greased wheel bolts or damaged
wheel bolts/hub threads can cause the wheel bolts to come loose. As a result, you could
lose a wheel while driving. There is a risk of
accident.
Never oil or grease wheel bolts. In the event of damage to the threads, contact a qualified
specialist workshop immediately. Have the
damaged wheel bolts or hub threads
replaced/renewed. Do not continue driving. G
WARNING
If you tighten the wheel bolts or wheel nuts
when the vehicle is raised, the jack could tip
over. There is a risk of injury.
Only tighten the wheel bolts or wheel nuts
when the vehicle is on the ground.
Always pay attention to the instructions and
safety notes in the "Changing a wheel" sec-
tion (Y page 465).
Only use wheel bolts that have been designed for the wheel and the vehicle. For safety rea-
sons, Mercedes-Benz recommends that you
only use wheel bolts which have been
approved for Mercedes-Benz vehicles and the
respective wheel.
! AMG vehicles:
during removal and repo-
sitioning of the wheel, the wheel rim can
strike the ceramic-brake disc and damage
it. Therefore, you should proceed carefully
and get a second person assist to you.
Alternatively, you can use a second align-
ment bolt.
! To prevent damage to the paintwork, hold
the wheel securely against the wheel hub
while screwing in the first wheel bolt. X
Clean the wheel and wheel hub contact
surfaces.
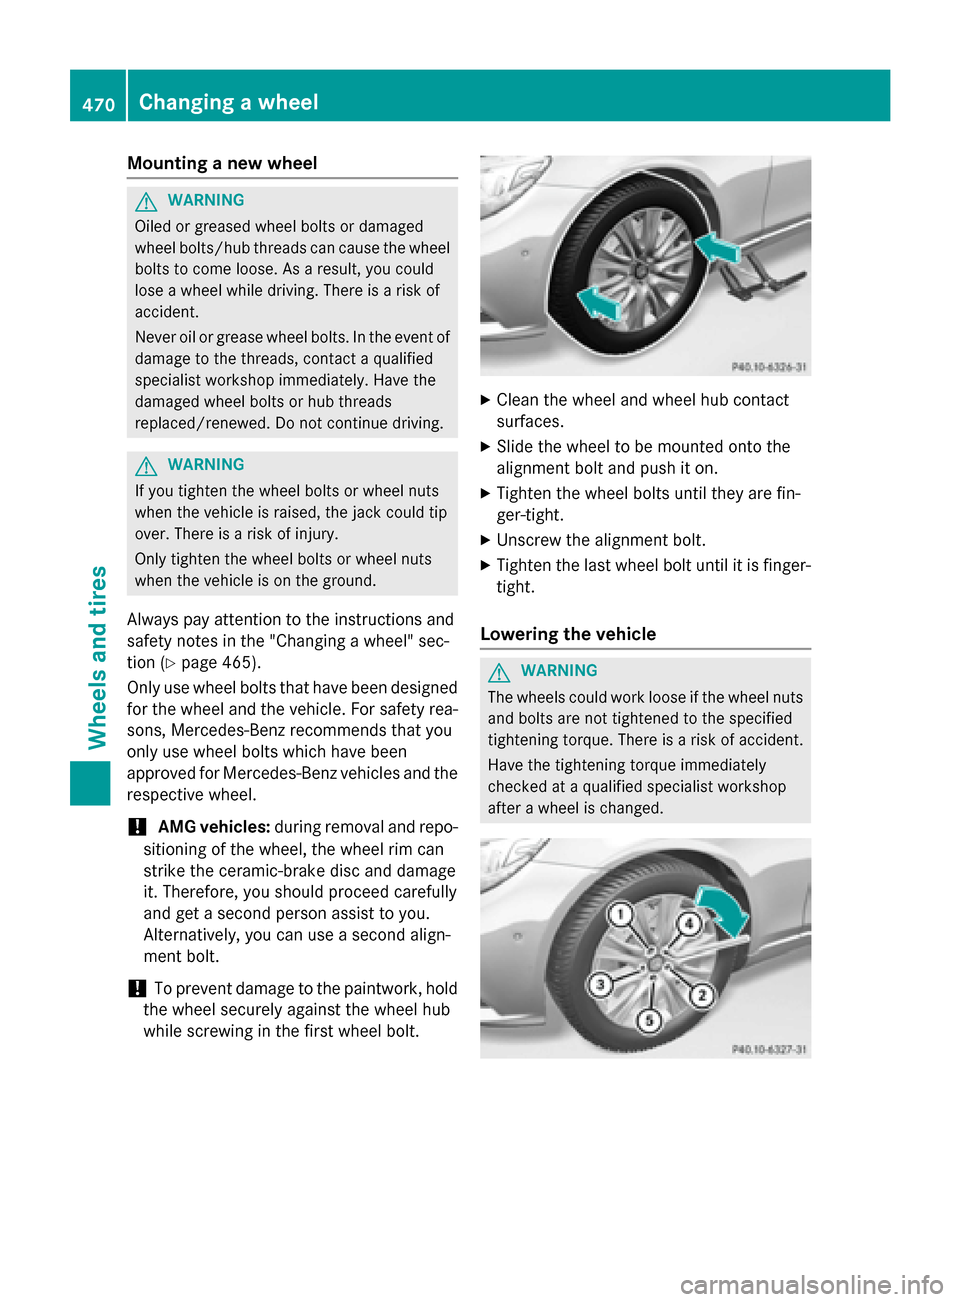
X Slide the wheel to be mounted onto the
alignment bolt and push it on.
X Tighten the wheel bolts until they are fin-
ger-tight.
X Unscrew the alignment bolt.
X Tighten the last wheel bolt until it is finger-
tight.
Lowering the vehicle G
WARNING
The wheels could work loose if the wheel nuts and bolts are not tightened to the specified
tightening torque. There is a risk of accident.
Have the tightening torque immediately
checked at a qualified specialist workshop
after a wheel is changed. 470
Changing a wheelWheels and tires