2015 MERCEDES-BENZ S-Class service interval
[x] Cancel search: service intervalPage 7 of 502

Anti-Theft Alarm system
see ATA (Anti-Theft Alarm system)
Armrest
Stowage compartment .................. 374
Ashtray .............................................. .382
Assistance display (on-board com-
puter) ................................................. .307
Assistance menu (on-board com-
puter) ................................................. .308
ASSYST PLUS
Displaying a service message ....... .410
Hiding a service message .............. 410
Notes ............................................. 410
Resetting the service interval dis-
play ................................................ 410
Service message ............................ 410
Special service requirements ......... 411
ATA (Anti-Theft Alarm system)
Activating/deactivating ................... 86
Function .......................................... .86
Switching off the alarm .................... 86
ATTENTION ASSIST
Activating/deactivating ................. 310
Display message ............................ 341
Function/note s............................. 264
Authorized Mercedes-Benz Center
see Qualified specialist workshop
Authorized workshop
see Qualified specialist workshop
AUTO lights
Display message ............................ 335
see Lights
Automatic car wash (care) ............... 411
Automatic engine start (ECO start/
stop function) .................................... 194
Automatic engine switch-off (ECO
start/stop function) .......................... 193
Automatic headlamp mode .............. 150
Automatic transmission
Accelerator pedal position ............. 200
Automatic drive program ............... 202
Changing gear ............................... 200
DIRECT SELECT lever ..................... 197
Display message ............................ 351
Driving tips .................................... 200
Emergency running mode .............. 205
Engaging drive position .................. 198 Engaging neutral ............................ 198
Engaging park position automati-
cally ............................................... 197
Engaging reverse gear ................... 197
Engaging the park position ............ 197
Kickdown ....................................... 200
Manual drive progra m.................... 202
Manual drive program (AMG vehi-
cles) ............................................... 203
Overview ........................................ 197
Problem (malfunction) ................... 205
Program selector button ................ 200
Pulling away ................................... 192
Starting the engine ........................ 192
Steering wheel paddle shifters ...... 201
Transmission position display ........ 199
Transmission positions .................. 199
Automatic transmission emer-
gency mode ....................................... 205 B
BAS (Brake Assist System) ................. 77
BAS PLUS Q (Brake Assist System
PLUS) with Cross-Traffic Assist
Function/note s................................ 77
Important safety notes .................... 78
Battery (high-voltage)
see High-voltage battery
Battery (SmartKey)
Checking .......................................... 94
Important safety notes .................... 93
Replacing ......................................... 94
Battery (vehicle)
Charging ........................................ 430
Display message ............................ 337
Important safety notes .................. 427
Jump starting ................................. 432
Belt
see Seat belts
Belt bag ................................................ 53
Blind Spot Assist
see Active Blind Spot Assist
Brake Assist
see BAS (Brake Assist System)
Brake fluid
Display message ............................ 324
Note s............................................. 492 Index
5
Page 26 of 502

Protection of the environment
General notes
H
Environmental note
Daimler's declared policy is one of compre-
hensive environmental protection.
The objectives are for the natural resources
that form the basis of our existence on this
planet to be used sparingly and in a manner
that takes the requirements of both nature
and humanity into account.
You too can help to protect the environment
by operating your vehicle in an environmen-
tally responsible manner.
Fuel consumption and the rate of engine,
transmission, brake and tire wear are affected by these factors:
R operating conditions of your vehicle
R your personal driving style
You can influence both factors. You should
bear the following in mind:
Operating conditions:
R avoid short trips as these increase fuel con-
sumption.
R always make sure that the tire pressures
are correct.
R do not carry any unnecessary weight.
R remove roof racks once you no longer need
them.
R a regularly serviced vehicle will contribute
to environmental protection. You should
therefore adhere to the service intervals.
R always have service work carried out at a
qualified specialist workshop.
Personal driving style:
R do not depress the accelerator pedal when
starting the engine.
R do not warm up the engine when the vehicle
is stationary.
R drive carefully and maintain a safe distance
from the vehicle in front.
R avoid frequent, sudden acceleration and
braking. R
change gear in good time and use each gear
only up to Ôof its maximum engine speed.
R switch off the engine in stationary traffic.
R keep an eye on the vehicle's fuel consump-
tion. H
Environmental note
Have a defective high-voltage battery dis-
posed of in an environmentally-responsible
manner. Contact a qualified specialist work-
shop which has the necessary specialist
knowledge and tools to carry out the work
required. Mercedes-Benz recommends that
you use an authorized Mercedes-Benz Center
for this purpose. Environmental concerns and recom-
mendations
Wherever the operating instructions require
you to dispose of materials, first try to regen-
erate or re-use them. Observe the relevant
environmental rules and regulations when
disposing of materials. In this way you will
help to protect the environment. Genuine Mercedes-Benz parts
H
Environmental note
Daimler AG also supplies reconditioned major
assemblies and parts which are of the same
quality as new parts. They are covered by the same Limited Warranty entitlements as new
parts.
! Air bags and Emergency Tensioning Devi-
ces, as well as control units and sensors for
these restraint systems, may be installed in the following areas of your vehicle:
R doors
R door pillars
R door sills
R seats
R cockpit 24
Introduction
Page 28 of 502

Information for customers in Califor-
nia
Under California law you may be entitled to a replacement of your vehicle or a refund of thepurchase price or lease price, if after a rea-
sonable number of repair attempts
Mercedes-Benz USA, LLC and/or its author-
ized repair or service facilities fail to fix one or
more substantial defects or malfunctions in
the vehicle that are covered by its express
warranty. During the period of 18 months
from original delivery of the vehicle or the
accumulation of 18,000 miles (approximately 29,000 km) on the odometer of the vehicle,
whichever occurs first, a reasonable number
of repair attempts is presumed for a retail
buyer or lessee if one or more of the following occurs:
(1) the same substantial defect or malfunc- tion results in a condition that is likely to
cause death or serious bodily injury if the
vehicle is driven, that defect or malfunc-
tion has been subject to repair two or
more times, and you have directly noti-
fied Mercedes-Benz USA, LLC in writing
of the need for its repair,
(2) the same substantial defect or malfunc- tion of a less serious nature than cate-
gory (1) has been subject to repair four or
more times and you have directly notified us in writing of the need for its repair, or
(3) the vehicle is out of service by reason of repair of the same or different substantial
defects or malfunctions for a cumulative
total of more than 30 calendar days.
Please send your written notice to:
Mercedes-Benz USA, LLC
Customer Assistance Center
One Mercedes Drive
Montvale, NJ 07645-0350 Maintenance
The Service and Warranty Booklet describes
all the necessary maintenance work which
should be done at regular intervals.
Always have the Service and Warranty Book-
let with you when you bring the vehicle to an authorized Mercedes-Benz Center. The ser-
vice advisor will record every service for you
in the Service and Warranty Booklet. Roadside Assistance
The Mercedes-Benz Roadside Assistance
Program offers technical help in the event of a breakdown. Calls to the toll-free Roadside
Assistance Hotline are answered by our
agents 24 hours a day, 365 days a year.
1-800-FOR-MERCedes(1-800-367-6372)
(USA)
1-800-387-0100 (Canada)
For additional information, refer to the
Mercedes-Benz Roadside Assistance Pro-
gram brochure (USA) or the "Roadside Assis-
tance" section in the Service and Warranty
booklet (Canada). You will find both in your
vehicle literature portfolio. Change of address or change of own-
ership
In the event of a change of address, please
send us the "Notification of Address Change" in the Service and Guarantee booklet or sim-
ply call the Mercedes-Benz Customer Assis-
tance Center (USA) at the hotline number
1-800-FOR-MERCedes(1-800-367-6372 )or
Customer Service Center (Canada) at
1-800-387-0100. This will assist us in con-
tacting you in a timely manner should the
need arise.
If you sell your Mercedes, please leave the
entire literature in the vehicle so that it is
available to the next owner.
If you have purchased a used car, please send
us the "Notification of Used Car Purchase" in 26
Introduction
Page 226 of 502

Driving tips
General driving tips
Important safety notes G
WARNING
If you switch off the ignition while driving,
safety-relevant functions are only available
with limitations, or not at all. This could affect, for example, the power steering and the brake
boosting effect. You will require considerably
more effort to steer and brake. There is a risk of an accident.
Do not switch off the ignition while driving. G
WARNING
If you operate mobile communication equip-
ment while driving, you will be distracted from traffic conditions. You could also lose controlof the vehicle. There is a risk of an accident.
Only operate this equipment when the vehicleis stationary.
Observe the legal requirements for the coun- try in which you are driving. Some jurisdic-
tions prohibit the driver from using a mobile
phone while driving a vehicle.
If you make a call while driving, always use
hands-free mode. Only operate the telephone
when the traffic situation permits. If you are
unsure, pull over to a safe location and stop
before operating the telephone.
Bear in mind that at a speed of only 30 mph
(approximately 50 km/h), the vehicle covers
a distance of 44 ft (approximately 14 m) per
second.
Drive sensibly – save fuel Observe the following tips to save fuel:
X The tires should always be inflated to the
recommended tire pressure.
X Remove unnecessary loads.
X Remove roof racks when they are not nee-
ded.
X Warm up the engine at low engine speeds. X
Avoid frequent acceleration or braking.
X Have all maintenance work carried out as
indicated by the service intervals in the
Maintenance Booklet or by the service
interval display.
Fuel consumption also increases when driv-
ing in cold weather, in stop-start traffic and in
hilly terrain.
Drinking and driving G
WARNING
Drinking and driving and/or taking drugs and driving are very dangerous combinations.
Even a small amount of alcohol or drugs can
affect your reflexes, perceptions and judg-
ment.
The possibility of a serious or even fatal acci-
dent is greatly increased when you drink or
take drugs and drive.
Do not drink or take drugs and drive or allow
anyone to drive who has been drinking or tak-
ing drugs.
Emission control G
WARNING
Combustion engines emit poisonous exhaust
gases such as carbon monoxide. Inhaling
these exhaust gases leads to poisoning. There is a risk of fatal injury. Therefore never leave
the engine running in enclosed spaces with-
out sufficient ventilation.
Certain engine systems are designed to keep
the level of poisonous components in exhaust fumes within legal limits.
These systems only work at peak efficiency if they are serviced exactly in accordance with
the manufacturer's specifications. For this
reason, all work on the engine must be carried
out by qualified and authorized Mercedes-
Benz technicians.
The engine settings must not be changed
under any circumstances. Furthermore, all
specific service work must be carried out at 224
Driving tipsDriving and pa
rking
Page 227 of 502

regular intervals and in accordance with the
Mercedes-Benz service requirements. Details
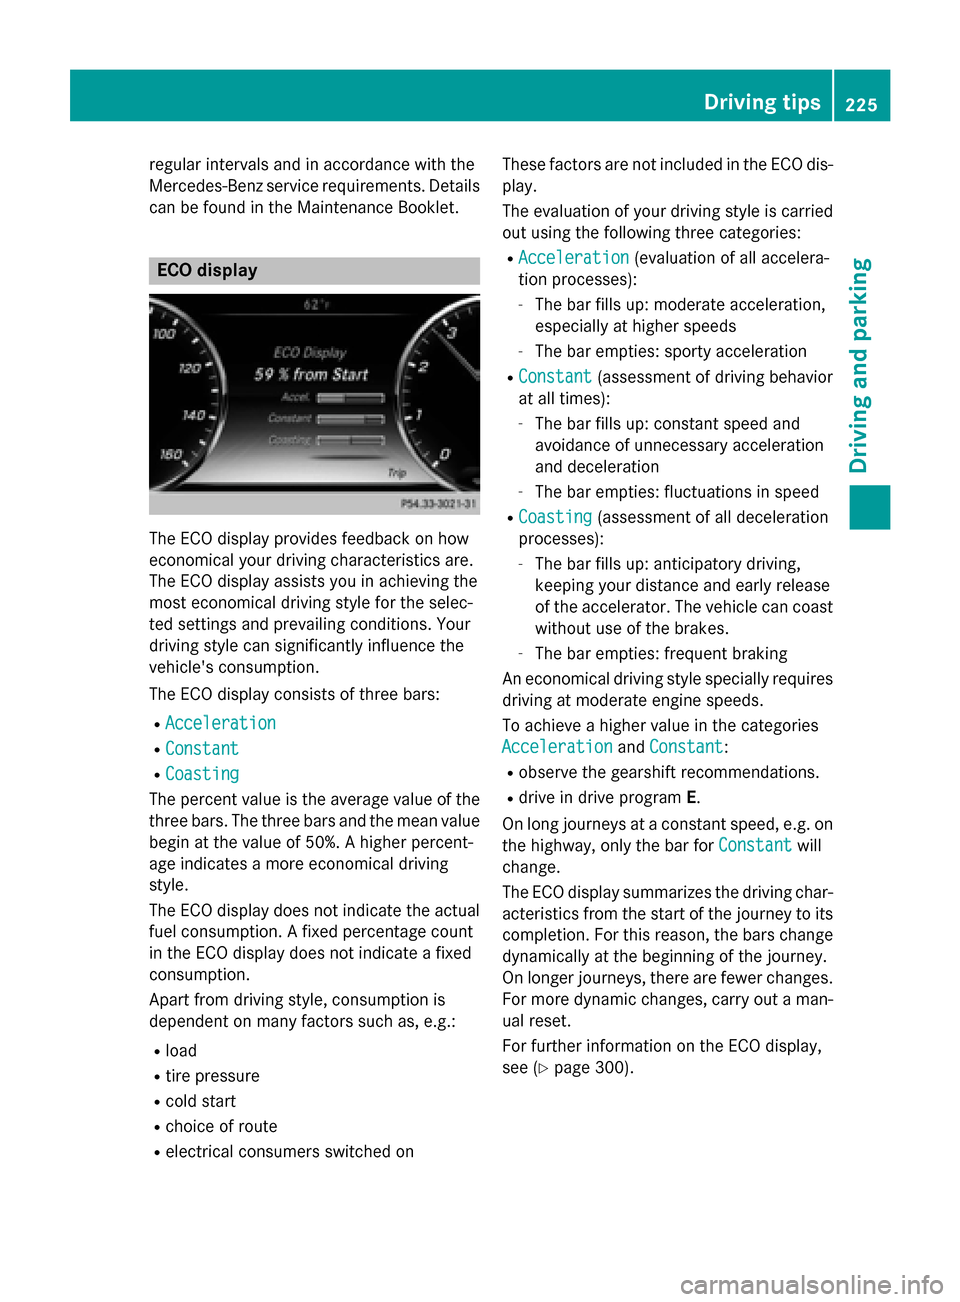
can be found in the Maintenance Booklet. ECO display
The ECO display provides feedback on how
economical your driving characteristics are.
The ECO display assists you in achieving the
most economical driving style for the selec-
ted settings and prevailing conditions. Your
driving style can significantly influence the
vehicle's consumption.
The ECO display consists of three bars:
R Acceleration
Acceleration
R Constant Constant
R Coasting
Coasting
The percent value is the average value of the three bars. The three bars and the mean value
begin at the value of 50%. A higher percent-
age indicates a more economical driving
style.
The ECO display does not indicate the actual fuel consumption. A fixed percentage count
in the ECO display does not indicate a fixed
consumption.
Apart from driving style, consumption is
dependent on many factors such as, e.g.:
R load
R tire pressure
R cold start
R choice of route
R electrical consumers switched on These factors are not included in the ECO dis-
play.
The evaluation of your driving style is carried
out using the following three categories:
R Acceleration
Acceleration (evaluation of all accelera-
tion processes):
- The bar fills up: moderate acceleration,
especially at higher speeds
- The bar empties: sporty acceleration
R Constant
Constant (assessment of driving behavior
at all times):
- The bar fills up: constant speed and
avoidance of unnecessary acceleration
and deceleration
- The bar empties: fluctuations in speed
R Coasting Coasting (assessment of all deceleration
processes):
- The bar fills up: anticipatory driving,
keeping your distance and early release
of the accelerator. The vehicle can coast
without use of the brakes.
- The bar empties: frequent braking
An economical driving style specially requires driving at moderate engine speeds.
To achieve a higher value in the categories
Acceleration
Acceleration andConstant Constant :
R observe the gearshift recommendations.
R drive in drive program E.
On long journeys at a constant speed, e.g. on
the highway, only the bar for Constant
Constantwill
change.
The ECO display summarizes the driving char- acteristics from the start of the journey to its completion. For this reason, the bars change
dynamically at the beginning of the journey.
On longer journeys, there are fewer changes. For more dynamic changes, carry out a man- ual reset.
For further information on the ECO display,
see (Y page 300). Driving tips
225Driving and parking Z
Page 315 of 502

X
Use ò on the steering wheel to call up
the list of menus.
X Press the :or9 button on the steer-
ing wheel to select the Settings
Settingsmenu.
X Confirm by pressing aon the steering
wheel.
X Press the :or9 button to select the
Instrument Cluster
Instrument Cluster submenu.
X Press ato confirm.
X Press the :or9 button to select the
Display Unit Speed-/Odometer
Display Unit Speed-/Odometer func-
tion.
You will see the selected setting: km
km or
miles miles.
X Press the abutton to save the setting.
The selected unit of measurement for dis-
tance applies to:
R Speedometer
R Digital speedometer in the Trip
Trip menu
R Additional speedometer in the status area
on the multi-function display
The unit in the additional speedometer is
displayed inversely to the selected dis-
tance unit.
R Odometer and the trip odometer
R Trip computer
R Current consumption and the range
R Navigation instructions in the Navi
Navi menu
R Cruise Control
R SPEEDTRONIC
R DISTRONIC PLUS
R ASSYST PLUS service interval display
Selecting the permanent display function
All vehicles except PLUG-IN HYBRID vehi-
cles: with the Permanent Display
Permanent Display function
you can switch on the outside temperature in the status bar of the multifunction display.
PLUG-IN HYBRID vehicles: with thePerma‐ Perma‐
nent
nent Display
Display function you can switch on the
following displays in the status bar of the mul-
tifunction display. R
outside temperature
R coolant temperature (PLUG‑IN HYBRID
vehicles)
R the total electric range (PLUG-IN HYBRID
vehicles)
X Use ò on the steering wheel to call up
the list of menus.
X Press the :or9 button on the steer-
ing wheel to select the Settings
Settings menu.
X Confirm by pressing aon the steering
wheel.
X Press the :or9 button to select the
Instrument Cluster Instrument Cluster submenu.
X Press ato confirm.
X Press :or9 to select the Perma‐
Perma‐
nent Display
nent Display function.
X Press ato confirm.
All vehicles except PLUG-IN HYBRID
vehicles: the current setting for Outside Outside
Temperature
Temperature is shown.
Only PLUG-IN HYBRID vehicles: the cur-
rent selection of Outside Temperature
Outside Temperature,
Coolant Temperature
Coolant Temperature orElectric
Electric
Range
Range is displayed.
X Only PLUG-IN HYBRID vehicles: select
the desired option with :or9.
X To change the setting: pressa.
Switching the additional speedometer
on/off
Use the Additional Speedometer Additional Speedometer function
to choose whether the status area in the mul- tifunction display shows the speed digitally.
X Use ò on the steering wheel to call up
the list of menus.
X Press the :or9 button on the steer-
ing wheel to select the Settings Settingsmenu.
X Confirm by pressing aon the steering
wheel.
X Press the :or9 button to select the
Instrument Cluster
Instrument Cluster submenu.
X Press ato confirm. Menus and submenus
313On-board computer and displays Z
Page 410 of 502

Where possible, let the engine cool down and
touch only the components described in the
following. G
WARNING
If engine oil comes into contact with hot com- ponents in the engine compartment, it may
ignite. There is a risk of fire and injury.
Make sure that engine oil is not spilled next to
the filler neck. Let the engine cool down and
thoroughly clean the engine oil off the com-
ponents before starting the engine. H
Environmental note
When adding oil, take care not to spill any. If
oil enters the soil or waterways, it is harmful to the environment.
! Only use engine oils and oil filters that
have been approved for vehicles with a ser-
vice system. You can obtain a list of the
engine oils and oil filters tested and
approved in accordance with the
Mercedes-Benz Specifications for Service
Products at any Mercedes-Benz Service
center.
Damage to the engine or exhaust system is caused by the following:
R using engine oils and oil filters that have
not been specifically approved for the
service system
R replacing engine oil and oil filters after
the interval for replacement specified by
the service system has been exceeded
R using engine oil additives.
! Do not add too much oil. adding too much
engine oil can result in damage to the
engine or to the catalytic converter. Have
excess engine oil siphoned off. Example
X Turn cap :counter-clockwise and remove
it.
X Add engine oil.
If the oil level is at or below the MIN mark on
the oil dipstick, add 1.1 US qt (1.0 l)of
engine oil.
X Replace cap :on the filler neck and turn
clockwise.
Ensure that the cap locks into place
securely.
X Check the oil level again with the oil dip-
stick (Y page 405).
Further information on engine oil
(Y page 491). Additional service products
Checking coolant level G
WARNING
Certain components in the engine compart-
ment, such as the engine, radiator and parts
of the exhaust system, can become very hot.
Working in the engine compartment poses a
risk of injury.
Where possible, let the engine cool down and touch only the components described in the
following. G
WARNING
The engine cooling system is pressurized, par- ticularly when the engine is warm. When 408
Engine compartmentMaintenance and care
Page 412 of 502

X
To open: pull cap:upwards by the tab.
X Place cap :on the edge of the filler neck
and engage in place.
X Add the premixed washer fluid.
X To close: press cap :onto the filler neck
until it engages.
If the washer fluid level drops below the rec-
ommended minimum of 1 liter, a message
appears in the multifunction display prompt-
ing you to add washer fluid (Y page 353).
Further information on windshield washer
fluid/antifreeze (Y page 494).ASSYST PLUS
Service message
The ASSYST PLUS service interval display
informs you of the next service due date.
Information on the type of service and service
intervals (see the separate Maintenance
Booklet).
You can obtain further information from an
authorized Mercedes-Benz Center or at
http://www.mbusa.com (USA only).
i The ASSYST PLUS service interval display
does not show any information on the
engine oil level. Observe the notes on the
engine oil level (Y page 405).
The multifunction display shows a service
message for several seconds, e.g.: R Service A in .. Days
Service A in .. Days
R Service A Due
Service A Due
R Service A Exceeded by .. Days Service A Exceeded by .. Days
Depending on the operating conditions of the vehicle, the remaining time or distance until
the next service due date is displayed.
The letter A
Aor B
B, possibly in connection with a
number or another letter, indicates the type
of service. A
Astands for a minor service and B
B
for a major service.
You can obtain further information from an
authorized Mercedes-Benz Center. The ASSYST PLUS service interval display
does not take into account any periods of
time during which the battery is disconnec-
ted.
Maintaining the time-dependent service
schedule:
X Note down the service due date displayed
in the multifunction display before discon-
necting the battery.
or
X After reconnecting the battery, subtract
the battery disconnection periods from the
service date shown on the display. Hiding a service message
X Press the aor% button on the steer-
ing wheel. Displaying service messages
X Switch the ignition on.
X Use ò on the steering wheel to call up
the list of menus.
X Press the 9or: button on the steer-
ing wheel to select the Service
Service menu and
press ato confirm.
X Press the 9or: button on the steer-
ing wheel to select the ASSYST PLUS ASSYST PLUSsub-
menu and press ato confirm.
The service due date appears in the multi-
function display. Information about Service
Resetting the ASSYST PLUS service
interval display !
If the ASSYST PLUS service interval dis-
play has been inadvertently reset, this set-
ting can be corrected at a qualified special-
ist workshop.
Have service work carried out as described in the Maintenance Booklet. This may oth- 410
ASSYST PLUSMaintenance and care