2015 MERCEDES-BENZ S-Class Transmission
[x] Cancel search: TransmissionPage 323 of 502

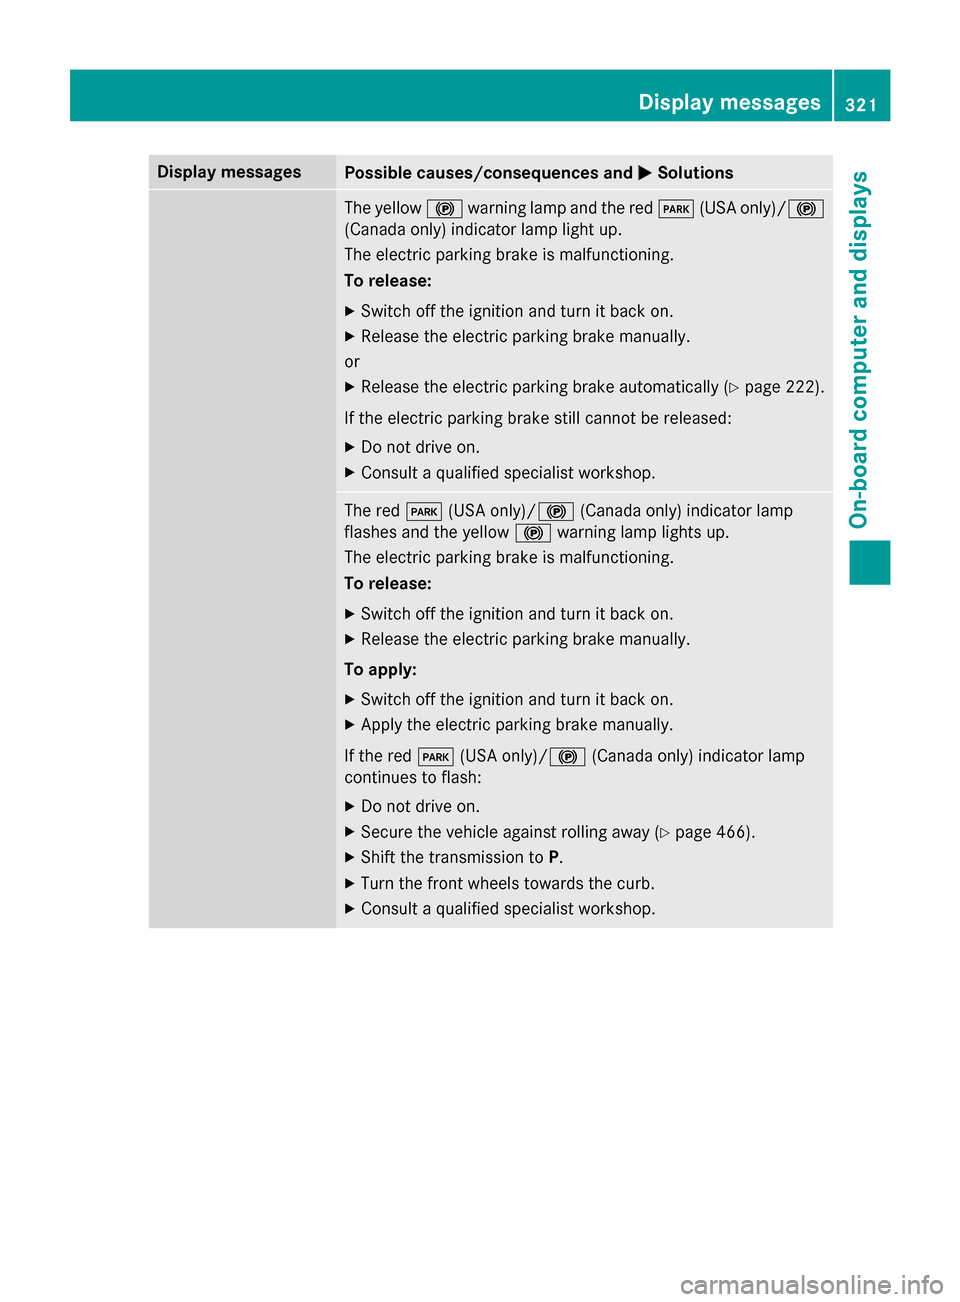
Display messages
Possible causes/consequences and
M
MSolutions The yellow
!warning lamp and the red F(USA only)/ !
(Canada only) indicator lamp light up.
The electric parking brake is malfunctioning.
To release:
X Switch off the ignition and turn it back on.
X Release the electric parking brake manually.
or X Release the electric parking brake automatically (Y page 222).
If the electric parking brake still cannot be released: X Do not drive on.
X Consult a qualified specialist workshop. The red
F(USA only)/! (Canada only) indicator lamp
flashes and the yellow !warning lamp lights up.
The electric parking brake is malfunctioning.
To release:
X Switch off the ignition and turn it back on.
X Release the electric parking brake manually.
To apply: X Switch off the ignition and turn it back on.
X Apply the electric parking brake manually.
If the red F(USA only)/ !(Canada only) indicator lamp
continues to flash:
X Do not drive on.
X Secure the vehicle against rolling away (Y page 466).
X Shift the transmission to P.
X Turn the front wheels towards the curb.
X Consult a qualified specialist workshop. Display
messages
321On-board computer and displays Z
Page 324 of 502

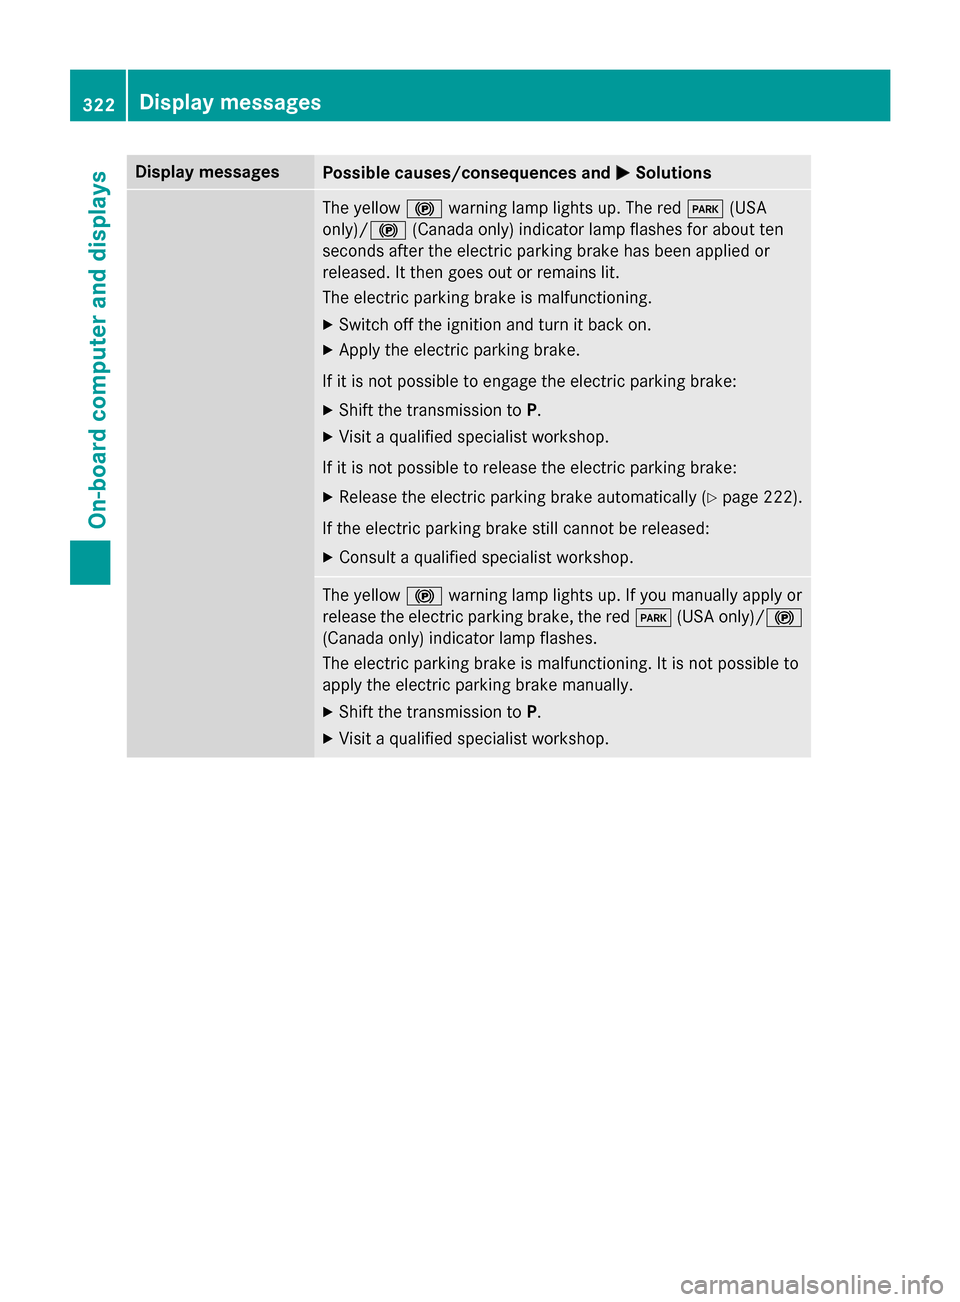
Display messages
Possible causes/consequences and
M
MSolutions The yellow
!warning lamp lights up. The red F(USA
only)/ !(Canada only) indicator lamp flashes for about ten
seconds after the electric parking brake has been applied or
released. It then goes out or remains lit.
The electric parking brake is malfunctioning.
X Switch off the ignition and turn it back on.
X Apply the electric parking brake.
If it is not possible to engage the electric parking brake:
X Shift the transmission to P.
X Visit a qualified specialist workshop.
If it is not possible to release the electric parking brake:
X Release the electric parking brake automatically (Y page 222).
If the electric parking brake still cannot be released: X Consult a qualified specialist workshop. The yellow
!warning lamp lights up. If you manually apply or
release the electric parking brake, the red F(USA only)/ !
(Canada only) indicator lamp flashes.
The electric parking brake is malfunctioning. It is not possible to
apply the electric parking brake manually.
X Shift the transmission to P.
X Visit a qualified specialist workshop. 322
Display
messagesOn-board computer and displays
Page 325 of 502

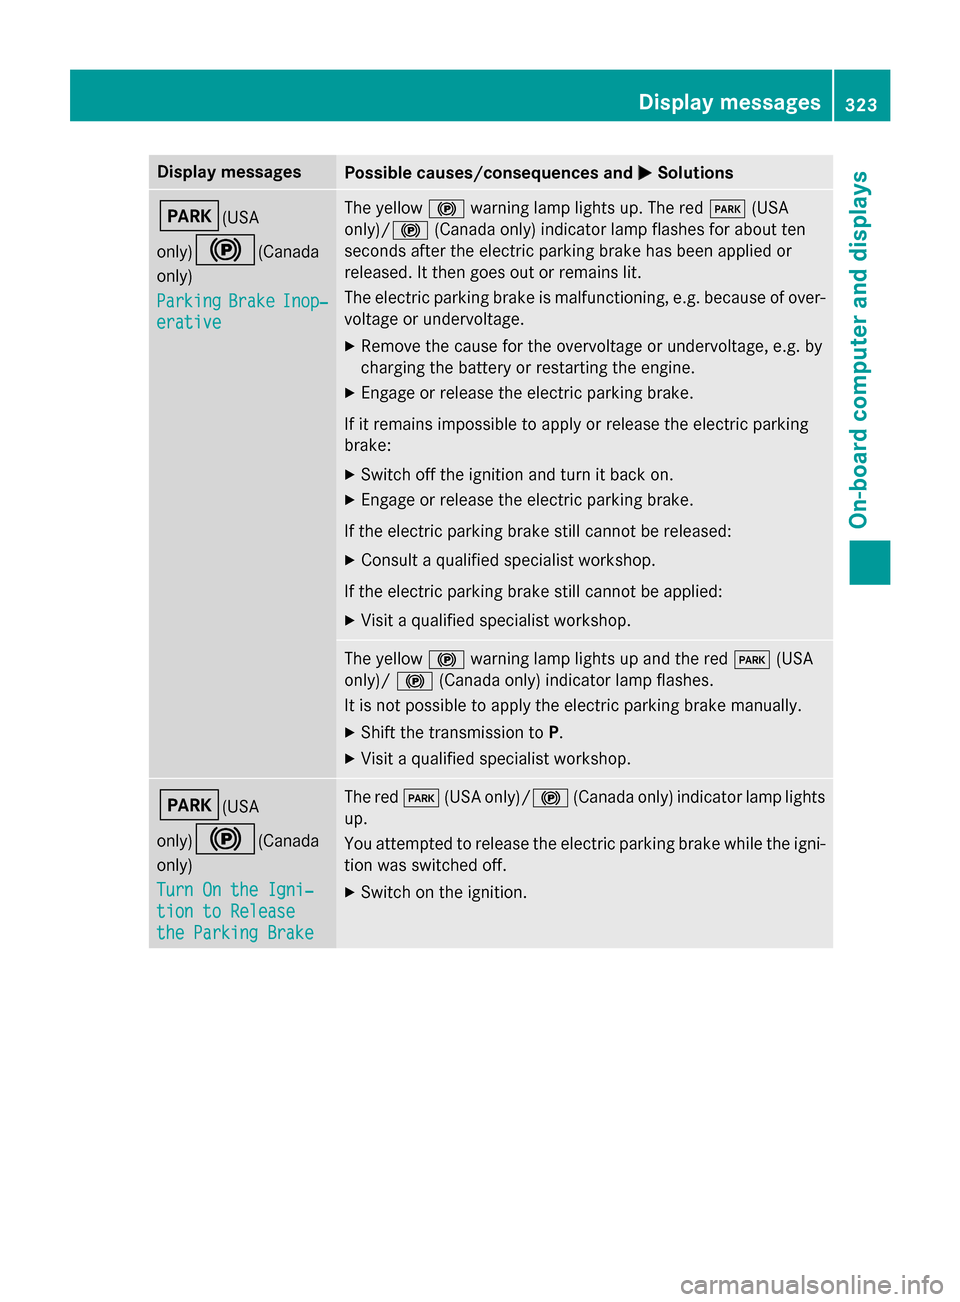
Display messages
Possible causes/consequences and
M
MSolutions F(USA
only)!
(Canada
only)
Parking Parking Brake
BrakeInop‐
Inop‐
erative
erative The yellow
!warning lamp lights up. The red F(USA
only)/ !(Canada only) indicator lamp flashes for about ten
seconds after the electric parking brake has been applied or
released. It then goes out or remains lit.
The electric parking brake is malfunctioning, e.g. because of over-
voltage or undervoltage.
X Remove the cause for the overvoltage or undervoltage, e.g. by
charging the battery or restarting the engine.
X Engage or release the electric parking brake.
If it remains impossible to apply or release the electric parking
brake:
X Switch off the ignition and turn it back on.
X Engage or release the electric parking brake.
If the electric parking brake still cannot be released: X Consult a qualified specialist workshop.
If the electric parking brake still cannot be applied: X Visit a qualified specialist workshop. The yellow
!warning lamp lights up and the red F(USA
only)/ !(Canada only) indicator lamp flashes.
It is not possible to apply the electric parking brake manually.
X Shift the transmission to P.
X Visit a qualified specialist workshop. F(USA
only)!
(Canada
only)
Turn On the Igni‐ Turn On the Igni‐
tion to Release tion to Release
the Parking Brake the Parking Brake The red
F(USA only)/! (Canada only) indicator lamp lights
up.
You attempted to release the electric parking brake while the igni-
tion was switched off.
X Switch on the ignition. Display
messages
323On-board computer and displays Z
Page 353 of 502

Vehicle
Display messages
Possible causes/consequences and
M
MSolutions Shift to 'P' or
Shift to 'P' or
'N' 'N'
to
toStart
Start Engine
Engine You have attempted to start the engine with the transmission in
position
Ror D.
X Shift the transmission to position Por N. Auxiliary Battery Auxiliary Battery
Malfunction Malfunction The auxiliary battery for the transmission is no longer being
charged.
X Visit a qualified specialist workshop. Apply Brake to Apply Brake to
Shift from 'P' Shift from 'P' You have attempted to move the transmission selector lever to
position
D,Ror Nwithout depressing the brake pedal.
X Depress the brake pedal. Transmission Not Transmission Not
in P Risk of Vehi‐ in P Risk of Vehi‐
cle Rolling Away cle Rolling Away The driver's door is open/not completely closed and the trans-
mission is in position
R,Nor D.
A warning tone also sounds.
G WARNING
The vehicle may roll away.
There is a risk of an accident. X Shift the transmission to position P.
X Secure the vehicle against rolling away (Y page 220).
X Close the driver's door completely. Service Required Service Required
Do Do
Not
Not Shift
Shift Gears
Gears
Visit Dealer
Visit Dealer You cannot change the transmission position due to a malfunction.
A warning tone also sounds.
If transmission position Dis selected:
X Drive to a qualified specialist workshop without shifting the
transmission from position D.
If transmission position R,Nor Pis selected:
X Notify a qualified specialist workshop or breakdown service. Transmission Mal‐ Transmission Mal‐
function Stop function Stop A malfunction has occurred in the mechanical transmission com-
ponents.
A warning tone also sounds. The gearbox automatically shifts to
position N.
X Pull over and stop the vehicle safely as soon as possible, paying
attention to road and traffic conditions.
X Shift the transmission to position P.
X Secure the vehicle against rolling away (Y page 220).
X Notify a qualified specialist workshop or breakdown service. Display messages
351On-board computer and displays Z
Page 354 of 502

Display messages
Possible causes/consequences and
M
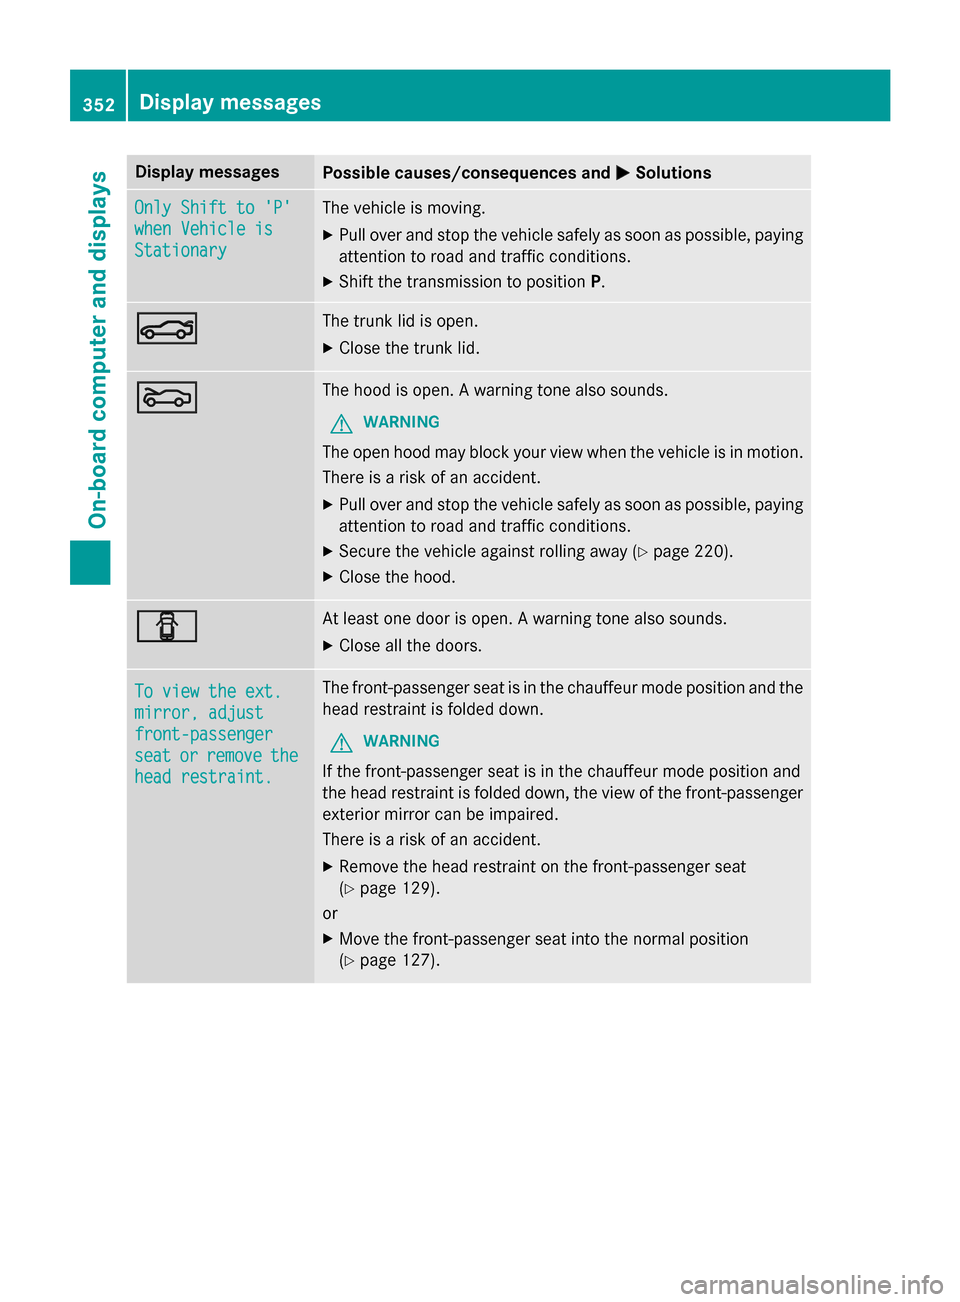
MSolutions Only Shift to 'P'
Only Shift to 'P'
when Vehicle is when Vehicle is
Stationary Stationary The vehicle is moving.
X
Pull over and stop the vehicle safely as soon as possible, paying
attention to road and traffic conditions.
X Shift the transmission to position P.N N The trunk lid is open.
X Close the trunk lid. M
M The hood is open. A warning tone also sounds.
G WARNING
The open hood may block your view when the vehicle is in motion.
There is a risk of an accident.
X Pull over and stop the vehicle safely as soon as possible, paying
attention to road and traffic conditions.
X Secure the vehicle against rolling away (Y page 220).
X Close the hood. C
C At least one door is open. A warning tone also sounds.
X Close all the doors. To view the ext.
To view the ext.
mirror, adjust mirror, adjust
front-passenger front-passenger
seat seat
or
orremove
remove the
the
head restraint.
head restraint. The front-passenger seat is in the chauffeur mode position and the
head restraint is folded down.
G WARNING
If the front-passenger seat is in the chauffeur mode position and
the head restraint is folded down, the view of the front-passenger
exterior mirror can be impaired.
There is a risk of an accident.
X Remove the head restraint on the front-passenger seat
(Y page 129).
or
X Move the front-passenger seat into the normal position
(Y page 127). 352
Display
messagesOn-board computer and displays
Page 360 of 502

Warning/
indicator
lamp
N
N Signal type
Possible causes/consequences and M MSolutions !
N
The yellow ABS warning lamp is lit while the engine is running.
ABS (Anti-lock Braking System) is deactivated due to a malfunction. Therefore BAS (Brake Assist System), BAS PLUS with Cross-Traffic Assist, COLLISION
PREVENTION ASSIST PLUS, ESP ®
(Electronic Stability Program), PRE‑SAFE ®
,
PRE‑SAFE ®
PLUS, PRE‑SAFE ®
Brake, the HOLD function, hill start assist,
Crosswind Assist, STEER CONTROL, Active Lane Keeping Assist and Active
Blind Spot Assist are also deactivated.
ATTENTION ASSIST is deactivated.
G WARNING
The brake system continues to function normally, but without the functions
listed above. The wheels could therefore lock if you brake hard, for example.
The steerability and braking characteristics may be severely affected. The
braking distance in an emergency braking situation can increase.
If ESP ®
is not operational, ESP ®
is unable to stabilize the vehicle.
There is an increased risk of skidding and an accident.
X Observe the additional display messages in the multifunction display.
X Drive on carefully.
X Visit a qualified specialist workshop.
If the ABS control unit is faulty, there is also a possibility that other systems,
such as the navigation system or the automatic transmission, will not be
available. 358
Warning and indicator lamps in the instrument clusterOn-board computer and displays
Page 401 of 502

lamp
:will only light up yellow after ten
seconds have elapsed.
X Release button ;,=or?. Indicator
lamp :flashes yellow.
X To program the remote control: point
garage door remote control Atowards
buttons ;to? on the rear-view mirror at
a distance of 2 to 8 inches (5 to 20 cm).
X Press and hold button Bon remote control
A until indicator lamp :lights up green.
When indicator lamp :lights up green:
programming is finished.
When indicator lamp :flashes green: pro-
gramming was successful. The next step is to synchronize the rolling code
(Y page 399).
X Release button Bon remote control Afor
the garage door drive system.
If indicator lamp :lights up red: repeat the
programing procedure for the correspond-
ing button on the rear-view mirror. When
doing so, vary the distance between remote control Aand the rear-view mirror.
The required distance between remote
control Aand the integrated garage door
opener depends on the garage door drive
system. Several attempts might be neces-
sary. You should test every position for at
least 25 seconds before trying another
position.
Synchronizing the rolling code
Pay attention to the "Important safety notes"
(Y page 398).
If the garage door system uses a rolling code, you will also have to synchronize the garage
door system with the integrated garage door
opener in the rear-view mirror. To do this you
will need to use the programming button on
the door drive control panel. The program-
ming button may be positioned at different
locations depending on the manufacturer. It
is usually located on the door drive unit on the
garage ceiling.
Familiarize yourself with the garage door
drive operating instructions, e.g. under "Pro- gramming of additional remote controls",
before carrying out the following steps.
Your vehicle must be within reach of the
garage door or gate opener drive. Make sure
that neither your vehicle nor any persons/
objects are present within the sweep of the
door or gate.
X Turn the SmartKey to position 2in the igni-
tion lock (Y page 189).
X Get out of the vehicle.
X Press the programming button on the door
drive unit.
Usually, you now have 30 seconds to ini-
tiate the next step.
X Get into the vehicle.
X Press previously programmed button ;,
= or? on the integrated garage door
opener until the door closes.
The rolling code synchronization is then
complete.
Notes on programming the remote con-
trol
Canadian radio frequency laws require a
"break" (or interruption) of the transmission
signals after broadcasting for a few seconds. Therefore, these signals may not last long
enough for the integrated garage door
opener. The signal is not recognized during
programming. Comparable with Canadian
law, some U.S. garage door openers also fea-
ture a "break".
Proceed as follows:
R if you live in Canada
R if you have difficulties programming the
garage door opener (regardless of where
you live) when using the programming
steps
X Press and hold one of buttons ;to? on
the integrated garage door opener.
After a short time, indicator lamp :lights
up yellow.
X Release the button.
Indicator lamp :flashes yellow. Features
399Stowage and features Z
Page 402 of 502

X
Press button Bof garage door remote
control Afor two seconds, then release it
for two seconds.
X Press button Bagain for two seconds.
X Repeat this sequence on button Bof
remote control Auntil indicator lamp :
lights up green.
When indicator lamp :lights up green:
programming is finished.
When indicator lamp :flashes green: pro-
gramming was successful. The next step is to synchronize the rolling code.
X Release button Bof remote control Aof
the garage door drive.
If indicator lamp :lights up red: repeat the
programming process for the correspond-
ing button on the rear-view mirror. When
doing so, vary the distance between remote
control Aand the rear-view mirror.
The required distance between remote
control Aand the integrated garage door
opener depends on the garage door drive
system. Several attempts might be neces-
sary. You should test every position for at
least 25 seconds before trying another
position.
Problems when programming
If you are experiencing problems programing
the integrated garage door opener on the
rear-view mirror, take note of the following
instructions:
R Check the transmitter frequency used by
garage door drive remote control Aand
whether it is supported. The transmitter
frequency can usually be found on the back
of the garage door drive remote control.
The integrated garage door opener is com- patible with devices that have units which
operate in the frequency range of 280 to
433 MHz.
R Replace the batteries in garage door
remote control A. This increases the like-
lihood that garage door remote control A
will transmit a strong and precise signal to
the integrated garage door opener. R
When programming, hold remote control
A at varying distances and angles from the
button which you are programming. Try var- ious angles at a distance between 2and
12 inches (5to 30 cm) or at the same angle
but at varying distances.
R If another remote control is available for the
same garage door drive, repeat the same
programming steps with this remote con-
trol. Before performing these steps, make
sure that new batteries have been installed in garage door drive remote control A.
R Note that some remote controls only trans-
mit for a limited amount of time (the indi-
cator lamp on the remote control goes out). Press button Bon remote control Aagain
before transmission ends.
R Align the antenna cable of the garage door
opener unit. This can improve signal recep- tion/transmission.
Opening/closing the garage door After it has been programmed, the integrated
garage door opener performs the function of
the garage door system remote control.
Please also read the operating instructions
for the garage door system.
X Turn the SmartKey to position 2in the igni-
tion lock (Y page 189).
X Press button ;,=or? which you have
programmed to operate the garage door.
Garage door system with a fixed code: indi-
cator lamp :lights up green.
Garage door system with a rolling code:
indicator lamp :flashes green.
The transmitter will transmit a signal as
long as the button is pressed. The trans-
mission is halted after a maximum of ten
seconds and indicator lamp :lights up
yellow.
X Press button ;,=or? again if neces-
sary. 400
FeaturesStowage and features