2015 MERCEDES-BENZ S-Class wheel
[x] Cancel search: wheelPage 145 of 502

X
Turn the SmartKey to position 2in the igni-
tion lock (Y page 189).
X Press button =for the exterior mirror on
the front-passenger side.
X Engage reverse gear.
The exterior mirror on the front-passenger
side moves to the preset parking position.
X Use adjustment button ;to adjust the
exterior mirror to a position that allows you to see the rear wheel and the curb.
The parking position is stored.
i If you shift the transmission to another
position, the exterior mirror on the front-
passenger side returns to the driving posi-
tion.
Using the memory button
You can position the front-passenger side
exterior mirror in such a way that you can see
the rear wheel on that side as soon as you
engage reverse gear. This setting can be
stored using memory button M:.
X Turn the SmartKey to position 2in the igni-
tion lock (Y page 189).
X Press button =for the exterior mirror on
the front-passenger side.
X Use adjustment button ;to adjust the
exterior mirror to a position that allows you to see the rear wheel and the curb.
X Press memory button M: and one of the
arrows on adjustment button ;within
three seconds.
The parking position is stored if the exterior
mirror does not move.
X If the mirror moves out of position, repeat
the steps. Calling up a stored parking position set-
ting X
Turn the SmartKey to position 2in the igni-
tion lock (Y page 189).
X Adjust the exterior mirror on the front-
passenger side using button =.
X Engage reverse gear.
The exterior mirror on the front-passenger
side moves to the stored parking position.
The exterior mirror on the front-passenger
side moves back to its original position:
R as soon as you exceed a speed of 9 mph
(15 km/h)
R about ten seconds after you have disen-
gaged reverse gear
R if you press button ?for the exterior mir-
ror on the driver's side Memory function
Important safety notes
G
WARNING
If you use the memory function on the driver's side while driving, you could lose control of
the vehicle as a result of the adjustments
being made. There is a risk of an accident.
Only use the memory function on the driver's
side when the vehicle is stationary. G
WARNING
When the memory function adjusts the seat or steering wheel, you and other vehicle occu-
pants – particularly children – could become
trapped. There is a risk of injury.
While the memory function is making adjust-
ments, make sure that no one has any body
parts in the sweep of the seat or steering
wheel. If somebody becomes trapped, imme-
diately release the memory function position
button. The adjustment process is stopped. Memory function
143Seats, steering wheel and mirrors Z
Page 146 of 502

G
WARNING
Children could become trapped if they acti-
vate the memory function, particularly when
unattended. There is a risk of injury.
When leaving the vehicle, always take the
SmartKey with you and lock the vehicle. Never leave children unsupervised in the vehicle. Storing settings
The memory function is only available in vehi- cles with the memory package.
With the memory function, you can store up
to three different settings, e.g. for three dif-
ferent people.
The following settings are stored as a single
memory preset:
R seat, backrest, head restraint position and
contour of the backrest in the lumbar
region
R active multicontour seat: side bolsters of
the backrest, shoulder of the backrest, con- tour of the backrest, dynamic function level
R seat heating: distribution of the heated sec-
tions of the seat cushion and backrest
R driver's side: position of the exterior mir-
rors on the driver's and front-passenger
sides X
Adjust the seat accordingly (Y page 122).
X On the driver's side, adjust the steering
wheel (Y page 137) and the exterior mirrors
(Y page 141).
X Press memory button Mand one of the
storage position buttons 1,2or 3within
three seconds.
The settings are stored in the selected pre- set position. A tone sounds when the set-
tings have been completed. Calling up a stored setting
X Press and hold the corresponding storage
position button 1,2or 3until:
R Seat
R Steering wheel
R Exterior mirrors
are in the stored position.
i If you release the storage position button,
the seat, steering wheel and mirror setting
functions stop immediately. The multicon-
tour seat setting or the 4-way lumbar sup-
port is still carried out. Memory function in the rear compart-
ment Important safety notes
G
WARNING
When the memory function adjusts the seat or steering wheel, you and other vehicle occu-
pants – particularly children – could become
trapped. There is a risk of injury.
While the memory function is making adjust-
ments, make sure that no one has any body
parts in the sweep of the seat or steering
wheel. If somebody becomes trapped, imme-
diately release the memory function position
button. The adjustment process is stopped. 144
Memory function in the rear compartmentSeats, steering wheel and mirrors
Page 147 of 502
G
WARNING
Children could become trapped if they acti-
vate the memory function, particularly when
unattended. There is a risk of injury.
When leaving the vehicle, always take the
SmartKey with you and lock the vehicle. Never leave children unsupervised in the vehicle. General notes
The settings for the rear seat and the front-
passenger seat can be stored using the rear-
compartment memory function.
R If the indicator lamp in the vbutton is
not lit, store the rear seat settings.
R If the indicator lamp in the vbutton
lights up, store the front-passenger seat
and rear seat settings. Both the front-
passenger and rear seat are taken into
account with this setting. Depending on the equipment in the vehicle, two or three
memory positions can be stored for the
front-passenger and rear seats. Storing settings
General notes With the memory function in the rear, you can
store up to three different settings, e.g. for
three different people.
The following settings are stored as a single
memory preset:
R position of the seat, backrest and head
restraint
R multicontour seat: the seat cushions of the
backrest as well as the contour of the back- rest in the lumbar and shoulder regions
R seat heating: distribution of the heated sec-
tions of the seat cushion and backrest if the
indicator lamp in the vbutton is not lit. The following settings are stored to a memory
position, if the indicator lamp in the v
button lights up:
R position of the footrest for the front-
passenger seat, if available
R position of the screen, if available
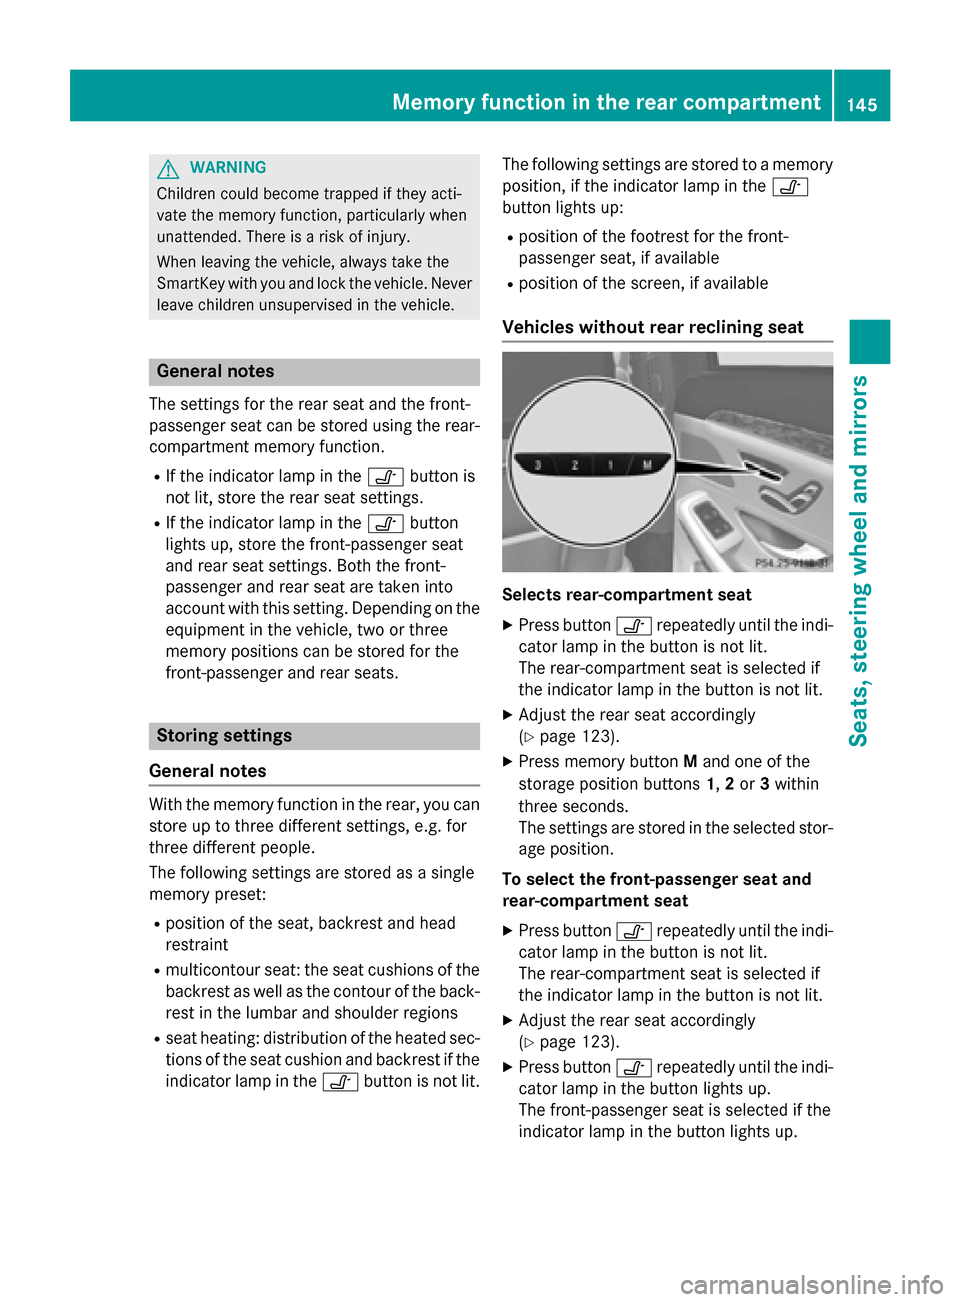
Vehicles without rear reclining seat Selects rear-compartment seat
X Press button vrepeatedly until the indi-
cator lamp in the button is not lit.
The rear-compartment seat is selected if
the indicator lamp in the button is not lit.
X Adjust the rear seat accordingly
(Y page 123).
X Press memory button Mand one of the
storage position buttons 1,2or 3within
three seconds.
The settings are stored in the selected stor- age position.
To select the front-passenger seat and
rear-compartment seat
X Press button vrepeatedly until the indi-
cator lamp in the button is not lit.
The rear-compartment seat is selected if
the indicator lamp in the button is not lit.
X Adjust the rear seat accordingly
(Y page 123).
X Press button vrepeatedly until the indi-
cator lamp in the button lights up.
The front-passenger seat is selected if the
indicator lamp in the button lights up. Memory function in the rear compartment
145Seats, steering wheel and mirrors Z
Page 148 of 502
X
Adjust the front-passenger seat accord-
ingly (Y page 124).
X Press memory button Mand one of the
storage position buttons 1,2or 3within
three seconds.
The settings are stored in the selected stor- age position.
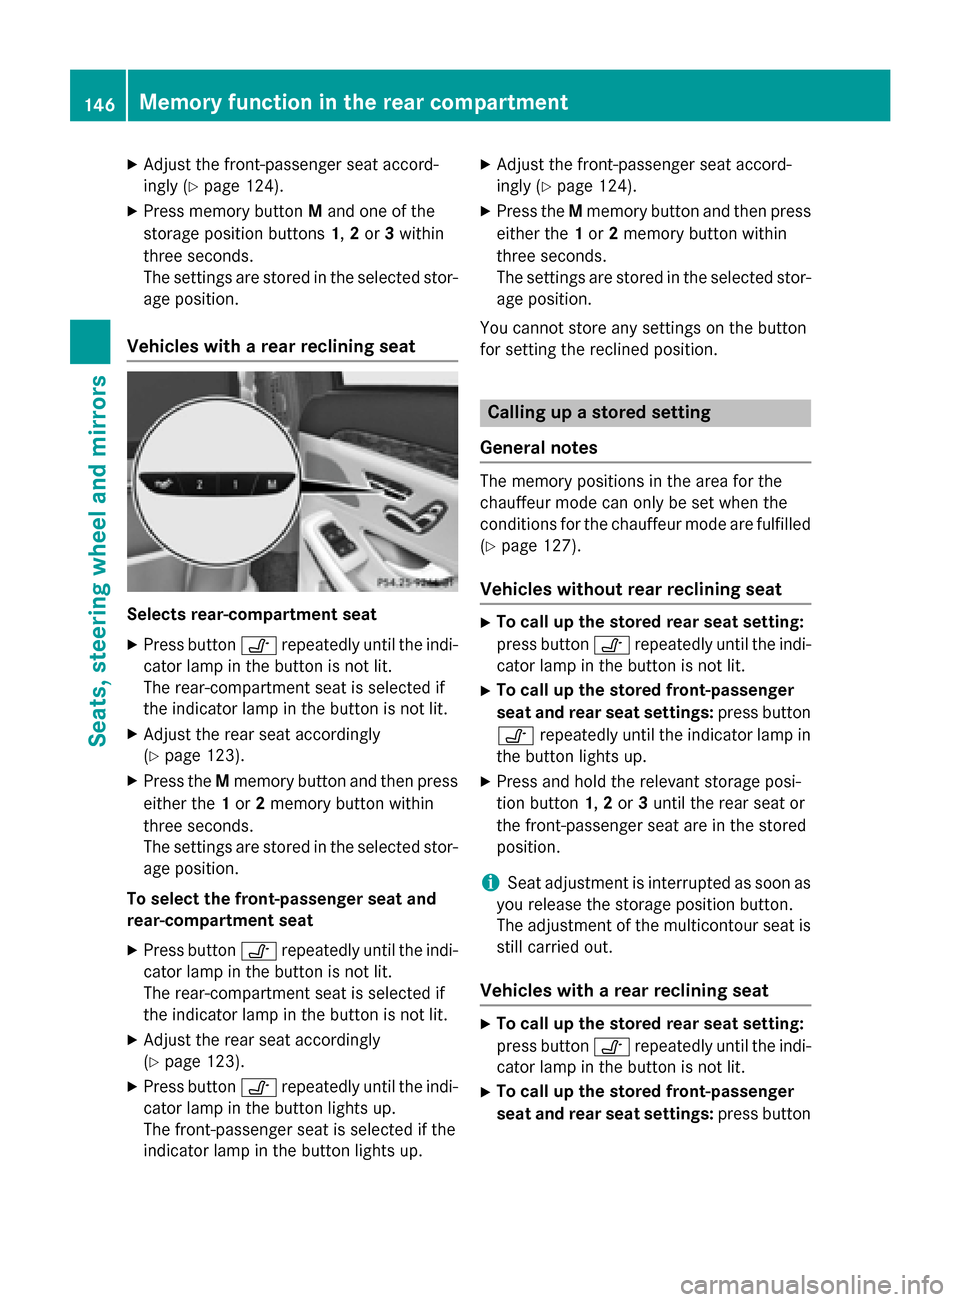
Vehicles with a rear reclining seat Selects rear-compartment seat
X Press button vrepeatedly until the indi-
cator lamp in the button is not lit.
The rear-compartment seat is selected if
the indicator lamp in the button is not lit.
X Adjust the rear seat accordingly
(Y page 123).
X Press the Mmemory button and then press
either the 1or 2memory button within
three seconds.
The settings are stored in the selected stor- age position.
To select the front-passenger seat and
rear-compartment seat
X Press button vrepeatedly until the indi-
cator lamp in the button is not lit.
The rear-compartment seat is selected if
the indicator lamp in the button is not lit.
X Adjust the rear seat accordingly
(Y page 123).
X Press button vrepeatedly until the indi-
cator lamp in the button lights up.
The front-passenger seat is selected if the
indicator lamp in the button lights up. X
Adjust the front-passenger seat accord-
ingly (Y page 124).
X Press the Mmemory button and then press
either the 1or 2memory button within
three seconds.
The settings are stored in the selected stor- age position.
You cannot store any settings on the button
for setting the reclined position. Calling up a stored setting
General notes The memory positions in the area for the
chauffeur mode can only be set when the
conditions for the chauffeur mode are fulfilled
(Y page 127).
Vehicles without rear reclining seat X
To call up the stored rear seat setting:
press button vrepeatedly until the indi-
cator lamp in the button is not lit.
X To call up the stored front-passenger
seat and rear seat settings: press button
v repeatedly until the indicator lamp in
the button lights up.
X Press and hold the relevant storage posi-
tion button 1,2or 3until the rear seat or
the front-passenger seat are in the stored
position.
i Seat adjustment is interrupted as soon as
you release the storage position button.
The adjustment of the multicontour seat is still carried out.
Vehicles with a rear reclining seat X
To call up the stored rear seat setting:
press button vrepeatedly until the indi-
cator lamp in the button is not lit.
X To call up the stored front-passenger
seat and rear seat settings: press button146
Memory function in the rear compartmentSeats, steering
wheel and mirrors
Page 149 of 502
v
repeatedly until the indicator lamp in
the button lights up.
X Press and hold the relevant storage posi-
tion button 1or 2until the rear seat or the
front-passenger seat is in the stored posi-
tion.
i Seat adjustment is interrupted as soon as
you release the storage position button.
The adjustment of the multicontour seat is still carried out. Memory function in the rear compartment
147Seats, steering wheel and mirrors Z
Page 155 of 502

The hazard warning lamps automatically
switch on if:
R an air bag is deployed or
R the vehicle decelerates rapidly from a
speed of above 45 mph (70 km/h) and
comes to a standstill
The hazard warning lamps switch off auto-
matically if the vehicle reaches a speed of
above 6 mph (10 km/h) again after a full
brake application.
The hazard warning lamps still operate if the
ignition is switched off. Cornering light function
The cornering light function improves the illu-
mination of the road over a wide angle in the direction you are turning, enabling better vis-
ibility in tight bends, for example. It can only
be activated when the low-beam headlamps
are switched on.
Active:
R if you are driving at speeds below 25 mph
(40 km/h) and switch on the turn signal or
turn the steering wheel
R if you are driving at speeds between
25 mph (40 km/ h)and 45 mph (70 km/h)
and turn the steering wheel
The cornering lamp may remain lit for a short
time, but is automatically switched off after
no more than three minutes. Adaptive Highbeam Assist Plus
General notes With Adaptive Highbeam Assist Plus, you can
automatically switch between low-beam, par-
tial high-beam and high-beam headlamps.
Partial high-beam is a form of illumination
whereby the high-beam is directed past other
road users. Other road users are kept out of
the high-beam. This prevents glare. When
there is a vehicle in front, for example, the
high-beam headlamps illuminate the areas to
its right and left, and the vehicle in front is
illuminated by the low-beam headlamps.
The system automatically adapts the low-
beam headlamp range depending on the dis-
tance to the other vehicle. Once the system
no longer detects any other vehicles, it reac-
tivates the high-beam headlamps.
If the high-beam or partial high-beam are
causing too much reflection from traffic
signs, the lights are automatically dimmed
and glare for the driver caused by the reflec-
tions is thus avoided.
The system's optical sensor is located behind the windshield near the overhead control
panel. Exterior lighting
153Lights and windshield wipers Z
Page 182 of 502
Problems with the perfume atomizer
Problem
Possible causes/consequences and
M
MSolutions The vehicle interior is
not perfumed although
the perfume atomizer is
activated. The perfume vial has not been pushed into the holder as far as it
will go.
X Slide the perfume vial into the holder as far as it will go. The perfume vial has not been adequately filled.
X Pre-filled vials: dispose of the empty vial.
X Use a new pre-filled vial.
X Refillable vials: refill the vial with a maximum of 15 ml of the
same perfume. The perfume atomizer is faulty.
X Have the perfume atomizer checked at a qualified specialist
workshop. Ionization
You can use the "Ionization" function to purify
the air in the vehicle interior and attain an
improved interior climate.
The ionization of the interior air is odorless
and cannot be perceived directly in the vehi-
cle interior.
You can switch ionization on and off using
COMAND (see the separate operating
instructions).
Ionization can only be switched on if the front automatic climate control is activated. The
side air vent on the driver's side must be
open. Pre-entry climate control via Smart-
Key
General notes The "Pre-entry climate control via SmartKey"
function is only available on PLUG-IN HYBRID
vehicles.
Before getting in, the driver's seat area or the whole interior can be briefly warmed or ven-
tilated in advance with the air from the air
vents being pre-cooled. The high-voltage battery must be sufficiently
charged before "Pre-entry climate control via
SmartKey" can be activated.
When the vehicle is pre-cooled, the following functions are activated:
R Climate control system
R Blower
R Seat ventilation
When the vehicle is pre-warmed, the following
functions are activated:
R Climate control system
R Blower
R Seat heating
R Steering wheel heating
R Exterior mirror heating
R Rear window defroster
If you have activated the following functions
using COMAND, they are activated together
with the "Pre-entry climate control via Smart-
Key" function:
R Armrest heating
R perfume atomizer
R Ionization 180
Operating the climate control systemsClimate control
Page 185 of 502
When the vehicle is heated, the following
functions are activated:
R Climate control system
R Blower
R Seat heating
R Steering wheel heating
R Armrest heating
R Exterior mirror heating
R Rear window defroster
i In contrast to the rest of the climate con-
trol functions, the seat heating/ventilation,
steering wheel heating and armrest heating only switch on if required.
If you have switched on the perfume atomizer or the ionization using COMAND, these will beactivated together with the "Pre-entry climate control at departure time".
Activating the perfume atomizer/ionization
(see separate COMAND operating instruc-
tions).
Setting the departure time You can set the departure time using the
instrument cluster or via the "Vehicle Home-
page" (Y
page 220). The activation of the
"Pre-entry climate control at departure time"
function can be linked to this departure time.
Your vehicle will then be cooled or heated
until the desired temperature is reached in
time for the set departure time. "Pre-entry
climate control at departure time" will be acti- vated a maximum of 55 minutes before
departure. If the departure is delayed, the
vehicle will be heated or cooled for a further
five minutes.
X To set the departure time: set the depar-
ture time via the instrument cluster. To set the departure time via the "Vehicle Home-
page" (Y page 220).
X To activate/deactivate "Pre-entry cli-
mate control at departure time": acti-
vate/deactivate "Pre-entry climate control
at departure time" via COMAND (see sep-
arate operating instructions). To activate/ deactivate the "Pre-entry climate control at
departure time" function via the Vehicle
Homepage (Y page 220).
When activating the "Pre-entry climate con-
trol at departure time" function: you can
select whether only the driver's area or the
whole vehicle interior should be heated or
cooled.
The "Pre-entry climate control at departure
time" function switches off automatically
when the vehicle is started. The following
functions remain active:
R Seat heating
R Seat ventilation
R Armrest heating
R Steering wheel heating
R Perfume atomizer
R Ionization
Switching off "Pre-entry climate control
at departure time": the activated "Pre-entry
climate control at departure time" can be
switched off using the rocker switch
(Y page 183).
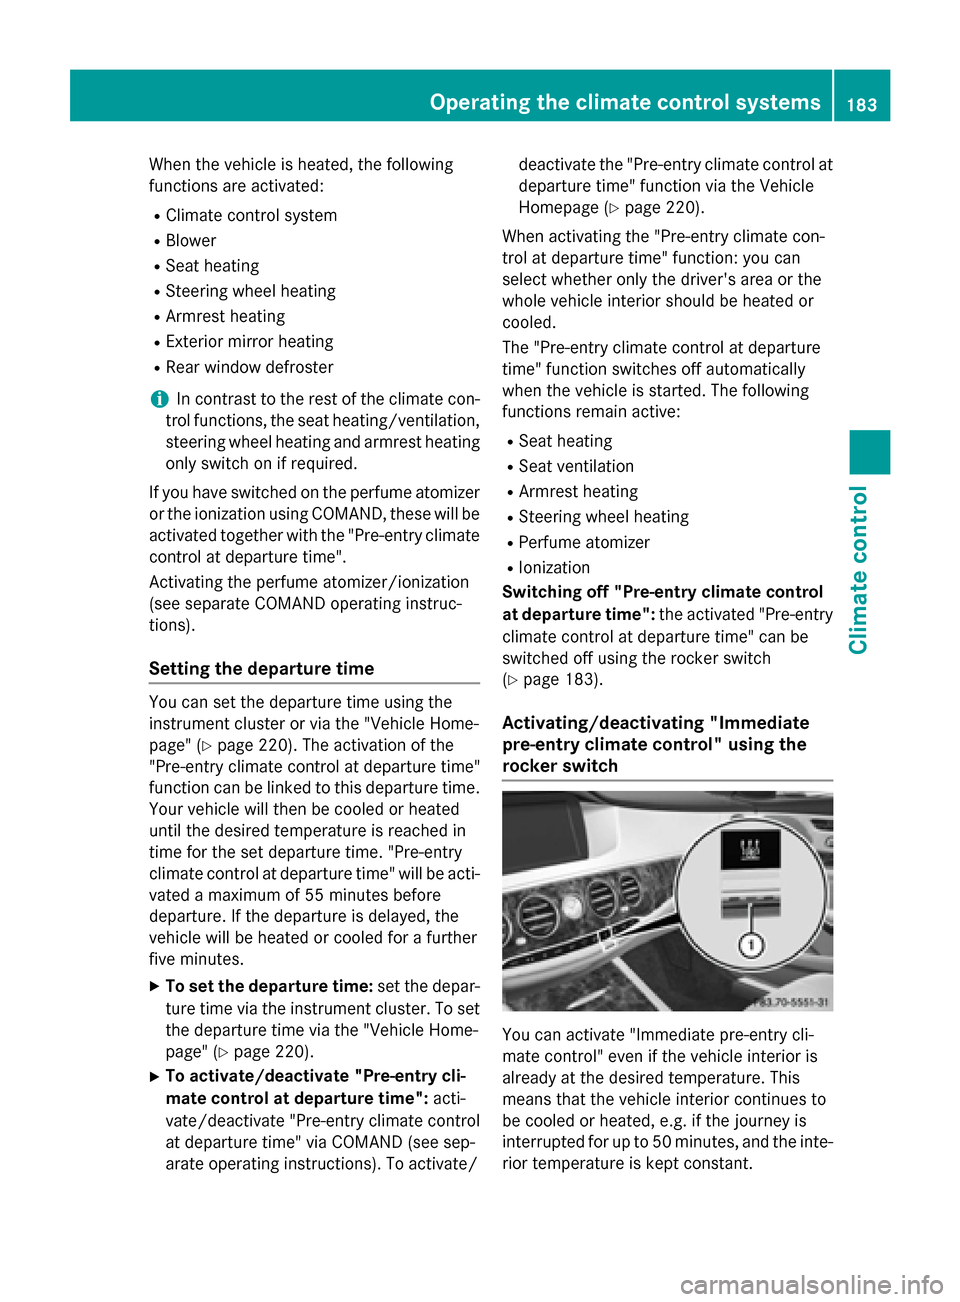
Activating/deactivating "Immediate
pre-entry climate control" using the
rocker switch You can activate "Immediate pre-entry cli-
mate control" even if the vehicle interior is
already at the desired temperature. This
means that the vehicle interior continues to
be cooled or heated, e.g. if the journey is
interrupted for up to 50 minutes, and the inte-
rior temperature is kept constant. Operating the climate control systems
183Climate control Z