2015 MERCEDES-BENZ S-CLASS COUPE ESP
[x] Cancel search: ESPPage 316 of 417
Tyres
Warning/
indicator
lamp
N N
Signal type
Possible causes/consequences and M
MSolutions h
N
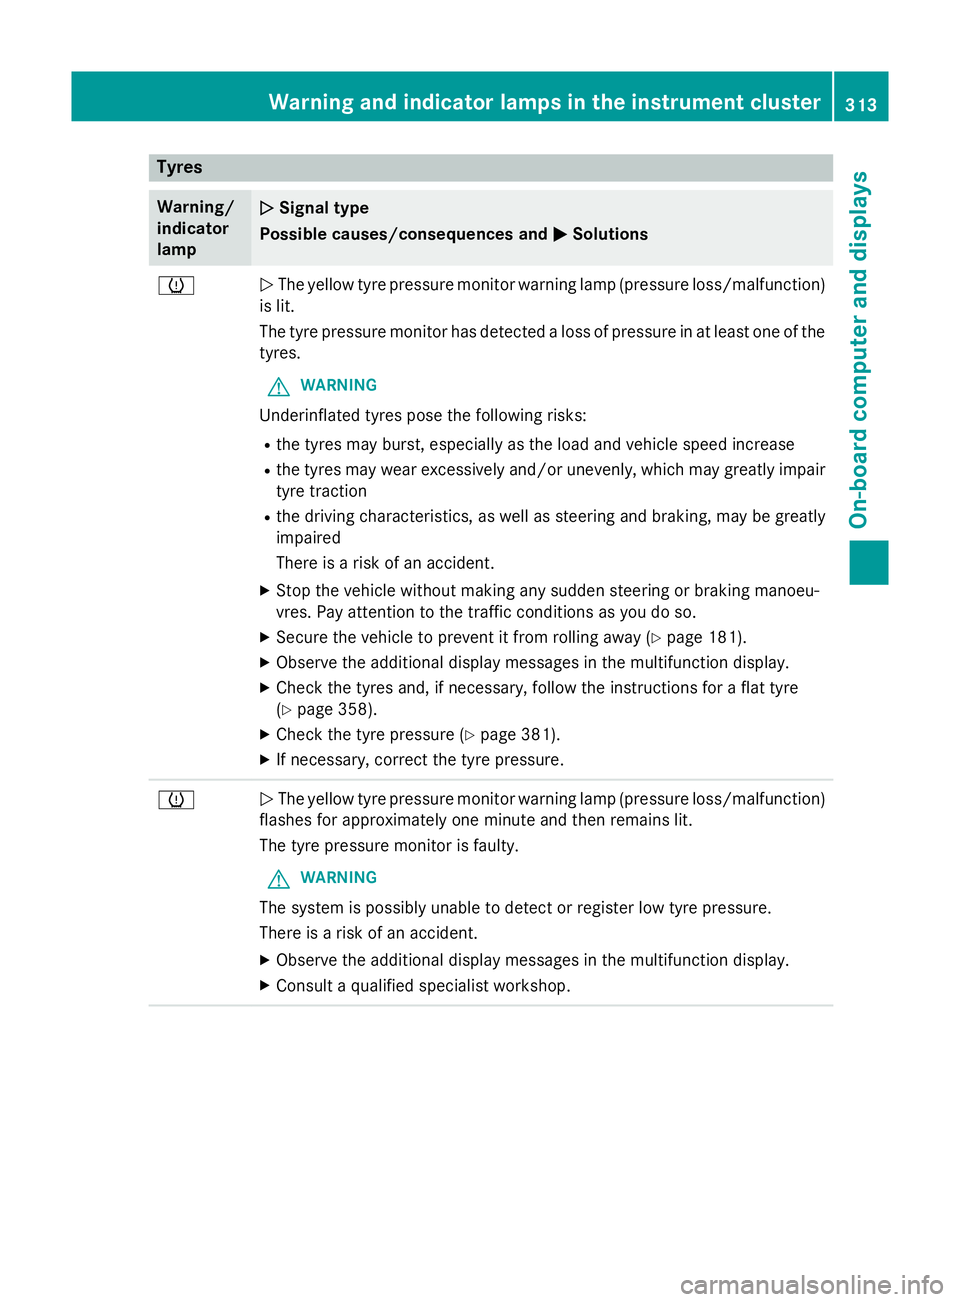
The yellow tyre pressure monitor warning lamp (pressure loss/malfunction)
is lit.
The tyre pressure monitor has detected a loss of pressure in at least one of the
tyres.
G WARNING
Underinflated tyres pose the following risks:
R the tyres may burst, especially as the load and vehicle speed increase
R the tyres may wear excessively and/or unevenly, which may greatly impair
tyre traction
R the driving characteristics, as well as steering and braking, may be greatly
impaired
There is a risk of an accident.
X Stop the vehicle without making any sudden steering or braking manoeu-
vres. Pay attention to the traffic conditions as you do so.
X Secure the vehicle to prevent it from rolling away (Y page 181).
X Observe the additional display messages in the multifunction display.
X Check the tyres and, if necessary, follow the instructions for a flat tyre
(Y page 358).
X Check the tyre pressure (Y page 381).
X If necessary, correct the tyre pressure. h
N
The yellow tyre pressure monitor warning lamp (pressure loss/malfunction)
flashes for approximately one minute and then remains lit.
The tyre pressure monitor is faulty.
G WARNING
The system is possibly unable to detect or register low tyre pressure.
There is a risk of an accident.
X Observe the additional display messages in the multifunction display.
X Consult a qualified specialist workshop. Warning and indicator lamps in the instrument cluster
313On-board computer and displays Z
Page 319 of 417
Useful information
i This Owner's Manual describes all mod-
els, series and optional equipment for your
vehicle that were available at the time of
going to press. National variations are pos- sible. Note that your vehicle may not be
equipped with all of the functions descri-
bed. This is also the case for systems and
functions relevant to safety.
i Read the information on qualified special-
ist workshops: (Y page 26). Stowage areas
Loading guidelines
G
WARNING
Combustion engines emit poisonous exhaust
gases such as carbon monoxide. Exhaust
gases can enter the vehicle interior if the boot
lid is open when the engine is running, espe-
cially if the vehicle is in motion. There is a risk of poisoning.
Always switch off the engine before opening
the boot lid. Never drive with the boot lid
open. G
WARNING
If objects, luggage or loads are not secured or not secured sufficiently, they could slip, tip
over or be flung around and thereby hit vehicle
occupants. There is a risk of injury, especially when braking or abruptly changing directions.
Always store objects so that they cannot be
flung around. Secure objects, luggage or
loads against slipping or tipping before the
journey. G
WARNING
The exhaust tail pipe and tail pipe trim can
become very hot. If you come into contact
with these parts of the vehicle, you could burn
yourself. There is a risk of injury. Always be particularly careful around the
exhaust tail pipe and the tail pipe trim. Allow
these components to cool down before touch-
ing them.
The handling characteristics of a laden vehi-
cle are dependent on the distribution of the
load within the vehicle. For this reason, you
should observe the following notes when
transporting a load:
R never exceed the maximum permissible
gross vehicle weight or the permissible axle
loads for the vehicle (including occupants).
R the boot is the preferred place to carry
objects.
R position heavy loads as far forwards as pos-
sible and as low down in the boot as pos-
sible.
R the load must not protrude above the upper
edge of the seat backrests.
R always place the load behind unoccupied
seats if possible.
R secure the load with sufficiently strong and
wear-resistant lashing material. Pad sharp
edges for protection.
i Load restraints are available at any quali-
fied specialist workshop, e.g. a Mercedes-
Benz Service Centre. Stowage compartments
Important safety notes G
WARNING
If you do not correctly store objects in the
vehicle interior, they can slip or be flung
around, thus striking vehicle occupants.
There is a risk of injury, especially when brak- ing or abruptly changing directions.
R Always store objects so that they cannot be
flung around in these or in similar situa-
tions.
R Always make sure that objects do not pro-
trude from stowage compartments, lug-
gage nets or stowage nets. 316
Stowage areasStowing and features
Page 322 of 417
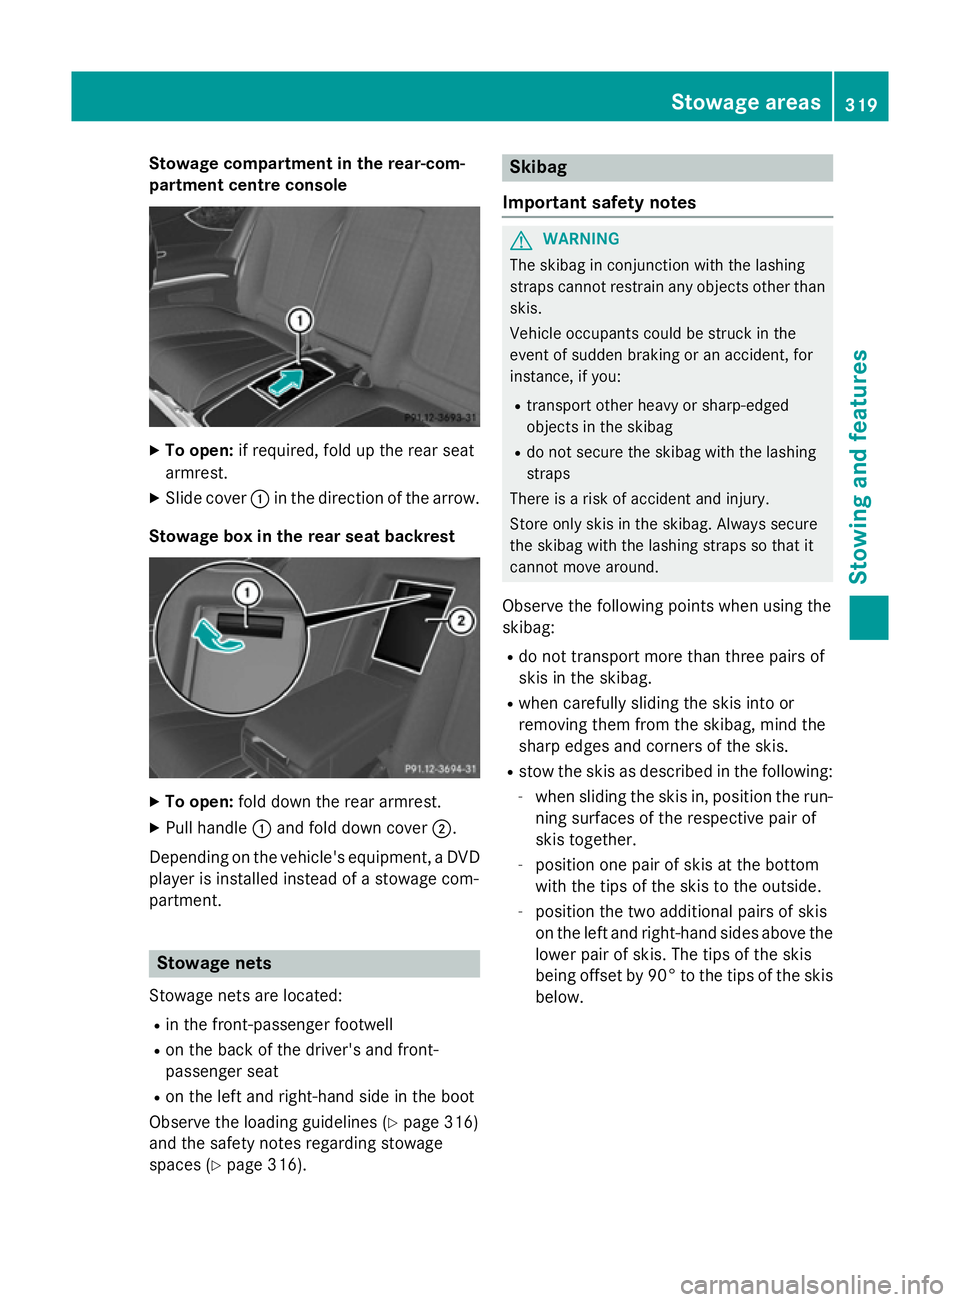
Stowage compartment in the rear-com-
partment centre console X
To open: if required, fold up the rear seat
armrest.
X Slide cover :in the direction of the arrow.
Stowage box in the rear seat backrest X
To open: fold down the rear armrest.
X Pull handle :and fold down cover ;.
Depending on the vehicle's equipment, a DVD
player is installed instead of a stowage com-
partment. Stowage nets
Stowage nets are located: R in the front-passenger footwell
R on the back of the driver's and front-
passenger seat
R on the left and right-hand side in the boot
Observe the loading guidelines (Y page 316)
and the safety notes regarding stowage
spaces (Y page 316). Skibag
Important safety notes G
WARNING
The skibag in conjunction with the lashing
straps cannot restrain any objects other than skis.
Vehicle occupants could be struck in the
event of sudden braking or an accident, for
instance, if you:
R transport other heavy or sharp-edged
objects in the skibag
R do not secure the skibag with the lashing
straps
There is a risk of accident and injury.
Store only skis in the skibag. Always secure
the skibag with the lashing straps so that it
cannot move around.
Observe the following points when using the
skibag:
R do not transport more than three pairs of
skis in the skibag.
R when carefully sliding the skis into or
removing them from the skibag, mind the
sharp edges and corners of the skis.
R stow the skis as described in the following:
- when sliding the skis in, position the run-
ning surfaces of the respective pair of
skis together.
- position one pair of skis at the bottom
with the tips of the skis to the outside.
- position the two additional pairs of skis
on the left and right-hand sides above the
lower pair of skis. The tips of the skis
being offset by 90° to the tips of the skis below. Stowage areas
319Stowing and features Z
Page 325 of 417
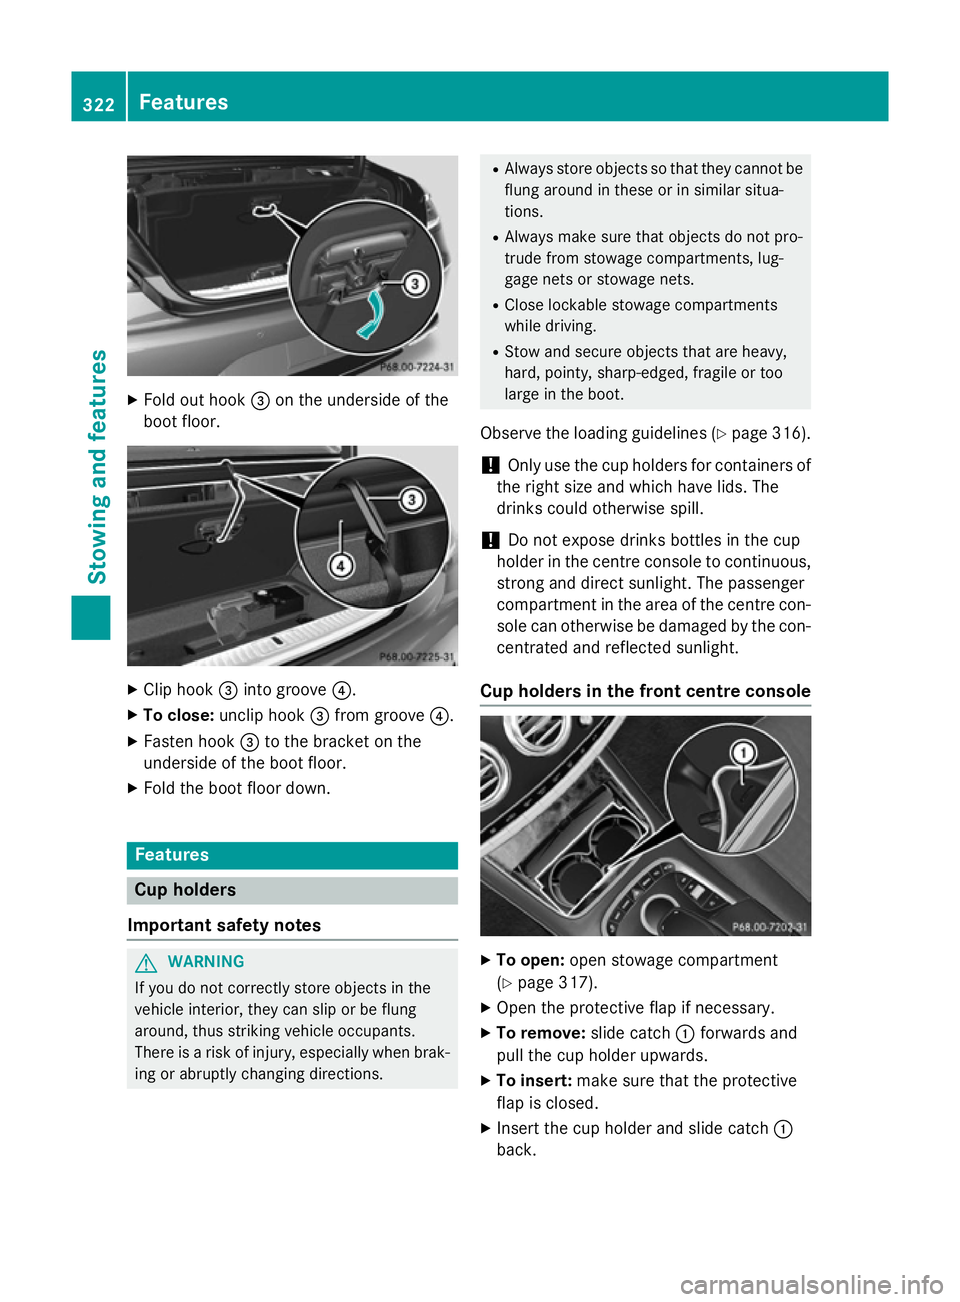
X
Fold out hook =on the underside of the
boot floor. X
Clip hook =into groove ?.
X To close: unclip hook =from groove ?.
X Fasten hook =to the bracket on the
underside of the boot floor.
X Fold the boot floor down. Features
Cup holders
Important safety notes G
WARNING
If you do not correctly store objects in the
vehicle interior, they can slip or be flung
around, thus striking vehicle occupants.
There is a risk of injury, especially when brak- ing or abruptly changing directions. R
Always store objects so that they cannot be
flung around in these or in similar situa-
tions.
R Always make sure that objects do not pro-
trude from stowage compartments, lug-
gage nets or stowage nets.
R Close lockable stowage compartments
while driving.
R Stow and secure objects that are heavy,
hard, pointy, sharp-edged, fragile or too
large in the boot.
Observe the loading guidelines (Y page 316).
! Only use the cup holders for containers of
the right size and which have lids. The
drinks could otherwise spill.
! Do not expose drinks bottles in the cup
holder in the centre console to continuous, strong and direct sunlight. The passenger
compartment in the area of the centre con-
sole can otherwise be damaged by the con- centrated and reflected sunlight.
Cup holders in the front centre console X
To open: open stowage compartment
(Y page 317).
X Open the protective flap if necessary.
X To remove: slide catch:forwards and
pull the cup holder upwards.
X To insert: make sure that the protective
flap is closed.
X Insert the cup holder and slide catch :
back. 322
FeaturesStowing and features
Page 331 of 417

Breakdown assistance call button
X
To call breakdown assistance: press but-
ton :for breakdown assistance.
The breakdown assistance call is initiated.
The Connecting Connecting call
callmessage appears in
the multifunction display. The audio system is muted.
Only in certain countries: a voice message
prompts you to confirm the data transmis-
sion. After confirmation, the required vehi-
cle data is transmitted. During data trans-
mission, you will see a corresponding sym-
bol in the display. This may take a moment. You are then connected to an employee.
X To end a call: press the~button on the
multifunction steering wheel.
or
X Press the corresponding COMAND Online
button for ending a phone call.
Info call button This function is not available in all countries. X
To call: press info call button :.
The breakdown assistance call is initiated.
The Connecting Connecting call
callmessage appears in
the multifunction display. The audio system is muted.
Only in certain countries: a voice message
prompts you to confirm the data transmis-
sion. After confirmation, the required vehi- cle data is transmitted. During data trans-
mission, you will see a corresponding sym-
bol in the display. This may take a moment.
You are then connected to an employee.
X To end a call: press the~button on the
multifunction steering wheel.
or
X Press the corresponding COMAND Online
button for ending a phone call. Mobile phone
Important safety notes G
WARNING
Operating mobile communications equip-
ment while driving distracts you from paying
attention to traffic conditions. This could also cause you to lose control of the vehicle. There
is a risk of an accident.
Use this device only when the vehicle is sta-
tionary.
You must observe the legal requirements for
the country in which you are currently driving when operating mobile communications
equipment in the vehicle.
If it is permitted by law to operate communi-
cations equipment while the vehicle is in
motion, you may only do so if the traffic sit-
uation permits. You may otherwise be dis-
tracted from the traffic conditions, cause an
accident and injure yourself and others.
Excessive levels of electromagnetic radiation
may cause damage to your health and to the
health of others. The use of an exterior aerial
takes into consideration the scientific discus- 328
FeaturesSto
wing an d features
Page 334 of 417
X
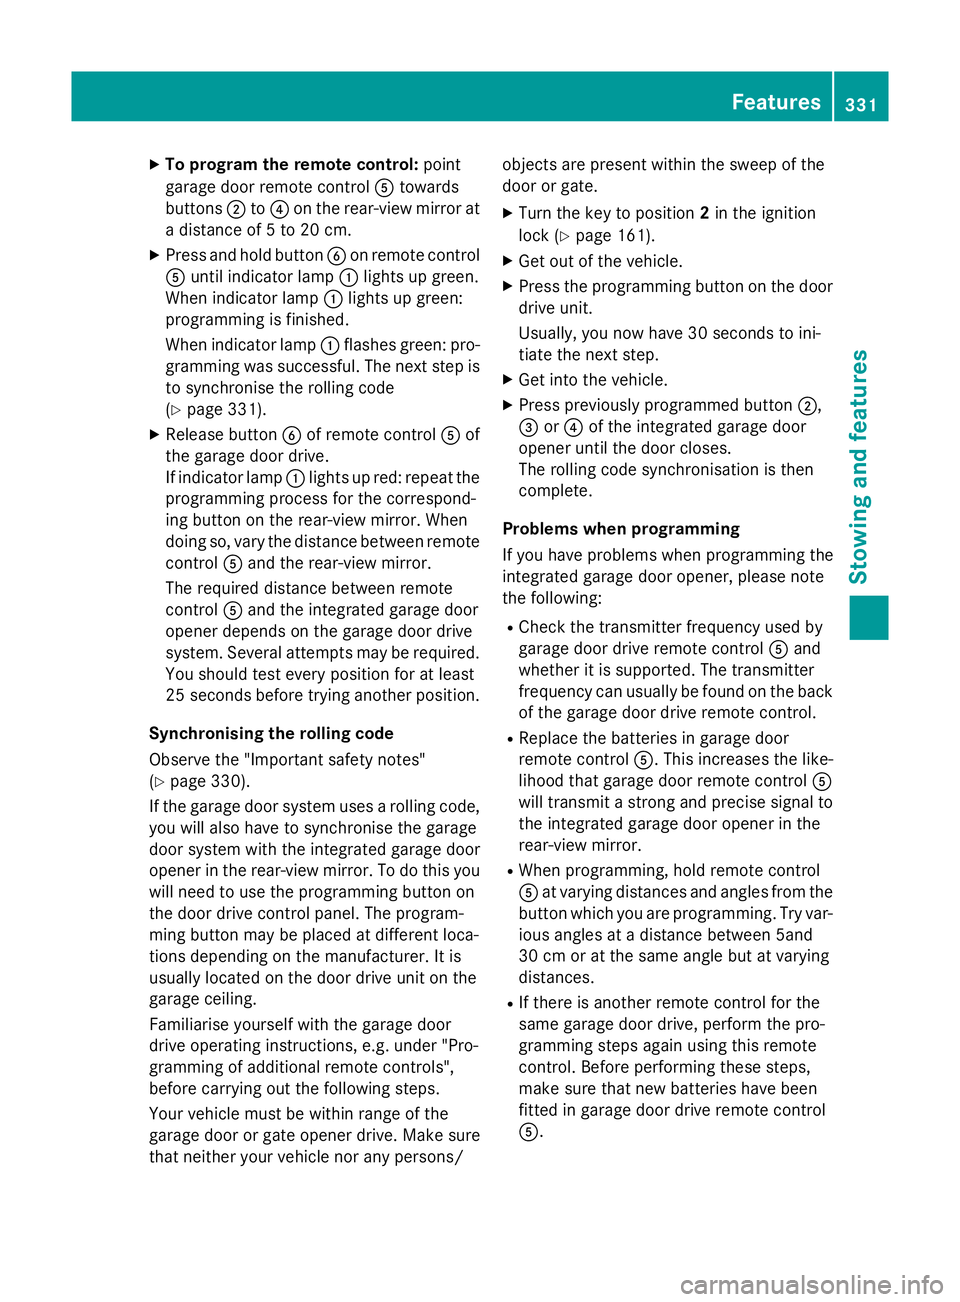
To program the remote control: point
garage door remote control Atowards
buttons ;to? on the rear-view mirror at
a distance of 5 to 20 cm.
X Press and hold button Bon remote control
A until indicator lamp :lights up green.
When indicator lamp :lights up green:
programming is finished.
When indicator lamp :flashes green: pro-
gramming was successful. The next step is
to synchronise the rolling code
(Y page 331).
X Release button Bof remote control Aof
the garage door drive.
If indicator lamp :lights up red: repeat the
programming process for the correspond-
ing button on the rear-view mirror. When
doing so, vary the distance between remote control Aand the rear-view mirror.
The required distance between remote
control Aand the integrated garage door
opener depends on the garage door drive
system. Several attempts may be required.
You should test every position for at least
25 second sbefore trying another position.
Synchronising the rolling code
Observe the "Important safety notes"
(Y page 330).
If the garage door system uses a rolling code,
you will also have to synchronise the garage
door system with the integrated garage door
opener in the rear-view mirror. To do this you
will need to use the programming button on
the door drive control panel. The program-
ming button may be placed at different loca-
tions depending on the manufacturer. It is
usually located on the door drive unit on the
garage ceiling.
Familiarise yourself with the garage door
drive operating instructions, e.g. under "Pro-
gramming of additional remote controls",
before carrying out the following steps.
Your vehicle must be within range of the
garage door or gate opener drive. Make sure
that neither your vehicle nor any persons/ objects are present within the sweep of the
door or gate.
X Turn the key to position 2in the ignition
lock (Y page 161).
X Get out of the vehicle.
X Press the programming button on the door
drive unit.
Usually, you now have 30 seconds to ini-
tiate the next step.
X Get into the vehicle.
X Press previously programmed button ;,
= or? of the integrated garage door
opener until the door closes.
The rolling code synchronisation is then
complete.
Problems when programming
If you have problems when programming the
integrated garage door opener, please note
the following: R Check the transmitter frequency used by
garage door drive remote control Aand
whether it is supported. The transmitter
frequency can usually be found on the back
of the garage door drive remote control.
R Replace the batteries in garage door
remote control A. This increases the like-
lihood that garage door remote control A
will transmit a strong and precise signal to
the integrated garage door opener in the
rear-view mirror.
R When programming, hold remote control
A at varying distances and angles from the
button which you are programming. Try var- ious angles at a distance between 5and
30 cm or at the same angle but at varying
distances.
R If there is another remote control for the
same garage door drive, perform the pro-
gramming steps again using this remote
control. Before performing these steps,
make sure that new batteries have been
fitted in garage door drive remote control
A. Features
331Stowing and features Z
Page 339 of 417
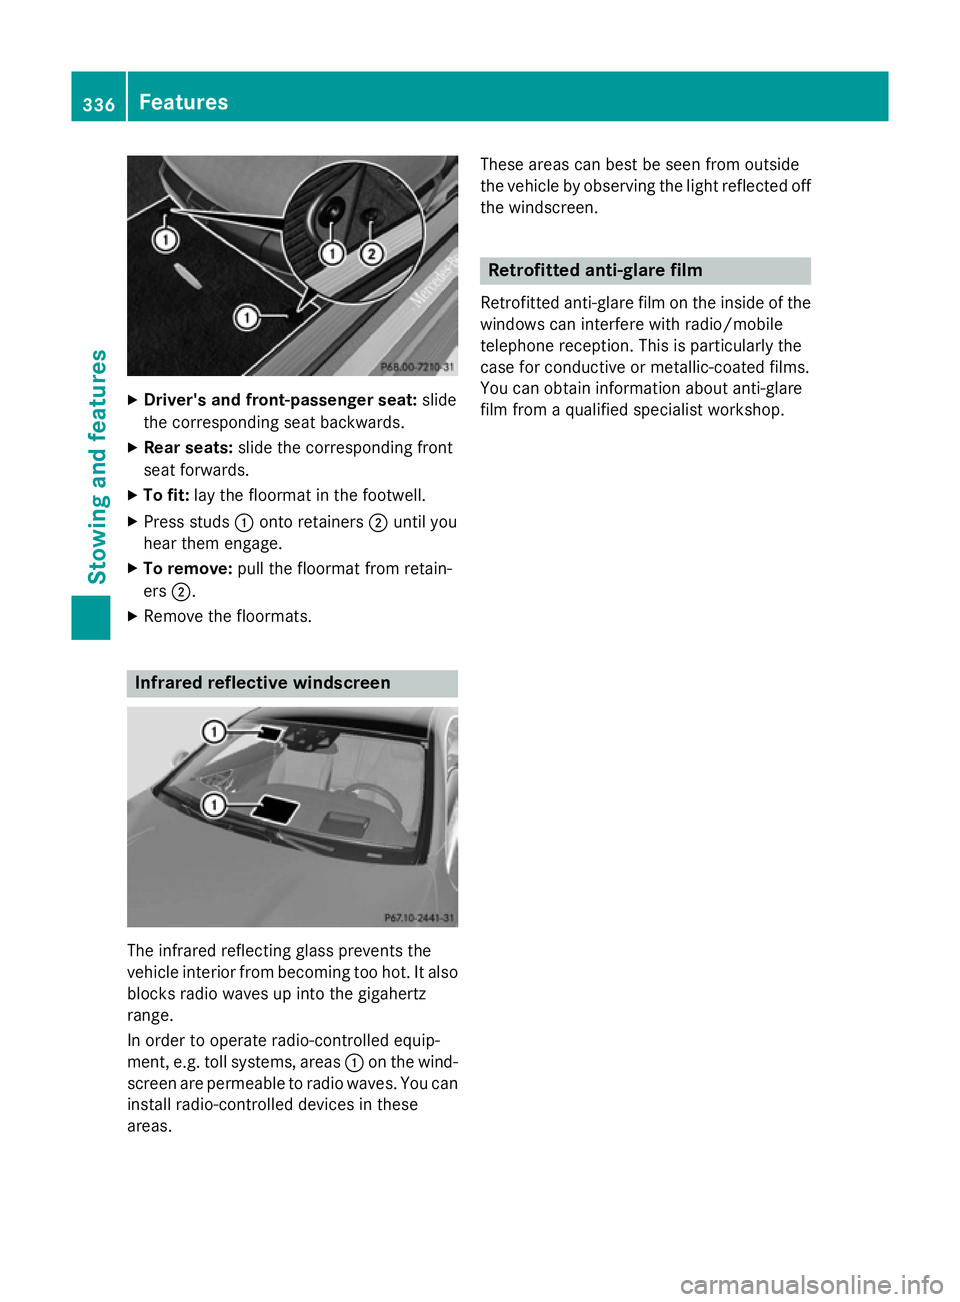
X
Driver's and front-passenger seat: slide
the corresponding seat backwards.
X Rear seats: slide the corresponding front
seat forwards.
X To fit: lay the floormat in the footwell.
X Press studs :onto retainers ;until you
hear them engage.
X To remove: pull the floormat from retain-
ers ;.
X Remove the floormats. Infrared reflective windscreen
The infrared reflecting glass prevents the
vehicle interior from becoming too hot. It also
blocks radio waves up into the gigahertz
range.
In order to operate radio-controlled equip-
ment, e.g. toll systems, areas :on the wind-
screen are permeable to radio waves. You can install radio-controlled devices in these
areas. These areas can best be seen from outside
the vehicle by observing the light reflected off
the windscreen. Retrofitted anti-glare film
Retrofitted anti-glare film on the inside of the windows can interfere with radio/mobile
telephone reception. This is particularly the
case for conductive or metallic-coated films.
You can obtain information about anti-glare
film from a qualified specialist workshop. 336
FeaturesStowing and fea
tures
Page 348 of 417

lead to increased wear and damage to the
major assemblies or the vehicle.
A qualified specialist workshop, e.g. a
Mercedes-Benz Service Centre, will reset the ASSYST PLUS service interval display after
the service work has been carried out. You
can also obtain further information on main-
tenance work, for example.
Special service requirements The prescribed service interval is based on
normal operation of the vehicle. Service work
will need to be performed more often if the
vehicle is operated under arduous conditions
or increased loads, for example:
R regular city driving with frequent intermedi-
ate stops
R if the vehicle is primarily used to travel
short distances
R for frequent operation in mountainous ter-
rain or on poor road surfaces
R if the engine is often left idling for long peri-
ods
In these or similar operating conditions, have,
for example, the air filter, engine oil and oil
filter changed more frequently. The tyres
must be checked more frequently if the vehi-
cle is operated under increased loads. Fur-
ther information can be obtained at a quali-
fied specialist workshop, e.g. a Mercedes-
Benz Service Centre.
Driving abroad An extensive Mercedes-Benz Service network
is also available in other countries. You can
obtain further information from any
Mercedes-Benz Service Centre. Care
General notes
H
Environmental note
Dispose of empty packaging and cleaning
cloths in an environmentally responsible man- ner.
! For cleaning your vehicle, do not use any
of the following:
R dry, rough or hard cloths
R abrasive cleaning agents
R solvents
R cleaning agents containing solvents
Do not scrub.
Do not touch the surfaces or protective
films with hard objects, e.g. a ring or ice
scraper. You could otherwise scratch or
damage the surfaces and protective film.
! Do not park up the vehicle for an extended
period straight after cleaning it, particularly after having cleaned the wheels with wheel cleaner. Wheel cleaners could cause
increased corrosion of the brake discs and
brake pads/linings. For this reason, you
should drive for a few minutes after clean-
ing. Braking heats the brake discs and the
brake pads/linings, thus drying them. The
vehicle can then be parked up.
Regular care of your vehicle is a condition for
retaining the quality in the long term.
Use care products and cleaning agents rec-
ommended and approved by Mercedes-Benz. Washing the vehicle and cleaning the
paintwork
Automatic car wash G
WARNING
Braking efficiency is reduced after the vehicle has been washed. There is a risk of an acci-
dent. Care
345Maintenance and care
Z