2015 MERCEDES-BENZ GLE SUV lock
[x] Cancel search: lockPage 433 of 453

Stowing the emergency spare wheel
X Place the "Minispare" emergency spare wheel
into the emergency spare wheel bag and
close the emergency spare wheel bag.
X Place the emergency spare wheel bag with
the "Minispare" emergency spare wheel into
the luggage compartment with the carrying
strap at the back.
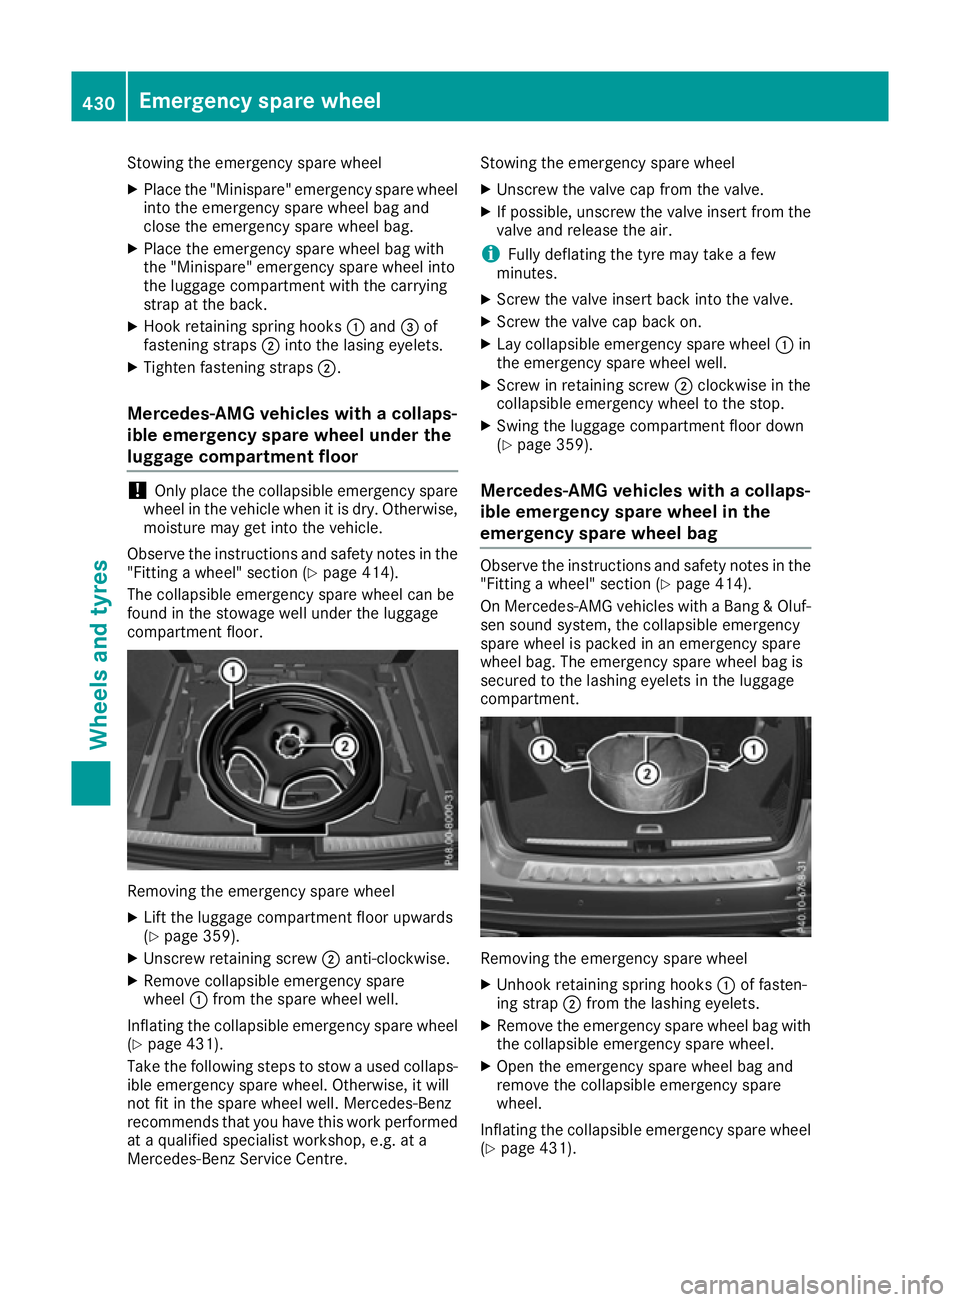
X Hook retaining spring hooks :and =of
fastening straps ;into the lasing eyelets.
X Tighten fastening straps ;.
Mercedes-AMG vehicles with a collaps-
ible emergency spare wheel under the
luggage compartment floor !
Only place the collapsible emergency spare
wheel in the vehicle when it is dry. Otherwise,
moisture may get into the vehicle.
Observe the instructions and safety notes in the "Fitting a wheel" section (Y page 414).
The collapsible emergency spare wheel can be
found in the stowage well under the luggage
compartment floor. Removing the emergency spare wheel
X Lift the luggage compartment floor upwards
(Y page 359).
X Unscrew retaining screw ;anti-clockwise.
X Remove collapsible emergency spare
wheel :from the spare wheel well.
Inflating the collapsible emergency spare wheel (Y page 431).
Take the following steps to stow a used collaps-
ible emergency spare wheel. Otherwise, it will
not fit in the spare wheel well. Mercedes-Benz
recommends that you have this work performed
at a qualified specialist workshop, e.g. at a
Mercedes-Benz Service Centre. Stowing the emergency spare wheel
X Unscrew the valve cap from the valve.
X If possible, unscrew the valve insert from the
valve and release the air.
i Fully deflating the tyre may take a few
minutes.
X Screw the valve insert back into the valve.
X Screw the valve cap back on.
X Lay collapsible emergency spare wheel :in
the emergency spare wheel well.
X Screw in retaining screw ;clockwise in the
collapsible emergency wheel to the stop.
X Swing the luggage compartment floor down
(Y page 359).
Mercedes-AMG vehicles with a collaps-
ible emergency spare wheel in the
emergency spare wheel bag Observe the instructions and safety notes in the
"Fitting a wheel" section (Y page 414).
On Mercedes-AMG vehicles with a Bang & Oluf-
sen sound system, the collapsible emergency
spare wheel is packed in an emergency spare
wheel bag. The emergency spare wheel bag is
secured to the lashing eyelets in the luggage
compartment. Removing the emergency spare wheel
X Unhook retaining spring hooks :of fasten-
ing strap ;from the lashing eyelets.
X Remove the emergency spare wheel bag with
the collapsible emergency spare wheel.
X Open the emergency spare wheel bag and
remove the collapsible emergency spare
wheel.
Inflating the collapsible emergency spare wheel (Y page 431). 430
Emergency spare wheelWheels and tyres
Page 434 of 453

Stowing the emergency spare wheel
X Place the collapsible emergency spare wheel
into the emergency spare wheel bag and
close the emergency spare wheel bag.
X Place the emergency spare wheel bag with
the collapsible emergency spare wheel into
the luggage compartment with the carrying
strap at the back.
X Hook retaining spring hooks :of fastening
strap ;into the lashing eyelets.
X Tighten fastening strap ;.Inflating the collapsible emergency
spare wheel (Mercedes-AMG GLE 63)
! Inflate the collapsible emergency spare
wheel using the tyre inflation compressor
before lowering the vehicle. The wheel rim
could otherwise be damaged.
! Do not operate the tyre inflation compres-
sor for longer than eight minutes at a time
without a break. It may otherwise overheat.
The tyre inflation compressor can be oper-
ated again once it has cooled down.
Comply with the manufacturer's safety instruc-
tions on the tyre inflation compressor label and
on the tyre sealant bottle.
X Mount the collapsible emergency spare wheel
as described (Y page 414).
The collapsible emergency spare wheel must
be mounted before it is inflated.
X Remove the tyre inflation compressor from
the stowage space under the luggage com-
partment floor (Y page 387). X
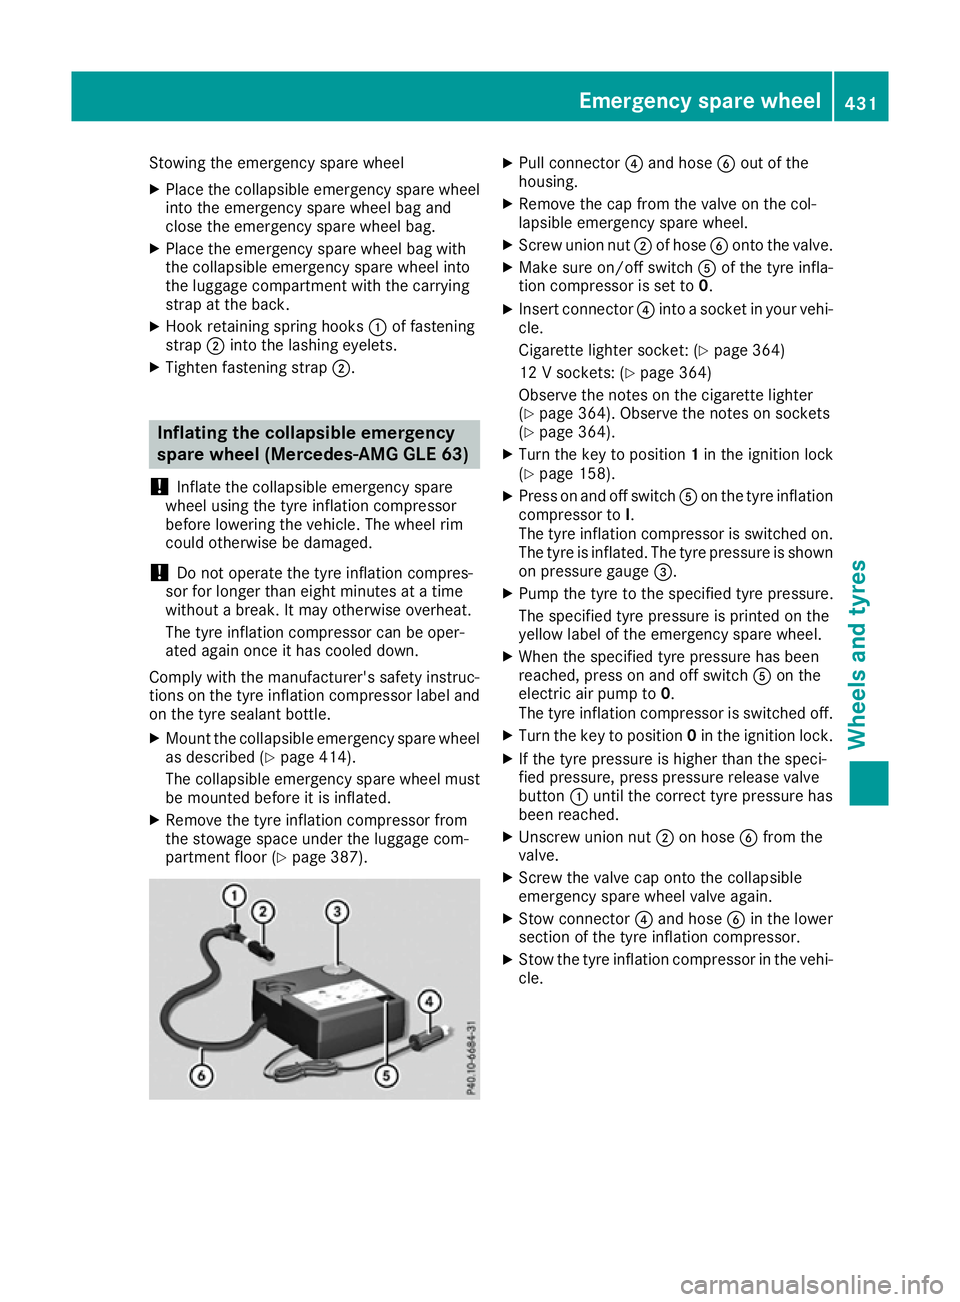
Pull connector ?and hose Bout of the
housing.
X Remove the cap from the valve on the col-
lapsible emergency spare wheel.
X Screw union nut ;of hose Bonto the valve.
X Make sure on/off switch Aof the tyre infla-
tion compressor is set to 0.
X Insert connector ?into a socket in your vehi-
cle.
Cigarette lighter socket: (Y page 364)
12 V sockets: (Y page 364)
Observe the notes on the cigarette lighter
(Y page 364). Observe the notes on sockets
(Y page 364).
X Turn the key to position 1in the ignition lock
(Y page 158).
X Press on and off switch Aon the tyre inflation
compressor to I.
The tyre inflation compressor is switched on.
The tyre is inflated. The tyre pressure is shown
on pressure gauge =.
X Pump the tyre to the specified tyre pressure.
The specified tyre pressure is printed on the
yellow label of the emergency spare wheel.
X When the specified tyre pressure has been
reached, press on and off switch Aon the
electric air pump to 0.
The tyre inflation compressor is switched off.
X Turn the key to position 0in the ignition lock.
X If the tyre pressure is higher than the speci-
fied pressure, press pressure release valve
button :until the correct tyre pressure has
been reached.
X Unscrew union nut ;on hose Bfrom the
valve.
X Screw the valve cap onto the collapsible
emergency spare wheel valve again.
X Stow connector ?and hose Bin the lower
section of the tyre inflation compressor.
X Stow the tyre inflation compressor in the vehi-
cle. Emergency spare wheel
431Wheels and tyres Z
Page 445 of 453

The antifreeze concentrate/corrosion inhibitor
concentration in the engine cooling system
should:
R be at least 50%. This will protect the engine
cooling system against freezing down to
approximately -37 †.
R not exceed 55% (antifreeze protection down
to -45 †). Heat will otherwise not be dissipa-
ted as effectively.
Mercedes-Benz recommends an antifreeze/
corrosion inhibitor concentrate in accordance
with MB Specifications for Service Products
310.1.
i When the vehicle is first delivered, it is filled
with a coolant mixture that ensures adequate
antifreeze and corrosion protection.
i The coolant is checked at every mainte-
nance interval at a qualified specialist work-
shop. Windscreen washer system
Important safety notes G
WARNING
If windscreen washer concentrate comes into contact with hot components of the engine or
the exhaust system, it can ignite. There is a
risk of fire and injury.
Make sure the windscreen washer concen-
trate does not come into contact with the filler neck.
! Only use washer fluid that is suitable for
plastic lamp lenses, e.g. MB SummerFit or MB
WinterFit. Unsuitable washer fluid could dam-
age the plastic lenses of the headlamps.
! Only the washer fluids SummerFit and Win-
terFit can be mixed. Otherwise, the spraying
nozzles could become blocked.
Do not use distilled or de-ionised water as the
level sensor may be triggered erroneously.
When handling washer fluid, observe the impor- tant safety notes on service products
(Y page 435).
At temperatures above freezing:
X Fill the washer fluid reservoir with a mixture of
water and washer fluid, e.g. MB SummerFit. Mix 1 part MB SummerFit to 100 parts water.
At temperatures below freezing:
X Fill the washer fluid reservoir with a mixture of
water and washer fluid, e.g. MB WinterFit.
For the correct mixing ratio refer to the infor- mation on the antifreeze reservoir.
i Add washer fluid concentrate, e.g. MB Sum-
merFit or MB WinterFit, to the washer fluid all
year round. Vehicle data
General notes
Please note that for the specified vehicle data:
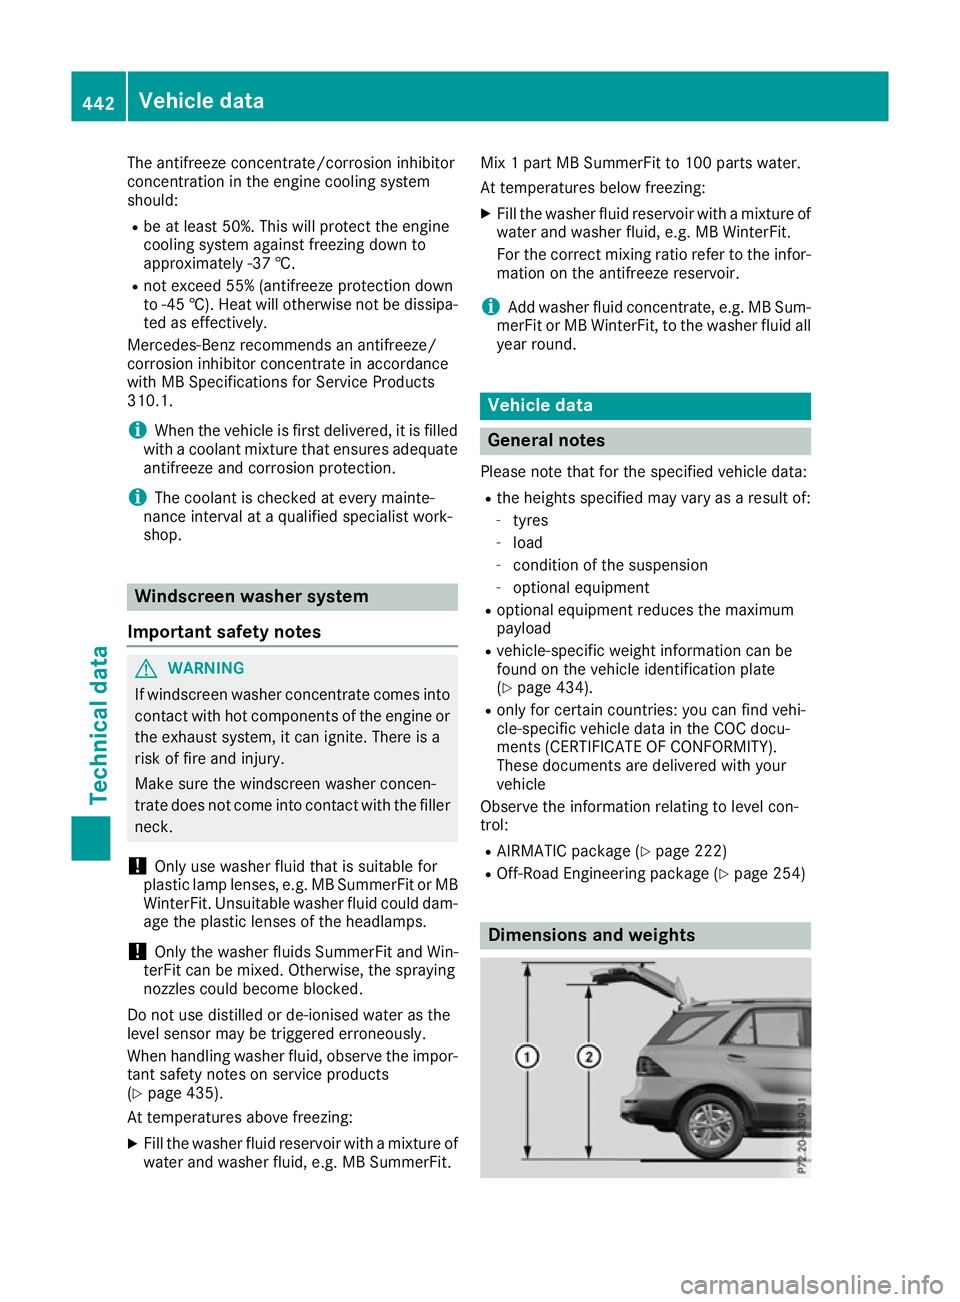
R the heights specified may vary as a result of:
- tyres
- load
- condition of the suspension
- optional equipment
R optional equipment reduces the maximum
payload
R vehicle-specific weight information can be
found on the vehicle identification plate
(Y page 434).
R only for certain countries: you can find vehi-
cle-specific vehicle data in the COC docu-
ments (CERTIFICATE OF CONFORMITY).
These documents are delivered with your
vehicle
Observe the information relating to level con-
trol:
R AIRMATIC package (Y page 222)
R Off-Road Engineering package (Y page 254) Dimensions and weights442
Vehicle dataTechnical data