2015 MERCEDES-BENZ GLC SUV ad blue
[x] Cancel search: ad bluePage 210 of 497
AdBlue
®
(BlueTEC vehicles only)
General notes To function properly, BlueTEC exhaust gas
aftertreatment must be operated with the
reducing agent AdBlue ®
.
When the supply of AdBlue ®
is down to
approximately 3.0 litres, the Refill
Refill
AdBlue See Owner’s Manual
AdBlue See Owner’s Manual message is
shown in the multifunction display.
If you drive the vehicle faster than 15 km/h
after topping up, the Refill AdBlue See Refill AdBlue See
Owner’s Manual
Owner’s Manual message goes out after
approximately one minute.
When the AdBlue ®
supply drops to a mini-
mum, the Refill AdBlue No start
Refill AdBlue No start
in ... mi in ... mi message is shown in the multi-
function display.
When the Refill AdBlue No start
Refill AdBlue No start
in ... mi
in ... mi message is shown in the multi-
function display, you can still drive the vehicle
over the distance shown. If the AdBlue ®
is not
topped up, you will subsequently be unable
to start the engine . If theRefill AdBlue Refill AdBlue
Start not possible
Start not possible message appears in
the multifunction display and the engine does
not start, you must top up AdBlue ®
.
X Add at least 3.5 l of AdBlue ®
.
X Switch on the ignition for at least 60 sec-
onds.
X Start the engine.
i You can also have the AdBlue ®
tank refil-
led at a qualified specialist workshop.
Before driving your vehicle outside Europe,
have the AdBlue ®
supply checked at a quali-
fied specialist workshop.
Further information about BlueTEC exhaust
gas aftertreatment and about AdBlue ®
can
be obtained from any Mercedes-Benz Service Centre. Important safety notes AdBlue
®
is a water-soluble fluid for the
exhaust gas aftertreatment of diesel engines.
It is:
R non-toxic
R colourless and odourless
R non-flammable
If you open the AdBlue ®
tank, small amounts
of ammonia vapour may be released.
Ammonia vapours have a pungent odour and
are particularly irritating to the skin, to
mucous membranes and to the eyes. You may experience a burning sensation in your eyes,
nose and throat. You may also experience
coughing and watery eyes.
Do not inhale any ammonia vapours that may
be released. Only fill the AdBlue ®
tank in well-
ventilated areas.
Do not swallow AdBlue ®
or let it come into
contact with skin, eyes or clothing. Keep
AdBlue ®
away from children.
If you or others come into contact with
AdBlue ®
, observe the following:
R immediately rinse AdBlue ®
off your skin
with soap and water.
R if AdBlue ®
comes into contact with your
eyes, immediately rinse them thoroughly
with clean water. Seek medical attention
immediately.
R if AdBlue ®
is swallowed, immediately rinse
your mouth out thoroughly. Drink plenty of water. Seek medical attention immedi-
ately.
R change immediately out of clothing that
has come into contact with AdBlue ®
.
! Only use AdBlue ®
in accordance with
ISO 22241. Do not mix any additives with
AdBlue ®
, and do not dilute AdBlue ®
with
water. This may destroy the BlueTEC
exhaust gas aftertreatment system.
! In order to fill the AdBlue ®
tank, the vehi-
cle must be parked on a level surface. The
AdBlue ®
tank can only be filled as intended Refuelling
207Driving and pa rking Z
Page 211 of 497
with the vehicle parked on a level surface.
Fluctuations in capacity will thus be avoi-
ded. Filling a vehicle standing on an uneven surface is not permitted. There is a danger
of overfilling, which can cause damage to
BlueTEC exhaust gas aftertreatment com-
ponents.
! Surfaces which have come into contact
with AdBlue ®
while refilling should be
rinsed immediately with water, or remove
AdBlue ®
with a moist cloth and cold water.
If AdBlue ®
has already crystallised, use a
sponge and cold water to clean the area.
AdBlue ®
residue crystallises after a certain
amount of time and soils the affected sur-
faces.
! AdBlue ®
is not a fuel additive and must
not be added to the fuel tank. If AdBlue ®
is
added to the fuel tank, this can lead to
engine damage.
Have the AdBlue ®
tank refilled at a qualified
specialist workshop. However, you can also
top up the AdBlue ®
tank:
R at a filling station with an AdBlue ®
filling
pump
R with AdBlue ®
refill bottles
R with an AdBlue ®
refill canister
When the pump nozzle switches off automat- ically during filling at a filling pump, the
AdBlue ®
tank has been completely filled. Do
not fill the AdBlue ®
tank any further. AdBlue ®
may leak out.
To avoid transporting already opened refill
containers in the vehicle, completely empty
refill bottles or canisters when filling the
AdBlue ®
tank, if possible.
Further information on AdBlue ®
(Y page 484). Opening the AdBlue
®
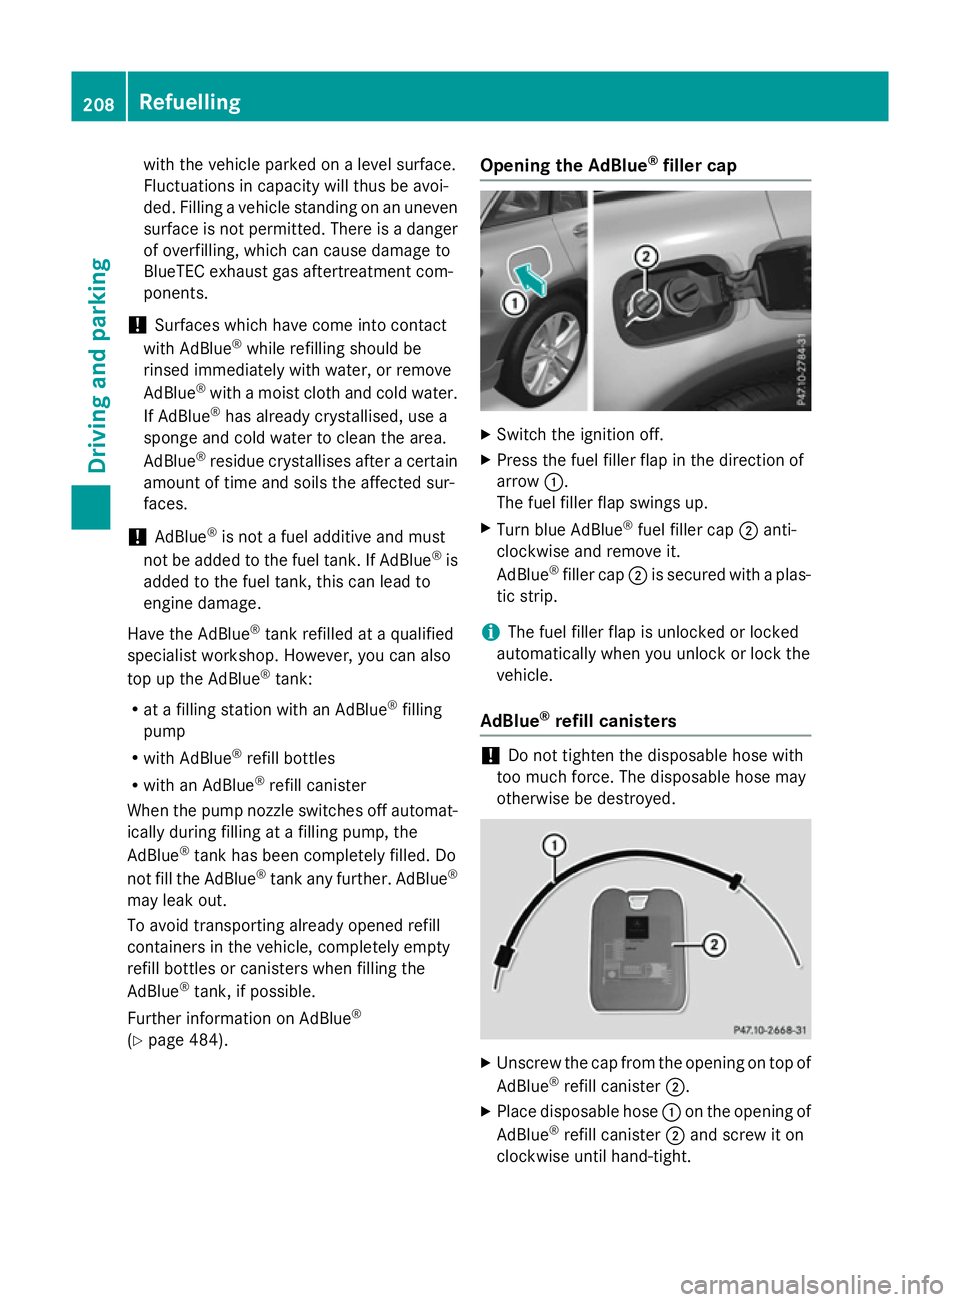
filler cap X
Switch the ignition off.
X Press the fuel filler flap in the direction of
arrow :.
The fuel filler flap swings up.
X Turn blue AdBlue ®
fuel filler cap ;anti-
clockwise and remove it.
AdBlue ®
filler cap ;is secured with a plas-
tic strip.
i The fuel filler flap is unlocked or locked
automatically when you unlock or lock the
vehicle.
AdBlue ®
refill canisters !
Do not tighten the disposable hose with
too much force. The disposable hose may
otherwise be destroyed. X
Unscrew the cap from the opening on top of
AdBlue ®
refill canister ;.
X Place disposable hose :on the opening of
AdBlue ®
refill canister ;and screw it on
clockwise until hand-tight. 208
RefuellingDriving and parking
Page 212 of 497
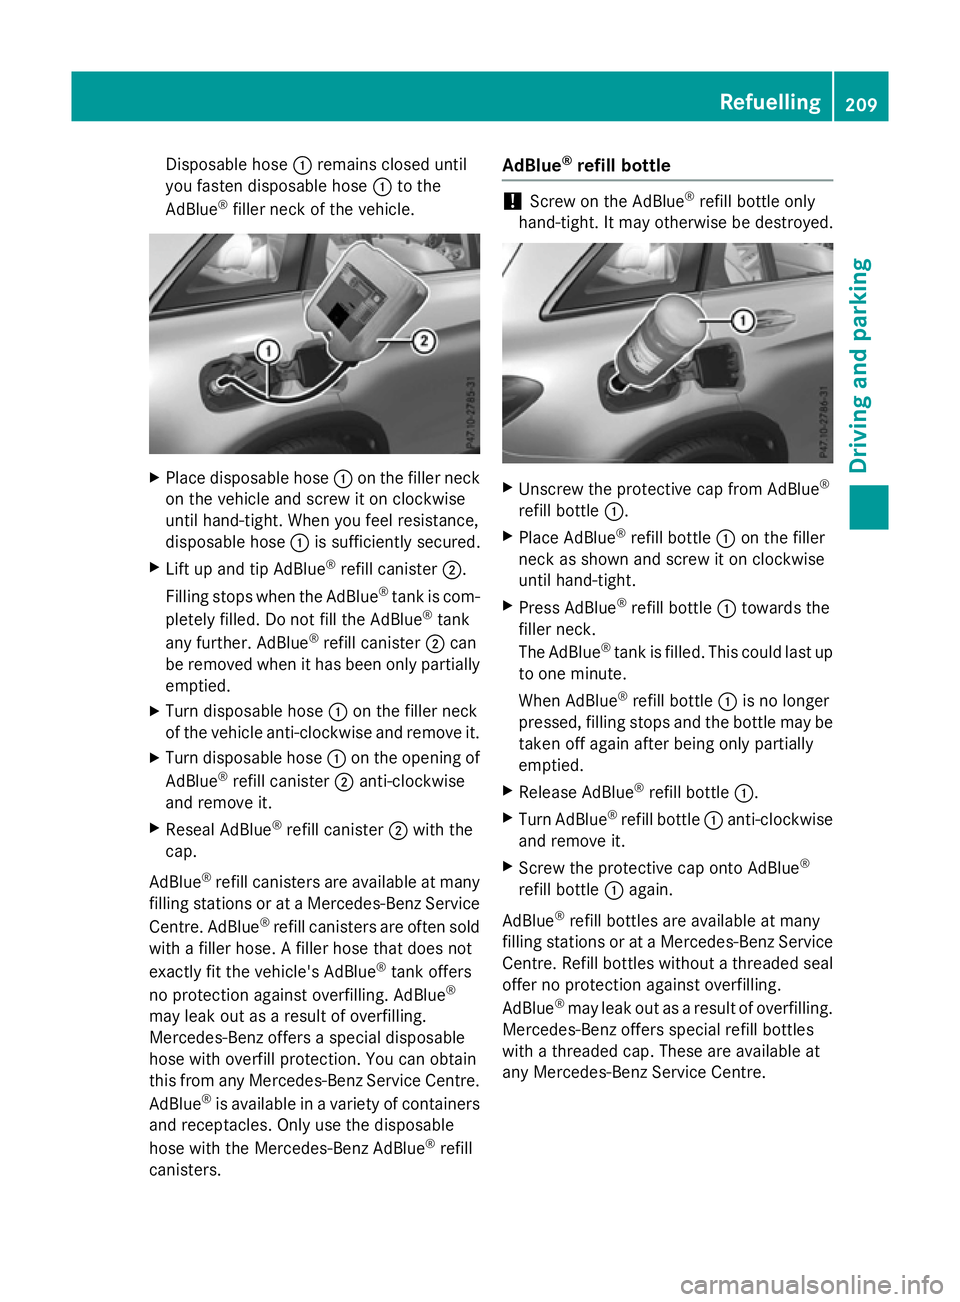
Disposable hose
:remains closed until
you fasten disposable hose :to the
AdBlue ®
filler neck of the vehicle. X
Place disposable hose :on the filler neck
on the vehicle and screw it on clockwise
until hand-tight. When you feel resistance,
disposable hose :is sufficiently secured.
X Lift up and tip AdBlue ®
refill canister ;.
Filling stops when the AdBlue ®
tank is com-
pletely filled. Do not fill the AdBlue ®
tank
any further. AdBlue ®
refill canister ;can
be removed when it has been only partially emptied.
X Turn disposable hose :on the filler neck
of the vehicle anti-clockwise and remove it.
X Turn disposable hose :on the opening of
AdBlue ®
refill canister ;anti-clockwise
and remove it.
X Reseal AdBlue ®
refill canister ;with the
cap.
AdBlue ®
refill canisters are available at many
filling stations or at a Mercedes-Benz Service
Centre. AdBlue ®
refill canisters are often sold
with a filler hose. A filler hose that does not
exactly fit the vehicle's AdBlue ®
tank offers
no protection against overfilling. AdBlue ®
may leak out as a result of overfilling.
Mercedes-Benz offers a special disposable
hose with overfill protection. You can obtain
this from any Mercedes-Benz Service Centre.
AdBlue ®
is available in a variety of containers
and receptacles. Only use the disposable
hose with the Mercedes-Benz AdBlue ®
refill
canisters. AdBlue
®
refill bottle !
Screw on the AdBlue ®
refill bottle only
hand-tight. It may otherwise be destroyed. X
Unscrew the protective cap from AdBlue ®
refill bottle :.
X Place AdBlue ®
refill bottle :on the filler
neck as shown and screw it on clockwise
until hand-tight.
X Press AdBlue ®
refill bottle :towards the
filler neck.
The AdBlue ®
tank is filled. This could last up
to one minute.
When AdBlue ®
refill bottle :is no longer
pressed, filling stops and the bottle may be
taken off again after being only partially
emptied.
X Release AdBlue ®
refill bottle :.
X Turn AdBlue ®
refill bottle :anti-clockwise
and remove it.
X Screw the protective cap onto AdBlue ®
refill bottle :again.
AdBlue ®
refill bottles are available at many
filling stations or at a Mercedes-Benz Service Centre. Refill bottles without a threaded seal
offer no protection against overfilling.
AdBlue ®
may leak out as a result of overfilling.
Mercedes-Benz offers special refill bottles
with a threaded cap. These are available at
any Mercedes-Benz Service Centre. Refuelling
209Driving and parking Z
Page 213 of 497
Closing the AdBlue
®
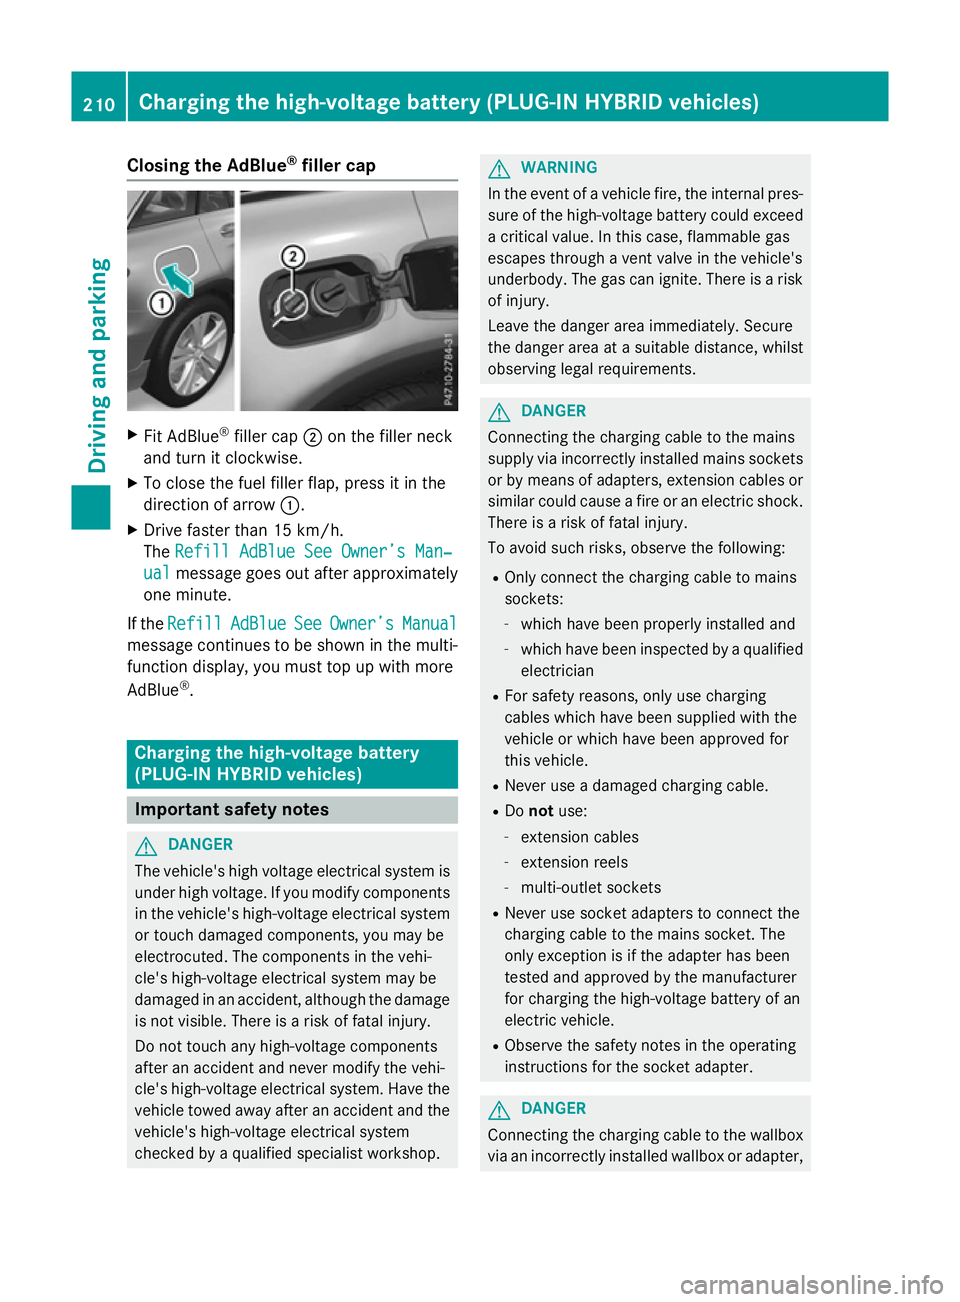
filler cap X
Fit AdBlue ®
filler cap ;on the filler neck
and turn it clockwise.
X To close the fuel filler flap, press it in the
direction of arrow :.
X Drive faster than 15 km/h.
The Refill AdBlue See Owner’s Man‐
Refill AdBlue See Owner’s Man‐
ual
ual message goes out after approximately
one minute.
If the Refill Refill AdBlue
AdBlueSee
SeeOwner’s
Owner’s Manual
Manual
message continues to be shown in the multi-
function display, you must top up with more
AdBlue ®
. Charging the high-voltage battery
(PLUG-IN HYBRID vehicles) Important safety notes
G
DANGER
The vehicle's high voltage electrical system is under high voltage. If you modify components
in the vehicle's high-voltage electrical system or touch damaged components, you may be
electrocuted. The components in the vehi-
cle's high-voltage electrical system may be
damaged in an accident, although the damage
is not visible. There is a risk of fatal injury.
Do not touch any high-voltage components
after an accident and never modify the vehi-
cle's high-voltage electrical system. Have the vehicle towed away after an accident and the vehicle's high-voltage electrical system
checked by a qualified specialist workshop. G
WARNING
In the event of a vehicle fire, the internal pres- sure of the high-voltage battery could exceeda critical value. In this case, flammable gas
escapes through a vent valve in the vehicle's
underbody. The gas can ignite. There is a risk
of injury.
Leave the danger area immediately. Secure
the danger area at a suitable distance, whilst
observing legal requirements. G
DANGER
Connecting the charging cable to the mains
supply via incorrectly installed mains sockets or by means of adapters, extension cables or
similar could cause a fire or an electric shock. There is a risk of fatal injury.
To avoid such risks, observe the following:
R Only connect the charging cable to mains
sockets:
- which have been properly installed and
- which have been inspected by a qualified
electrician
R For safety reasons, only use charging
cables which have been supplied with the
vehicle or which have been approved for
this vehicle.
R Never use a damaged charging cable.
R Do not use:
- extension cables
- extension reels
- multi-outlet sockets
R Never use socket adapters to connect the
charging cable to the mains socket. The
only exception is if the adapter has been
tested and approved by the manufacturer
for charging the high-voltage battery of an
electric vehicle.
R Observe the safety notes in the operating
instructions for the socket adapter. G
DANGER
Connecting the charging cable to the wallbox via an incorrectly installed wallbox or adapter, 210
Charging the high-voltage battery (PLUG-IN HYBRID vehicles)Driving and parking
Page 326 of 497
R
USB storage device
R Bluetooth ®
capable audio device
Please observe further information on media
support and media operation in the separate
Audio 20 or COMAND Online operating
instructions.
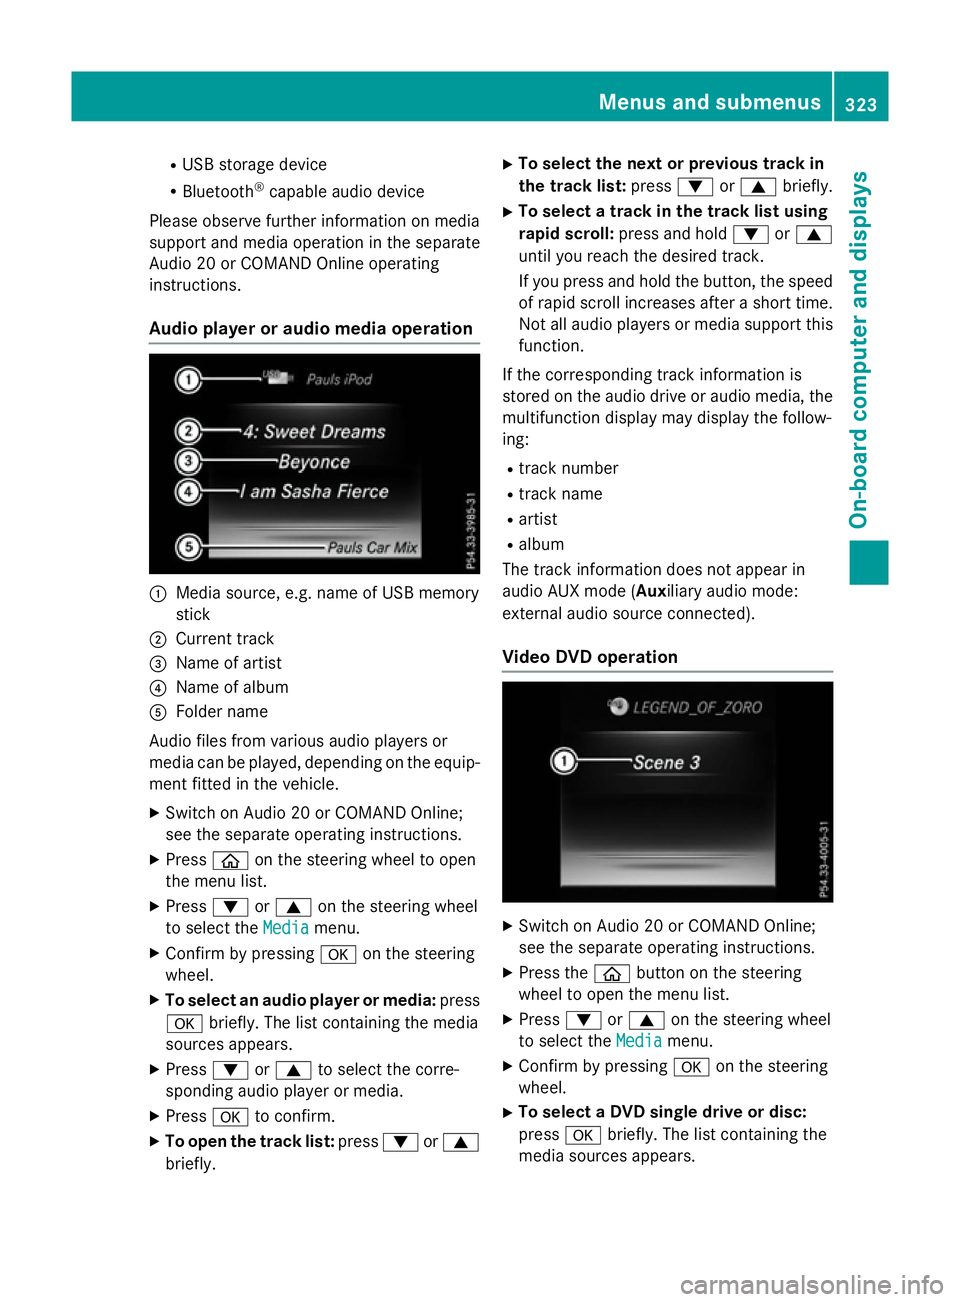
Audio player or audio media operation :
Media source, e.g. name of USB memory
stick
; Current track
= Name of artist
? Name of album
A Folder name
Audio files from various audio players or
media can be played, depending on the equip-
ment fitted in the vehicle.
X Switch on Audio 20 or COMAND Online;
see the separate operating instructions.
X Press òon the steering wheel to open
the menu list.
X Press :or9 on the steering wheel
to select the Media Mediamenu.
X Confirm by pressing aon the steering
wheel.
X To select an audio player or media: press
a briefly. The list containing the media
sources appears.
X Press :or9 to select the corre-
sponding audio player or media.
X Press ato confirm.
X To open the track list: press:or9
briefly. X
To select the next or previous track in
the track list: press:or9 briefly.
X To select a track in the track list using
rapid scroll: press and hold :or9
until you reach the desired track.
If you press and hold the button, the speed of rapid scroll increases after a short time.Not all audio players or media support this
function.
If the corresponding track information is
stored on the audio drive or audio media, the multifunction display may display the follow-
ing:
R track number
R track name
R artist
R album
The track information does not appear in
audio AUX mode (Aux iliary audio mode:
external audio source connected).
Video DVD operation X
Switch on Audio 20 or COMAND Online;
see the separate operating instructions.
X Press the òbutton on the steering
wheel to open the menu list.
X Press :or9 on the steering wheel
to select the Media
Media menu.
X Confirm by pressing aon the steering
wheel.
X To select a DVD single drive or disc:
press abriefly. The list containing the
media sources appears. Menus and submenus
323On-board computer and displays Z
Page 327 of 497
X
Press :or9 to select the corre-
sponding DVD single drive or disc.
X Press ato confirm.
X To open the scene list: press:or
9 briefly.
X To select the next or previous scene in
the scene list: press:or9 briefly.
X To select a scene in the scene list using
rapid scroll: press and hold :or9
until desired scene :has been reached.
X Press ato confirm your selection.
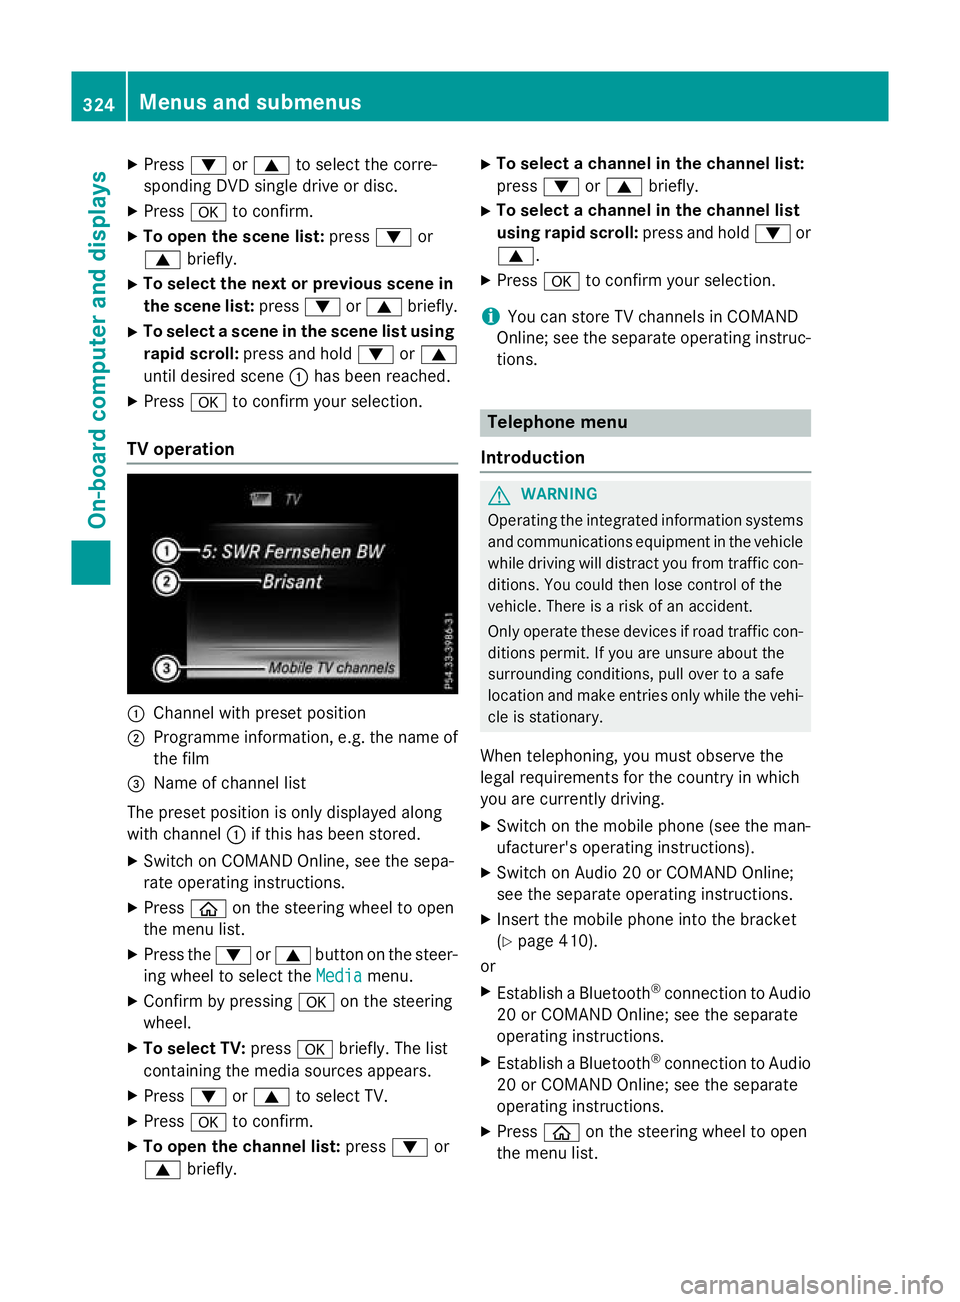
TV operation :
Channel with preset position
; Programme information, e.g. the name of
the film
= Name of channel list
The preset position is only displayed along
with channel :if this has been stored.
X Switch on COMAND Online, see the sepa-
rate operating instructions.
X Press òon the steering wheel to open
the menu list.
X Press the :or9 button on the steer-
ing wheel to select the Media
Media menu.
X Confirm by pressing aon the steering
wheel.
X To select TV: pressabriefly. The list
containing the media sources appears.
X Press :or9 to select TV.
X Press ato confirm.
X To open the channel list: press:or
9 briefly. X
To select a channel in the channel list:
press :or9 briefly.
X To select a channel in the channel list
using rapid scroll: press and hold:or
9.
X Press ato confirm your selection.
i You can store TV channels in COMAND
Online; see the separate operating instruc-
tions. Telephone menu
Introduction G
WARNING
Operating the integrated information systems and communications equipment in the vehicle
while driving will distract you from traffic con-
ditions. You could then lose control of the
vehicle. There is a risk of an accident.
Only operate these devices if road traffic con-
ditions permit. If you are unsure about the
surrounding conditions, pull over to a safe
location and make entries only while the vehi-
cle is stationary.
When telephoning, you must observe the
legal requirements for the country in which
you are currently driving.
X Switch on the mobile phone (see the man-
ufacturer's operating instructions).
X Switch on Audio 20 or COMAND Online;
see the separate operating instructions.
X Insert the mobile phone into the bracket
(Y page 410).
or
X Establish a Bluetooth ®
connection to Audio
20 or COMAND Online; see the separate
operating instructions.
X Establish a Bluetooth ®
connection to Audio
20 or COMAND Online; see the separate
operating instructions.
X Press òon the steering wheel to open
the menu list. 324
Menus and submenusOn-board computer and displays
Page 328 of 497
X
Press :or9 on the steering wheel
to select the Telephone Telephonemenu.
X Confirm by pressing aon the steering
wheel.
You will see one of the following display mes- sages in the multifunction display:
R Telephone ready Telephone ready or the name of the net-
work provider: the mobile phone has found a network and is ready to receive.
R Telephone No service
Telephone No service: there is no net-
work available or the mobile phone is
searching for a network.
i You can obtain further information about
suitable mobile phones and connecting
mobile phones via Bluetooth ®
:
R at any Mercedes-Benz Service Centre
R on the Internet at http://
www.mercedes-benz.com/connect
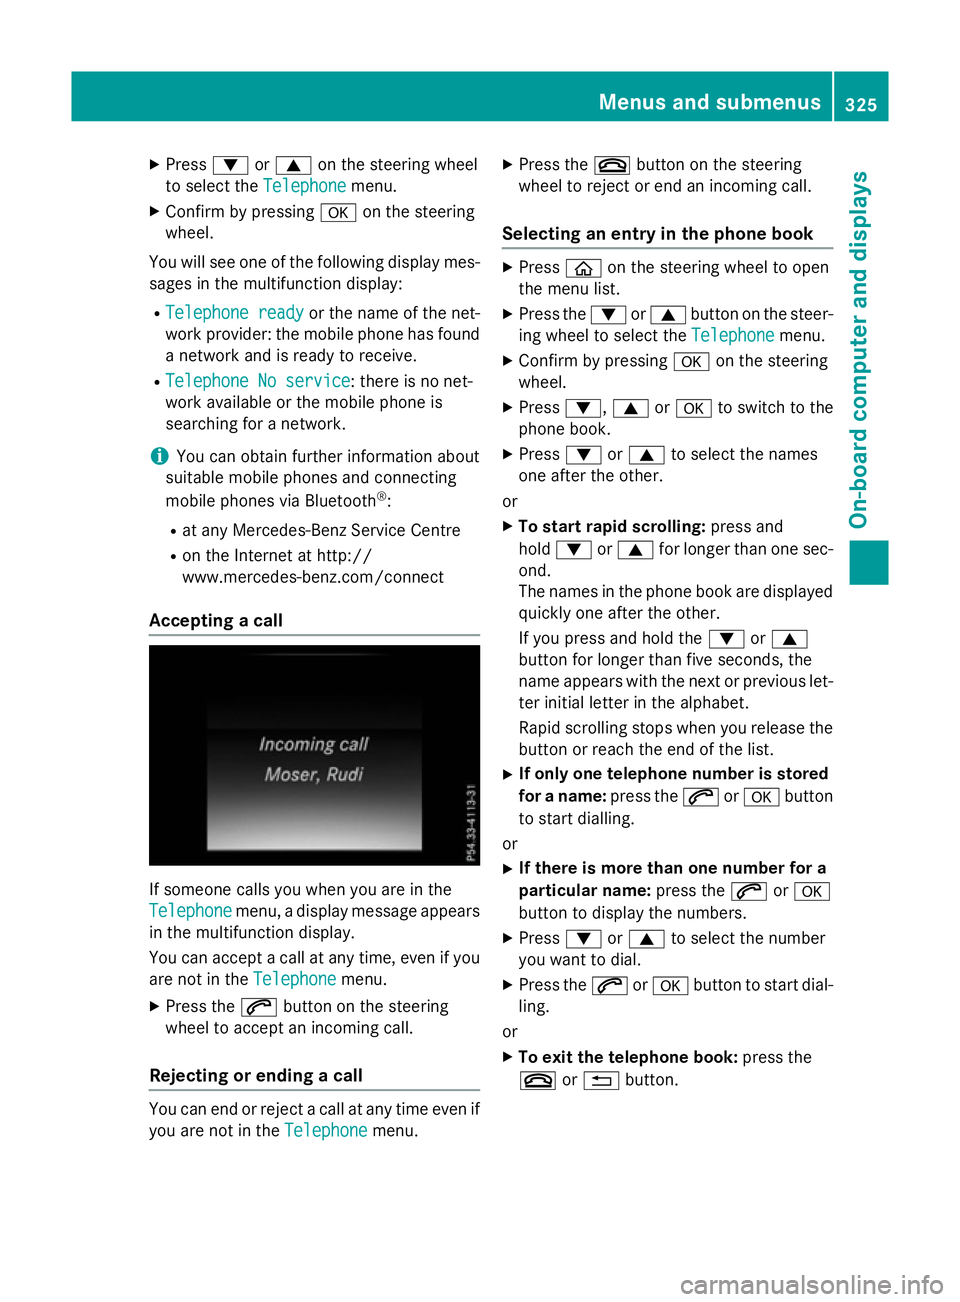
Accepting a call If someone calls you when you are in the
Telephone
Telephone menu, a display message appears
in the multifunction display.
You can accept a call at any time, even if you
are not in the Telephone
Telephone menu.
X Press the 6button on the steering
wheel to accept an incoming call.
Rejecting or ending a call You can end or reject a call at any time even if
you are not in the Telephone Telephonemenu. X
Press the ~button on the steering
wheel to reject or end an incoming call.
Selecting an entry in the phone book X
Press òon the steering wheel to open
the menu list.
X Press the :or9 button on the steer-
ing wheel to select the Telephone
Telephonemenu.
X Confirm by pressing aon the steering
wheel.
X Press :, 9ora to switch to the
phone book.
X Press :or9 to select the names
one after the other.
or
X To start rapid scrolling: press and
hold : or9 for longer than one sec-
ond.
The names in the phone book are displayed quickly one after the other.
If you press and hold the :or9
button for longer than five seconds, the
name appears with the next or previous let-
ter initial letter in the alphabet.
Rapid scrolling stops when you release the button or reach the end of the list.
X If only one telephone number is stored
for a name: press the6ora button
to start dialling.
or X If there is more than one number for a
particular name: press the6ora
button to display the numbers.
X Press :or9 to select the number
you want to dial.
X Press the 6ora button to start dial-
ling.
or X To exit the telephone book: press the
~ or% button. Menus and submenus
325On-board computer and displays Z
Page 330 of 497
R
Displaying the coolant temperature (PLUG-
IN HYBRID vehicles) (Y page 327)
R Displaying the AdBlue ®
level and range
(Y page 327) (BlueTEC vehicles only)
Displaying the AdBlue ®
level and range The
AdBlue
AdBlue menu is only available in BlueTEC
vehicles.
X Press òon the steering wheel to open
the menu list.
X Press :or9 on the steering wheel
to select the Service
Servicemenu.
X Confirm by pressing aon the steering
wheel.
X Press :or9 to select the AdBlue
AdBlue
submenu.
X Press ato confirm your selection.
The range and AdBlue ®
level appear in a bar
graph in the multifunction display.
Observe the information and notes on "Refu- elling" (Y page 207).
Displaying the coolant temperature The
Coolant
Coolant menu is only available in PLUG-
IN HYBRID vehicles.
Observe the notes on coolant temperature
(Y page 313).
X Press òon the steering wheel to open
the menu list.
X Press :or9 on the steering wheel
to select the Service
Service menu.
X Confirm by pressing aon the steering
wheel.
X Press :or9 to select the Coolant Coolant
submenu.
X Press ato confirm your selection.
The coolant temperature is shown in a bar
display. Settings menu
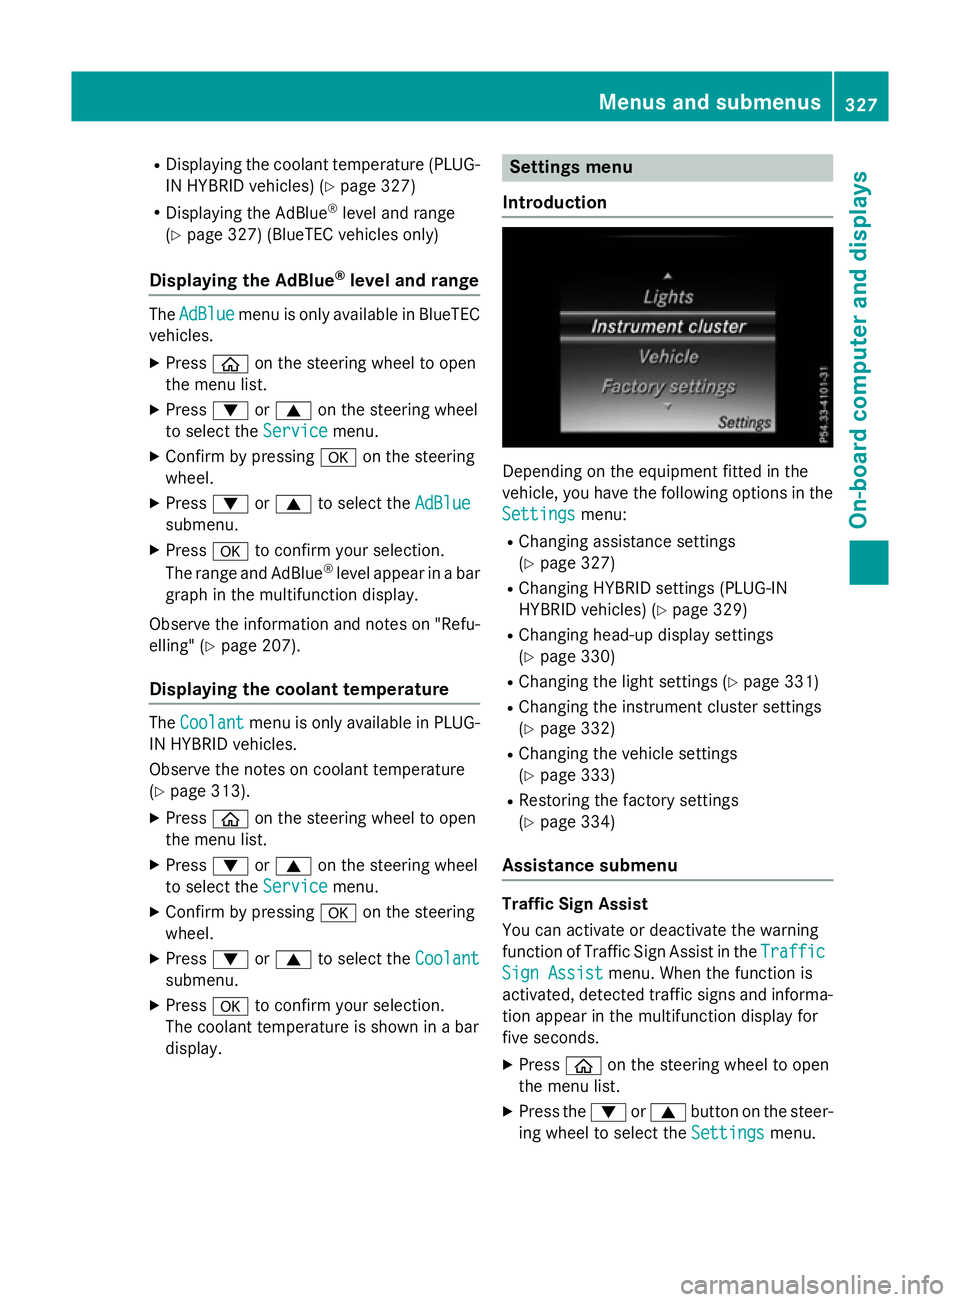
Introduction Depending on the equipment fitted in the
vehicle, you have the following options in the
Settings Settings menu:
R Changing assistance settings
(Y page 327)
R Changing HYBRID settings (PLUG-IN
HYBRID vehicles) (Y page 329)
R Changing head-up display settings
(Y page 330)
R Changing the light settings (Y page 331)
R Changing the instrument cluster settings
(Y page 332)
R Changing the vehicle settings
(Y page 333)
R Restoring the factory settings
(Y page 334)
Assistance submenu Traffic Sign Assist
You can activate or deactivate the warning
function of Traffic Sign Assist in the
Traffic Traffic
Sign Assist
Sign Assist menu. When the function is
activated, detected traffic signs and informa-
tion appear in the multifunction display for
five seconds.
X Press òon the steering wheel to open
the menu list.
X Press the :or9 button on the steer-
ing wheel to select the Settings Settingsmenu. Menus and submenus
327On-board computer and displays Z