2015 MERCEDES-BENZ G-CLASS SUV key
[x] Cancel search: keyPage 129 of 274

Deactivating the HOLD function
GWARNING
When leaving the vehicle, it can still roll awaydespite being braked by the HOLD function if:
R there is a malfunction in the system or in
the voltage supply.
R the HOLD function has been deactivated by
pressing the accelerator pedal or the brake
pedal, e.g. by a vehicle occupant.
R the electrical system in the engine com-
partment, the battery or the fuses have
been tampered with.
R the battery is disconnected
There is a risk of an accident.
If you wish to exit the vehicle, always turn off the HOLD function and secure the vehicle
against rolling away.
The HOLD function is deactivated automati-
cally if: R you accelerate and the transmission is in
position Dor R.
R you shift the transmission to position P.
R you depress the brake pedal again with a
certain amount of pressure until ëdis-
appears from the multifunction display.
R you activate DISTRONIC PLUS.
On steep uphill or downhill gradients or if
there is a malfunction, the transmission may
also be automatically shifted into position P.
Permanent all-wheel drive
!
Never tow the vehicle with one axle
raised. This may damage the transfer case. Damage of this sort is not covered by the
Mercedes-Benz Limited Warranty. All
wheels must remain either on the ground or
be fully raised. Observe the instructions for
towing the vehicle with all wheels in full
contact with the ground.
!When testing the parking brake, operate
the vehicle only briefly (for a maximum of ten seconds) on a brake test dynamometer.
When doing this, turn the SmartKey to posi-
tion 0or 1in the ignition. Failure to do this
can cause damage to the drive train or the brake system.
!A function or performance test should
only be carried out on a two-axle dyna-
mometer. Before you operate the vehicle
on such a dynamometer, please consult a
qualified workshop. You could otherwise
damage the drive train or the brake system.
The all-wheel drive system ensures that all
four wheels are permanently driven. The all-
wheel drive system improves vehicle traction together with ESP ®
and 4ETS if a drive wheel
spins due to insufficient grip.
If a drive wheel spins due to insufficient grip: R Only depress the accelerator pedal as far as
necessary when pulling away.
R Take your foot off the accelerator, slowly,
while the vehicle is in motion.
The permanent all-wheel drive system can
neither reduce the risk of accident nor over-
ride the laws of physics if you fail to adapt
your driving style or if you are inattentive. The
all-wheel drive system cannot take into
account road, weather or traffic conditions.
The all-wheel drive system is only an aid. You
are responsible for maintaining a safe dis-
tance to the vehicle in front, for vehicle speed, for braking in good time and for staying in
lane.
In wintry driving conditions, always use winter
tires (M+S tires) and if necessary, snow
chains ( Ypage 232). Only in this way can the
maximum effect of all-wheel drive be ach-
ieved.
For information on driving off-road, see the
Digital Operator's Manual.
Driving syste ms127
Driving and parking
Z
Page 132 of 274

Deactivating/activating PARKTRONIC
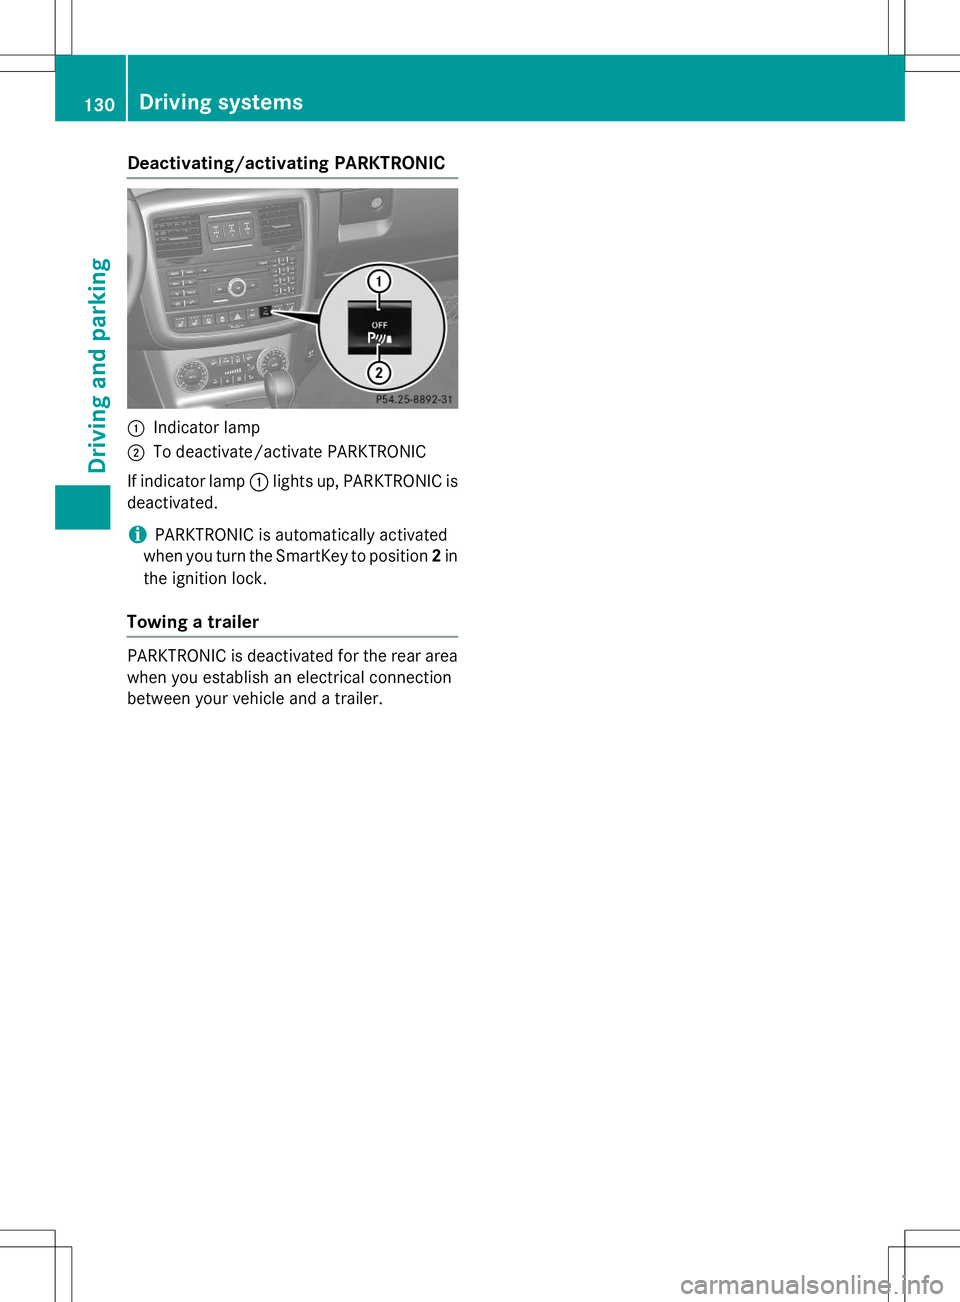
:Indicator lamp
;To deactivate/activate PARKTRONIC
If indicator lamp :lights up, PARKTRONIC is
deactivated.
iPARKTRONIC is automatically activated
when you turn the SmartKey to position 2in
the ignition lock.
Towing a trailer
PARKTRONIC is deactivated for the rear area
when you establish an electrical connection
between your vehicle and a trailer.
130Driving syste ms
Driving and parking
Page 134 of 274

Activating/deactivating the rear view
camera
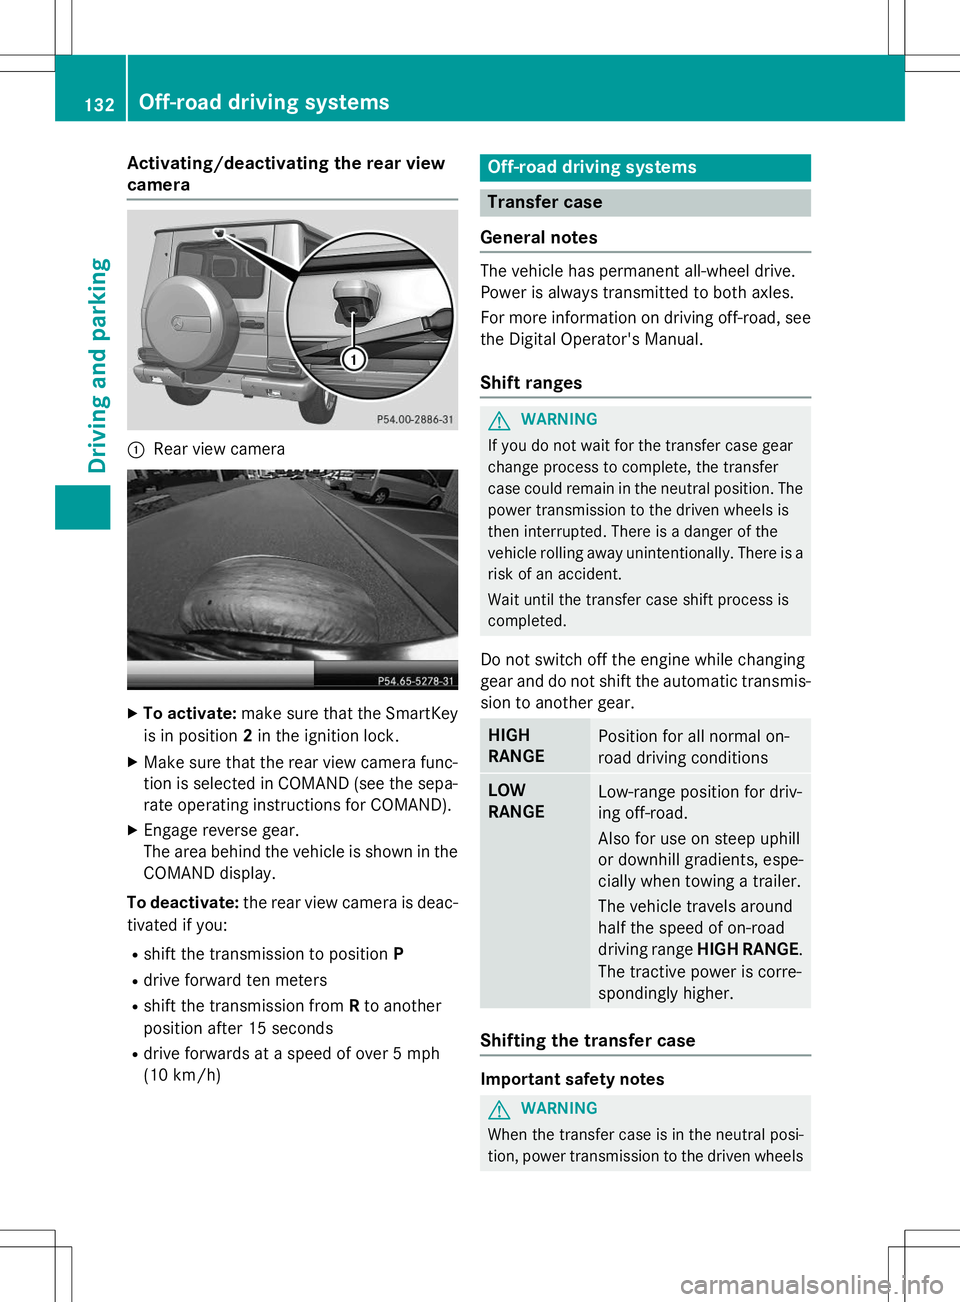
:Rear view camera
XTo activate: make sure that the SmartKey
is in position 2in the ignition lock.
X Make sure that the rear view camera func-
tion is selected in COMAND (see the sepa-
rate operating instructions for COMAND).
X Engage reverse gear.
The area behind the vehicle is shown in the
COMAND display.
To deactivate: the rear view camera is deac-
tivated if you:
R shift the transmission to position P
R drive forward ten meters
R shift the transmission from Rto another
position after 15 seconds
R drive forwards at a speed of over 5 mph
(10 km/h)
Off-road driving systems
Transfer case
General notes
The vehicle has permanent all-wheel drive.
Power is always transmitted to both axles.
For more information on driving off-road, see the Digital Operator's Manual.
Shift ranges
GWARNING
If you do not wait for the transfer case gear
change process to complete, the transfer
case could remain in the neutral position. The power transmission to the driven wheels is
then interrupted. There is a danger of the
vehicle rolling away unintentionally. There is a
risk of an accident.
Wait until the transfer case shift process is
completed.
Do not switch off the engine while changing
gear and do not shift the automatic transmis-
sion to another gear.
HIGH
RANGEPosition for all normal on-
road driving conditions
LOW
RANGELow-range position for driv-
ing off-road.
Also for use on steep uphill
or downhill gradients, espe-
cially when towing a trailer.
The vehicle travels around
half the speed of on-road
driving range HIGH RANGE .
The tractive power is corre-
spondingly higher.
Shifting the transfer case
Important safety notes
GWARNING
When the transfer case is in the neutral posi-
tion, power transmission to the driven wheels
132Off-road driving systems
Driving and pa rking
Page 136 of 274

positionNappears in the multifunction dis-
play.
R
TC Shift Canceled
The transfer case has not performed the
gear change process.
X Carry out the gear change process again.
Make sure to meet all conditions for chang-
ing gears.
R
TC Malfunction Visit Workshop
There is a malfunction in the transfer case.
X Do not shift the transfer case.
X Have the vehicle checked as soon as pos-
sible at a qualified specialist workshop.
Shifting to neutral
GWARNING
When the transfer case is in the neutral posi-
tion, power transmission to the driven wheels
is interrupted. As a result, the vehicle could
roll away. There is a risk of an accident.
Secure the vehicle with the parking brake, and on uphill or downhill gradients, also secure it
with a device such as a wheel chock.
X Turn the SmartKey to position 2in the igni-
tion lock ( Ypage 103).
X Apply the parking brake.
X Depress the brake pedal.
X Move the selector lever to position N
( Y page 106).
X Press and hold LOW RANGE button ;for
approximately ten seconds.
When the shift procedure is complete, the
TC neutral onmessage appears in the
multifunction display for five seconds.
If the gear change is not completed, the fol-
lowing messages could appear in the display( Y page 148).
iIf the transfer case is in neutral, the
SmartKey is in the ignition lock and you
open the driver's door, the
TCInNeutral
message appears in the multifunction dis-
play. If you then release the parking brake, a warning tone will sound.
Differential locks
General notes
GWARNING
When the differential locks are engaged, ABS, 4ETS, ESP ®
and BAS are deactivated. As a
result, the wheels could lock when braking
and the braking distance is increased. There is
a risk of an accident.
Disengage the differential locks immediately
on firm surfaces with good grip.
!In order to avoid damage to the transfer
case, you must operate the vehicle on a
dynamometer (1-axle dynamometer) onlyif:
R the axle not driven on is jacked up or
R the corresponding propeller shaft is dis-
connected and the transfer case differ-
ential lock is engaged.
Otherwise, the transfer case can be dam-aged.
Differential locks improve the traction of the vehicle.
Your vehicle is equipped with a differential
lock each for: R the transfer case: this controls the balance
between the front and rear axles.
R the rear axle: this controls the balance
between the wheels on the rear axle.
R the front axle: this controls the balance
between the wheels on the front axle.
Information on differential gear system
and differential lock
When the vehicle drives around a curve, the
wheels on the outside of the curve must cover
a greater distance. Therefore, the wheels turn more rapidly than on the inside. The differen-
tial, a gear system in the drive train, allows for
differing rotational speeds and facilitates cor- nering.
134Off-road driving systems
Driving and parking
Page 149 of 274

?Left control panel
ABack button
X To activate the on-board computer: turn
the SmartKey to position 1(Y page 103) in
the ignition lock.
You can control the multifunction display and
the settings in the on-board computer using
the buttons on the multifunction steering
wheel.
Left control panel
= ;R Calls up the menu and menu bar
9 :Press briefly:
R Scrolls in lists
R Selects a submenu or function
R In the
Audiomenu: selects a
stored station, an audio track or
a video scene
R In the
Tel(telephone) menu:
switches to the phone book and
selects a name or telephonenumber
9 :Press and hold:
R In the
Audiomenu: selects the
previous/next station or selects
an audio track or a video scene
using rapid scrolling
R In the
Tel(telephone) menu:
starts rapid scrolling if the phone
book is open
aR Confirms a selection/display
message
R In the
Tel(telephone) menu:
switches to the telephone book
and starts dialing the selectednumber
R In the
Audiomenu: stops the
station search function at the
desired station
Right control panel
~R Rejects or ends a call
R Exits phone book/redial mem- ory
6RMakes or accepts a call
R Switches to the redial memory
W XRAdjusts the volume
8RMute
Back button
%Press briefly:
R Back
R Switches off the Voice Control
System; see the separate oper-
ating instructions
R Hides display messages/calls
up the last
Tripmenu function
used
R Exits the telephone book/redial memory
%Press and hold:
R Calls up the standard display in the
Tripmenu
Menus and submenus
Menu overview
Press the =or; button on the steer-
ing wheel to call up the menu bar and select a
menu.
Operating the on-board computer ( Y page 146).
You can find more information on the individ-
ual menus in the Digital Operator's Manual.
Depending on the equipment installed in the
vehicle, you can call up the following menus:
R
Tripmenu
R
Navimenu (navigation instructions)
Menus and submenus147
On-board computer and displays
Z
Page 190 of 274

COMAND controller and pressWto con-
firm.
The carousel view appears.
X Bring the
Internet Radiopanel to the
front by turning cVdthe COMAND con-
troller and press Wto confirm.
The Internet radio menu appears.
Searching for stations
X SelectSearchin the Internet radio menu.
A list with search criteria appears.
X Select criterion and press Wto confirm.
iFor example as a search criterion, you can
set an Internet radio station that is located
close to your navigation destination.
Connecting to a station
X Search for a station ( Ypage 188).
X Select ;(play) in the Internet radio
menu and press Wto confirm.
The call is placed.
If the data stream is interrupted, an automatic attempt is made to re-establish the connec-
tion.
Manually re-establishing a connection
X Select ;(play) again in the Internet
radio menu and press Wto confirm.
Ending data transfer: X Select É(stop) in the Internet radio
menu and press Wto confirm.
or
X Change to another audio source, for exam-
ple
Disc.
If you change to a main function that is not an
audio source, e.g. navigation, the data con-
nection remains on. You can continue listen-
ing to the set station.
Internet
Display restriction
Internet pages cannot be shown while the
vehicle is in motion.
Calling up a website
Calling up the carousel view
X Select the ®symbol in the main function
bar by turning cVdthe COMAND con-
troller and press Wto confirm.
The carousel view appears.
You can now enter a web address.
Entering a web address
You can enter the web address using either
the character bar or the number keypad.
X Select
wwwby sliding VÆand turning cVd
the COMAND controller and press Wto
confirm.
An input menu appears.
188Online and Internet functions
COMAND
Page 208 of 274

When checking the oil level:
R park the vehicle on a level surface.
R the engine should be switched off for
approximately five minutes if the engine is
at normal operating temperature.
R the engine should be switched off for at
least 30 minutes if the engine is not at
operating temperature, e.g. if you only start
the engine briefly.
X Pull oil dipstick :out of the dipstick guide
tube.
X Wipe off oil dipstick :.
X Slowly slide oil dipstick :into the guide
tube to the stop, and take it out again.
If the level is between MIN mark =and
MAX mark ;, the oil level is correct.
X Add oil if necessary.
Checking the oil level using the on-
board computer
!Do not add too much oil. adding too much
engine oil can result in damage to the
engine or to the catalytic converter. Have
excess engine oil siphoned off.
G 65 AMG: the oil level can be checked using
the on-board computer only.
On all other models, the oil dipstick must be
used to check the engine oil level.
When checking the oil level:
R park the vehicle on a level surface.
R the engine should be switched off for
approximately five minutes if the engine is
at normal operating temperature.
X Make sure that the SmartKey is in posi-tion 2in the ignition lock.
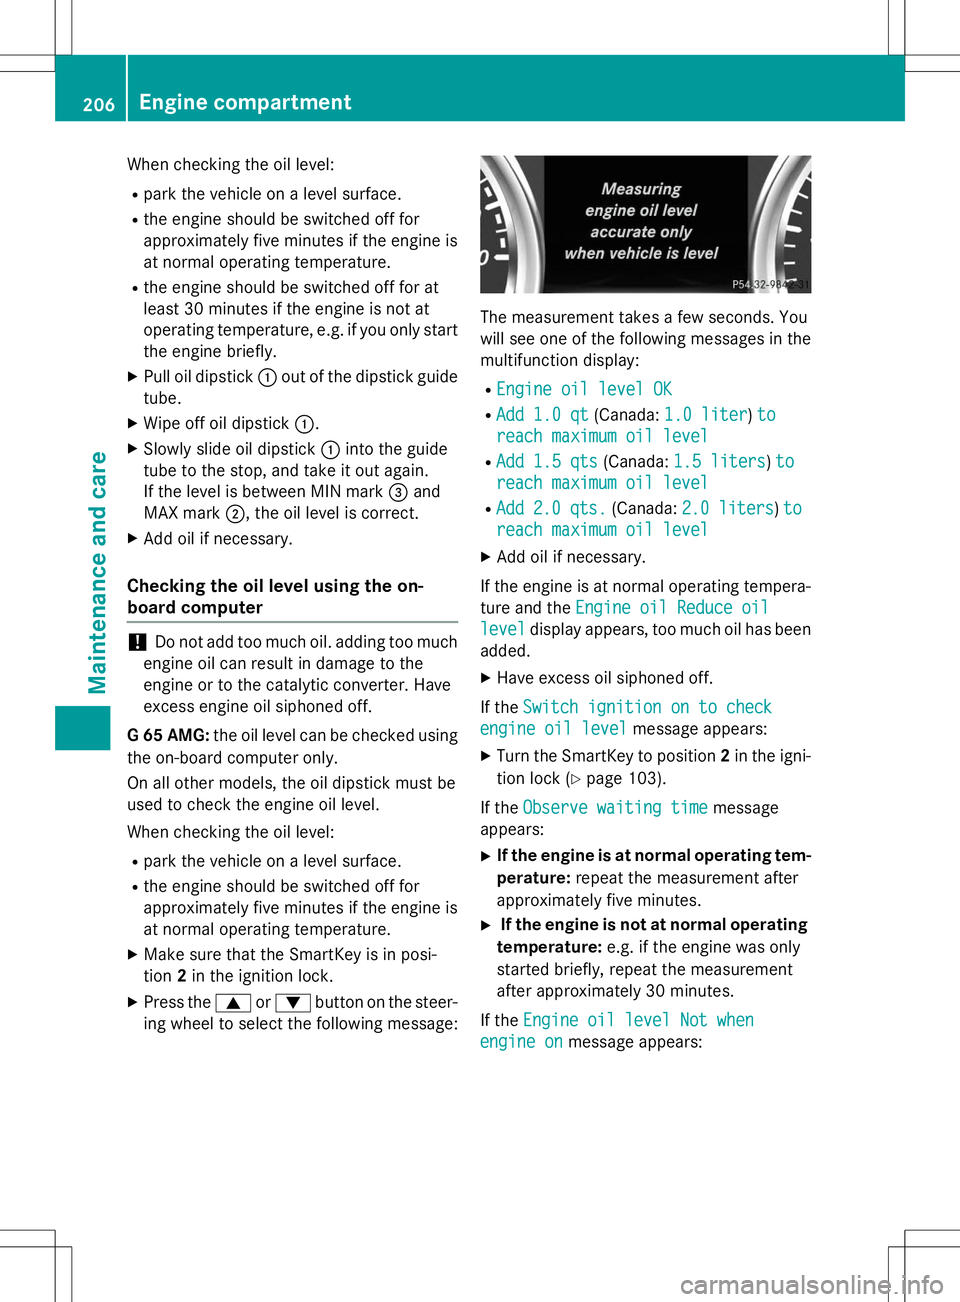
X Press the 9or: button on the steer-
ing wheel to select the following message:
The measurement takes a few seconds. You
will see one of the following messages in the multifunction display: R
Engine oil level OK
RAdd 1.0 qt(Canada:1.0 liter)to
reach maximum oil level
RAdd 1.5 qts(Canada:1.5 liters)to
reach maximum oil level
RAdd2.0 qts.(Canada:2.0 liters)to
reach maximum oil level
X Add oil if necessary.
If the engine is at normal operating tempera- ture and the
Engine oil Reduce oil
leveldisplay appears, too much oil has been
added.
X Have excess oil siphoned off.
If the
Switch ignition on to check
engine oil levelmessage appears:
X Turn the SmartKey to position 2in the igni-
tion lock ( Ypage 103).
If the
Observe waiting timemessage
appears:
X If the engine is at normal operating tem-
perature: repeat the measurement after
approximately five minutes.
X If the engine is not at normal operating
temperature: e.g. if the engine was only
started briefly, repeat the measurement
after approximately 30 minutes.
If the
Engine oil level Not when
engine onmessage appears:
206Engine compartment
Maintenance and care
Page 210 of 274

Additional service products
Checking coolant level
GWARNING
Certain components in the engine compart-
ment, such as the engine, radiator and parts
of the exhaust system, can become very hot.
Working in the engine compartment poses a
risk of injury.
Where possible, let the engine cool down and touch only the components described in the
following.
GWARNING
The engine cooling system is pressurized, par-ticularly when the engine is warm. When
opening the cap, you could be scalded by hotcoolant spraying out. There is a risk of injury.
Let the engine cool down before opening the
cap. Wear eye and hand protection when
opening the cap. Open the cap slowly half a
turn to allow pressure to escape.
X Park the vehicle on a level surface.
Only check the coolant level when the vehi-
cle is on a level surface and the engine has
cooled down.
X Turn the SmartKey to position 2
( Y page 103) in the ignition lock.
X Check the coolant temperature display in
the instrument cluster.
The coolant temperature must be below
158 ‡ (70 †). X
Slow ly turn cap :half a turn counter-
clockwise and allow excess pressure to
escape.
X Turn cap :further counter-clockwise and
remove it.
If the coolant is at the level of marker bar =
in the filler neck when cold, there is enough coolant in coolant expansion tank ;.
If the coolant level is approximately 0.6 in
(1.5 cm) above marker bar =in the filler
neck when warm, there is enough coolant
in coolant expansion tank ;.
X If necessary, add coolant that has been tes-
ted and approved by Mercedes-Benz.
X Replace cap :and turn it clockwise as far
as it will go.
For further information on coolant, see( Y page 264).
Adding washer fluid to the windshield
washer system/headlamp cleaning
system
GWARNING
Certain components in the engine compart-
ment, such as the engine, radiator and parts
of the exhaust system, can become very hot.
Working in the engine compartment poses a
risk of injury.
Where possible, let the engine cool down and
touch only the components described in the
following.
GWARNING
Windshield washer concentrate could ignite if it comes into contact with hot engine compo-
nents or the exhaust system. There is a risk of
fire and injury.
Make sure that no windshield washer con-
centrate is spilled next to the filler neck.
208Engine compartment
Maintenance and care