2015 MERCEDES-BENZ G-CLASS SUV belt
[x] Cancel search: beltPage 85 of 274

restraint supports the back of the head at
about eye level.
Make sure that you do not rotate the head
restraints of the front and rear seats when
adjusting the head restraints. Otherwise, you cannot adjust the height and angle of the
head restraints correctly.
Adjust the head restraint so that it is as close as possible to your head.
GWARNING
You could lose control of your vehicle if you do the following while driving:
R adjust the driver's seat, head restraint,
steering wheel or mirrors
R fasten the seat belt
There is a risk of an accident.
Adjust the driver's seat, head restraint, steer-
ing wheel and mirror and fasten your seat belt before starting the engine.
GWARNING
According to accident statistics, children are
safer when properly restrained on the rear
seats than on the front-passenger seat. Thus,we strongly recommend that children be
placed in the rear seat whenever possible.
Regardless of seating position, children 12
years old and under must be seated and prop- erly secured in an appropriately sized child
restraint system or booster seat recommen-
ded for the size and weight of the child. For
additional information, see the "Children in
the vehicle" section.
A child's risk of serious or fatal injuries is sig-
nificantly increased if the child restraints are
not properly secured in the vehicle and/or the child is not properly secured in the child
restraint.
!To avoid damage to the seats and the seat
heating, observe the following information:
R keep liquids from spilling on the seats. If
liquid is spilled on the seats, dry them as
soon as possible.
R if the seat covers are damp or wet, do not
switch on the seat heating. The seat
heating should also not be used to dry
the seats.
R clean the seat covers as recommended;
see the "Interior care" section.
R do not transport heavy loads on the
seats. Do not place sharp objects on the
seat cushions, e.g. knives, nails or tools. The seats should only be occupied by
passengers, if possible.
R when the seat heating is in operation, do
not cover the seats with insulating mate- rials, e.g. blankets, coats, bags, seat cov-
ers, child seats or booster seats.
!Make sure that there are no objects in the
footwell under or behind the seats when
moving the seats back. There is a risk that
the seats and/or the objects could be dam-
aged.
!When the rear bench seat is folded for-
wards, the front seats cannot be moved to their rearmost position. You could other-
wise damage the seats and the rear bench
seat.
!Make sure that the sun visor is folded up
before adjusting the backrest and head
restraint height. The head restraint and sun visor could otherwise collide when the head
restraint is fully extended.
iIf the front door is open, the seats can be
adjusted for up to 30 minutes after the igni- tion has been switched off.
iThe rear-compartment head restraints
can be removed ( Ypage 84).
For more information, contact a qualified
specialist workshop.
Seats83
Seats, steering wheel and mirrors
Z
Page 88 of 274
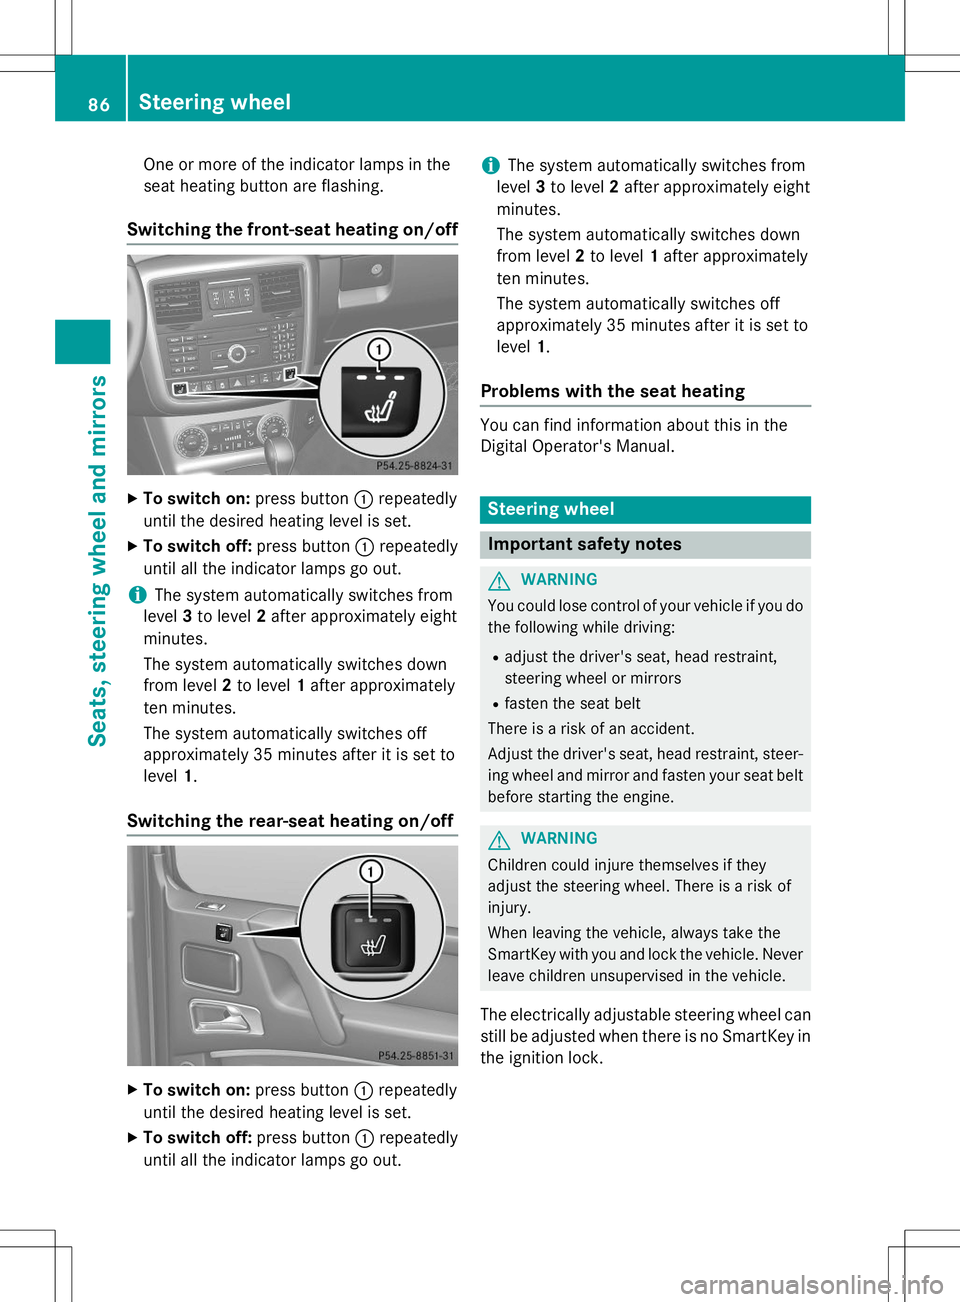
One or more of the indicator lamps in the
seat heating button are flashing.
Switching the front-seat heating on/off
XTo switch on: press button:repeatedly
until the desired heating level is set.
X To switch off: press button:repeatedly
until all the indicator lamps go out.
iThe system automatically switches from
level 3to level 2after approximately eight
minutes.
The system automatically switches down
from level 2to level 1after approximately
ten minutes.
The system automatically switches off
approximately 35 minutes after it is set tolevel 1.
Switching the rear-seat heating on/off
X
To switch on: press button:repeatedly
until the desired heating level is set.
X To switch off: press button:repeatedly
until all the indicator lamps go out.
iThe system automatically switches from
level 3to level 2after approximately eight
minutes.
The system automatically switches down
from level 2to level 1after approximately
ten minutes.
The system automatically switches off
approximately 35 minutes after it is set tolevel 1.
Problems with the seat heating
You can find information about this in the
Digital Operator's Manual.
Steering wheel
Important safety notes
GWARNING
You could lose control of your vehicle if you do
the following while driving:
R adjust the driver's seat, head restraint,
steering wheel or mirrors
R fasten the seat belt
There is a risk of an accident.
Adjust the driver's seat, head restraint, steer-
ing wheel and mirror and fasten your seat belt before starting the engine.
GWARNING
Children could injure themselves if they
adjust the steering wheel. There is a risk ofinjury.
When leaving the vehicle, always take the
SmartKey with you and lock the vehicle. Neverleave children unsupervised in the vehicle.
The electrically adjustable steering wheel can
still be adjusted when there is no SmartKey in
the ignition lock.
86Steering wheel
Seats, steering wheel and mirrors
Page 121 of 274
iCanada only: This device complies with
RSS-210 of Industry Canada. Operation is
subject to the following two conditions:
1. This device may not cause harmful inter- ference, and
2. This device must accept any interference
received, including interference that may
cause undesired operation of the device.
Removal, tampering, or altering of the
device will void any warranties, and is not
permitted. Do not tamper with, alter, or use
in any non-approved way.
Any unauthorized modification to this
device could void the user's authority to
operate the equipment.
Information in the Digital Operator's
Manual
In the Digital Operator's Manual you will find
information on the following topics: R Setting a speed
R Setting the specified minimum distance
R DISTRONIC PLUS displays in the instru-
ment cluster
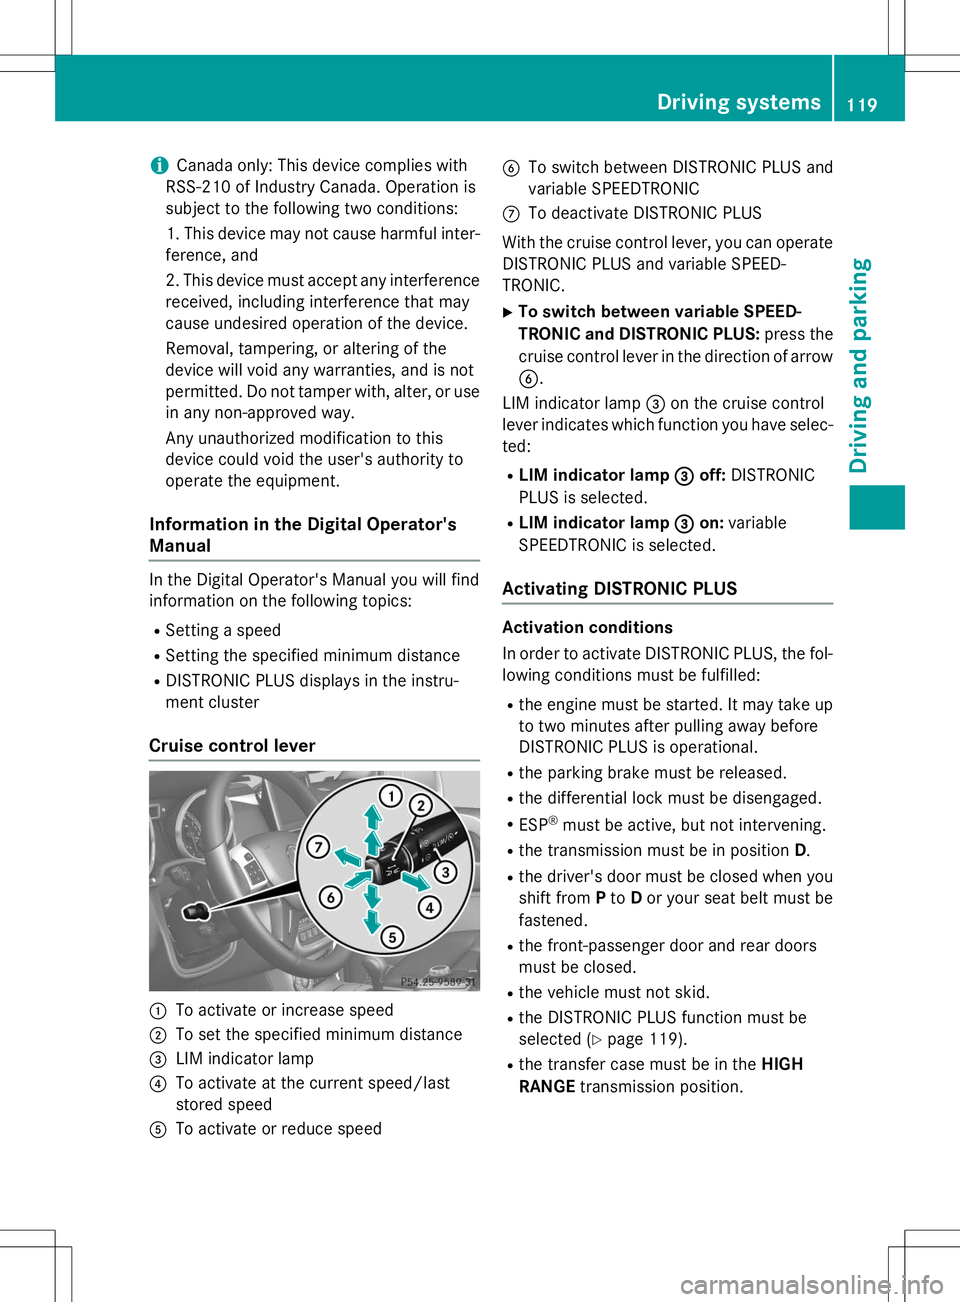
Cruise control lever
:To activate or increase speed
;To set the specified minimum distance
=LIM indicator lamp
?To activate at the current speed/last
stored speed
ATo activate or reduce speed
BTo switch between DISTRONIC PLUS and
variable SPEEDTRONIC
CTo deactivate DISTRONIC PLUS
With the cruise control lever, you can operate
DISTRONIC PLUS and variable SPEED-
TRONIC. X To switch between variable SPEED-
TRONIC and DISTRONIC PLUS: press the
cruise control lever in the direction of arrow B .
LIM indicator lamp =on the cruise control
lever indicates which function you have selec-
ted:
R LIM indicator lamp =
off:DISTRONIC
PLUS is selected.
R LIM indicator lamp =
on:variable
SPEEDTRONIC is selected.
Activating DISTRONIC PLUS
Activation conditions
In order to activate DISTRONIC PLUS, the fol- lowing conditions must be fulfilled:
R the engine must be started. It may take up
to two minutes after pulling away before
DISTRONIC PLUS is operational.
R the parking brake must be released.
R the differential lock must be disengaged.
R ESP ®
must be active, but not intervening.
R the transmission must be in position D.
R the driver's door must be closed when you
shift from Pto Dor your seat belt must be
fastened.
R the front-passenger door and rear doors
must be closed.
R the vehicle must not skid.
R the DISTRONIC PLUS function must be
selected ( Ypage 119).
R the transfer case must be in the HIGH
RANGE transmission position.
Driving systems119
Driving and pa rking
Z
Page 128 of 274
If a vehicle is detected in the monitoring range
of Blind Spot Assist and you switch on the
corresponding turn signal, a double warning
tone sounds. Red warning lamp :flashes. If
the turn signal remains on, vehicles detected
are indicated by the flashing of red warninglamp :. There are no further warning tones.
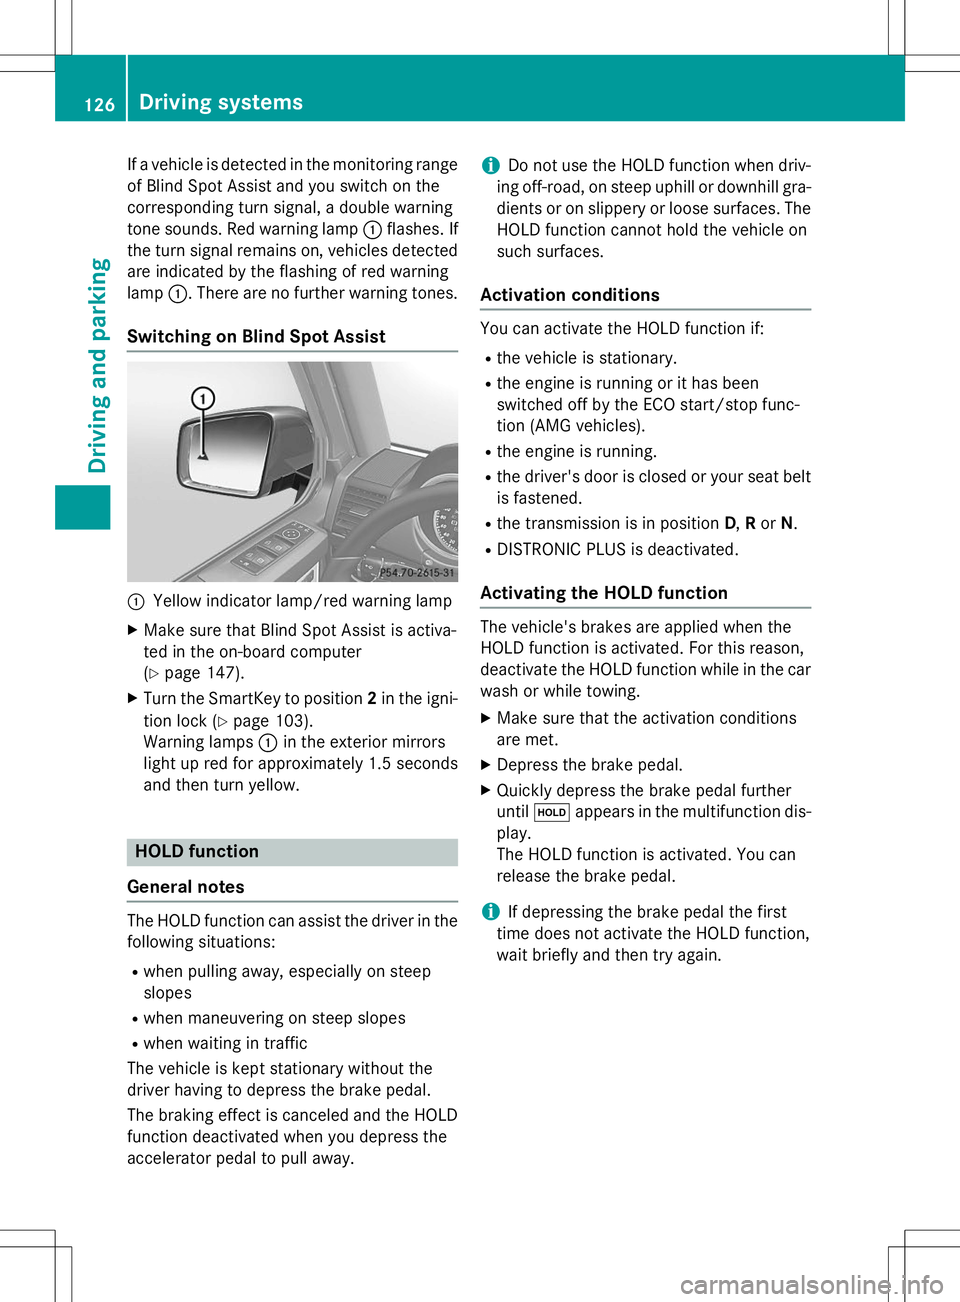
Switching on Blind Spot Assist
:Yellow indicator lamp/red warning lamp
X Make sure that Blind Spot Assist is activa-
ted in the on-board computer(Y page 147).
X Turn the SmartKey to position 2in the igni-
tion lock ( Ypage 103).
Warning lamps :in the exterior mirrors
light up red for approximately 1.5 seconds
and then turn yellow.
HOLD function
General notes
The HOLD function can assist the driver in the
following situations: R when pulling away, especially on steep
slopes
R when maneuvering on steep slopes
R when waiting in traffic
The vehicle is kept stationary without the
driver having to depress the brake pedal.
The braking effect is canceled and the HOLD
function deactivated when you depress the
accelerator pedal to pull away.
iDo not use the HOLD function when driv-
ing off-road, on steep uphill or downhill gra- dients or on slippery or loose surfaces. The
HOLD function cannot hold the vehicle on
such surfaces.
Activation conditions
You can activate the HOLD function if: R the vehicle is stationary.
R the engine is running or it has been
switched off by the ECO start/stop func-
tion (AMG vehicles).
R the engine is running.
R the driver's door is closed or your seat belt
is fastened.
R the transmission is in position D,R or N.
R DISTRONIC PLUS is deactivated.
Activating the HOLD function
The vehicle's brakes are applied when the
HOLD function is activated. For this reason,
deactivate the HOLD function while in the car
wash or while towing.
X Make sure that the activation conditions
are met.
X Depress the brake pedal.
X Quickly depress the brake pedal furtheruntil ë appears in the multifunction dis-
play.
The HOLD function is activated. You can
release the brake pedal.
iIf depressing the brake pedal the first
time does not activate the HOLD function,
wait briefly and then try again.
126Driving systems
Driving and parking
Page 157 of 274

Engine
Display messagesPossible causes/consequences andMSolutions
?
Coolant Too Hot
Stop Vehicle
Switch Engine Off
The coolant is too hot.
A warning tone also sounds.
GWARNING
Do not drive when your engine is overheated. This can cause some
fluids which may have leaked into the engine compartment to
catch fire.
Steam from the overheated engine can also cause serious burns
which can occur just by opening the hood.
There is a risk of injury. X Pull over and stop the vehicle safely and switch off the engine,
paying attention to road and traffic conditions.
X Secure the vehicle against rolling away ( Ypage 110).
X Leave the vehicle and keep a safe distance from the vehicle until
the engine has cooled down.
X Make sure that the air supply to the engine radiator is not
blocked, e.g. by snow, slush or ice.
X Do not start the engine again until the display message goes out
and the coolant temperature is below 248 ‡ (120 †). Other-
wise, the engine could be damaged.
X Pay attention to the coolant temperature display.
X If the temperature increases again, visit a qualified specialist
workshop immediately.
Under normal operating conditions and with the specified coolant
level, the coolant temperature may rise to 248 ‡ (120 †).
The poly-V-belt may have torn.
X Pull over and stop the vehicle safely and switch off the engine,
paying attention to road and traffic conditions.
X Check the poly-V-belt.
If the poly-V-belt is torn:
!Do not continue driving. The engine could otherwise overheat.
X Consult a qualified specialist workshop.
If the poly-V-belt is not damaged:
X Wait until the display message disappears before restarting the
engine. Otherwise, the engine could be damaged.
X Pay attention to the coolant temperature display.
X Visit a qualified specialist workshop.
Display messages155
On-board computer and displays
Z
Page 163 of 274
Safety
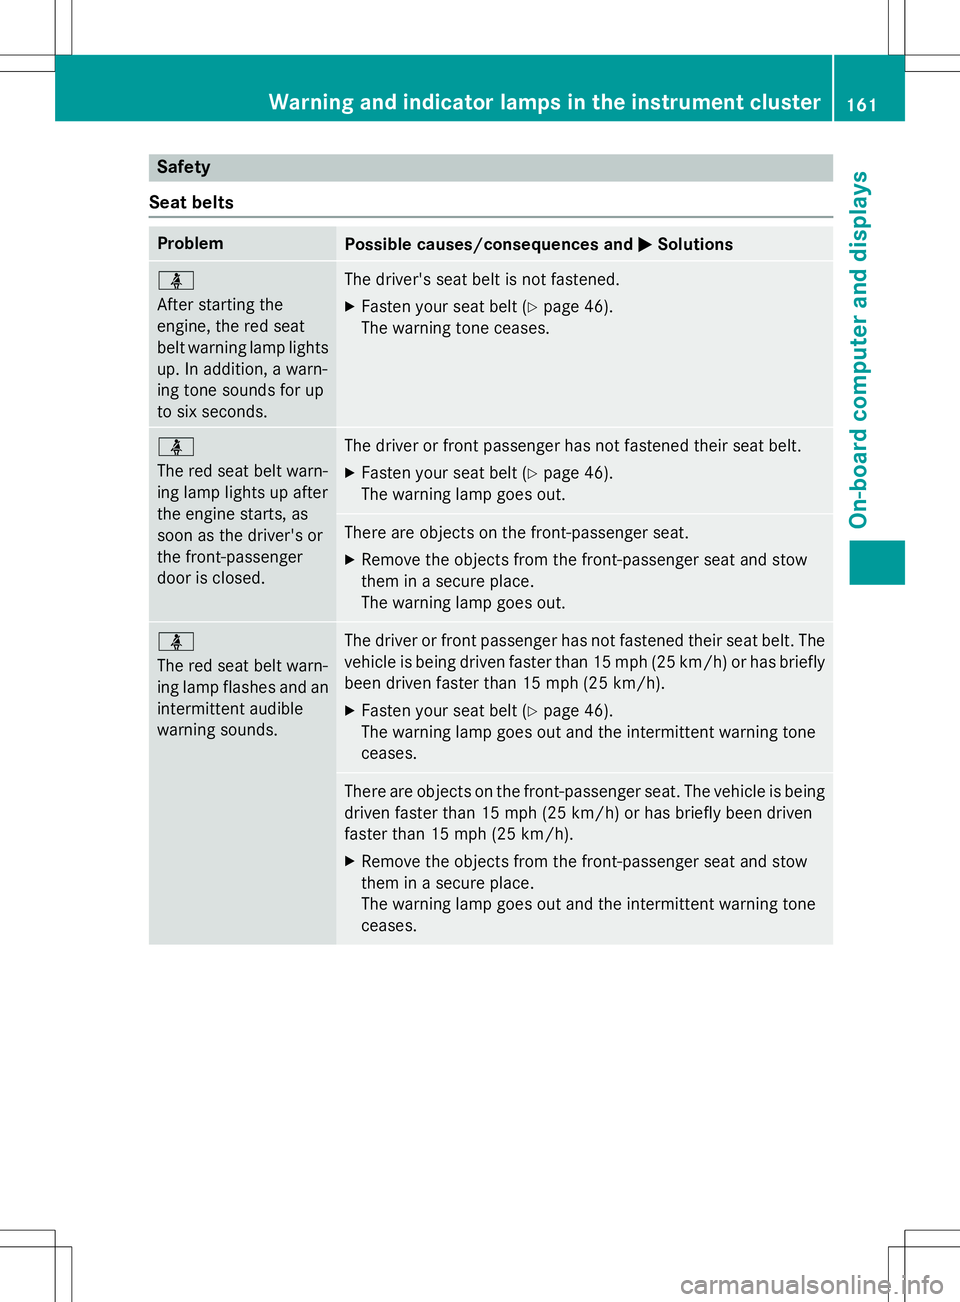
Seat belts
ProblemPossible causes/consequences and MSolutions
ü
After starting the
engine, the red seat
belt warning lamp lights
up. In addition, a warn-
ing tone sounds for up
to six seconds.The driver's seat belt is not fastened.
X Fasten your seat belt ( Ypage 46).
The warning tone ceases.
ü
The red seat belt warn-
ing lamp lights up after
the engine starts, as
soon as the driver's or
the front-passenger
door is closed.The driver or front passenger has not fastened their seat belt.
X Fasten your seat belt ( Ypage 46).
The warning lamp goes out.
There are objects on the front-passenger seat.
X Remove the objects from the front-passenger seat and stow
them in a secure place.
The warning lamp goes out.
ü
The red seat belt warn-
ing lamp flashes and an
intermittent audible
warning sounds.The driver or front passenger has not fastened their seat belt. The
vehicle is being driven faster than 15 mph (25 km/h) or has briefly been driven faster than 15 mph (25 km/h). X Fasten your seat belt ( Ypage 46).
The warning lamp goes out and the intermittent warning tone ceases.
There are objects on the front-passenger seat. The vehicle is being
driven faster than 15 mph (25 km/h) or has briefly been driven
faster than 15 mph (25 km/h).
X Remove the objects from the front-passenger seat and stow
them in a secure place.
The warning lamp goes out and the intermittent warning toneceases.
Warning and indicator lamps in the instrument cluster161
On-board computer and displays
Z
Page 195 of 274
Further information can be found in the
"Loading the vehicle" section (Ypage 238).
Observe the following notes when transport-
ing a load:
R Position heavy loads as far forwards as pos-
sible and as low down in the cargo com-
partment as possible.
iTransport loads when possible in the
cargo compartment. You should only use
the cargo compartment enlargement if the
load does not fit in the cargo compartment.
R Always place the load against the backrests
of the front seats or rear seats.
R Use the cargo tie-down rings and the parcel
nets to transport loads and luggage.
R Use cargo tie-down rings and fastening
materials appropriate for the weight and
size of the load.
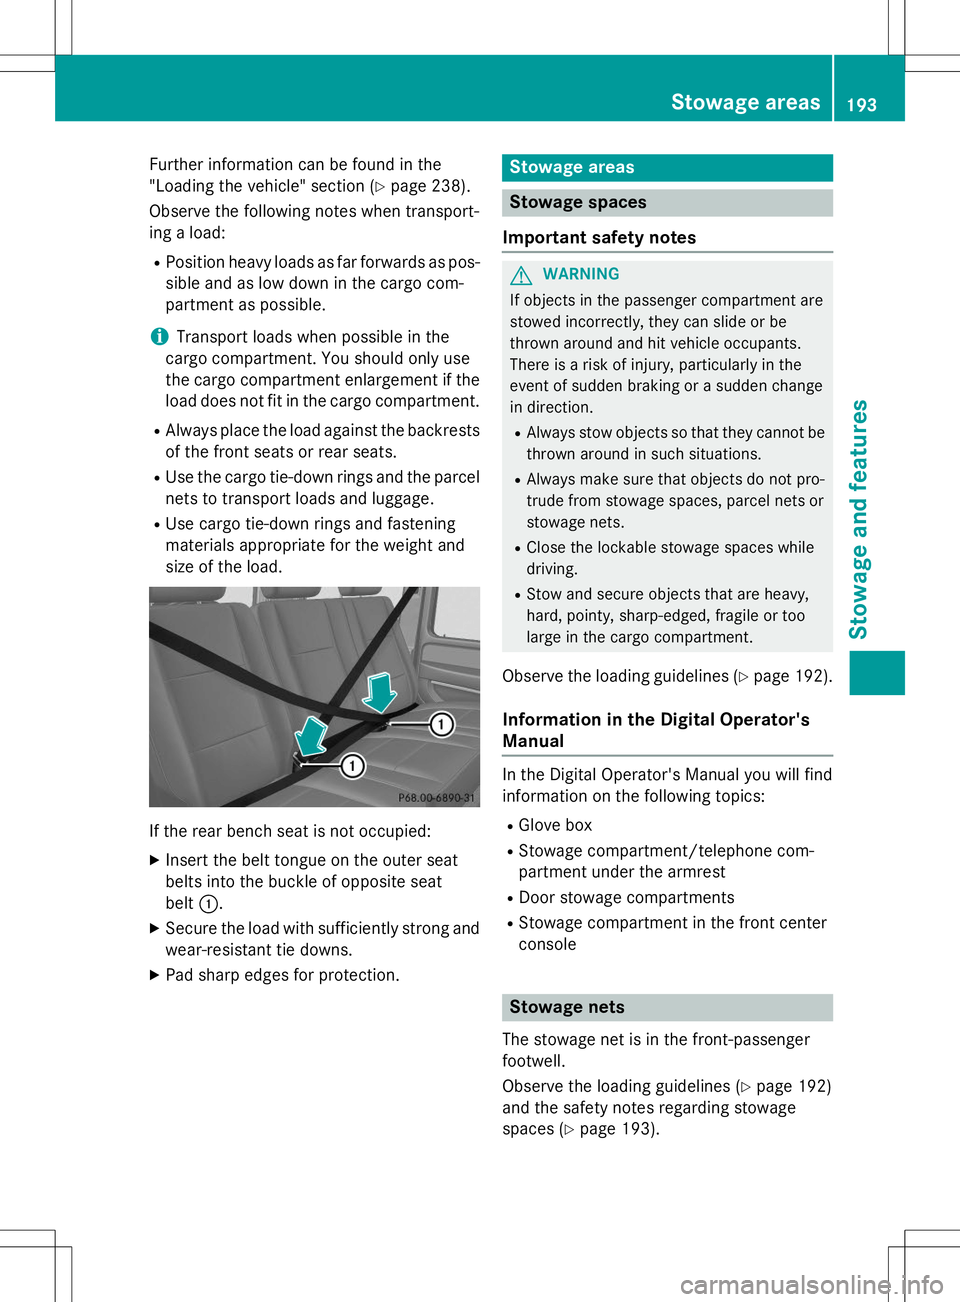
If the rear bench seat is not occupied: XInsert the belt tongue on the outer seat
belts into the buckle of opposite seat
belt :.
X Secure the load with sufficiently strong and
wear-resistant tie downs.
X Pad sharp edges for protection.
Stowage areas
Stowage spaces
Important safety notes
GWARNING
If objects in the passenger compartment are
stowed incorrectly, they can slide or be
thrown around and hit vehicle occupants.
There is a risk of injury, particularly in the
event of sudden braking or a sudden change
in direction. R Always stow objects so that they cannot be
thrown around in such situations.
R Always make sure that objects do not pro-
trude from stowage spaces, parcel nets or
stowage nets.
R Close the lockable stowage spaces while
driving.
R Stow and secure objects that are heavy,
hard, pointy, sharp-edged, fragile or too
large in the cargo compartment.
Observe the loading guidelines ( Ypage 192).
Information in the Digital Operator'sManual
In the Digital Operator's Manual you will find
information on the following topics: R
Glove box
R Stowage compartment/telephone com-
partment under the armrest
R Door stowage compartments
R Stowage compartment in the front center
console
Stowage nets
The stowage net is in the front-passenger
footwell.
Observe the loading guidelines ( Ypage 192)
and the safety notes regarding stowage
spaces ( Ypage 193).
Stowage areas193
Stowage and features
Z
Page 196 of 274
Cargo compartment enlargement
Important safety notes
GWARNING
If the rear bench seat/rear seat and seat
backrest are not engaged they could fold for- wards, e.g. when braking suddenly or in the
event of an accident. R The vehicle occupant would thereby be
pushed into the seat belt by the rear bench
seat/rear seat or by the seat backrest. The
seat belt can no longer offer the intended
level of protection and could even cause
injuries.
R Objects or loads in the trunk/cargo com-
partment cannot be restrained by the seat
backrest.
There is an increased risk of injury.
Before every trip, make sure that the seat
backrests and the rear bench seat/rear seat
are engaged.
GWARNING
Combustion engines emit poisonous exhaust
gases such as carbon monoxide. If the rear
door is open when the engine is running, par- ticularly if the vehicle is moving, exhaust
fumes could enter the passenger compart-
ment. There is a risk of poisoning.
Turn off the engine before opening the rear
door. Never drive with the rear door open.
!Ensure that you remove all containers
from the cup holder in the rear before fold- ing the seat backrest and the seat cushionof the rear bench seat forwards.
Observe the loading guidelines ( Ypage 192).
The rear bench seat is split symmetrically.
The left-hand and right-hand rear bench seats
can be folded forward to increase the capa-
city of the rear compartment. The following
changes are possible:
R fold the seat backrests forward
R fold the rear bench seat back fully
Folding the seat backrest forward
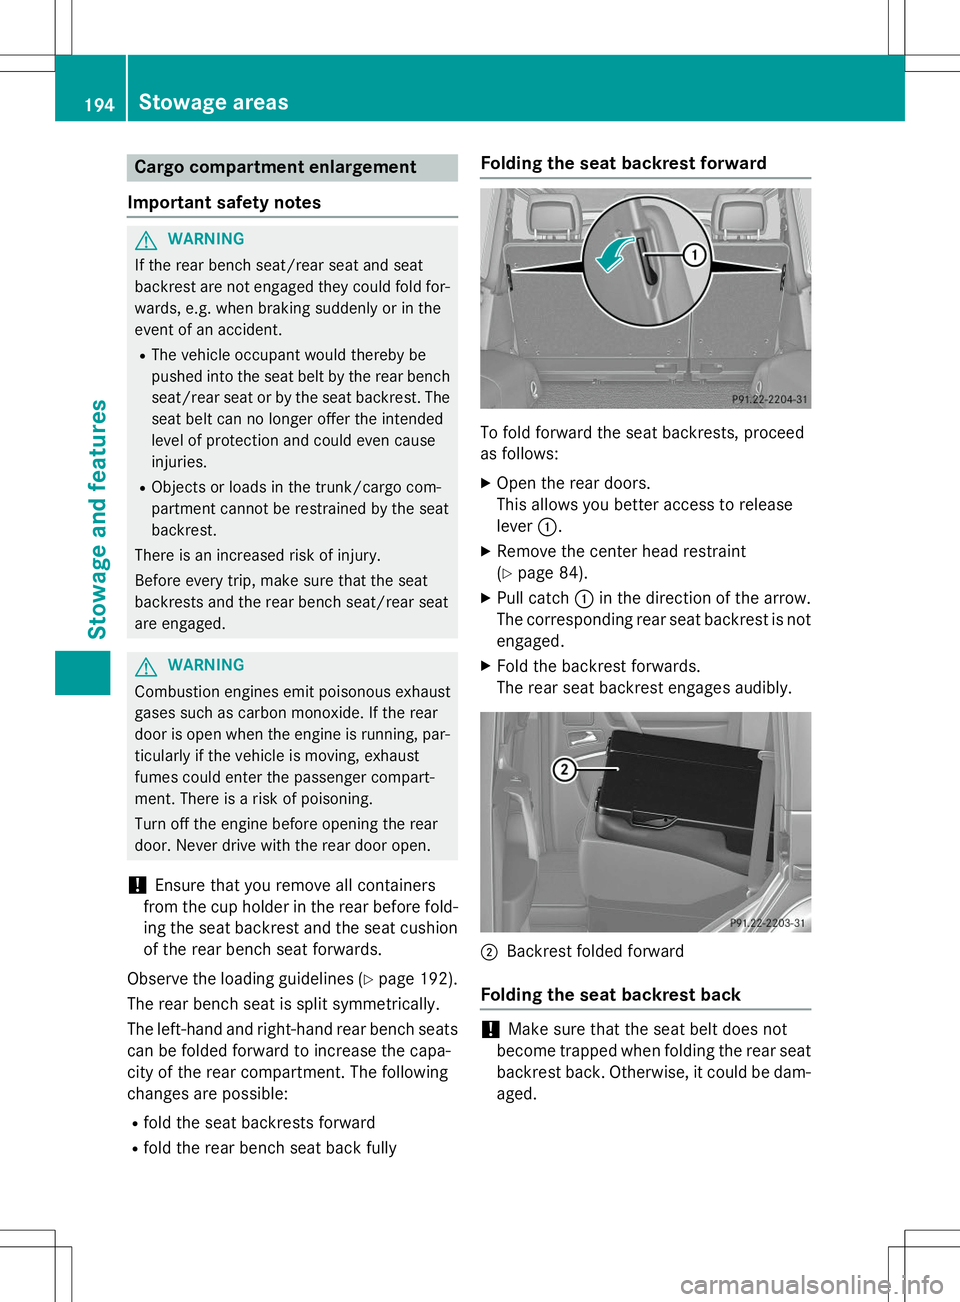
To fold forward the seat backrests, proceed
as follows:
X Open the rear doors.
This allows you better access to release
lever :.
X Remove the center head restraint(Y page 84).
X Pull catch :in the direction of the arrow.
The corresponding rear seat backrest is not
engaged.
X Fold the backrest forwards.
The rear seat backrest engages audibly.
;Backrest folded forward
Folding the seat backrest back
!Make sure that the seat belt does not
become trapped when folding the rear seat backrest back. Otherwise, it could be dam- aged.
194Stowage areas
Stowage and features