2015 MERCEDES-BENZ G-CLASS SUV mirror
[x] Cancel search: mirrorPage 127 of 274

Blind Spot Assist monitors the area up to 10 ft
(3 m) behind your vehicle and directly next toyour vehicle, as shown in the diagram.
If the lanes are narrow, vehicles driving in the
lane beyond the lane next to your vehicle may
be indicated, especially if the vehicles are not
driving in the middle of their lane. This may be the case if the vehicles are driving on the inner
side of their lane.
Due to the nature of the system:
R warnings may be issued in error when driv-
ing close to crash barriers or similar solid
lane borders.
R the warning is canceled when driving for an
extended period next to long vehicles, such
as trucks.
The two sensors for Blind Spot Assist are
integrated into the sides of the rear bumper.
Make sure that the bumper is free of dirt, ice
or slush in the vicinity of the sensors. The
radar sensors must not be covered, for exam- ple rear bicycle racks or overhanging loads.
Following a severe impact or in the event of
damage to the bumpers, have the function of
the radar sensors checked at a qualified spe-
cialist workshop. Blind Spot Assist may oth-
erwise not work properly.
Indicator and warning display
GWARNING
Blind Spot Assist does not react to:
R vehicles overtaken too closely on the side,
placing them in the blind spot area
R vehicles being overtaken at a speed differ-
ence of more than 7.5 mph (12 km/h)
R vehicles which approach with a large speed
differential and overtake your vehicle
As a result, Blind Spot Assist may not give
warnings in such situations. There is a risk of
an accident.
Always observe the traffic conditions care-
fully, and maintain a safe lateral distance.
:Yellow indicator lamp/red warning lamp
When Blind Spot Assist is activated, indicator
lamp :in the exterior mirrors lights up yel-
low at speeds of up to 20 mph (30 km/h). At speeds above 20 mph (30 km/h), the indica-
tor lamp goes out and Blind Spot Assist is
operational.
If a vehicle is detected within the monitoring
range of Blind Spot Assist at speeds above
20 mph (30 km/h), warning lamp :on the
corresponding side lights up red. This warning
occurs when a vehicle enters the blind spot
monitoring range from behind or from the
side. When you overtake a vehicle, the warn- ing only occurs as long as the difference in
speed is less than 7 mph (12 km/h).
The yellow indicator lamp goes out if reversegear is engaged. In this event, Blind Spot
Assist is no longer active.
The brightness of the indicator/warning
lamps is adjusted automatically according to
the ambient light.
Collision warning
:Yellow indicator lamp/red warning lamp
Driving systems125
Driving and parking
Z
Page 128 of 274
If a vehicle is detected in the monitoring range
of Blind Spot Assist and you switch on the
corresponding turn signal, a double warning
tone sounds. Red warning lamp :flashes. If
the turn signal remains on, vehicles detected
are indicated by the flashing of red warninglamp :. There are no further warning tones.
Switching on Blind Spot Assist
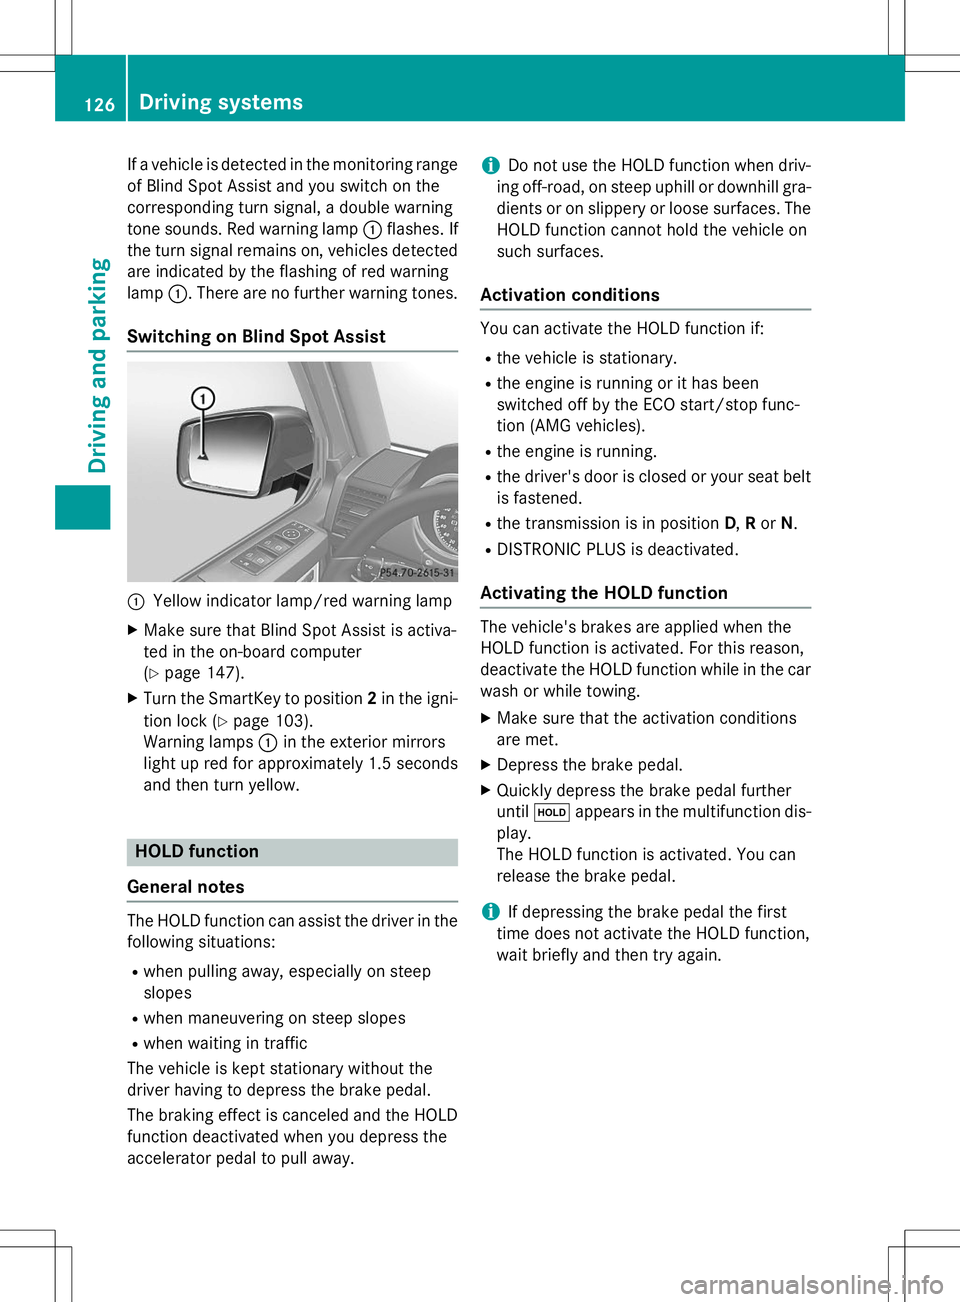
:Yellow indicator lamp/red warning lamp
X Make sure that Blind Spot Assist is activa-
ted in the on-board computer(Y page 147).
X Turn the SmartKey to position 2in the igni-
tion lock ( Ypage 103).
Warning lamps :in the exterior mirrors
light up red for approximately 1.5 seconds
and then turn yellow.
HOLD function
General notes
The HOLD function can assist the driver in the
following situations: R when pulling away, especially on steep
slopes
R when maneuvering on steep slopes
R when waiting in traffic
The vehicle is kept stationary without the
driver having to depress the brake pedal.
The braking effect is canceled and the HOLD
function deactivated when you depress the
accelerator pedal to pull away.
iDo not use the HOLD function when driv-
ing off-road, on steep uphill or downhill gra- dients or on slippery or loose surfaces. The
HOLD function cannot hold the vehicle on
such surfaces.
Activation conditions
You can activate the HOLD function if: R the vehicle is stationary.
R the engine is running or it has been
switched off by the ECO start/stop func-
tion (AMG vehicles).
R the engine is running.
R the driver's door is closed or your seat belt
is fastened.
R the transmission is in position D,R or N.
R DISTRONIC PLUS is deactivated.
Activating the HOLD function
The vehicle's brakes are applied when the
HOLD function is activated. For this reason,
deactivate the HOLD function while in the car
wash or while towing.
X Make sure that the activation conditions
are met.
X Depress the brake pedal.
X Quickly depress the brake pedal furtheruntil ë appears in the multifunction dis-
play.
The HOLD function is activated. You can
release the brake pedal.
iIf depressing the brake pedal the first
time does not activate the HOLD function,
wait briefly and then try again.
126Driving systems
Driving and parking
Page 144 of 274

stopping and backing up in a traffic-free location.
R Before driving, check:
- Trailer tow hitch
- Safety switch for braked trailers
- Safety chains
- Electrical connections
- Lights
- Wheels
R Adjust the exterior mirrors to provide an
unobstructed view of the rear section of the
trailer.
R If the trailer features electronically control-
led brakes, pull away the vehicle/trailer
combination carefully, manually brake
using the brake controller, and check the
brakes for correct function.
R Secure any objects on the trailer to prevent
the cargo from slipping when the vehicle is
in motion.
R If you couple up a trailer, regularly check
the cargo for secure fastening and make
sure that the trailer lamps and (if applica-
ble) the trailer brakes are functioning cor-rectly.
R Bear in mind that the handling will be less
stable when towing a trailer than when driv-
ing without one. Avoid sudden steeringmovements.
R The vehicle/trailer combination is heavier,
accelerates more slowly, has a decreased
gradient climbing capability and a longer
braking distance.
It is more susceptible to side winds and
requires more careful steering.
R If possible, avoid abrupt braking. Depress
the brake pedal moderately at first, so that
the trailer can activate its own brakes. Thenincrease the pressure on the brake pedal.
R If the automatic transmission continues to
shift back and forth between two gears
when driving up or downhill, restrict the
shift range. Select shift range 4, 3, 2,or1.
A lower gear and lower speed reduce the
risk of engine failure. R
When driving downhill, shift to a lower gear
to utilize the engine's braking effect.
Avoid continuous brake application as this
may overheat the vehicle brakes and, if
installed, the trailer brakes.
R If the coolant temperature increases dra-
matically while the air-conditioning system
is switched on, switch off the air-condition-
ing system.
Coolant heat can additionally be dissipated
by opening the windows and by setting the
blower fan and the interior temperature tomaximum.
R When overtaking, pay particular attention
to the extended length of your vehicle/
trailer combination.
Due to the length of your vehicle/trailer
combination, you will have to travel an addi-
tional distance beyond the vehicle you are
overtaking before returning to the previous lane.
Decoupling a trailer
!
Do not disconnect a trailer with an
engaged overrun brake. Otherwise, your
vehicle could be damaged by the rebound- ing of the overrun brake.
X Make sure that the automatic transmission
is set to position P.
X Apply the parking brake.
X Start the engine.
X Close all doors, including the rear door.
X Apply the trailer's parking brake.
X Detach the trailer cable and decouple thetrailer.
X Switch off the engine.
Permissible trailer and drawbar loads
Weight specifications
The gross trailer weight is calculated by add-
ing the weight of the trailer to the weight of
142Towing a trailer
Driving and parking
Page 213 of 274

XVisit a qualified specialist workshop as
soon as possible.
Care
General notes
GWARNING
Many cleaning products can be hazardous.
Some are poisonous, others are flammable.
Always follow the instructions on the particu-
lar container. Always open your vehicle's
doors or windows when cleaning the inside.
Never use fluids or solvents that are not
designed for cleaning your vehicle.
Always lock away cleaning products and keep
them out of reach of children.
!For cleaning your vehicle, do not use any
of the following:
R dry, rough or hard cloths
R abrasive cleaning agents
R solvents
R cleaning agents containing solvents
Do not scrub.
Do not touch the surfaces or protective
films with hard objects, e.g. a ring or ice
scraper. You could otherwise scratch or
damage the surfaces and protective film.
!Do not park the vehicle for an extended
period straight after cleaning it, particularly
after having cleaned the wheels with wheel
cleaner. Wheel cleaners could cause
increased corrosion of the brake discs and
brake pads/linings. For this reason, you
should drive for a few minutes after clean-
ing. Braking heats the brake discs and the
brake pads/linings, thus drying them. The
vehicle can then be parked.
HEnvironmental note
Dispose of empty packaging and cleaning
cloths in an environmentally responsible man-
ner. Regular care of your vehicle is a condition for
retaining the quality in the long term.
Use care products and cleaning agents rec-
ommended and approved by Mercedes-Benz.
Exterior care
Information in the Digital Operator's Manual
In the Digital Operator's Manual you will find
information on the following topics: R Washing by hand
R Power washers
R Cleaning the wheels
R Cleaning the paintwork
R Matte finish care
R Cleaning the windows
R Cleaning wiper blades
R Cleaning the headlamps
R Cleaning the sensors
R Cleaning the rear view camera
R Cleaning the exhaust pipes
R Cleaning chrome parts
R Cleaning the trailer tow hitch
Automatic car wash
GWARNING
Braking efficiency is reduced after washing
the vehicle. There is a risk of an accident.
After the vehicle has been washed, brake
carefully while paying attention to the traffic
conditions until full braking power is restored.
!Never clean your vehicle in a Touchless
Automatic Car Wash as these use special
cleaning agents. These cleaning agents can damage the paintwork or plastic parts.
!Make sure that the automatic car wash is
suitable for the size of the vehicle. Fold in
the exterior mirrors before the vehicle is
washed. The exterior mirrors could other-
wise be damaged.
Care211
Maintenance and care
Z
Page 221 of 274

little energy, thus conserving battery power.
iIf the power supply has been interrupted,
e.g. due to a discharged battery, you will
have to: R set the clock. Information on setting the
clock can be found in the Digital Opera-
tor's Manual.
On vehicles with COMAND and a naviga-
tion system, the clock is set automati- cally.
R reset the head restraints on the front
seats. Information on resetting the head
restraints can be found in the Digital
Operator's Manual.
R reset the function for folding the exterior
mirrors in/out automatically, by folding
the mirrors out once ( Ypage 87).
Charging the battery
GWARNING
During charging and jump-starting, explosive
gases can escape from the battery. There is a
risk of an explosion.
Particularly avoid fire, open flames, creating
sparks and smoking. Ensure there is sufficient
ventilation while charging and jump-starting.
Do not lean over a battery.
GWARNING
Battery acid is caustic. There is a risk of injury.
Avoid contact with skin, eyes or clothing. Do
not inhale any battery gases. Do not lean over
the battery. Keep children away from batter-
ies. Wash away battery acid immediately with
plenty of clean water and seek medical atten- tion.
GWARNING
A discharged battery can freeze at tempera-
tures below freezing point. When jump-start-
ing the vehicle or charging the battery, gases can escape from the battery. There is a risk of
an explosion.
Allow the frozen battery to thaw out before
charging it or jump-starting.
!Only charge the battery using the jump-
starting connection point.
!Only use battery chargers with a maxi-
mum charging voltage of 14.8 V.
!Only charge the installed battery with a
battery charger which has been tested and
approved by Mercedes-Benz. These battery
chargers allow the battery to be charged
while still installed in the vehicle.
If, at low temperatures, the indicator lamps/
warning lamps in the instrument cluster do
not light up, it is highly likely that the dis-
charged battery has frozen. In this case you
may neither jump-start the vehicle nor charge the battery. The service life of a thawed-out
battery may be shorter. The starting charac-
teristics can be impaired, particularly at low
temperatures. Have the thawed-out battery
checked at a qualified specialist workshop.
A battery charger unit specially adapted for
Mercedes-Benz vehicles and tested and
approved by Mercedes-Benz is available as an
accessory. Contact an authorized Mercedes-
Benz Center for information and availability.
Charge the battery in accordance with the
operating instructions for the battery
charger.
The jump-starting connection point is in the
engine compartment ( Ypage 220).
X Read the operating instructions for the bat-
tery charger.
X Open the hood ( Ypage 205).
X Connect the battery charger to the positive
terminal and ground point in the same
order as when connecting the donor bat-
tery in the jump-starting procedure( Y page 220).
Battery (vehicle)219
Roadside Assistance
Z
Page 268 of 274

At temperatures above freezing:X Fill the washer fluid reservoir with a mixture
of water and windshield washer fluid, e.g.
MB SummerFit.
X Add 1 part MB SummerFit to 100 parts
water.
At temperatures below freezing:
X Fill the washer fluid reservoir with a mixture
of water and washer fluid, e.g. MB Winter-Fit.
For the correct mixing ratio refer to the
information on the antifreeze reservoir.
iAdd washer fluid concentrate, e.g. MB
SummerFit or MB WinterFit, to the washer
fluid all year round.
Vehicle data
General notes
Please note that for the specified vehicle
data:
R the heights specified may vary as a resultof:
- tires
- load
- condition of the suspension
- optional equipment
R the vehicle length specified includes the
front license plate adapter.
Dimensions and weights
G 550G 63 AMG
: Upper-
edge clear-
ance75 in -
78.9 in
(1905 mm - 2005 mm)74.5 in - 78.4 in
(1892 mm - 1992 mm)
; Lower-
edge clear-
ance26.8 in - 30.7 in
(680 mm - 780 mm)26.3 in -30.2 in
(667 mm - 767 mm)
= Range of
movement36.7 in
(931 mm)36.7 in
(931 mm)
G 550
Vehicle length183.5 in
(4662 mm)
Vehicle width including
exterior mirrors80.9 in
(2055 mm)
Vehicle height76.8 in
(1951 mm)
Wheelbase112.2 in
(2850 mm)
Minimum ground clear-
ance8.1 in
(205 mm)
Turning radius44.6 ft
(13.60 m)
Gross vehicle weigh t rat-
ing (GVWR)7054.8 lb
(3200 kg)
Gross axle weight rating
(GAWR), front3196.7 lb
(1450 kg)
Gross axle weight rating
(GAWR), rear4188.8 lb
(1900 kg)
G 63 AMG
Vehicle length187.8 in
(4769 mm)
Vehicle width including
exterior mirrors80.9 in
(2056 mm)
266Vehicle data
Technical data