2015 MERCEDES-BENZ E-CLASS ESTATE wipers
[x] Cancel search: wipersPage 6 of 497
Index
....................................................... 4Introduction
......................................... 24 At
ag lance ........................................... 31 Safety
................................................... 43 Opening and closing
...........................93 Seats
,steering wheel and mirrors ..121 Lights and windscreen wipers
.........141 Climat
econtrol ................................. 155 Driving and parking
..........................177 On-boar
dcomputer and displays ....275 Stowing and features
.......................341 Maintenance and care
......................377 Breakdown assistance
.....................393 Wheels and tyres
.............................. 415 Technica
ldata ................................... 469 Contents
3
Page 26 of 497
Vehicl
eidentificatio nnumber
see VIN
Vehicl eidentificatio nplate .............. 472
Vehicl elevel
AIRMATI C...................................... 231
Vehicl elevel (display message) ....... 315
Vehicl emaintenance
see ASSYST PLUS
Vehicl etoolkit.................................. 395
Vehicl eweigh ts................................. 481
Video
Operating the DVD ......................... 284
VIN
Sea t............................................... 472
Type plate ...................................... 472 W
Warning and indicator lamps ABS ................................................ 332
Brakes ........................................... 330
Distance warning signa l................. 338
ESP ®
.............................................. 333
ESP ®
OFF ....................................... 334
Fue ltank ........................................ 336
Genera lnotes ................................ 329
LIM (cruis econtrol) ........................ 212
LIM (DISTRONIC PLUS) .................. 219
LIM (variabl eSPEEDTRONIC )......... 215
Overview .......................................... 35
PASSENGER AIR BAG OFF ............... 45
Reserve fue l................................... 336
Sea tbelt. ....................................... 329
Tyre pressure monitor ................... 339
Warning triangle ................................ 394
Washer fluid
Displa ymessage ............................ 328
Wheel and tyre combinations
see Tyres
Wheel bolt tightenin gtorque ........... 430
Wheel chock ...................................... 427
Wheels
Changing awheel .......................... 426
Changing/replacing ....................... 426
Checking ........................................ 417
Cleaning ......................................... 388
Emergency spare whee l................. 465
Fitting anew whee l........................ 430 Fitting
awheel ............................... 426
Genera lnotes ................................ 431
Important safety notes .................. 416
Information on driving .................... 416
Removing awheel .......................... 429
Storing ........................................... 426
Tightening torque ........................... 430
Wheel size/tyre size ...................... 431
Windowbag
Operation ......................................... 52
Windows
Cleaning ......................................... 388
see Sid ewindows
Windscreen
Demisting ...................................... 164
Windscree nwasher fluid
see Windscree nwashe rs ystem
Windscree nwasher system
Important safety notes .................. 480
Topping up ..................................... 383
Windscree nwipers
Problem (malfunction) ................... 154
Rear window wipe r........................ 152
Replacing the wipe rblade s............ 152
Switching on/of f........................... 151
Winter operation
Important safety notes .................. 418
Radiato rcove r............................... 380
Slippery roa dsurfaces ................... 211
Snow chains .................................. 419
Winter tyres
Limiting the speed (on-board com-
puter) ............................................. 292
M+S tyre s...................................... 418
Wipe rblades
Cleaning ......................................... 389
Important safety notes .................. 152
Replacing (o nthe rea rwindow )..... 153
Replacing (windscreen) .................. 152
Wooden trim (cleaning instruc-
tions) .................................................. 392
Workshop
see Qualifie dspecialist workshop Z
ZONE function Switching on/of f........................... 164 Index
23
Page 144 of 497
Useful information
............................142
Exterior lighting ................................ 142
Interior lighting ................................. 148
Replacing bulbs ................................. 149
Windscreen wipers ...........................151 141Lights and windscreen wipers
Page 145 of 497
Useful information
i This Owner's Manual describes all mod-
els, series and optional equipment for your
vehicle that were available at the time of
going to press. National variation sare pos-
sible. Not ethat your vehicle may not be
equipped with all of the function sdescri-
bed. This is also the case for system sand
function srelevan ttosafety.
i Read the information on qualified special-
ist workshops: (Y page 27). Exterior lighting
Genera
lnotes
For reason sofsafety, Mercedes-Benz recom-
mends that you drive with the lights switched
on even during the daytime. Therefore, your
vehicle is equipped with special daytime driv- ing lamps. In some countries, operation of the
headlamps varies due to legal requirements
and self-imposed obligations. Driving abroad
Genera lnotes If your journey takes you to countries where
vehicles are driven on the opposite side of the
road to the country in which the vehicle is
registered, your headlamps must be switched to symmetrical dipped beam as soon as pos-sible after crossing the border (exception:
vehicles with static LED headlamps). This pre-
vent soncoming traffic from being dazzled.
Symmetrical lights do not illuminate as large
an area of the edge of the carriageway.
Vehicles with static LED headlamps It is not necessary to switc
hyour headlamps
to symmetrical dipped beam when drivin gin
countries where vehicles are driven on the
opposite side of the road to the country in
which the vehicle is registered. Legal require- ment
sare fulfilled without switching the
headlamps to symmetrical dipped beam.
Vehicles with Intelligent Light System X
Before crossing the border, set the head-
lamps to symmetrical dipped beam and
after returnin gback to asymmetrical
dipped beam via the "Dipped-beam head-
lamps for drivin gonthe right/left "function
in the on-board computer (Y page 291).
If the headlamps are converted to symmetri-
cal dipped beam, the "motorway mode" and
"extended range foglamps" function sare not
available. Setting the exterior lighting
Setting options Exterior lightin
gcan be set by:
R using the light switch
R using the combination switch
(Y page 144)
R using the on-board computer
(Y page 290)
Light switch Operation
1
W
Left-han dparkin glamps
2 X
Right-hand parkin glamps
3 T
Side lamps, licenc eplate and instru-
ment cluster lighting 142
Exterior lightingLights and windscreen wipers
Page 146 of 497
4
Ã
Automatic headlamp mode, control-
le dbyt he light sensor
5 L
Dipped-beam/main-bea mhead-
lamps
B R
Rear foglamp
If yo uhearaw arning tone when yo uleave the
vehicle, the lights ma ystill be switched on.
X Turn the light switch to Ã.
The exterio rlighting (excep tthe side lamps/
parking lamps )switches off automaticall yif
you:
R remove the key fro mthe ignition lock
R open the driver's door with the key in posi-
tion 0
Automati cheadlamp mode G
WARNING
Whe nthe light switch is set to Ã,the
dipped-beam headlamps ma ynot be switched
on automaticall yifthereisf og,snow or other
causes of poor visibility du etothe weather
conditions such as spray .There is ariskofan
accident.
In such situations, tur nthe light switch to
L.
The automatic headlamp featur eisonlyan
aid. The driver is responsibl efor the vehicle
lighting at al ltimes.
à is the preferred light switch setting. The
light setting is automaticall yselecte daccord-
ing to the brightness of the ambient light
(exception: poor visibility du etoweather con-
ditions such as fog ,snow or spray):
R key in position 1in the ignition lock: the
side lamps ar eswitched on or off automat-
icall ydepen ding on the brightness of the
ambient light
R with the engine running :ifyouhave
switched on the daytime driving lights func-
tio nint he on-board computer, the daytime
driving lights or the side lamps and dipped-
beam headlamps ar eswitched on or off
automaticall ydepen ding on the brightness
of the ambient light X
To switc honautomatic headlamp
mode: turnthe light switch to Ã.
The daytime driving lights improv ethe detect-
ability of your vehicl eduring the day. Here,
the daytime driving lights functio nmustbe
switched on via the on-board computer
(Y page 290).
When the side lamps and dipped-beam head- lamps ar eswitched on, the green T(side
lamps )and L (dipped-bea mheadlam ps)
indicator lamps in the instrument cluster light
up.
Dipped-beam headlamps G
WARNING
Whe nthe light switch is set to Ã,the
dipped-beam headlamps ma ynot be switched
on automaticall yifthereisf og,snow or other
causes of poor visibility du etothe weather
conditions such as spray .There is ariskofan
accident.
In such situations, tur nthe light switch to
L.
When the ignition is switched on and the light
switch is in the Lposition, the side lamps
and dipped-beam headlamps ar eswitched on
eve nift he light sensor does not sens edark
ambient light conditions. Thi sisadvanta-
geou swhent her eisf og or rain.
X To switc honthe dipped-beam head-
lamps: turnthe key in the ignition lock to
position 2or start the engine.
X Turn the light switch to L.
The green Lindicator lamp in the instru-
ment cluster lights up.
Rea rfoglamp
The rea rfoglamp improves the visibility of
your vehicl einheavyfog for the following
traffic. Please observe the country-specific
laws on the us eofrearfoglamps.
X To switc honthe rear foglamp: turnthe
key in the ignition lock to position 2or start
the engine.
X Turn the light switch to LorÃ. Exterior lighting
143Lights andwindscreen wipers Z
Page 147 of 497
X
Press the Rbutton.
The yellow Rindicator lamp in the
instrument cluster lights up.
X To switch off the rear foglamp: press the
R button.
The yellow Rindicator lamp in the
instrument cluster goes out.
Side lamps ! If the batter
yhas been excessively dis-
charged, the side lamps or parking lamps
are automatically switched off to enable
the next engine start .Always park your
vehicle safely and sufficiently lit according
to legal standards. Avoid the continuous
use of the Tside lamps for several
hours. If possible, switch on the Xright
or the Wleft parking lamp.
X To switch on: turn the light switch to T.
The green Tindicator lamp in the instru-
ment cluster lights up.
Parking lamps
Switching on the parking lamps ensures that
the corresponding side of the vehicle is illu-
minated.
X To switch on the parking lamps: the key
is not in the ignition lock or it is in posi-
tion 0.
X Turn the light switch to W(left-hand side
of the vehicle) or X(right-hand side of
the vehicle). Combination switch
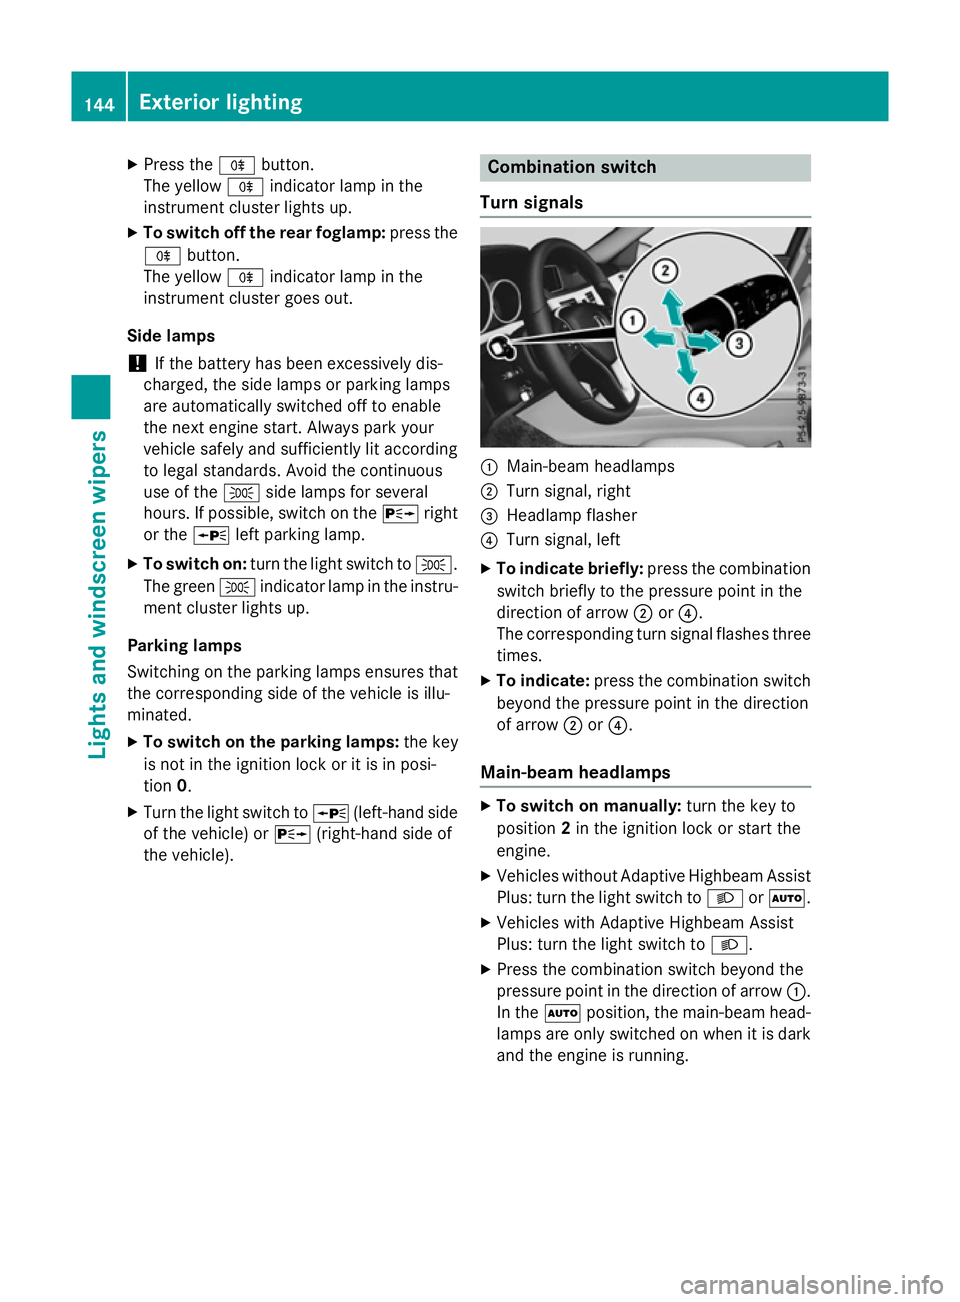
Turns ignals :
Main-beam headlamps
; Turn signal, right
= Headlamp flasher
? Turn signal, left
X To indicate briefly: press the combination
switch briefly to the pressure point in the
direction of arrow ;or?.
The corresponding turn signal flashes three
times.
X To indicate: press the combination switch
beyond the pressure point in the direction
of arrow ;or?.
Main-beam headlamps X
To switch on manually: turn the key to
position 2in the ignition lock or start the
engine.
X Vehicles without Adaptive Highbeam Assist
Plus: turn the light switch to LorÃ.
X Vehicles with Adaptive Highbeam Assist
Plus: turn the light switch to L.
X Press the combination switch beyond the
pressure point in the direction of arrow :.
In the Ãposition, the main-beam head-
lamps are only switched on when it is dark
and the engine is running. 144
Exterior lightingLights and windscreen wipers
Page 148 of 497
The blue
Kindicator lamp in the instru-
ment cluster lights up when the main-beam headlamps are switched on.
X To deactivate: move the combination
switch back to its normal position.
The blue Kindicator lamp in the instru-
ment cluster goes out.
Vehicles with Adaptive Highbeam Assist
Plus: when Adaptive Highbeam Assist Plus is
activated, it automatically controls activation
and deactivation of the main-beam head-
lamps (Y page 147).
Headlam pflasher X
To switch on: turn the key in the ignition
lock to position 1or 2,ors tart the engine.
X Pull the combination switch in the direction
of arrow =. Hazard warning lamps
X
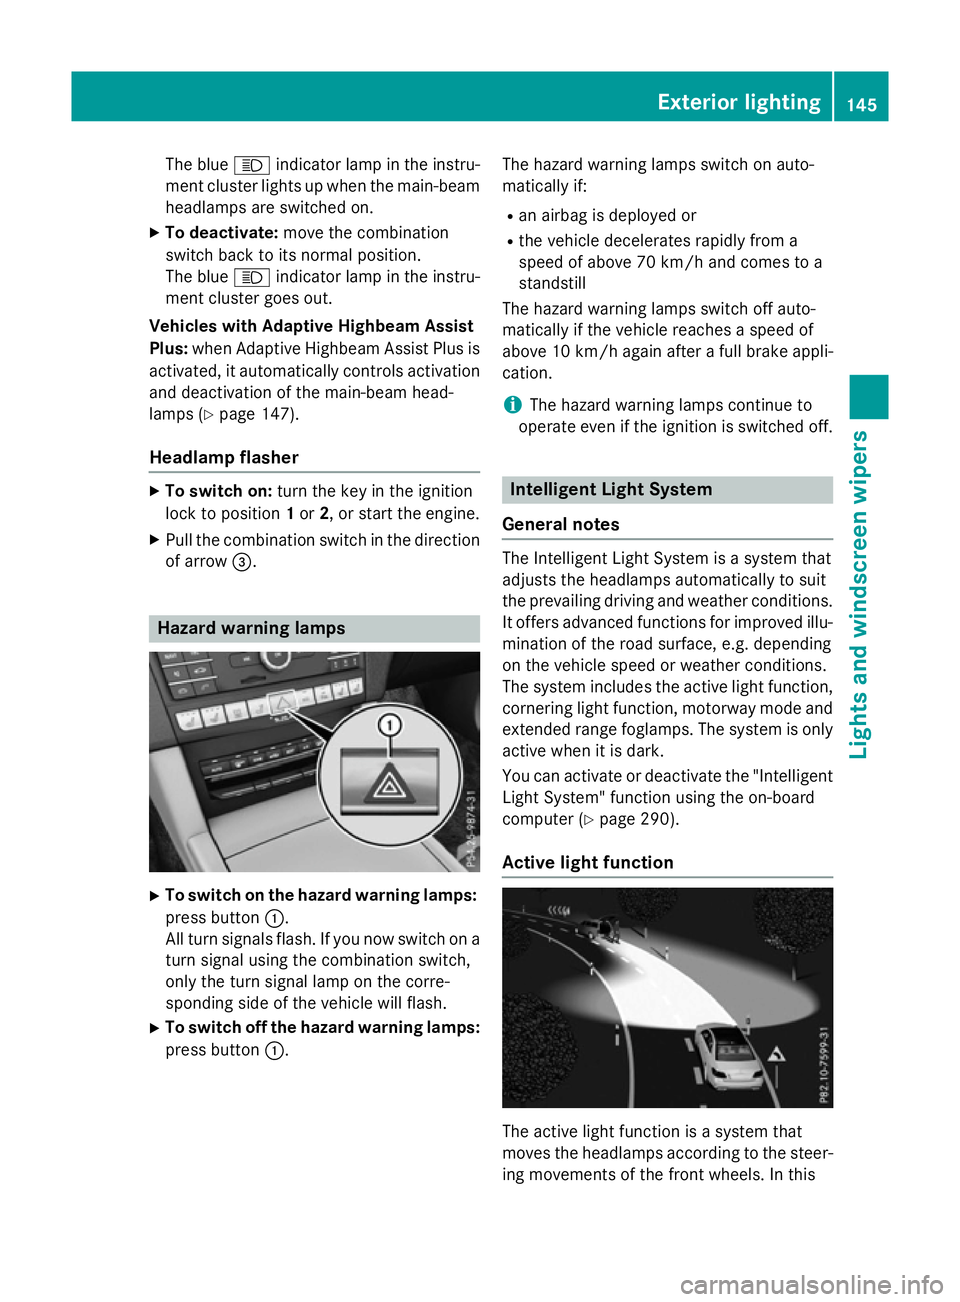
To switch on the hazard warning lamps:
press button :.
All turn signals flash. If you now switch on a turn signal using the combination switch,
only the turn signal lamp on the corre-
sponding side of the vehicle will flash.
X To switch off the hazard warning lamps:
press button :. The hazard warning lamps switch on auto-
matically if:
R an airbag is deployed or
R the vehicle decelerates rapidly from a
speed of above 70 km/ha nd comes to a
standstill
The hazard warning lamps switch off auto-
matically if the vehicle reaches aspeed of
above 10 km/ha gain afterafull brake appli-
cation.
i The hazard warning lamps continue to
operate even if the ignition is switched off. Intelligent Light System
General notes The Intelligent Light System is
asystem that
adjusts the headlamps automatically to suit
the prevailing driving and weather conditions.
It offers advanced functions for improved illu-
mination of the road surface, e.g. depending
on the vehicle speed or weather conditions.
The system includes the active light function, cornering light function, motorway mode and
extended range foglamps. The system is only active when it is dark.
You can activate or deactivate the "IntelligentLight System" function using the on-board
computer (Y page 290).
Active light function The active light function is
asystem that
moves the headlamps according to the steer-
ing movements of the front wheels. In this Exterior lighting
145Lights and windscreen wipers Z
Page 149 of 497
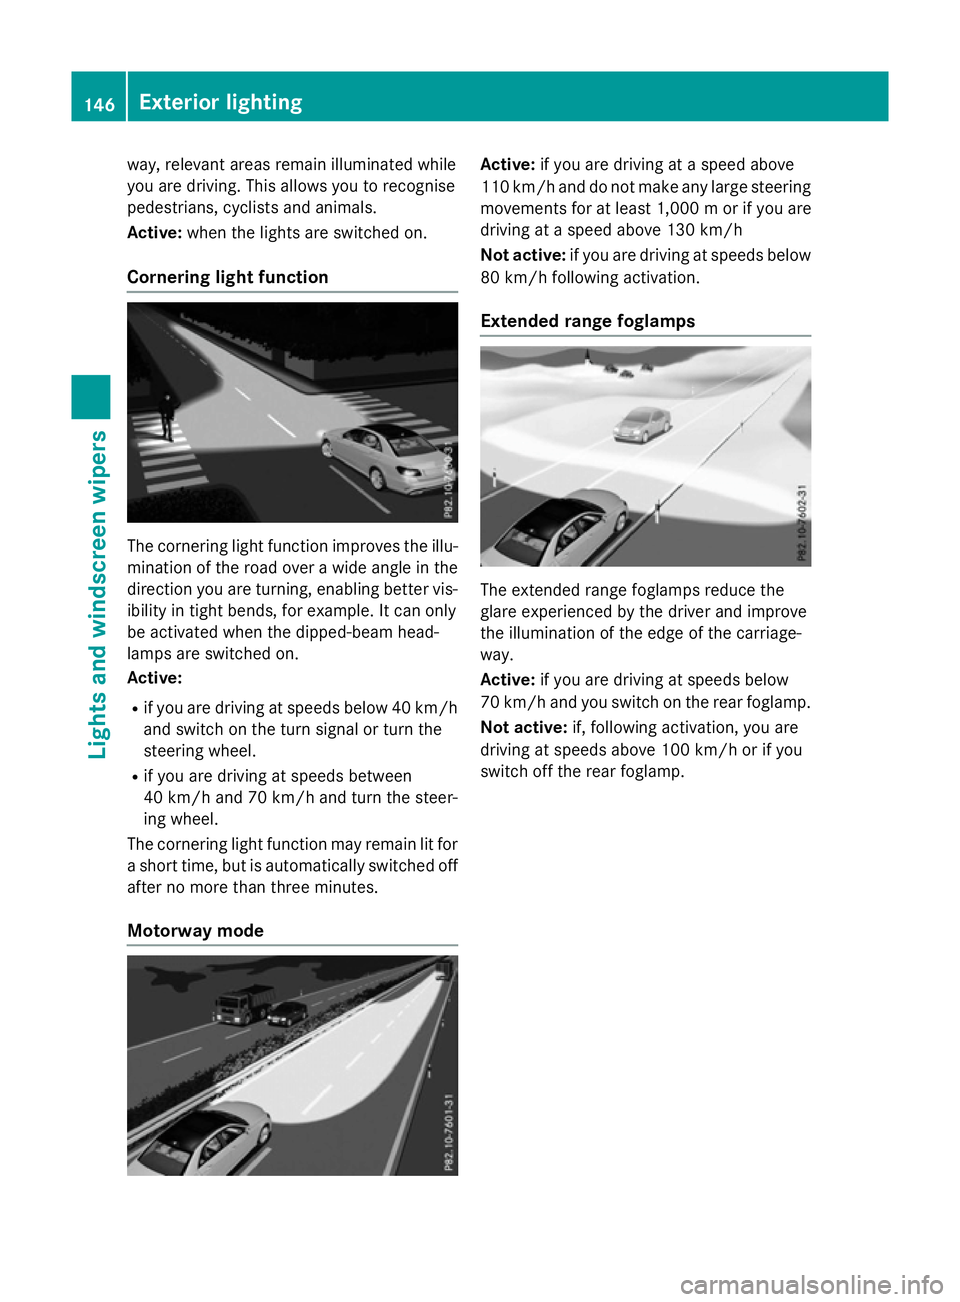
way, relevant areas remain illuminated while
you are driving .This allows you to recognise
pedestrians ,cyclist sand animals.
Active: when thelight sare switche don.
Cornering light function The cornering light function improves th
eillu-
minatio noftheroad over awide angle in the
directio nyou are turning, enabling better vis-
ibilit yint ight bends, for example. It can only
be activated when th edipped-beam head-
lamps are switche don.
Active:
R if you are driving at speed sbelow 40 km/h
and switch on th eturns ignal or tur nthe
steerin gwheel.
R if you are driving at speed sbetween
40 km/h and 70 km/h and tur nthe steer-
ing wheel.
The cornering light function may remain lit for as hor ttime, but is automatically switche doff
after no mor ethant hree minutes.
Motorwa ymode Active:
if you are driving at aspeed above
11 0k m/ hand do not mak eany large steering
movements for at least 1,000 morify ou are
driving at aspee dabove 130 km/h
Not active: if you are driving at speeds below
80 km/h following activation.
Extended range foglamps The extended range foglamps reduce the
glare experienced by the drive
rand improve
the illumination of the edge of the carriage-
way.
Active: if you are driving at speeds below
70 km/h and you switch on the rear foglamp.
Not active: if, following activation, you are
driving at speeds above 100 km/h or if you
switch off the rear foglamp. 146
Exterio
rlightingLights and windscreen wipers