2015 MERCEDES-BENZ E-CLASS ESTATE service
[x] Cancel search: servicePage 83 of 497
When driving at
aspee dabove 30 km/h :if
you depress the brake peda lsharply,B AS
PLUS automatically increases the brake pres- sure to adegre esuited to the traffic situation.
BAS PLUS provides braking assistance in haz- ardous situations with vehicles in front within
as pee drange between 7km/h and
250 km/h.
Up to aspee dofa pproximately 70 km/h, BAS
PLUS may react to:
R stationary objects in the path of yourv ehi-
cle, e.g. stoppe dorparked vehicles
R pedestrians in the path of yourv ehicle
R obstacles crossing yourp ath, which move
in the detection range of the sensors and
are recognised by them
i If BAS PLUS demands particularly high
braking force, preventative passenger pro-
tection measures (PRE-SAFE ®
)a re activa-
ted simultaneously.
X Keep the brake peda ldepressed until the
emergency braking situation is over.
ABS prevents the wheels from locking.
BAS PLUS is deactivated and the brakes func-
tion as usual, if:
R you release the brake pedal
R there is no longer arisk of collision
R no obstacl eisdetected in front of your
vehicle
R you depress the accelerator pedal
R you activate kickdown COLLISIONP
REVENTIONASSIST
PLUS
General notes COLLISION PREVENTIO
NASSIST PLUS con-
sists of adistance warning function with an
autonomous braking function and Adaptive
Brake Assist.
COLLISION PREVENTIO NASSIST PLUS can
help you to minimise the risk of acollision with the vehicl
einfront or reduce the effects
of such acollision.
If COLLISION PREVENTIO NASSIST PLUS
detects that there is arisk of acollision, you
willbew arned visuallya nd acoustically.Ify ou
do not react to the visual and audible collision warning, autonomous braking can be initiated
in critical situations. If you apply the brake
yourself in acritical situation, the COLLISION
PREVENTIO NASSIST PLUS Adaptive Brake
Assist assists you.
Switchin gthe soun don/off COLLISION PREVENTIO
NASSIST PLUS is
activated after every ignition cycle .You can
activate or deactivate COLLISION PREVEN-
TION ASSIST PLUS in the on-board computer
(Y page2 87). When deactivated, the dis-
tance warning function and the autonomous
braking function are alsod eactivated.
If COLLISION PREVENTIO NASSIST PLUS is
deactivated, the æsymbol appears in the
assistance graphics display.
Important safety notes In particular, the detection of obstacles can
be impaired in the case of:
R dirt on the sensors or obscured sensors
R snow or heavy rain
R interference by other rada rsources
R strong rada rreflections, for example, in
multi-storey car parks
R an arrow vehicl etravelling in front, e.g. a
motorcycle
R av ehicl etravelling in front on adifferent
line
R new vehicles or after aservice on the COL-
LISION PREVENTIO NASSIST PLUS system
Please observe the information in the sec-
tion on running-in the vehicle
(Y page1 78).
Following damage to the front end of the vehi-
cle, have the configuration and operation of
the rada rsensor checked at aqualified spe- 80
Driving safety systemsSafety
Page 153 of 497
Do not us
eabulbt hath as been dropped or if
its glas stub eh asbeen scratched.
Th eb ulbm ayexplode if:
R yo ut ouch it
R it is hot
R yo ud ropit
R yo us cratch it
Onl yoperate bulb sinenclose dlam ps
designe dfor tha tpurpose .Onlyf it spare
bulb soft he same typ eand the specifie dvolt-
age.
Marks on the glas stub er educe the service
life of the bulbs. Do not touch the glas stube
with your bare hands .Ifnecessary ,clean the
glas stub ew henc oldw itha lcohol or spirit and
ru bito ff with alint-fre ecloth.
Protect bulb sfromm oisture during opera-
tion. Do not allo wbulbs to come into contact
with liquids.
Replace onl ythe bulb sliste d( Ypage 150).
Have the bulb sthatyou cannot replace your-
self replaced at aquali fied specialis twork-
shop.
If yo urequire assistance replacing bulbs, con-
sult aquali fied specialis tworkshop.
If the new bulb still does not ligh tup,consult
aq uali fied specialis tworkshop.
Bulb sand lamps ar eanimportant aspect of
vehicl esafety .You must therefore make sure
tha tthese functio ncorrectl yatalltimes.
Have the headlamp setting checked regularly.
Vehicle swithI ntelligent Light System
Th ef ront and rea rlight clusters of your vehi-
cle ar eequippe dwithL ED ligh tbulbs .Don ot
replace the bulb syoursel f. Contact aquali fied
specialis tworkshop which ha sthe necessary
specialis tknowledg eand tools to carry out
the work required.
Lamps ar eanimportant aspect of vehicle
safety .You must therefore make sure that
these functio ncorrectl yatalltimes .Havet he
headlamp setting checked regularly. Overvie
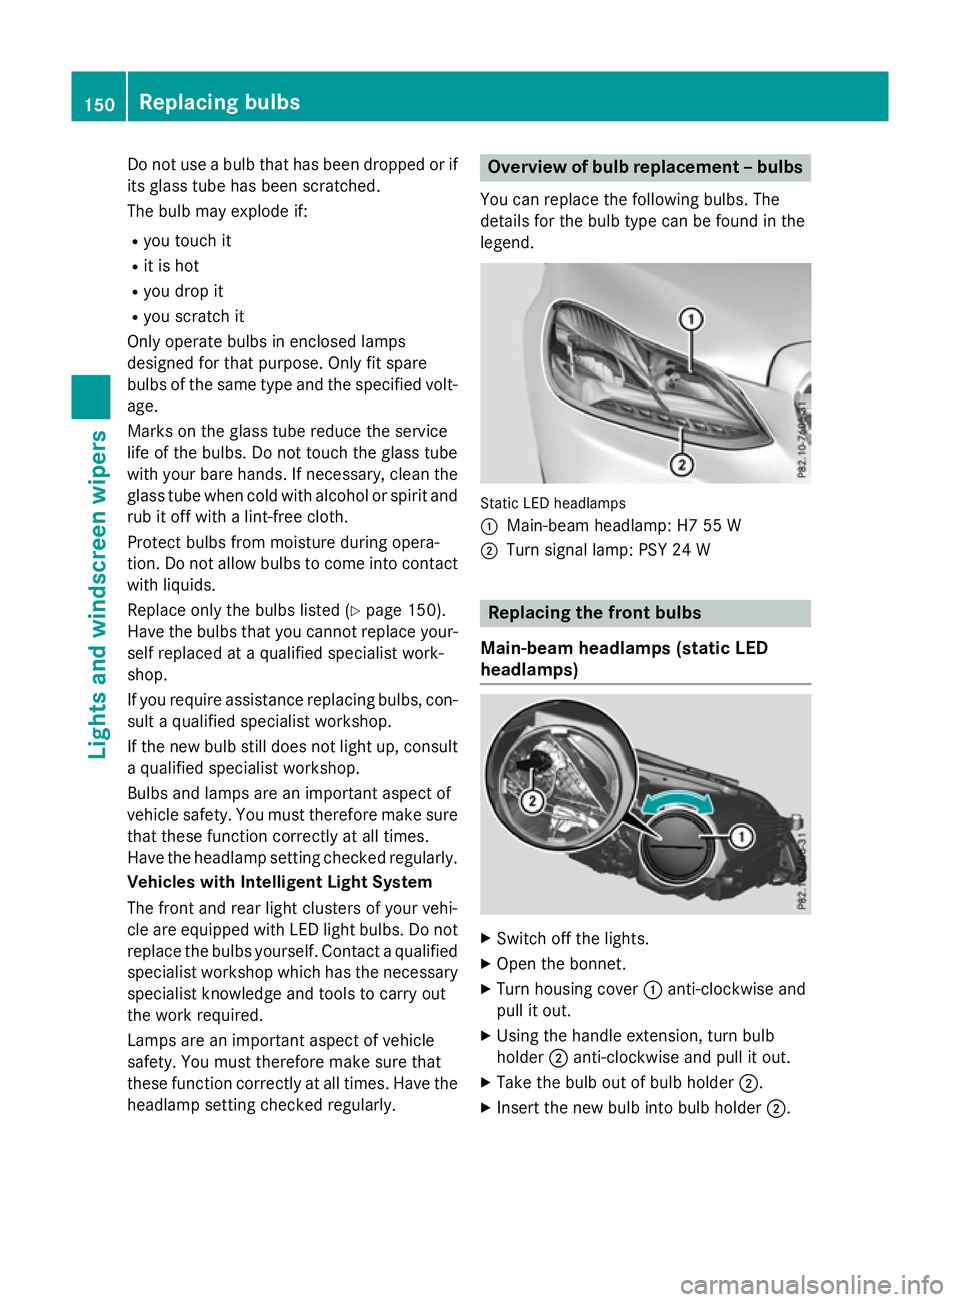
wofbulbr eplacement –bulbs
Yo uc an replace the following bulbs. The
details for the bulb typ ecan be found in the
legend. Static LED headlamps
:
Main-bea mheadlam p: H7 55 W
; Turn signa llam p: PSY 24 W Replacin
gthe front bulbs
Main-bea mheadlamps (static LED
headlamps) X
Switch off the lights.
X Open the bonnet.
X Turn housing cover :anti-clockwise and
pull it out.
X Using the handl eextension, tur nbulb
holder ;anti-clockwise and pull it out.
X Take the bulb ou tofbulbh older ;.
X Insert the new bulb into bulb holder ;.150
Replacin
gbulbsLights and windscreen wipers
Page 159 of 497
Useful information
i This Owner's Manual describes all mod-
els, series and optional equipment for your
vehicle that were available at the time of
going to press. National variation sare pos-
sible. Not ethat your vehicle may not be
equipped with all of the function sdescri-
bed. This is also the case for system sand
function srelevan ttosafety.
i Read the information on qualified special-
ist workshops: (Y page 27). Overview of climat
econtrol systems Genera
lnotes
Observ ethe settings recommende donthe
following pages. The windows could other-
wise mist up.
To preven tthe windows from misting up:
R switc hoff climat econtro lonly briefly
R switc hona ir-recirculation mode only
briefly
R switc hont he coolin gwith air dehumidifi-
cation function
R switc hont he windscreen demisting func-
tion briefly, if required
Climate contro lregulates the temperature
and the humidity in the vehicle interior and
filter sundesirable substances out of the air.
Climate contro lisonly operational when the
engin eisrunning. Optimum operation is only
achieved when the side windows and the roof
are closed.
The residual heat function can only be acti-
vated or deactivated with the ignition
switched off (Y page 167).
i Ventilate the vehicle for
abrief period
during warm weather, e.g. using the con-
venience openin gfeature (Y page 111).
This will speed up the coolin gprocess and
the desired interior temperature will be
reached more quickly. i
The integrated filter filter
sout most par-
ticles of dust and soot and completely fil-
ter sout pollen. It also reduces gaseous pol-
lutant sand odours. Aclogged filter reduces
the amount of air supplied to the vehicle
interior. For this reason ,you should always
observ ethe interval for replacin gthe filter,
which is specified in the Service Booklet. As this depends on environmental conditions,
e.g. heavy air pollution, the interval may be shorter than stated in the Service Booklet.
i It is possible that the residual heat func-
tion may be activated automatically an hour
after the key has been removed. The vehi-
cle is then ventilated for 30 minutes to dry the automatic climat econtrol. 156
Overview of climat
econtrol systemsClimat econtrol
Page 181 of 497
Useful information
i This Owner's Manual describes all mod-
els, series and optional equipment for your
vehicle that were available at the time of
going to press. National variation sare pos-
sible. Not ethat your vehicle may not be
equipped with all of the function sdescri-
bed. This is also the case for system sand
function srelevan ttosafety.
i Read the information on qualified special-
ist workshops: (Y page 27). Running-in notes
Important safet
ynotes
In certain drivin gand drivin gsafet ysystems,
the sensors adjust automatically while acer-
tain distance is being driven after the vehicle has been delivered or after repairs. Full sys-
tem effectiveness is not reached until the end
of this teach-in process.
Brak epads/linings and discs that are either
new or have been replaced only achieve opti- mum brakin geffec tafter several hundred kil-
ometres of driving. Compensate for the
reduced brakin geffec tbya pplying greater
forc etot he brake pedal. The first 1,500 km
If you treat the engin ewith sufficient care
from the very start ,you will be rewarded with
excellent performanc efor the remainder of
the engine's life.
R Driv eatv arying road speeds and engine
speeds for the first 1,50 0km.
R Avoid overstraining the vehicle during this
period, e.g. drivin gatfull throttle.
R Change gear in good time, before the rev
counter needle is Ôof the way to the red
area of the rev counter. R
Do not shift down agear manually in order
to brake.
R Vehicles with automatic transmission:
try to avoid depressin gthe accelerator
pedal beyond the point of resistance (kick-
down).
Additional running-in notes for AMG vehicles:
R Do not drive at speeds above 140 km/ hfor
the first 1,500 km.
R Only allow the engine to reach amaximum
engine speed of 4,500 rpm briefly.
After 1,500 km, you may graduall yaccelerate
the vehicle to full road and engine speeds.
i You should also observe these notes on
running-in if the engine or parts of the drive
train on your vehicle have been replaced. AMG vehicles with self-locking rear
axle differential
Your vehicle is equipped with aself-locking
differential on the rear axle.
Change the oil to improve protection of the
rear axle differential:
R after arunning-in period of 3,000 km
R every 50,000 km or 3years
These oil changes prolong the service life of
the differential. Have the oil change carried
out at aqualified specialist workshop. Driving
Important safety notes
G
WARNING
Object sinthe driver's footwell may restrict
the clearance around the pedals or block a
depressed pedal. This jeopardises the oper-
ating and road safety of the vehicle. There is a risk of an accident.
Stow all object ssecurely in the vehicle so that
they do not get into the driver's footwell.
Always fit the floormats securely and as pre-
scribed in order to ensure that there is always 178
DrivingDriving and parking
Page 213 of 497
New brak
epads/linings Brake pads/lining
sand discs tha tare either
new or have been replaced onl yachieve opti-
mu mb raking effect after several hundred kil-
ometres of driving. Compensate for the
reduced braking effect by applying greater
force to the brake pedal.
For safety reasons, Mercedes-Benz recom-
mend stha tyou onl yhaveb rake pads/linings
fitted to your vehicl ewhich have been
approved for Mercedes-Benz vehicles or
which correspond to an equivalent quality
standard. Brake pads/lining swhich have not
been approved for Mercedes-Benz vehicles or
which ar enot of an equivalent quality could
affec tyou rv ehicle' soperating safety.
AM Gh igh-performanc eand ceramic
brakes Th
eh igh- performance brake syste misonly
availabl eonAMG vehicles.
Th eA MG brake systems ar edesig nedf or
heav yloads .Thism aylead to noise when
braking .Thisisd ependent on:
R speed
R braking force
R environmenta lconditions ,suc hast emper-
ature and humidity
Th ew earofi ndividua lcomponents of the
brake system, such as the brake pads/linings
or brake discs ,depen ds on the individua ldriv-
ing style and operating conditions.
For thi sreason, it is impossibl etostate a
mileag e(service life) tha twillbev alidunder
al lc ircumstances .Anaggressive driving style
will lead to high wear .You can obtai nfurther
information abou tthisf romy ourM ercedes-
Benz Service Centre.
Brake pads/lining sand discs tha tare either
new or have been replaced onl yachieve opti-
mu mb raking effect after several hundred kil-
ometres of driving. Compensate for the
reduced braking effect by applying greater
force to the brake pedal. Alway sbeawareofthi
sa nd adap tyou rd riving and braking
accordingly during the running-in period.
Excessive heav ybraking results in corre-
spondingly high brake wear .Obser ve the
brake wear warning lamp in the instrument
cluste rand note any brake status messages
in the multifunctio ndisplay .Ifyouregularly
drive at high speeds ,itisparticularl yimpor-
tant to have the brake syste mchecked and
maintaine dregularly. Driving on we
troads
Aquaplaning If water ha
saccumulate dtoacertaindepth
on the roa dsurface, there is adangerofa qua-
planing occurring, eve nif:
R yo ua redriving at lo wspeeds
R the tyres have adequate trea ddepth
For thi sreason, drive in the following manner
in the event of heav yrainorinc onditions in
which aquaplaning can occur:
R lowe ryours peed
R avoi dtyrer uts
R avoi dsudde nsteering movements
R brake carefully
Driving on flooded roads !
Bea
rinm indt hatv ehicles travelling in
front or in the opposite directio ncreate
waves .Thism aycause the maximum per-
missibl ewater depth to be exceeded.
Thes enote sm ustbeo bservedu nder all
circumstances .You could otherwis edam-
ag et he engine ,the electronics or the trans-
mission. 210
Driving
tipsDriving an dparking
Page 288 of 497
You will see one of the followin
gdisplay mes-
sages in the multifunction display:
R Telephon eready
Telephon eready or the name of the net-
work provider: the mobile phon ehas found
an etwork and is ready to receive.
R Telephon eNoservice
Telephon eNoservice:t here is no net-
work available or the mobile phon eis
searching for anetwork.
i You can obtain further information about
suitable mobile phones and connecting
mobile phones via Bluetooth ®
:
R fro ma ny Mercedes-Ben zService Centre
R on the Internet at http://
www.mercedes-benz.com/connect
Accepting acall X
Press the 6button on the steering
wheel to accept an incomin gcall.
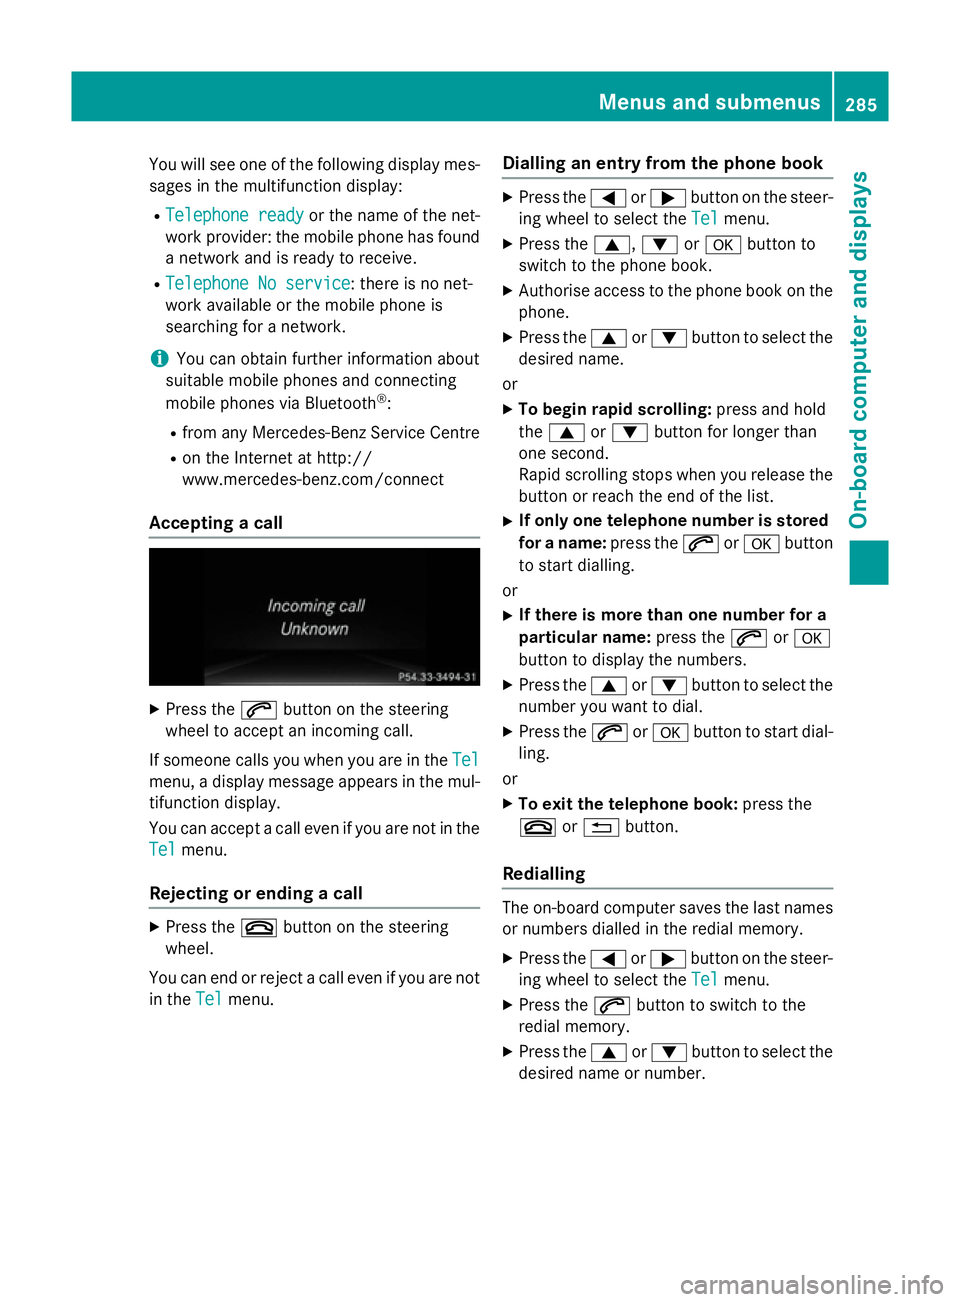
If someone calls you when you are in the Tel Tel
menu, adisplay message appears in the mul-
tifunction display.
You can accept acall even if you are not in the
Tel
Tel menu.
Rejecting or ending acall X
Press the ~button on the steering
wheel.
You can end or reject acall even if you are not
in the Tel
Tel menu. Dialling an entr
yfromt hephone book X
Press the =or; button on the steer-
ing wheel to selec tthe Tel Tel menu.
X Press the 9,:ora button to
switc htot he phon ebook.
X Authoris eaccess to the phon ebook on the
phone.
X Press the 9or: button to selec tthe
desired name.
or
X To begin rapid scrolling: press and hold
the 9 or: button for longer than
one second.
Rapid scrolling stops when you release the
button or reach the end of the list.
X If only one telephone number is stored
for aname: press the 6ora button
to star tdialling.
or
X If there is mor ethano ne number for a
particular name: press the6ora
button to display the numbers.
X Press the 9or: button to selec tthe
number you want to dial.
X Press the 6ora button to star tdial-
ling.
or
X To exit th etelephone book: press the
~ or% button.
Redialling The on-board computer saves the last names
or numbers dialled in the redial memory.
X Press the =or; button on the steer-
ing wheel to selec tthe Tel Tel menu.
X Press the 6button to switc htothe
redial memory.
X Press the 9or: button to selec tthe
desired name or number. Menus and submenus
285On-board computer and displays Z
Page 291 of 497
Activating/deactivating Steering
Assis tand Stop&Go Pilot X
Press the =or; buttononthesteer-
ing whee ltos elect the Assist.
Assist. menu.
X Using 9or:,s electDTR+:
DTR+: steer.
steer.
asst.
asst.
X Press the abutton.
The curren tselection is displayed.
X To activate/deactivate: press thea
butto nagain.
When Steering Assis tand Stop&Go Pilot
are activated, th emultifunction display
shows the DTR+: steering assistant
DTR+: steering assistant
On
On message.
Further information about DISTRONI CPLUS
wit hS teering Assis tand Stop&Go Pilot
(Y page 226).
Activating/deactivating ATTENTION
ASSIST X
Press the =or; buttononthesteer-
ing whee ltos elect the Assist.
Assist. menu.
X Press the 9or: buttontos elect
Attention Assist
Attention Assist .
X Press the abutton.
The curren tselection is displayed.
X Press ato confirm.
X Press the :or9 buttontos etOff Off ,
Standard
Standard orSensitive
Sensitive .
X Press the abuttontos avet he setting.
When ATTENTION ASSIST is deactivated,
the é symbol appear sinthemultifunc-
tion display in th eassistanc egraphic dis-
play.
Fo rfurther information about ATTENTION
ASSIST ,see (Y page 253).
Activating/deactivating Blind Spot
Assist X
Press the =or; buttononthesteer-
ing whee ltos elect the Assist.
Assist. menu.
X Press the 9or: buttontos elect
Blind Spo tAssist
Blind Spo tAssist . X
Press the abutton.
The curren tselection appears.
X To activate/deactivate: press thea
butto nagain.
Further information about Blind Spot Assist
(Y page 257).
Further information about Active Blind Spot
Assis t(Y page 261).
Activating/deactivating Lan eKeeping
Assist X
Press the =or; buttononthesteer-
ing whee ltos elect the Assist. Assist.menu.
X Press the 9or: buttontos elect
Lan eK eep. Assist
Lan eK eep. Assist .
X Press the abutton.
The curren tselection appears.
X Press ato confirm.
X Press the :or9 buttontos etOff
Off ,
Standard
Standard orAdaptive
Adaptive.
X Press the abuttontos avet he setting.
When Lan eKeepin gAssistorA ctiveLane
Keepin gAssistisa ctivated, th emultifunc-
tion display shows th elan em arking sas
bright lines in th eassistanc egraphic.
Further information about Lan eKeeping
Assis t(Ypage 259).
Further information about Active Lan eKeep-
ing Assis t(Y page 263). Service menu
Dependin
gontheequipmen tfitte dint he
vehicle, you hav ethe followin goption sinthe
Serv.
Serv. menu: 288
Menu
sand sub menusOn-boardcomputer an ddisplays
Page 345 of 497
Useful information
i This Owner's Manual describes all mod-
els, series and optional equipment for your
vehicle that were available at the time of
going to press. National variation sare pos-
sible. Not ethat your vehicle may not be
equipped with all of the function sdescri-
bed. This is also the case for system sand
function srelevan ttosafety.
i Read the information on qualified special-
ist workshops: (Y page 27). Stowage areas
Loading guidelines
G
WARNING
If objects, luggage or loads are not secured or not secured sufficiently, they could slip, tip
over or be flung around and thereby hit vehicle
occupants .There is arisk of injury, especially
when brakin gorabruptly changing directions.
Always stor eobjects so that they cannot be
flung around. Secure objects, luggage or
loads against slipping or tippin gbefore the
journey. G
WARNING
Combustion engines emit poisonous exhaust
gases such as carbon monoxide. Exhaust
gases can enter the vehicle interior if the boot
lid/tailgat eisopen when the engin eisrun-
ning, especially if the vehicle is in motion.
There is arisk of poisoning.
Always switc hoff the engin ebefore opening
the boot lid/tailgate. Never drive with the
boot lid/tailgat eopen. G
WARNING
The exhaust tail pipe and tail pipe trim can
becom every hot. If you come int ocontact
with thes eparts of the vehicle, you could burn
yourself. There is arisk of injury. Always be particularly careful around the
exhaust tail pipe and the tail pipe trim .Allow
thes ecomponents to cool down before touch-
ing them.
The handling characteristic sofaladen vehi-
cle are dependen tonthe distribution of the
load within the vehicle. For this reason ,you
should observ ethe following notes when
transporting aload:
R neve rexceed the maximum permissible
gross vehicle weight or the permissible axle loads for the vehicle (includin goccupants).
R the boot/luggage compartment is the pre-
ferred place to stor eobjects.
R position heavy loads as far forwards as pos-
sible and as low down in the boot/luggagecompartment as possible.
R the load must not protrude above the upper
edge of the seat backrests.
R always place the load against the rear or
fron tseat backrests .Make sure that the
seat backrests are securely locked into
place.
R always place the load behind unoccupied
seats if possible.
R use the lashing eyelets and the luggage
net stot ransport loads and luggage.
R only use lashing eyelets and fastenin gcom-
ponents that are suitable for the weight and size of the load.
R when transporting objects in the luggage
compartment,t he combined luggage cover
and net must always be installed (luggage
compartment cove rand safet ynet).
R secure the load with sufficiently strong and
wear-resistan tlashing material. Pad sharp
edges for protection.
i Load restraint
sare available at any quali-
fied specialist workshop, e.g. aMercedes-
Ben zService Centre. 342
Stowage areasStowing and features