2015 MERCEDES-BENZ E-CLASS COUPE battery
[x] Cancel search: batteryPage 8 of 345

B
Back button ....................................... 257
Bag hook ............................................ 269
Ball coupling
Folding in ....................................... 203
Folding in/out ................................ 203
Folding out ..................................... 203
BAS (Brake Assist System) ................. 62
BAS PLUS (Brake Assist System
PLUS) with Cross-Traffic Assist
Function/note s................................ 62
BAS PLUS with Cross-Traffic Assist
(Brake Assist PLUS with Cross-
Traffic Assist)
Important safety notes .................... 63
Battery (key)
Checking .......................................... 77
Important safety notes .................... 77
Replacing ......................................... 77
Battery (vehicle)
Charging ........................................ 304
Display message ............................ 232
Important safety notes .................. 302
Jump starting ................................. 305
Belt
see Seat belts
Belt tensioner
Activation ......................................... 44
Blind Spot Assist
Activating/deactivating (on-
board computer) ............................ 215
Display message ............................ 235
Notes/function .............................. 193
Trailer towing ................................. 195
see Active Blind Spot Assist
BlueTEC (AdBlue ®
) ............................. 332
Bluetooth ®
Connecting another mobile
phone ............................................ 260
Searching for a mobile phone ........ 259
See also Digital Owner's Manua l... 256
Telephony ...................................... 259
Bonnet
Active bonnet (pedestrian protec-tion) ............................................... 283
Closing ........................................... 285
Display message ............................ 243 Important safety notes .................. 283
Opening ......................................... 284
Boot
Emergency release .......................... 84
Important safety notes .................... 82
Locking separately ........................... 83
Opening (automatically from
inside) .............................................. 83
Opening/closing (manually from
outside) ............................................ 83
Boot lid
Display message ............................ 243
Opening dimensions ...................... 335
Boot load (maximum) ........................ 335
Brake Assist
see BAS (Brake Assist System)
Brake fluid
Display message ............................ 225
Notes ............................................. 333
Brake force distribution
see EBD (electronic brake force
distribution)
Brake lamps
Adaptive ........................................... 66
Display message ............................ 229
Brakes
ABS .................................................. 62
Adaptive Brake Assist ...................... 66
BAS .................................................. 62
BAS PLUS with Cross-Traffic
Assist ............................................... 62
Brake fluid (notes) ......................... 333
Display message ............................ 223
Driving tips .................................... 153
HOLD function ............................... 170
Important safety notes .................. 153
Parking brake ................................ 152
Warning lamp ................................. 248
Breakdown
Where will I find...? ........................ 296
see Flat tyre
Brightness control (instrument
cluster lighting) ................................... 30
Bulbs
see Replacing bulbs Index
5
Page 15 of 345

Setting the dipped-beam head-
lamps for driving on the right/left .. 217
Interior lighting
Automatic control system .............. 110
Delayed switch-off (on-board
computer) ...................................... 218
Overview ........................................ 110
Reading lamp ................................. 110
Setting brightness for display/
switches (on-board computer) ....... 216
Interior motion sensor
Deactivating ..................................... 73
Function ........................................... 72
Priming ............................................ 73
Switching off .................................... 73
iPod ®
See also Digital Owner's Manua l... 256
ISOFIX child seat securing system .... 49J
Jack Storage location ............................ 297
Using ............................................. 322
Jump starting (engine) ...................... 305K
Key Changing the battery ....................... 77
Checking the battery ....................... 77
Convenience opening feature .......... 86
Display message ............................ 245
Door central locking/unlocking ....... 74
Emergency key element ................... 76
Important safety notes .................... 74
Loss ................................................. 79
Modifying the programming ............. 76
Overview .......................................... 74
Positions (ignition lock) ................. 132
Problem (malfunction) ..................... 79
Starting the engine ........................ 134
Key positions
Key ................................................ 132
KEYLESS GO .................................. 132
KEYLESS-GO
Convenience closing ........................ 86
Deactivation ..................................... 75 Display message ............................ 245
Locking ............................................ 75
Removing the Start/Stop button ... 133
Start/Stop button .......................... 132
Starting the engine ........................ 134
Unlocking ......................................... 75
Kickdown
Driving tips .................................... 143
Manual drive progra m.................... 146
Kneebag ............................................... 42 L
Lamps see Warning and indicator lamps
Lane Keeping Assist
Activating/deactivating ................. 215
Display message ............................ 235
Function/information .................... 195
Lane package ..................................... 193
Lashing eyelets ................................. 269
Licence plate lamp (display mes-
sage) ................................................... 229
Light sensor (display message) ....... 230
Lighting
see Lights
Lights
Activating/deactivating the Intel-
ligent Light System ........................ 217
Activating/deactivating the inte-
rior lighting delayed switch-off ....... 218
Active light function ....................... 109
Adaptive Highbeam Assist PLUS .... 109
Automatic headlamp mode ............ 106
Cornering light function ................. 109
Dipped-beam headlamp s............... 107
Driving abroad ............................... 106
Foglamps (extended range) ........... 109
Hazard warning lamps ................... 108
Headlamp flashe r........................... 108
Light switch ................................... 106
Main-beam headlamp s................... 108
Motorway mode ............................. 109
Parking lamps ................................ 107
Rear foglamp ................................. 107
Setting brightness for display/
switches (on-board computer) ....... 216
Side lamps ..................................... 107 12
Index
Page 19 of 345

R
Radiator cover ................................... 285
Radio
Selecting a station ......................... 211
see separate operating instructions
Radio mode
See also Digital Owner's Manua l... 256
Radio-based vehicle components
Declaration of conformity ................ 25
Rain closing feature
Panorama sliding sunroo f................ 89
Reading lamp ..................................... 110
Rear compartment
Setting the temperature ................ 120
Rear foglamp
Display message ............................ 229
Switching on/of f........................... 107
Rear seat
Display message ............................ 243
Rear window blind ............................ 273
Rear window heating
Problem (fault) ............................... 123
Switching on/of f........................... 122
Rear-compartment seat belt sta-
tus indicator ........................................ 41
Rear-view mirror
Anti-dazzle mode (automatic) ........ 103
Dipping (manual) ........................... 102
Refuelling
Fuel gaug e....................................... 30
Important safety notes .................. 147
Refuelling process ......................... 148
see Fuel
Remote control
Auxiliary heating/ventilation .......... 125
Changing the batteries (auxiliary
heating) ......................................... 127
Garage door opener ....................... 276
Programming (garage door
opener) .......................................... 277
Replacing bulbs
Important safety notes .................. 111
Overview of bulb types .................. 111
Replacing the battery (auxiliary
heating remote control) .................... 127
Rescue card ......................................... 26 Reserve (fuel tank)
see Fuel
Reserve fuel
Display message ............................ 232
Warning lamp ................................. 252
Residual heat (climate control) ........ 124
Restraint system
Display message ............................ 228
Introduction ..................................... 36
Problem (malfunction) ................... 251
Warning lamp (function) ................... 37
Rev counter ........................................ 206
Reverse gear
Engaging (manual transmission) .... 139
Reversing camera
Cleaning instructions ..................... 293
Display in the multimedia system .. 182
Function/note s............................. 181
Switching on/of f........................... 181
Reversing feature
Panorama sliding sunroo f................ 89
Roller sunblind s............................... 90
Side windows ................................... 85
Sliding sunroof ................................. 89
Reversing lamp (display message) .. 229
Roller sunblind
Panorama sliding sunroo f................ 90
Rear window .................................. 273
Roof lining and carpets (cleaning
instructions) ...................................... 295
Roof load (maximum) ........................ 335
Route guidance
See also Digital Owner's Manua l... 256 S
Safety Children in the vehicle ..................... 47
see Occupant safety
Safety system
see Driving safety systems
SD memory card
Ejecting .......................................... 263
Inserting ........................................ 263
Inserting/removing ........................ 263
See also Digital Owner's Manua l... 256
Selecting ........................................ 211 16
Index
Page 28 of 345

Always have work on electrical and electronic
components carried out at a qualified special-ist workshop.
If you make any changes to the vehicle elec-
tronics, the general operating permit is ren-
dered invalid.
! There is a risk of damage to the vehicle if:
R the vehicle becomes stuck, e.g. on a high
kerb or an unpaved road
R you drive too fast over an obstacle, e.g. a
kerb or a pothole in the road
R a heavy object strikes the underbody or
parts of the chassis
In situations like this, the body, the under-
body, chassis parts, wheels or tyres could be
damaged without the damage being visible.
Components damaged in this way can unex-
pectedly fail or, in the case of an accident, no
longer withstand the strain they are designed for.
If the underbody panelling is damaged, com-
bustible materials such as leaves, grass or
twigs can gather between the underbody and
the underbody panelling. If these materials
come in contact with hot parts of the exhaust
system, they can catch fire.
In such situations, have the vehicle checked
and repaired immediately at a qualified spe-
cialist workshop. If, upon continuing your
journey, you notice that driving safety is
impaired, pull over and stop the vehicle imme- diately, paying attention to road and traffic
conditions. In such cases, consult a qualified
specialist workshop. Declarations of conformity
Wireless vehicle components The following information applies to all compo-
nents of the vehicle and the information sys-
tems and communication devices integrated
into the vehicle which receive and/or transmit
radio waves:
The components of this vehicle that receive
and/or transmit radio waves are compliant with
the basic requirements and all other relevant
conditions of Directive 1999/5/EC. You can
obtain further information from any Mercedes-
Benz Service Centre. Electromagnetic compatibility The electromagnetic compatibility of the vehicle
components has been checked and certified
according to the currently valid version of Reg-
ulation ECE-R 10. Diagnostics connection
The diagnostics connection is only intended for the connection of diagnostic equipment at a
qualified specialist workshop. G
WARNING
If you connect equipment to a diagnostics
connection in the vehicle, it can affect the
operation of the vehicle systems. This may
affect the operating safety of the vehicle.
There is a risk of an accident.
Do not connect any equipment to a diagnos-
tics connection in the vehicle. G
WARNING
Objects in the driver's footwell may restrict
the clearance around the pedals or block a
depressed pedal. This jeopardises the oper-
ating and road safety of the vehicle. There is a risk of an accident.
Stow all objects securely in the vehicle so that
they do not get into the driver's footwell.
Always fit the floormats securely and as pre-
scribed in order to ensure that there is always sufficient room for the pedals. Do not use
loose floormats and do not place several floor-mats on top of one another.
! If the engine is switched off and equipment
on the diagnostics connection is used, the
starter battery may discharge.
Connecting equipment to the diagnostics con-
nection can lead to emissions monitoring infor-
mation being reset, for example. This may lead
to the vehicle failing to meet the requirements of
the next emissions test during the main inspec- tion. Operating safety
25Introduction Z
Page 78 of 345

X
To lock centrally: press the&button.
The key centrally locks/unlocks: R the doors
R the boot lid
R the fuel filler flap
When unlocking, the turn signals flash once.
When locking, they flash three times.
You can also set an audible signal to confirm
that the vehicle has been locked. The audible
signal can be activated or deactivated using the on-board computer (Y page 219).
When it is dark, the surround lighting also comes
on if it is activated in the on-board computer
(Y page 218). KEYLESS-GO
General notes Bear in mind that the engine can be started by
any of the vehicle occupants if there is a KEY-
LESS-GO key in the vehicle (Y page 134).
Locking and unlocking centrally You can start, lock or unlock the vehicle using
KEYLESS-GO. To do this, you need to carry the
key with you. You can combine the KEYLESS-GO
functions with the functions of a conventional
key. Unlock the vehicle by using KEYLESS-GO,
for instance, and lock it using the &button
on the key.
When locking or unlocking with KEYLESS-GO,
the distance between the key and the corre-
sponding door handle must not be greater than 1 m.
A check which periodically establishes a radio
connection between the vehicle and the key
determines whether a valid key is in the vehicle. This occurs, for example:
R when the external door handles are touched
R when starting the engine
R whilst driving X
To unlock the vehicle: touch the inner sur-
face of the door handle.
X To lock the vehicle: touch sensor sur-
face :.
X Convenience closing feature: touch
recessed sensor surface ;for an extended
period.
For further information on the convenience
closing feature (Y page 86). X
To unlock the boot lid: pull the boot lid han-
dle.
The vehicle only unlocks the boot lid.
Deactivating and activating If you do not intend to use a key for an extended
period of time, you can deactivate the KEYLESS-
GO function of the key. The key will then use very
little power, thereby conserving battery power.
For the purposes of activation or deactivation,
the vehicle does not have to be nearby. Key
75Opening and closing Z
Page 79 of 345

X
To deactivate: press the&button on the
key twice in rapid succession.
The battery indicator light of the key
(Y page 77) flashes twice briefly and lights
up once. KEYLESS-GO is then deactivated.
X To activate: press any button on the key.
or X Insert the key into the ignition lock.
KEYLESS-GO and all of its associated features
are available again. Changing the settings of the locking
system
You can change the settings of the locking sys-
tem. This means that only the driver's door and
the fuel filler flap are unlocked when the vehicle is unlocked. This is useful if you frequently travelon your own.
X To change the setting: simultaneously press
the % and& buttons on the key for
approximately six seconds until the battery
check lamp flashes twice (Y page 77).
If the setting of the locking system is changed
within the signal range of the vehicle, pressing
the & or% button:
R locks or
R unlocks the vehicle
The key now functions as follows:
X To unlock: press the%button once.
X To unlock centrally: press the%button
twice.
X To lock centrally: press the&button.
The KEYLESS-GO function is changed as fol-
lows:
X To unlock the driver's door: touch the inner
surface of the door handle on the driver's
door.
X To unlock centrally: touch the inner surface
of the front-passenger door handle.
X To lock centrally: touch the outer sensor
surface on one of the door handles.
X To restore the factory settings: press and
hold down the %and& buttons simul-
taneously for approximately six seconds until
the battery check lamp flashes twice
(Y page 77). Emergency key element
General notes If the vehicle can no longer be locked or
unlocked with the key, use the emergency key
element.
If you use the emergency key element to unlock
and open the driver's door or the boot lid, the
anti-theft alarm system will be triggered. Switch
off the alarm (Y page 71).
If you unlock the vehicle using the emergency
key element, the fuel filler flap will not be
unlocked automatically.
X To unlock the fuel filler flap: insert the key
into the ignition lock.
Removing the emergency key element X
Push release catch :in the direction of the
arrow and, at the same time, remove emer-
gency key element ;from the key.
Further information about: R Unlocking the driver's door (Y page 82)
R Unlocking the boot (Y page 84)
R Locking the vehicle (Y page 82)
Inserting the emergency key element X
Push emergency key element ;fully into the
key until it engages and release catch :
returns to its basic position. 76
KeyOpening and closing
Page 80 of 345

Battery of the key
Important safety notes G
WARNING
Batteries contain toxic and corrosive substan- ces. If batteries are swallowed, it can result in
severe health problems. There is a risk of fatal injury.
Keep batteries out of the reach of children. If
a battery is swallowed, seek medical attention immediately. H
Environmental note Batteries contain pollutants.
It is illegal to dispose of them with the household rubbish.
They must be collected sep-
arately and disposed of in anenvironmentally responsible
recycling system. Dispose of batteries in an
environmentally responsible
manner. Take discharged
batteries to a qualified spe-
cialist workshop or to a col-
lection point for used batter-
ies.
Mercedes-Benz recommends that you have the
batteries replaced at a qualified specialist work- shop.
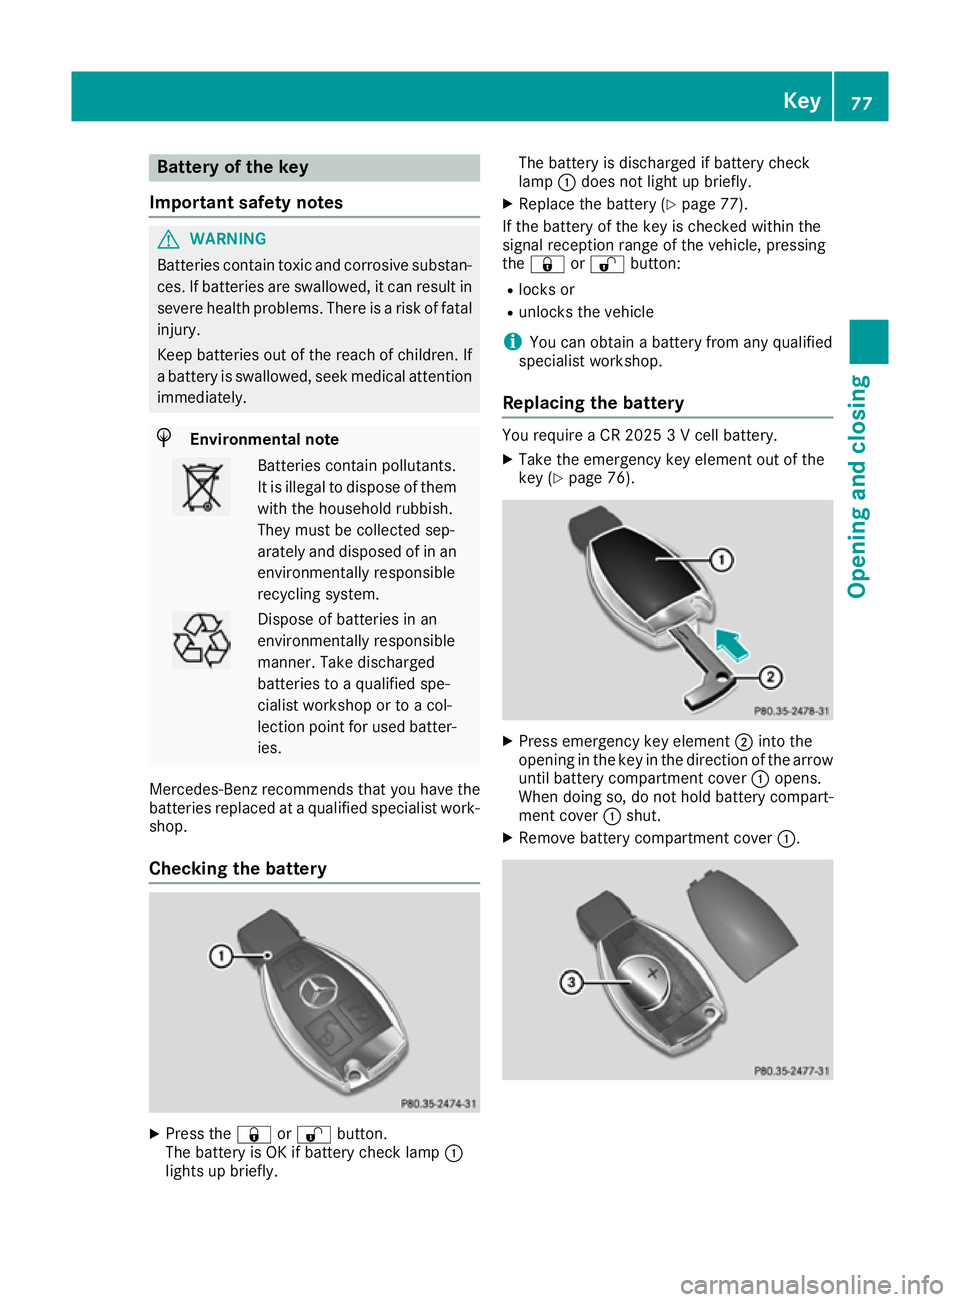
Checking the battery X
Press the &or% button.
The battery is OK if battery check lamp :
lights up briefly. The battery is discharged if battery check
lamp
:does not light up briefly.
X Replace the battery (Y page 77).
If the battery of the key is checked within the
signal reception range of the vehicle, pressing
the & or% button:
R locks or
R unlocks the vehicle
i You can obtain a battery from any qualified
specialist workshop.
Replacing the battery You require a CR 2025 3 V cell battery.
X Take the emergency key element out of the
key (Y page 76). X
Press emergency key element ;into the
opening in the key in the direction of the arrow
until battery compartment cover :opens.
When doing so, do not hold battery compart-
ment cover :shut.
X Remove battery compartment cover :. Key
77Opening and closing Z
Page 81 of 345

X
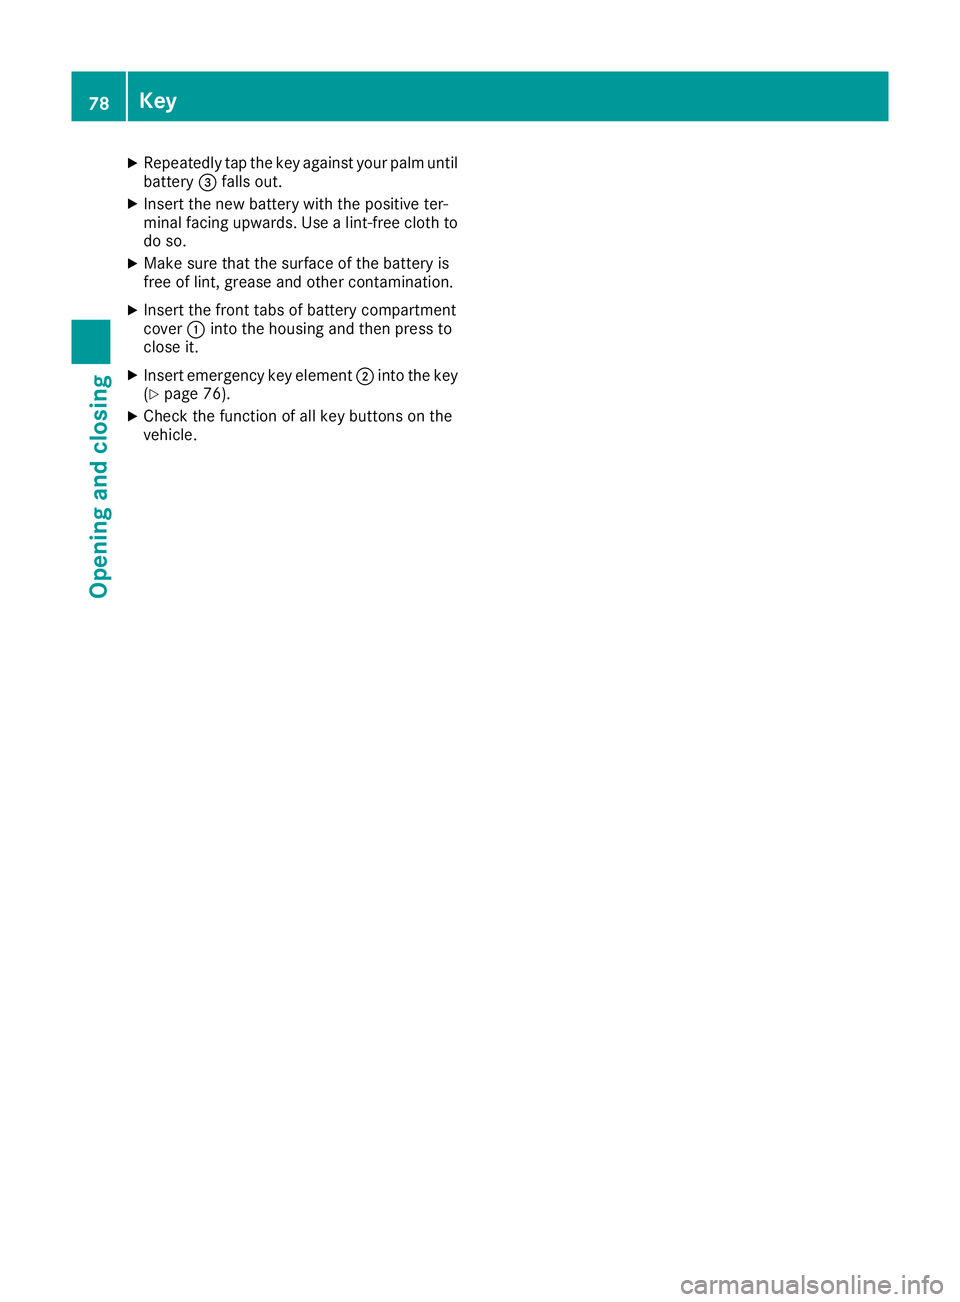
Repeatedly tap the key against your palm until
battery =falls out.
X Insert the new battery with the positive ter-
minal facing upwards. Use a lint-free cloth to
do so.
X Make sure that the surface of the battery is
free of lint, grease and other contamination.
X Insert the front tabs of battery compartment
cover :into the housing and then press to
close it.
X Insert emergency key element ;into the key
(Y page 76).
X Check the function of all key buttons on the
vehicle. 78
KeyOpening and closing