2015 MERCEDES-BENZ E-CLASS CABRIOLET change time
[x] Cancel search: change timePage 168 of 349
Setting a speed
X
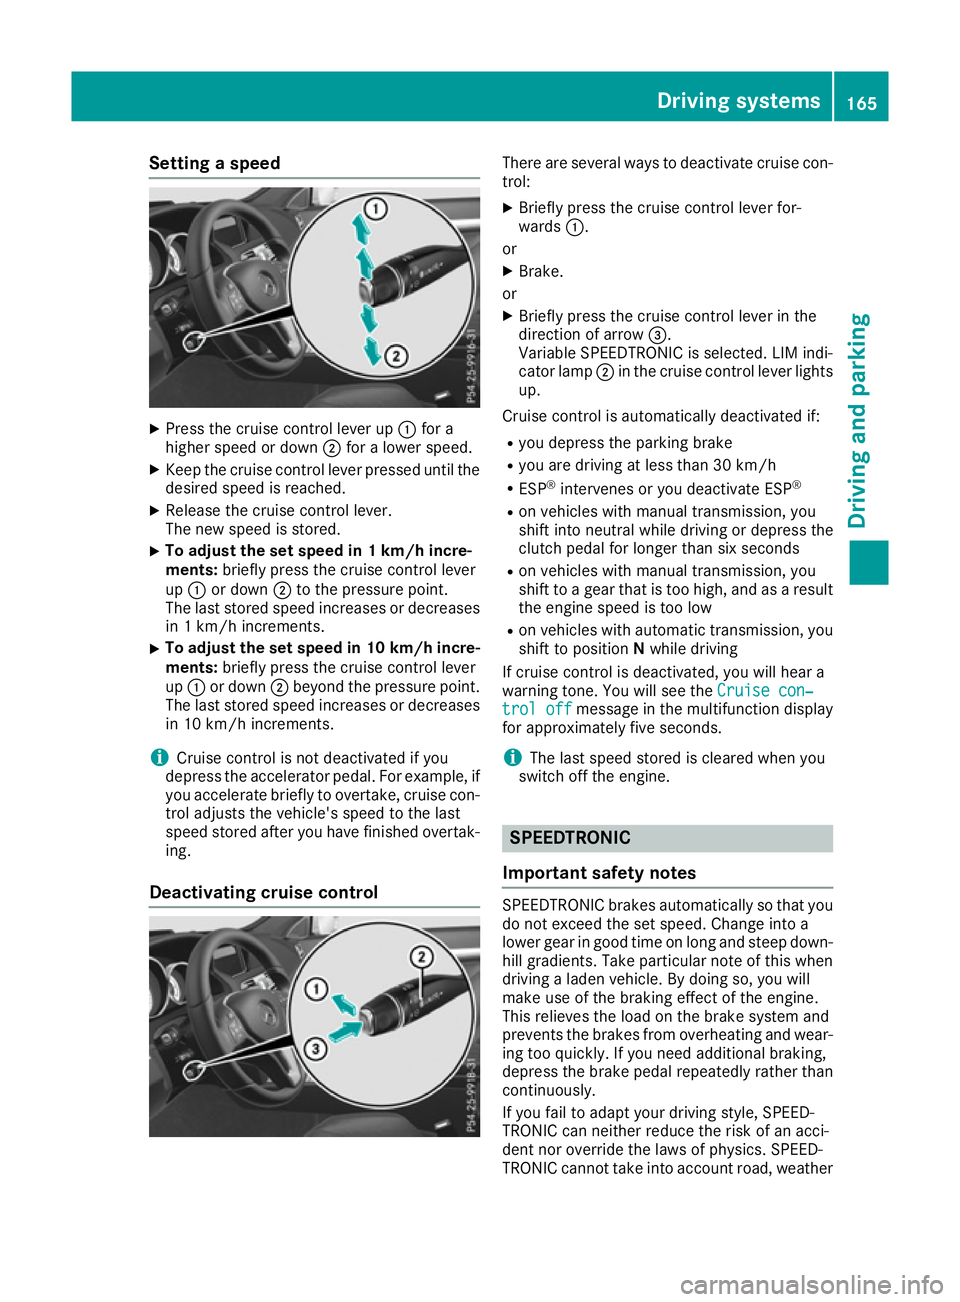
Press the cruise control lever up :for a
higher speed or down ;for a lower speed.
X Keep the cruise control lever pressed until the
desired speed is reached.
X Release the cruise control lever.
The new speed is stored.
X To adjust the set speed in 1 km/h incre-
ments:
briefly press the cruise control lever
up : or down ;to the pressure point.
The last stored speed increases or decreases
in 1 km/h increments.
X To adjust the set speed in 10 km/h incre-
ments: briefly press the cruise control lever
up : or down ;beyond the pressure point.
The last stored speed increases or decreases in 10 km/h increments.
i Cruise control is not deactivated if you
depress the accelerator pedal. For example, if
you accelerate briefly to overtake, cruise con-
trol adjusts the vehicle's speed to the last
speed stored after you have finished overtak-
ing.
Deactivating cruise control There are several ways to deactivate cruise con-
trol:
X Briefly press the cruise control lever for-
wards :.
or X Brake.
or X Briefly press the cruise control lever in the
direction of arrow =.
Variable SPEEDTRONIC is selected. LIM indi-
cator lamp ;in the cruise control lever lights
up.
Cruise control is automatically deactivated if: R you depress the parking brake
R you are driving at less than 30 km/h
R ESP ®
intervenes or you deactivate ESP ®
R on vehicles with manual transmission, you
shift into neutral while driving or depress the
clutch pedal for longer than six seconds
R on vehicles with manual transmission, you
shift to a gear that is too high, and as a result
the engine speed is too low
R on vehicles with automatic transmission, you
shift to position Nwhile driving
If cruise control is deactivated, you will hear a
warning tone. You will see the Cruise con‐ Cruise con‐
trol off
trol off message in the multifunction display
for approximately five seconds.
i The last speed stored is cleared when you
switch off the engine. SPEEDTRONIC
Important safety notes SPEEDTRONIC brakes automatically so that you
do not exceed the set speed. Change into a
lower gear in good time on long and steep down-
hill gradients. Take particular note of this when
driving a laden vehicle. By doing so, you will
make use of the braking effect of the engine.
This relieves the load on the brake system and
prevents the brakes from overheating and wear- ing too quickly. If you need additional braking,
depress the brake pedal repeatedly rather than continuously.
If you fail to adapt your driving style, SPEED-
TRONIC can neither reduce the risk of an acci-
dent nor override the laws of physics. SPEED-
TRONIC cannot take into account road, weather Driving systems
165Driving and parking Z
Page 169 of 349

or traffic conditions. SPEEDTRONIC is only an
aid. You are responsible for the distance to the
vehicle in front, for vehicle speed, for braking in
good time, and for staying in lane.
If there is a change of drivers, advise the new
driver of the speed stored.
You can set a variable or permanent limit speed:
R variable for speed limits, e.g. in built-up areas
R permanent for long-term speed restrictions,
e.g. when driving with winter tyres fitted
i The speed indicated in the speedometer
may differ slightly from the limit speed stored.
Variable SPEEDTRONIC General notes
:
To store the current speed or a higher speed
; LIM indicator lamp
= To store the current speed or calling up the
last stored speed
? To store the current speed or a lower speed
A To switch between cruise control or
DISTRONIC PLUS and variable SPEED-
TRONIC
B To deactivate variable SPEEDTRONIC
With the cruise control lever, you can operate
cruise control or DISTRONIC PLUS and variable SPEEDTRONIC.
The LIM indicator lamp on the cruise control
lever indicates which system you have selected:
R LIM indicator lamp off: cruise control or
DISTRONIC PLUS is selected.
R LIM indicator lamp on: variable SPEED-
TRONIC is selected. Selecting variable SPEEDTRONIC
If there is a change of drivers, advise the new
driver of the limit speed stored.
X Check whether LIM indicator lamp :is on.
If it is on, variable SPEEDTRONIC is already
selected.
If it is not, press the cruise control lever in the
direction of arrow ;.
LIM indicator lamp :in the cruise control
lever lights up. Variable SPEEDTRONIC is
selected.
Storing the current speed X
Briefly press the cruise control lever up :or
down ;.
The current speed is stored and shown in the
multifunction display.
The segments in the multifunction display
light up from the start of the scale up to the
stored speed.
You can use the cruise control lever to limit the
speed to any speed above 30 km/h while the
engine is running. 166
Driving systemsDriving and parking
Page 171 of 349

i
The last speed stored is cleared when you
switch off the engine.
Permanent SPEEDTRONIC You can use the on-board computer to limit the
speed permanently to a value between
160 km/h( e.g. for driving on winter tyres) and
the maximum speed (Y page 225).
Shortly before the stored speed is reached, it
appears in the multifunction display.
Permanent SPEEDTRONIC remains active, even
if variable SPEEDTRONIC is deactivated.
You cannot exceed the stored limit speed, even if you depress the accelerator pedal beyond the
pressure point (kickdown). DISTRONIC PLUS
General notes DISTRONIC PLUS regulates the speed and auto-
matically helps you maintain the distance to the vehicle detected in front. Vehicles are detected
with the aid of the radar sensor system.
DISTRONIC PLUS brakes automatically so that
the set speed is not exceeded.
Change into a lower gear in good time on long
and steep downhill gradients. Take particular
note of this when driving a laden vehicle. By
doing so, you will make use of the braking effect
of the engine. This relieves the load on the brake system and prevents the brakes from overheat- ing and wearing too quickly.
If DISTRONIC PLUS detects that there is a risk of
a collision, you will be warned visually and
acoustically. Without your intervention,
DISTRONIC PLUS cannot prevent a collision. An
intermittent warning tone will then sound and
the distance warning lamp will light up in the
instrument cluster. Brake immediately to
increase the distance to the vehicle driving in
front, or take evasive action, provided it is safe
to do so.
For DISTRONIC PLUS to assist you, the radar
sensor system must be operational.
DISTRONIC PLUS operates in the range
between 0 km/h and 200 km/h.
Do not use DISTRONIC PLUS while driving on
roads with steep gradients. Important safety notes G
WARNING
DISTRONIC PLUS does not react to:
R people or animals
R stationary obstacles on the road, e.g. stop-
ped or parked vehicles
R oncoming and crossing traffic
As a result, DISTRONIC PLUS may neither give
warnings nor intervene in such situations.
There is a risk of an accident.
Always pay careful attention to the traffic sit- uation and be ready to brake. G
WARNING
DISTRONIC PLUS cannot always clearly rec-
ognise other road users and complex traffic
conditions.
In such cases, DISTRONIC PLUS may:
R give an unnecessary warning and then
brake the vehicle
R neither give a warning nor intervene
R accelerate or brake unexpectedly
There is a risk of an accident.
Continue to drive carefully and be prepared to
brake, particularly if DISTRONIC PLUS warns
you. G
WARNING
DISTRONIC PLUS brakes your vehicle with up to 50% of the maximum possible deceleration.
If this deceleration is not sufficient,
DISTRONIC PLUS alerts you with a visual and
acoustic warning. There is a risk of an acci-
dent.
Apply the brakes yourself in these situations
and try to take evasive action.
! When DISTRONIC PLUS or the HOLD func-
tion is activated, the vehicle brakes automat- ically in certain situations. 168
Driving systemsDriving an
d parking
Page 172 of 349

To avoid damage to the vehicle, deactivate
DISTRONIC PLUS and the HOLD function in
the following or similar situations:
R when towing away
R in a car wash
If you fail to adapt your driving style, DISTRONIC PLUS can neither reduce the risk of an accident
nor override the laws of physics. DISTRONIC
PLUS cannot take road and weather conditions
or traffic conditions into account. DISTRONIC
PLUS is only an aid. You are responsible for the distance to the vehicle in front, for vehicle
speed, for braking in good time and for staying in
lane.
Do not use DISTRONIC PLUS:
R in road and traffic conditions which do not
allow you to maintain a constant speed, e.g. in
heavy traffic or on winding roads
R on smooth or slippery roads. Braking or accel-
erating can cause the drive wheels to lose
traction and the vehicle could then skid
R when there is poor visibility, e.g. due to fog,
heavy rain or snow
DISTRONIC PLUS may not detect narrow vehi-
cles driving in front, e.g. motorcycles, or vehi-
cles driving on a different line.
In particular, the detection of obstacles can be
impaired in the case of:
R dirt on the sensors or obscured sensors
R snow or heavy rain
R interference by other radar sources
R the possibility of strong radar reflections, for
example, in multi-storey car parks
If DISTRONIC PLUS no longer detects a vehicle
in front, it may unexpectedly accelerate to the
speed stored.
This speed can:
R be too high for a filter lane or a slip road
R be so high in the right lane that you pass vehi-
cles driving on the left (in countries where
they drive on the right)
R be so high in the left lane that you pass vehi-
cles driving on the right (in countries where
they drive on the left)
If there is a change of drivers, advise the new
driver of the speed stored. Cruise control lever
:
To store the current speed or a higher speed
; To set the specified minimum distance
= LIM indicator lamp
? To store the current speed or calling up the
last stored speed
A To store the current speed or a lower speed
B To switch between DISTRONIC PLUS and
variable SPEEDTRONIC
C To deactivate DISTRONIC PLUS
You can operate DISTRONIC PLUS and variable
SPEEDTRONIC with the cruise control lever.
The LIM indicator lamp on the cruise control
lever indicates which system you have selected:
R LIM indicator lamp off: DISTRONIC PLUS is
selected.
R LIM indicator lamp on: variable SPEED-
TRONIC is selected.
Selecting DISTRONIC PLUS X
Check whether LIM indicator lamp :is off.
If it is off, DISTRONIC PLUS is already selec-
ted. Driving systems
169Driving and parking Z
Page 179 of 349
DISTRONIC PLUS with Steering Assist
and Stop&Go Pilot General notes
DISTRONIC PLUS with Steering Assist and
Stop&Go Pilot aids you in keeping the vehicle in
the centre of the driving lane by means of mod-
erate steering interventions in a speed range
from 0 - 200 km/h.
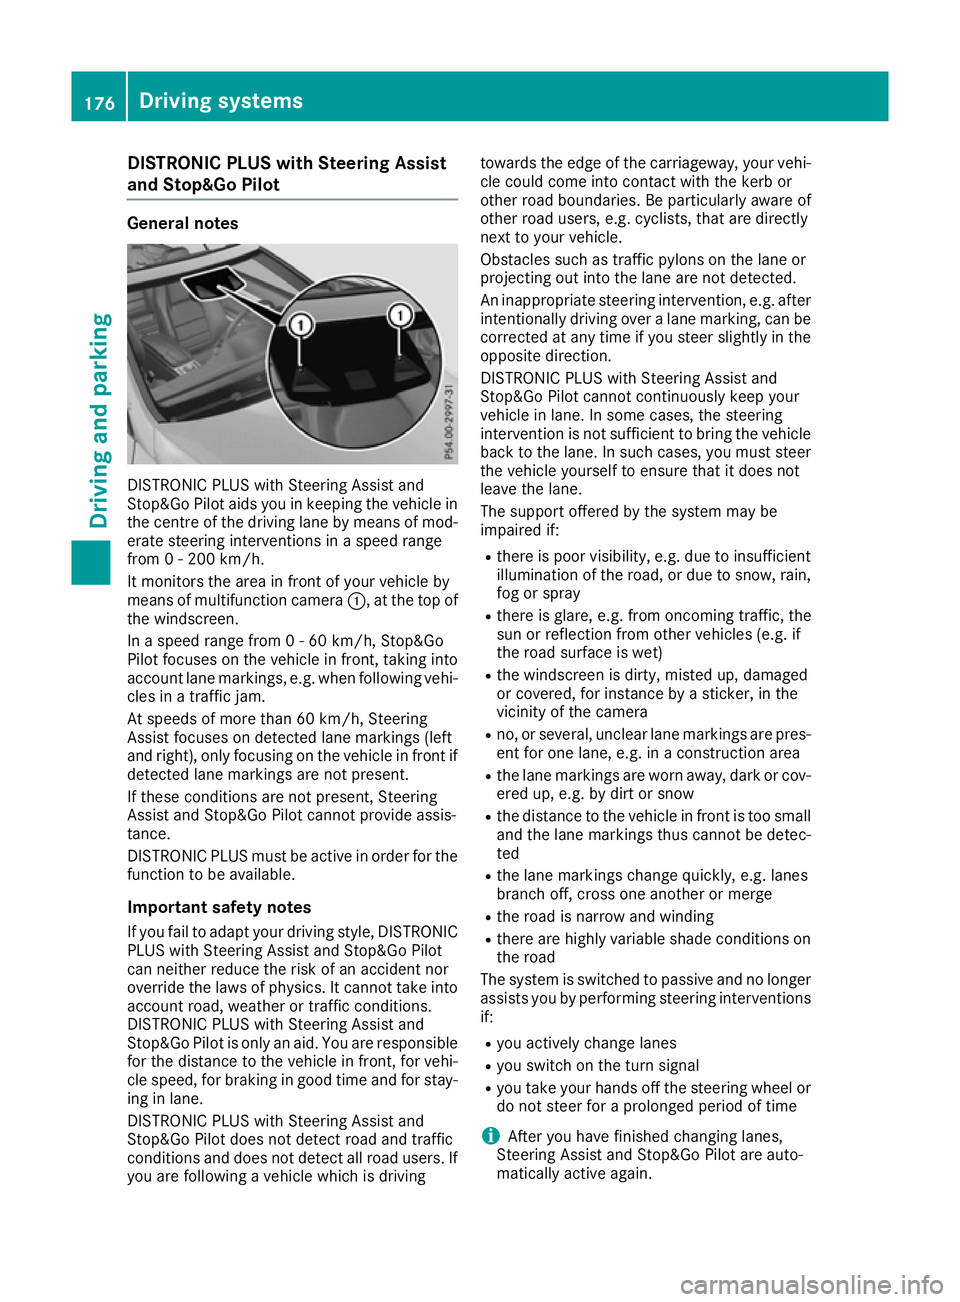
It monitors the area in front of your vehicle by
means of multifunction camera :, at the top of
the windscreen.
In a speed range from 0 - 60 km/h, Stop&Go
Pilot focuses on the vehicle in front, taking into
account lane markings, e.g. when following vehi- cles in a traffic jam.
At speeds of more than 60 km/h, Steering
Assist focuses on detected lane markings (left
and right), only focusing on the vehicle in front if
detected lane markings are not present.
If these conditions are not present, Steering
Assist and Stop&Go Pilot cannot provide assis-
tance.
DISTRONIC PLUS must be active in order for the
function to be available.
Important safety notesIf you fail to adapt your driving style, DISTRONIC
PLUS with Steering Assist and Stop&Go Pilot
can neither reduce the risk of an accident nor
override the laws of physics. It cannot take into account road, weather or traffic conditions.
DISTRONIC PLUS with Steering Assist and
Stop&Go Pilot is only an aid. You are responsible
for the distance to the vehicle in front, for vehi-
cle speed, for braking in good time and for stay- ing in lane.
DISTRONIC PLUS with Steering Assist and
Stop&Go Pilot does not detect road and traffic
conditions and does not detect all road users. If
you are following a vehicle which is driving towards the edge of the carriageway, your vehi-
cle could come into contact with the kerb or
other road boundaries. Be particularly aware of
other road users, e.g. cyclists, that are directly
next to your vehicle.
Obstacles such as traffic pylons on the lane or
projecting out into the lane are not detected.
An inappropriate steering intervention, e.g. after intentionally driving over a lane marking, can be
corrected at any time if you steer slightly in the
opposite direction.
DISTRONIC PLUS with Steering Assist and
Stop&Go Pilot cannot continuously keep your
vehicle in lane. In some cases, the steering
intervention is not sufficient to bring the vehicle back to the lane. In such cases, you must steer the vehicle yourself to ensure that it does not
leave the lane.
The support offered by the system may be
impaired if:
R there is poor visibility, e.g. due to insufficient
illumination of the road, or due to snow, rain, fog or spray
R there is glare, e.g. from oncoming traffic, the
sun or reflection from other vehicles (e.g. if
the road surface is wet)
R the windscreen is dirty, misted up, damaged
or covered, for instance by a sticker, in the
vicinity of the camera
R no, or several, unclear lane markings are pres-
ent for one lane, e.g. in a construction area
R the lane markings are worn away, dark or cov-
ered up, e.g. by dirt or snow
R the distance to the vehicle in front is too small
and the lane markings thus cannot be detec-
ted
R the lane markings change quickly, e.g. lanes
branch off, cross one another or merge
R the road is narrow and winding
R there are highly variable shade conditions on
the road
The system is switched to passive and no longer assists you by performing steering interventions
if:
R you actively change lanes
R you switch on the turn signal
R you take your hands off the steering wheel or
do not steer for a prolonged period of time
i After you have finished changing lanes,
Steering Assist and Stop&Go Pilot are auto-
matically active again. 176
Driving syste
msDriving and parking
Page 189 of 349
The
Park Assist active Accelerate
Park Assist active Accelerate
and brake Observe surroundings
and brake Observe surroundings mes-
sage appears in the multifunction display.
i You will achieve the best results by waiting
for the steering procedure to complete before
pulling away.
X Drive forwards and be ready to brake at all
times.
Vehicles with automatic transmission:
Active Parking Assist brakes the vehicle to a
standstill.
X Vehicles with manual transmission: stop,
at the latest when PARKTRONIC sounds the
continuous warning tone.
Vehicles with manual transmission: the
Park Assist active Engage reverse
Park Assist active Engage reverse
gear Observe surroundings gear Observe surroundings message
appears in the multifunction display.
Vehicles with automatic transmission: the
Park Assist active Select R Observe
Park Assist active Select R Observe
surroundings surroundings message appears in the multi-
function display.
Additional transmission shifts may be neces-
sary.
As soon as the parking procedure is complete,
the Park Assist switched off
Park Assist switched off message
appears in the multifunction display and you will hear a tone. The vehicle is now parked. The
vehicle is kept stationary without the driver hav- ing to depress the brake pedal. The braking
effect is cancelled when you depress the accel-
erator pedal.
Active Parking Assist no longer supports you
with steering interventions and brake applica-
tions. When Active Parking Assist is finished,
you must steer and brake again yourself.
PARKTRONIC is still available.
X Manoeuvre if necessary.
X Always observe the warning messages dis-
played by PARKTRONIC (Y page 181).
Parking tips:
R The way your vehicle is positioned in the park-
ing space after parking is dependent on vari-
ous factors. These include the position and
shape of the vehicles parked in front and
behind it and the conditions of the location. It
may be the case that Active Parking Assist
guides you too far into a parking space, or not far enough into it. In some cases, it may also
lead you across or onto the kerb. If necessary, you should cancel the parking procedure with
Active Parking Assist.
R You can also preselect transmission position
D. The vehicle redirects and does not drive as
far into the parking space. Should a gear be
changed too early, the parking procedure will be cancelled. A sensible parking position can
no longer be achieved from this position.
Exiting a parking space In order that Active Parking Assist can support
you when exiting the parking space:
R the border of the parking space must be high
enough at the front and the rear. A kerb stoneis too small, for example.
R the border of the parking space must not be
too wide, as the position of the vehicle must
not exceed an angle of 45° to the starting
position as it is manoeuvred into the parking
space.
R a manoeuvring distance of at least 1.0 mmust
be available.
i Vehicles with automatic transmission:
If PARKTRONIC detects obstacles, Active
Parking Assist brakes automatically whilst the vehicle exits the parking space. You are
responsible for braking in good time.
Active Parking Assist can only assist you with
exiting a parking space if you have parked the
vehicle parallel to the direction of travel using
Active Parking Assist.
X Start the engine.
X Release the parking brake.
X Switch on the turn signal in the direction you
are pulling away.
X Vehicles with manual transmission:
engage first or reverse gear.
Vehicles with automatic transmission:
shift the transmission to position
Dor R.
The Start Park Assist? Yes: OK No: Start Park Assist? Yes: OK No:
% message appears in the multifunction
display.
X To cancel the procedure: press the%
button on the multifunction steering wheel or
pull away.
or 186
Driving systemsDriving and pa
rking
Page 191 of 349
Reversing camera
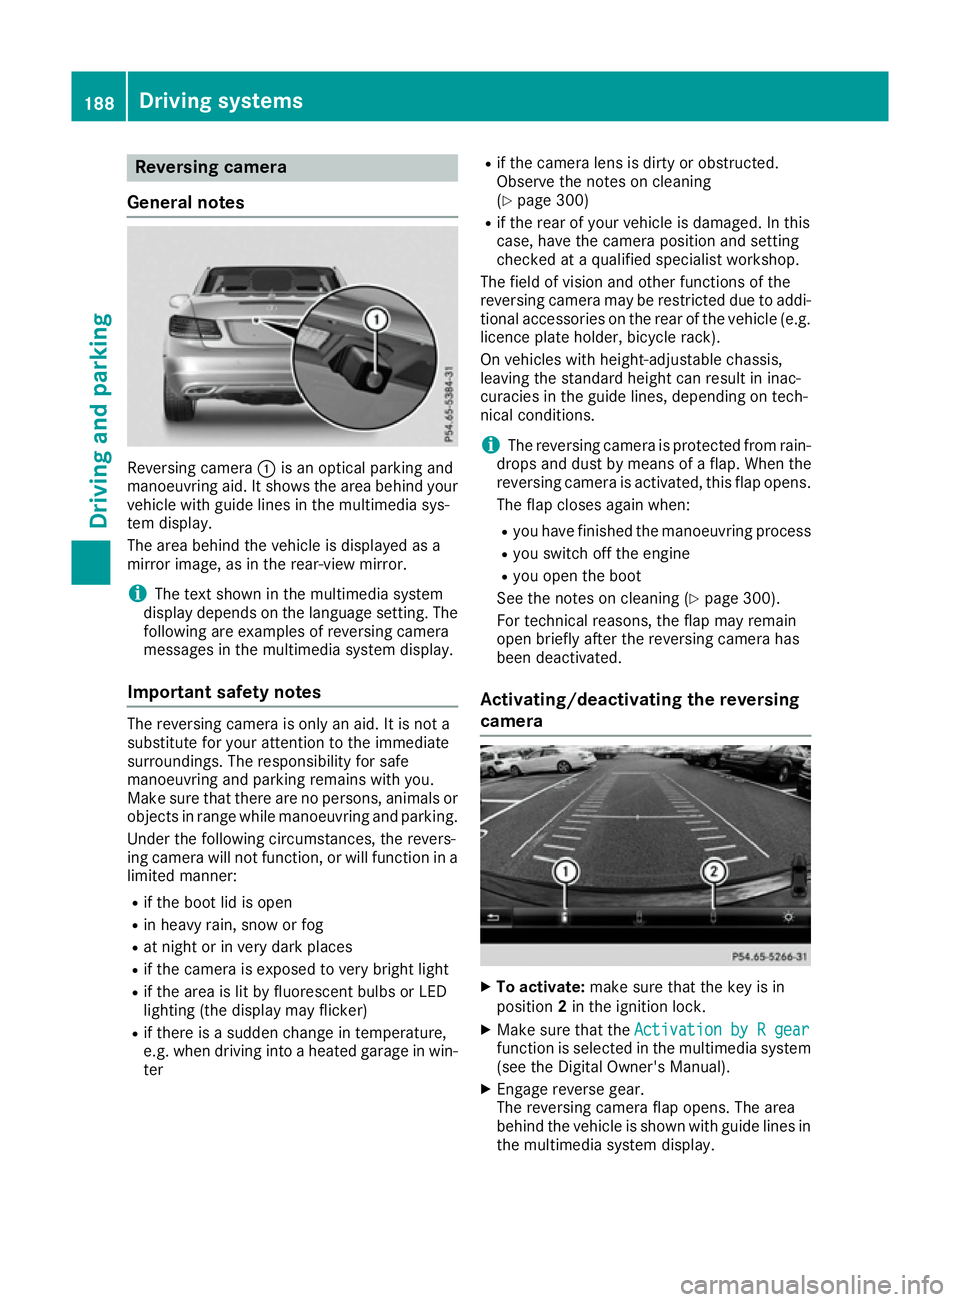
General notes Reversing camera
:is an optical parking and
manoeuvring aid. It shows the area behind your vehicle with guide lines in the multimedia sys-
tem display.
The area behind the vehicle is displayed as a
mirror image, as in the rear-view mirror.
i The text shown in the multimedia system
display depends on the language setting. The following are examples of reversing camera
messages in the multimedia system display.
Important safety notes The reversing camera is only an aid. It is not a
substitute for your attention to the immediate
surroundings. The responsibility for safe
manoeuvring and parking remains with you.
Make sure that there are no persons, animals or
objects in range while manoeuvring and parking.
Under the following circumstances, the revers-
ing camera will not function, or will function in a limited manner:
R if the boot lid is open
R in heavy rain, snow or fog
R at night or in very dark places
R if the camera is exposed to very bright light
R if the area is lit by fluorescent bulbs or LED
lighting (the display may flicker)
R if there is a sudden change in temperature,
e.g. when driving into a heated garage in win-
ter R
if the camera lens is dirty or obstructed.
Observe the notes on cleaning
(Y page 300)
R if the rear of your vehicle is damaged. In this
case, have the camera position and setting
checked at a qualified specialist workshop.
The field of vision and other functions of the
reversing camera may be restricted due to addi-
tional accessories on the rear of the vehicle (e.g.
licence plate holder, bicycle rack).
On vehicles with height-adjustable chassis,
leaving the standard height can result in inac-
curacies in the guide lines, depending on tech-
nical conditions.
i The reversing camera is protected from rain-
drops and dust by means of a flap. When the
reversing camera is activated, this flap opens.
The flap closes again when:
R you have finished the manoeuvring process
R you switch off the engine
R you open the boot
See the notes on cleaning (Y page 300).
For technical reasons, the flap may remain
open briefly after the reversing camera has
been deactivated.
Activating/deactivating the reversing
camera X
To activate: make sure that the key is in
position 2in the ignition lock.
X Make sure that the Activation by R gear Activation by R gear
function is selected in the multimedia system (see the Digital Owner's Manual).
X Engage reverse gear.
The reversing camera flap opens. The area
behind the vehicle is shown with guide lines in
the multimedia system display. 188
Driving systemsDriving and parking
Page 196 of 349
R
Top view and image from the reversing cam-
era (130° viewing angle)
R Top view and image from the front camera
(130° viewing angle without displaying the
maximum steering wheel angle)
R Top view and enlarged rear view
R Top view and enlarged front view
R Top view and trailer view (vehicles with trailer
tow hitch)
R Top view and images from the rear-facing side
cameras (rear wheel view)
R Top view and images from the forward-facing
side cameras (front wheel view)
When the function is active and you shift the
transmission from Dor Rto N, the dynamic
guide lines are hidden.
When you change between transmission posi-
tions Dand R, you see the previously selected
front or rear view.
Distances measured by PARKTRONIC will also
be optically displayed:
R as red or yellow brackets around the vehicle
symbol in top view in split-screen mode or
R at the bottom right as red or yellow brackets
around the vehicle symbol in full-screen mode
The line thickness and colour of the brackets
show how far the vehicle is from an object.
R yellow brackets with thin lines: PARKTRONIC
is active
R yellow brackets with normal lines: an object is
present in close range of the vehicle
R red line: an object is present in the immediate
close range of the vehicle
Important safety notes The 360° camera is only an aid and may show a
distorted view of obstacles, show them incor-
rectly or not at all. The 360° camera is not a
substitute for attentive driving.
The responsibility for safe manoeuvring and
parking remains with you. Make sure that there are no persons, animals or objects in range
while manoeuvring and parking.
You are always responsible for safety, and must
always pay attention to your surroundings when parking and manoeuvring. This applies to the
areas behind, in front of and beside the vehicle.
You could otherwise endanger yourself and oth- ers. The 360° camera will not function or will func-
tion only in a limited manner:
R if the doors are open
R if the exterior mirrors are folded in
R if the boot lid is open
R in heavy rain, snow or fog
R at night or in very dark places
R if the cameras are exposed to very bright light
R if the area is lit by fluorescent bulbs or LED
lighting (the display may flicker)
R if there is a sudden change in temperature,
e.g. when driving into a heated garage in win-
ter
R if the camera lenses are dirty or covered
R if the vehicle components in which the cam-
eras are fitted are damaged. In this event,
have the camera position and setting checked at a qualified specialist workshop.
Do not use the 360° camera under such cir-
cumstances. You could otherwise injure others
or damage objects when parking the vehicle.
Guide lines are always shown at road level. In
trailer mode, the guide lines are shown at the
level of the trailer coupling.
The field of vision and other functions of the
camera system may be restricted due to addi-
tional accessories on the rear of the vehicle (e.g.
licence plate holder, bicycle rack).
On vehicles with height-adjustable suspension,
due to the technical conditions, leaving the
standard height can result in:
R inaccuracies in the guide lines
R inaccuracies in the display of generated
images (top view)
Activation conditions The 360° camera image can be displayed if:
R your vehicle is equipped with a 360° camera
R the key is in position 2in the ignition lock
R the multimedia system is switched on
R the 360° camera 360° camera function is switched on
Activating the 360° camera X
Press the Øbutton in the centre console
for longer than two seconds.
The following appears depending on whether
transmission position Dor Ris selected: Driving systems
193Driving and parking Z