2015 MERCEDES-BENZ C-Class ECO mode
[x] Cancel search: ECO modePage 65 of 214

Entry restriction
For vehicles in certain countries, there is a
data entry restriction.
The restriction is active from a vehicle speed
of above approximately 3 mph (5 km/h). As
soon as the speed falls below approximately
2 mph (3 km/h), the restriction becomes
inactive.
When the restriction is active, certain entries
cannot be made. This will be indicated by the
fact that certain menu items are grayed out
and cannot be selected.
The following entries are not possible, for
example:
R entering the destination city and street
R entering a destination via the map
R entering POIs in the vicinity of a city or via
a name search
R editing entries
Other entries are possible, such as entering
points of interest in the vicinity of the desti-
nation or current position. Switching to navigation mode
X
Press the 00CBbutton.
The map shows the vehicle's current posi-
tion.
Access from one of the other main functions:
X To activate the menu: slide 5the con-
troller (e.g. in radio mode).
X To select Navi
Navi: turn and press the control-
ler. Access within navigation:
X
From any menu, press the 00CBbutton.
The navigation menu appears.
X Press the controller.
The map shows the vehicle's current posi-
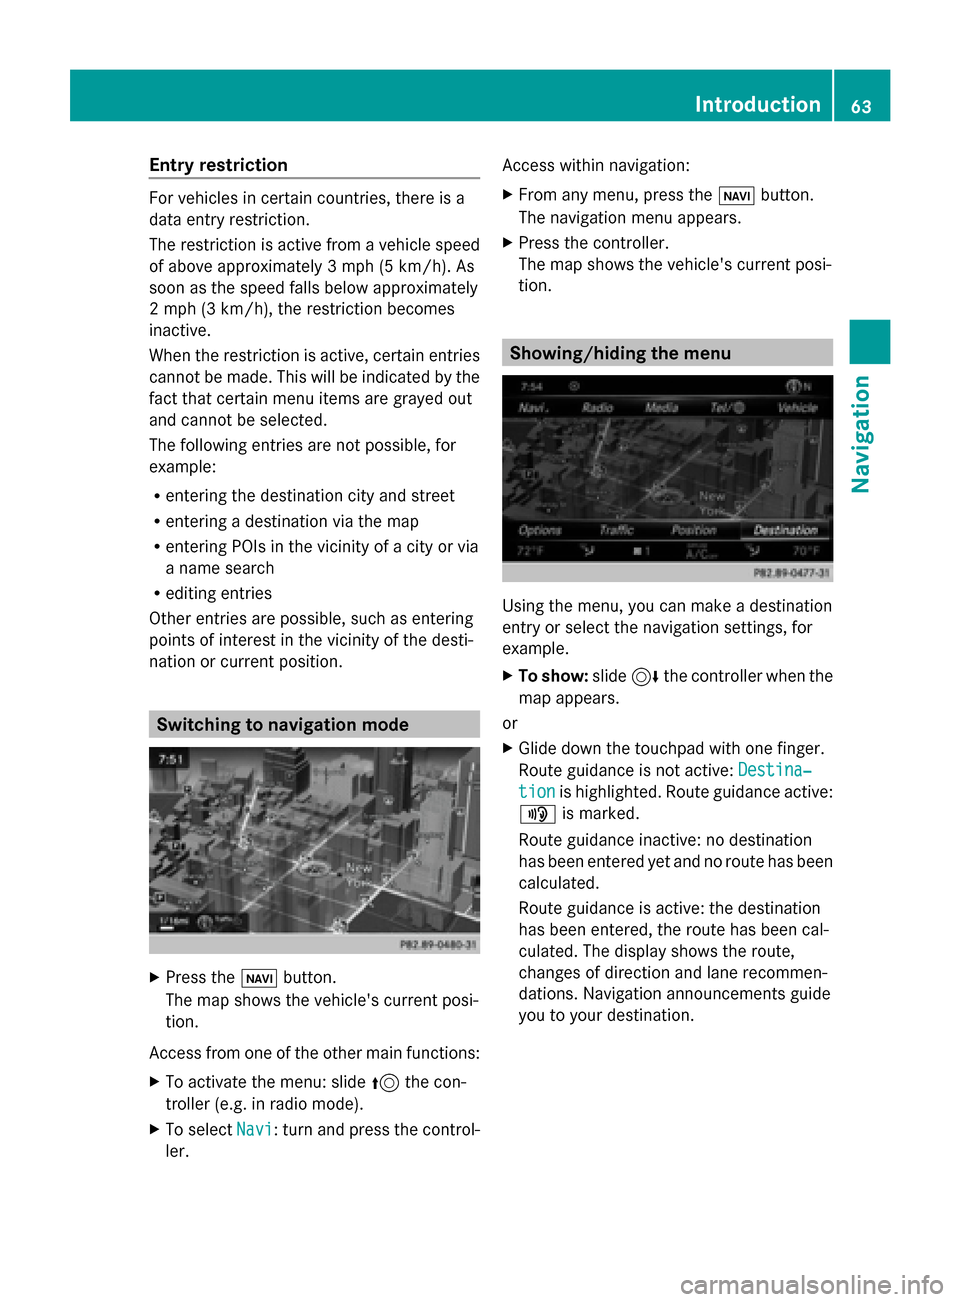
tion. Showing/hiding the menu
Using the menu, you can make a destination
entry or select the navigation settings, for
example.
X
To show: slide6the controller when the
map appears.
or
X Glide down the touchpad with one finger.
Route guidance is not active: Destina‐
Destina‐
tion tion is highlighted. Route guidance active:
008F is marked.
Route guidance inactive: no destination
has been entered yet and no route has been
calculated.
Route guidance is active: the destination
has been entered, the route has been cal-
culated. The display shows the route,
changes of direction and lane recommen-
dations. Navigation announcements guide
you to your destination. Introduction
63Navigation Z
Page 81 of 214

Using geo-coordinates
X To switch to navigation mode: press the
00CB button.
X To show the menu: slide6the control-
ler.
X To select Destination
Destination: turn and press the
controller.
X Select Using Geo-Coordinates
Using Geo-Coordinates.
Geo-coordinates are entered in degrees,
minutes and seconds.
Entering the latitude and longitude coor-
dinates
X To change the value: turn the controller.
X To move the selection within the line: slide
1 the controller.
X To move the selection between lines: slide
4 the controller.
X To confirm the value: press the controller.
Saving a destination
X To select Save
Save: turn and press the control-
ler.
The destination can be saved as:
R a navigable contact in the address book
R My Address
Starting route calculation
X To select Start Route Guidance
Start Route Guidance: turn
and press the controller. Route guidance
Important notes
For this reason, you must always observe
road and traffic rules and regulations during
your journey. Road and traffic rules and reg-
ulations always have priority over system
driving recommendations.
COMAND calculates the route to the destina-
tion without taking account of the following,
for example:
R traffic lights
R stop and yield signs R
merging lanes
R parking or stopping in a no parking/no
stopping zone
R other road and traffic rules and regulations
R narrow bridges
COMAND may give differing navigation com-
mands if the actual street/traffic situation
does not correspond with the digital map's
data. For example, if the road layout or the
direction of a one-way street has been
changed.
For this reason, you must always observe
road and traffic rules and regulations during
your journey. Road and traffic rules and reg-
ulations always have priority over the sys-
tem's driving recommendations.
Route guidance begins once a route has been
calculated (Y page 69).
COMAND guides you to your destination by
means of navigation announcements in the
form of audible navigation announcements
and route guidance displays.
The route guidance displays can be seen if the
display is switched to navigation mode.
If you do not follow the navigation announce-
ments or if you leave the calculated route,
COMAND automatically calculates a new
route to the destination.
If the digital map contains the corresponding
information, the following applies:
R during route guidance, COMAND tries to
avoid roads with restricted access. Those
roads, for example, that are closed to
through-traffic.
R roads that have time restrictions (e.g.
closed on Sundays and public holidays) are
considered for route guidance on days
when they are open. For this purpose, the
relevant times must be correctly stored in
the database. Route guidance
79Navigation Z
Page 83 of 214

Lane recommendations
0043
Lanes not recommended (dark gray)
0044 Possible lane (light gray)
0087 Recommended lanes (white)
If the digital map contains the relevant data,
COMAND can display lane recommendations
on multilane roads for the next change of
direction.
Lane not recommended 0043: you will not be
able to complete the next change of direction
if you stay in this lane.
Possible lane 0044: you will only be able to com-
plete the next change of direction in this lane.
Recommended lane 0087: in this lane you will
be able to complete the next change of direc-
tion and the one after that.
COMAND shows the lane recommendations
for the next two changes of direction. Lane
recommendations are also shown in the mul-
tifunction display of the instrument cluster
(see the vehicle Operator's Manual). 0043
Approaching new lane
During the change of direction, new lanes
may be added. These will be shown in the dis- play of lane recommendations with a lower
boundary line. Once the destination is reached, you will see
the checkered flag. Route guidance is fin-
ished.
Highway information
Requirement: the map content
Highway Highway
Information
Information must be enabled.
Display mode: while driving on the highway,
gas stations, rest stops, rest areas and high-
way exits are displayed along with their imme-
diate distances from the current vehicle posi-
tion. X
To call up the selection mode: while dis-
playing the motorway information, slide
9 the controller.
The marker is on the highway information.
The associated position is marked on the
map.
X To select the desired rest stop/high-
way exit: turn and press the controller. Route guidance
81Navigation Z
Page 84 of 214

Highway information facilitates route guid-
ance to a POI and use of the traffic jam func-
tion. The remaining route on the highway in
this case is blocked in the direction of travel
from the selected exit.
Starting route guidance and using addi-
tional functions
X To select a POI: turn the controller and
press to confirm.
The POI details are displayed.
The POI can now be:
R stored in the address book
(Y page 89)
R viewed on the map (Y page 94)
R called if a phone is connected and a
phone number is available
(Y page 110).
R selected for route guidance and a route
to it calculated (Y page 69).
Using the traffic jam function
X To select Detour
Detour: turn and press the con-
troller.
The traffic jam function appears
(Y page 84). Navigation announcements
Repeating navigation announcements If you missed the current navigation
announcement, you can call it up again. X
To switch to navigation mode: press the
00BE button.
X To show the menu: slide6the control-
ler.
X Select 006A: turn and press the controller.
i If you previously assigned the Repeat Repeat
Spoken
Spoken Driving
Driving Recommendations
Recommendations func-
tion to the Favorites button, you can select
the function using the Favorites button
instead (Y page 42).
Setting the volume manually X
Set the volume using the thumbwheel to
the right of the controller during the navi-
gation announcement.
i When you start the engine, the volume will
be at its lowest setting.
Switching navigation announcements
on/off X
To switch off navigation announce-
ments: during a navigation announcement,
press the thumbwheel to the right of the
controller.
or
X During a navigation announcement, press
the 0063 button on the multifunction steer-
ing wheel.
The Spoken Spoken driving
driving recommendations
recommendations
have been deactivated.
have been deactivated. message
appears.
X To switch navigation announcements
back on: press the controller.
X Select 006A: turn and press the controller.
COMAND automatically switches the naviga-
tion announcements back on when:
R a new route is calculated.
R you switch COMAND on again or start the
engine.
A navigation message is given if the route is
recalculated during dynamic route guidance
due to new traffic reports (Y page 85).82
Route guidanceNavigation
Page 86 of 214

Routes 1, 2 and 4 are displayed with a dark
blue line (Y page 64).
Route 3 is the most economic route and is
displayed with a green line.
X To switch to navigation mode: press the
00BE button.
X To show the menu: slide6the control-
ler.
X To select Route
Route: turn and press the con-
troller.
X Select Alternative Route
Alternative Route.
Route 1 is shown.
X To display additional routes: select Next Nextor
Previous
Previous.
X To start a new route guidance: select
Start
Start.
Route list X
To switch to navigation mode: press the
00BE button.
X To show the menu: slide6the control-
ler.
X To select Route
Route: turn and press the con-
troller.
X Select Route List
Route List.
The route list shows the next change of
direction and the immediate distances
from the current vehicle position.
X To display additional route sections:
turn the controller.
The position of the change of direction that
belongs to the respective route section is
indicated on the map with a cross. Where am I?
X
To switch to navigation mode: press the
00BE button.
X To show the menu: slide6the control-
ler.
X To select Position
Position: turn and press the
controller.
X Select Where am I?
Where am I?.
The street you are currently on and the pre-
vious and next intersections are displayed. Traffic jam function
X
To switch to navigation mode: press the
00BE button.
X To show the menu: slide6the control-
ler.
X To select Route Route: turn and press the con-
troller.
X Select Detour
Detour .
X To specify the start of the traffic jam
section: selectBeginning
Beginning .
The next possible traffic jam section start-
ing point is marked. 84
Route guidanceNavigation
Page 98 of 214

Activating/deactivating the blocked area:
X To select an area: turn and press the con-
troller.
Switch blocking on 0073or off 0053.
Displaying/changing the area:
X To select an area: turn the controller.
X Slide 9the controller.
X To select Display/Change
Display/Change : press the con-
troller.
The map with the crosshair appears.
The area currently blocked is displayed as
a red square.
X To move to a different area to block: slide
1, 4,2the controller.
X To resize the blocked area: press the con-
troller.
X Turn the controller.
The size of the blocked area changes.
X To accept changes: press the controller.
A message appears stating that the area
has been set.
Deleting an area:
X To select an area: turn the controller.
X Slide 9the controller.
X Select Delete
Delete .
A prompt appears asking whether you wish
to delete the area.
X Select Yes
Yes orNo No.
After selecting Yes
Yes , the area is deleted.
Deleting all areas:
X Slide 9and press the controller while
the list is shown.
X Select Delete All
Delete All .
A prompt appears asking whether you wish
to delete all areas.
X Select Yes
Yes orNo No.
After selecting Yes
Yes , all areas are deleted.
i Alternatively, you can carry out this oper-
ation using the touchpad ( Ypage 21). SIRIUS XM service
Displaying SIRIUS XM service informa-
tion You can display the SIRIUS XM service infor-
mation.
X
To switch to navigation mode: press the
00BE button.
X To show the menu: slide6the control-
ler.
X To select Traffic Traffic: turn and press the con-
troller.
X Select SIRIUS Service
SIRIUS Service.
The provider's phone number (SIRIUS XM)
and the serial number of your service mod-
ule are displayed.
i Alternatively you can call up this function
using the touchpad ( Ypage 21).
Registering for the SIRIUS XM traffic
report service X
Call the provider telephone number shown
on the COMAND display.
i You can also have the satellite service
activated online. To do so, visit the SIRIUS
XM Radio website at
http://www.sirius.com (USA).
Once the connection has been established:
X Follow the service employee's instructions.
The activation process may take up to ten
minutes.
If registration is not included when purchas-
ing the system, your credit card details will be
required to activate your account. Updating the digital map
Introduction The digital maps generated by the map soft-
ware become outdated in the same way as
conventional road maps. Optimal route guid-
ance can only be provided by the navigation96
Map functionsNavigation
Page 104 of 214

Your COMAND equipment
These operating instructions describe all
standard and optional equipment available
for your COMAND system at the time of pur-
chase. Country-specific differences are pos-
sible. Please note that your COMAND system
may not be equipped with all the features
described. This also applies to safety-relevant
systems and functions. Therefore, the equip-
ment on your COMAND system may differ
from that in the descriptions and illustrations.
Should you have any questions concerning
equipment and operation, please consult an
authorized Mercedes-Benz Center. Important safety notes
G
WARNING
If you operate mobile communication equip-
ment while driving, you will be distracted from
traffic conditions. You could also lose control
of the vehicle. There is a risk of an accident.
Only operate this equipment when the vehicle
is stationary.
If you make a call on your mobile phone while
driving, always use hands-free mode. Only
use the mobile phone when road, weather
and traffic conditions permit. Some jurisdic-
tions prohibit the driver from using a mobile
phone while driving a vehicle.
Bear in mind that at a speed of 30 mph
(approximately 50 km/h), the vehicle covers
a distance of 44 feet (approximately 14 m)
per second.
Excessive levels of electromagnetic radiation
may cause damage to your health and the
health of others.
There is scientific discussion surrounding the
possible health risks posed by electromag-
netic fields. You can reduce this risk by using
an exterior antenna. Therefore, connect your mobile communica-
tions equipment to the vehicle's exterior
antenna wherever possible. General notes
Introduction
A Bluetooth ®
interface is available for teleph-
ony.
If your mobile phone supports the Blue-
tooth ®
profile PBAP (P honeBook Access
Profile), the contacts are automatically dis-
played in COMAND.
You can use the message function if your
mobile phone supports the MAP Bluetooth ®
profile ( Message AccessProfile).
With a suitable mobile phone, you can use the
hands-free system and receive vCards via the
Bluetooth ®
interface.
You can obtain more information about suit-
able mobile phones on the Internet at
http://www.mbusa-mobile.com. Or call
the Mercedes-Benz Customer Assistance
center at
1-800-FOR-MERCedes(1-800-367-6372) for
the USA or at 1-800-387-0100 for Canada. Call disconnection while the vehicle is
in motion
A call may be disconnected if:
R there is insufficient network coverage in
certain areas.
R you move from one transmitter/receiver
area (cell) into another and no channels are
free.
R you use a SIM card which is not compatible
with the network available. Operating options
You can operate the telephone by:
R using the controller: 102
General notesTelephone
Page 173 of 214

X
Select a sub-category, e.g. Rock
Rock.
If the Rock
Rocksub-category includes music
tracks, these will be shown.. Gracenote
®
Media Database
General notes This function is only available in audio CD
mode.
There is a version of
Gracenote® music recognition technology,
Emeryville, California, USA on the COMAND
hard disk. You will recognize this by the logo
in the bottom right-hand corner of certain
audio displays.
If the audio CD does not contain any CD text
information, COMAND can use the Grace-
note ®
Media Database to identify unknown
audio tracks when in audio CD mode.
Internet update of metadata With the option
Update metadata via Inter-
net, the audio CD meta data that is not avail-
able (e.g. cover, track, album, artist) can be
reloaded to the internal Gracenote database.
An Internet connection is required for this
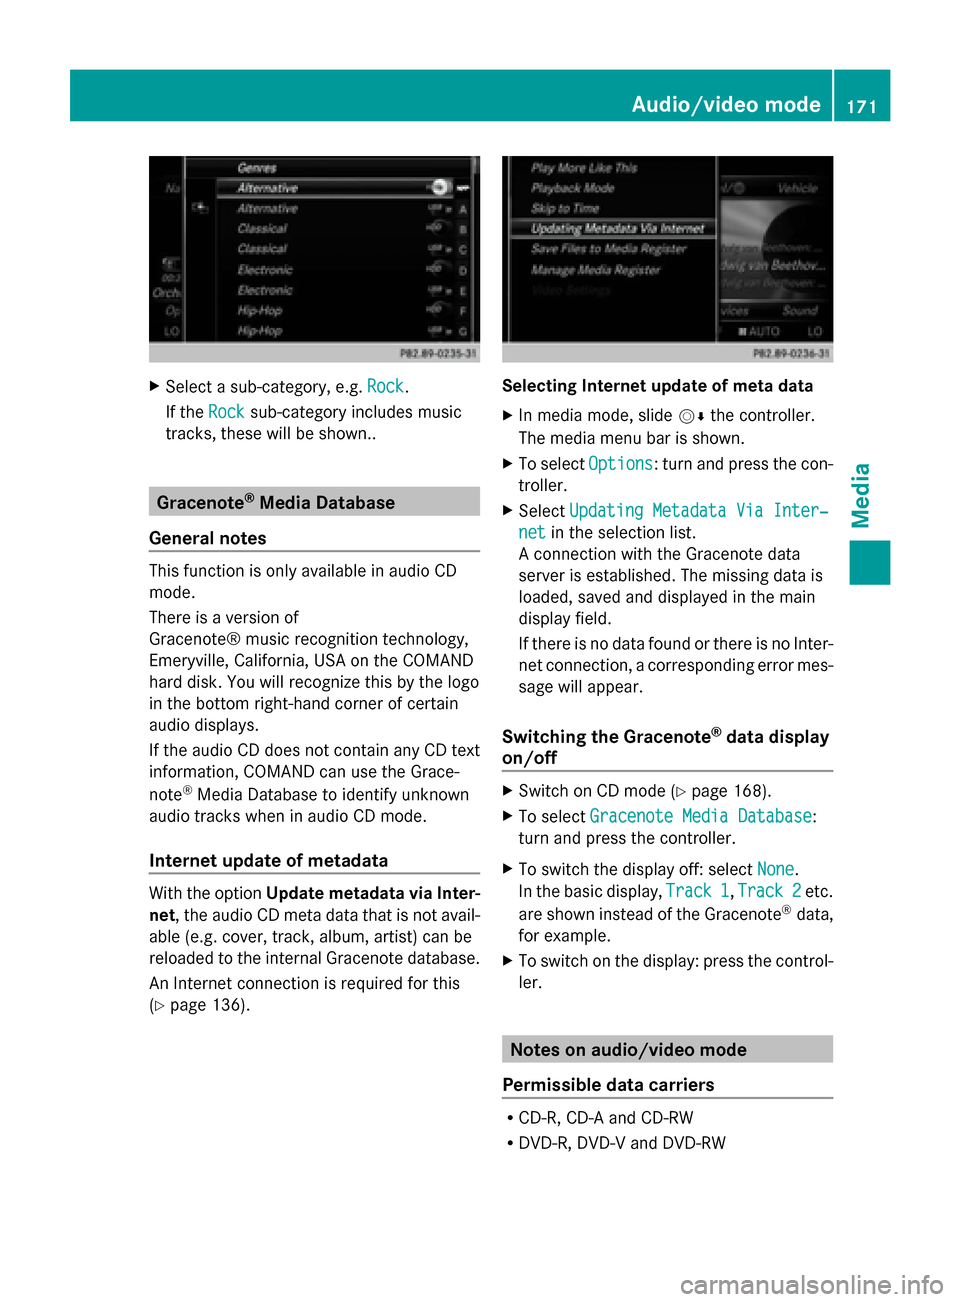
(Y page 136). Selecting Internet update of meta data
X
In media mode, slide 00520064the controller.
The media menu bar is shown.
X To select Options Options: turn and press the con-
troller.
X Select Updating Metadata Via Inter‐
Updating Metadata Via Inter‐
net
net in the selection list.
A connection with the Gracenote data
server is established. The missing data is
loaded, saved and displayed in the main
display field.
If there is no data found or there is no Inter-
net connection, a corresponding error mes-
sage will appear.
Switching the Gracenote ®
data display
on/off X
Switch on CD mode (Y page 168).
X To select Gracenote Media Database Gracenote Media Database:
turn and press the controller.
X To switch the display off: select None
None.
In the basic display, Track 1
Track 1,Track 2
Track 2 etc.
are shown instead of the Gracenote ®
data,
for example.
X To switch on the display: press the control-
ler. Notes on audio/video mode
Permissible data carriers R
CD-R, CD-A and CD-RW
R DVD-R, DVD-V and DVD-RW Audio/video mode
171Media Z