2015 MERCEDES-BENZ B-CLASS SPORTS fog light bulb
[x] Cancel search: fog light bulbPage 8 of 346
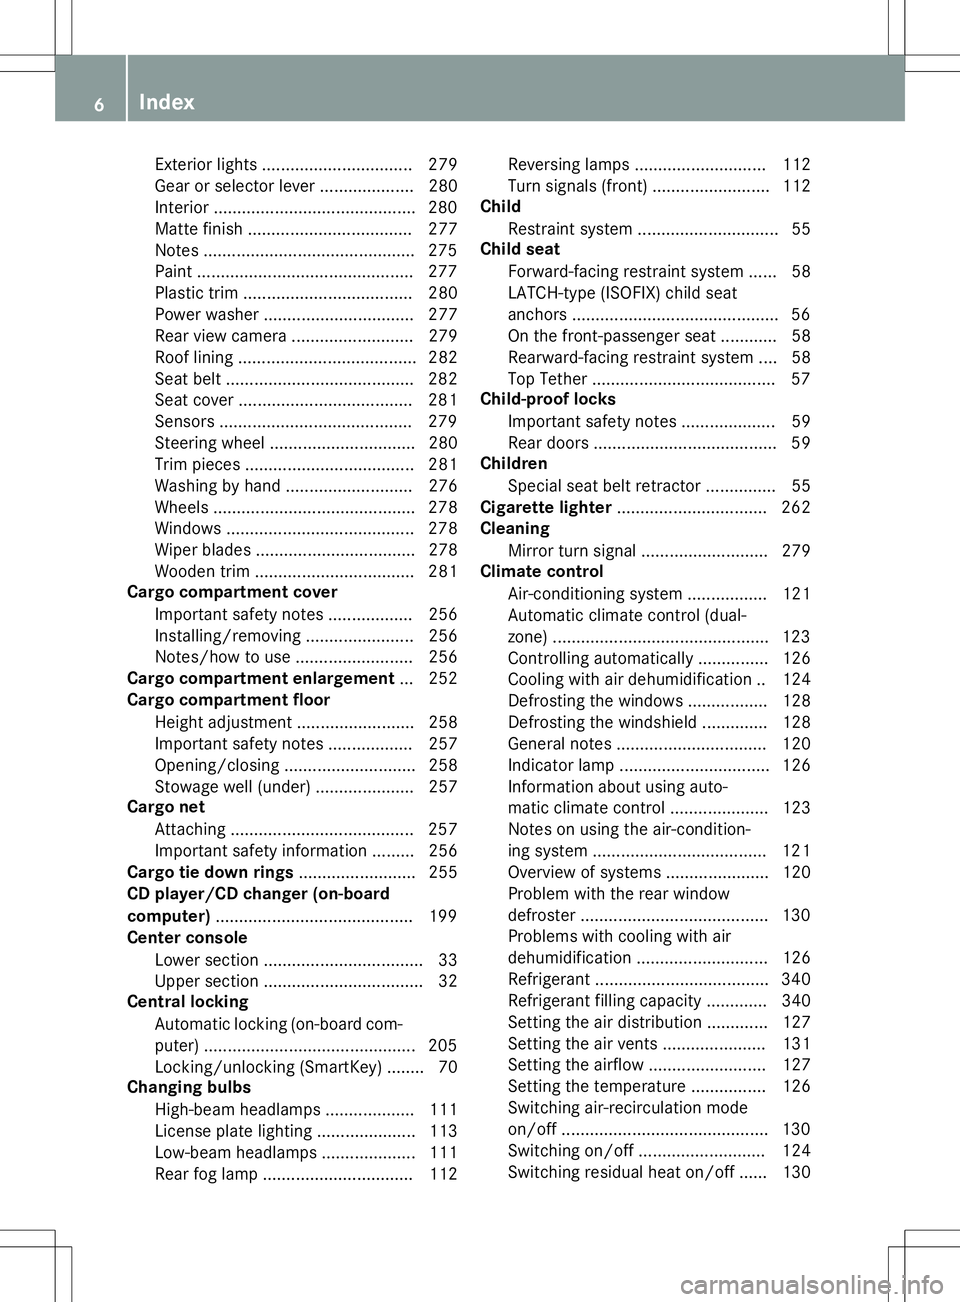
Exterior lights ................................ 279
Gear or selector lever .................... 280
Interior........................................... 280
Matte finish ................................... 277
Notes ............................................. 275
Paint .............................................. 277
Plastic trim .................................... 280
Power washe r................................ 277
Rear view camera .......................... 279
Roof lining ...................................... 282
Seat belt ........................................ 282
Seat cove r..................................... 281
Sensors ......................................... 279
Steering wheel ............................... 280
Trim pieces .................................... 281
Washing by hand ........................... 276
Wheels ........................................... 278
Windows ........................................ 278
Wiper blades .................................. 278
Wooden trim .................................. 281
Cargo compartment cover
Important safety notes .................. 256
Installing/removing ....................... 256
Notes/how to use ......................... 256
Cargo compartment enlargement ... 252
Cargo compartment floor
Height adjustment ......................... 258
Important safety notes .................. 257
Opening/closing ............................ 258
Stowage well (under )..................... 257
Cargo net
Attaching ....................................... 257
Important safety information ......... 256
Cargo tie down rings ......................... 255
CD player/CD changer (on-board
computer) .......................................... 199
Center console
Lower section .................................. 33
Upper section .................................. 32
Central locking
Automatic locking (on-board com-
puter) ............................................. 205
Locking/unlocking (SmartKey )........ 70
Changing bulbs
High-beam headlamp s................... 111
License plate lighting ..................... 113
Low-beam headlamp s.................... 111
Rear fog lamp ................................ 112 Reversing lamps ............................ 112
Turn signals (front) ......................... 112
Child
Restraint system .............................. 55
Child seat
Forward-facing restraint system ...... 58
LATCH-type (ISOFIX) child seat
anchors ............................................ 56
On the front-passenger sea t............ 58
Rearward-facing restraint system .... 58
Top Tether ....................................... 57
Child-proof locks
Important safety notes .................... 59
Rear doors ....................................... 59
Children
Special seat belt retractor ............... 55
Cigarette lighter ................................ 262
Cleaning
Mirror turn signal ........................... 279
Climate control
Air-conditioning system ................. 121
Automatic climate control (dual-
zone) .............................................. 123
Controlling automaticall y............... 126
Cooling with air dehumidification .. 124
Defrosting the window s................. 128
Defrosting the windshield .............. 128
General notes ................................ 120
Indicator lamp ................................ 126
Information about using auto-
matic climate control ..................... 123
Notes on using the air-condition-
ing system ..................................... 121
Overview of systems ...................... 120
Problem with the rear window
defroster ........................................ 130
Problems with cooling with air
dehumidification ............................ 126
Refrigerant ..................................... 340
Refrigerant filling capacity ............. 340
Setting the air distribution ............. 127
Setting the air vents ...................... 131
Setting the airflow ......................... 127
Setting the temperature ................ 126
Switching air-recirculation modeon/of f............................................ 130
Switching on/of f........................... 124
Switching residual heat on/off ...... 130
6Index
Page 13 of 346
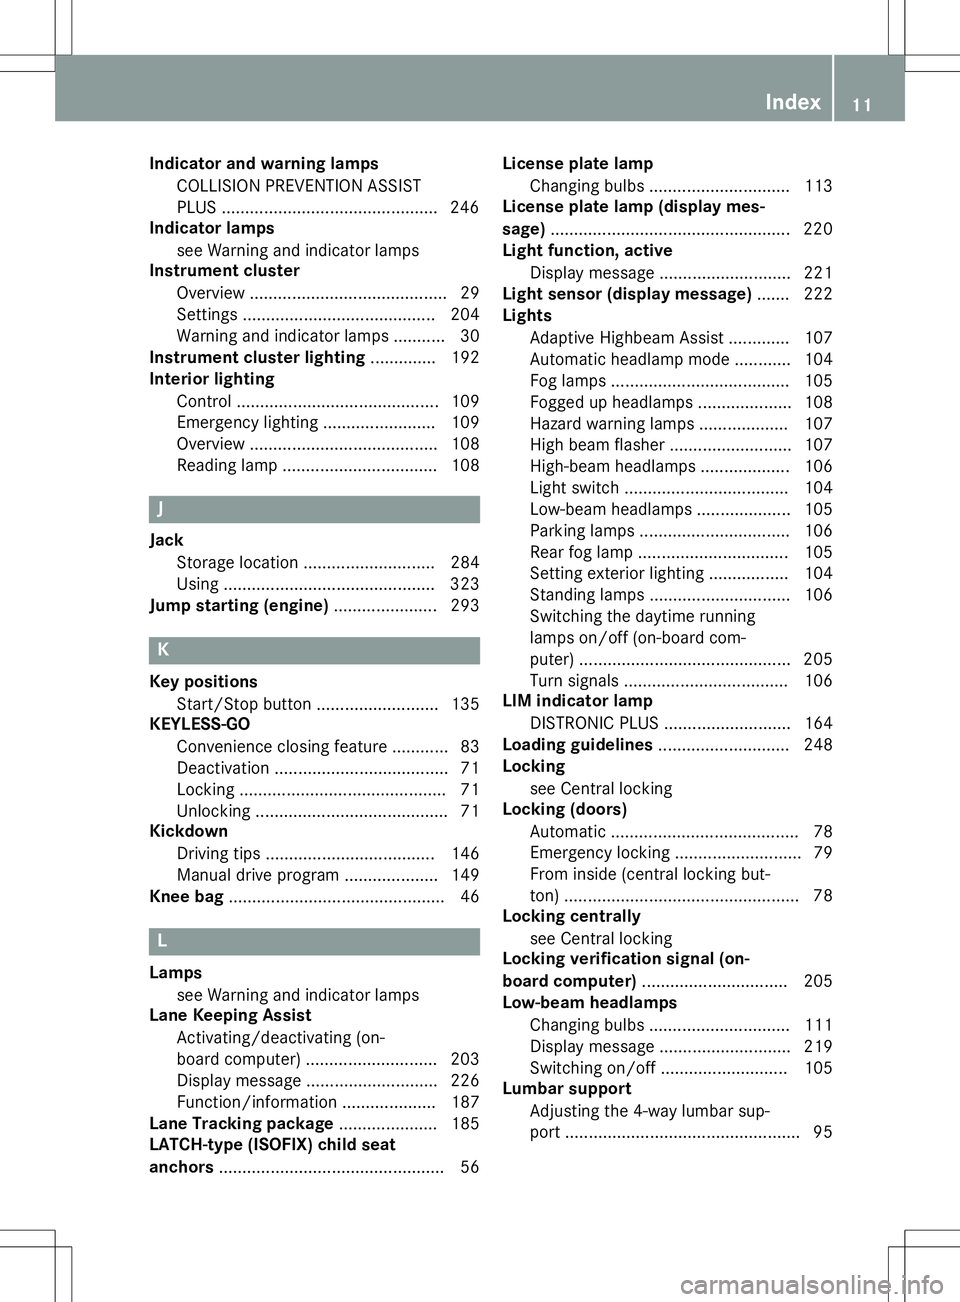
Indicator and warning lampsCOLLISION PREVENTION ASSIST
PLUS .............................................. 246
Indicator lamps
see Warning and indicator lamps
Instrument cluster
Overview .......................................... 29
Settings ........................................ .204
Warning and indicator lamps ........... 30
Instrument cluster lighting .............. 192
Interior lighting
Control .......................................... .109
Emergency lighting ........................ 109
Overview ........................................ 108
Reading lamp ................................. 108
J
Jack
Storage location ............................ 284
Using ............................................. 323
Jump starting (engine) ......................293
K
Key positions
Start/Stop button .......................... 135
KEYLESS-GO
Convenience closing feature ............ 83
Deactivation ..................................... 71
Locking ............................................ 71
Unlocking ......................................... 71
Kickdown
Driving tips ................................... .146
Manual drive program .................... 149
Knee bag .............................................. 46
L
Lamps
see Warning and indicator lamps
Lane Keeping Assist
Activating/deactivating (on-
board computer) ............................ 203
Display message ............................ 226
Function/informatio n.................... 187
Lane Tracking package ..................... 185
LATCH-type (ISOFIX) child seat
anchors ................................................ 56 License plate lamp
Changing bulb s.............................. 113
License plate lamp (display mes-
sage) ................................................... 220
Light function, active
Display message ............................ 221
Light sensor (display message) ....... 222
Lights
Adaptive Highbeam Assist ............. 107
Automatic headlamp mod e............ 104
Fog lamps ...................................... 105
Fogged up headlamp s.................... 108
Hazard warning lamps ................... 107
High beam flashe r.......................... 107
High-beam headlamp s................... 106
Light switch ................................... 104
Low-beam headlamp s.................... 105
Parking lamps ................................ 106
Rear fog lamp ................................ 105
Setting exterior lighting ................. 104
Standing lamps .............................. 106
Switching the daytime running
lamps on/off (on-board com-
puter) ............................................. 205
Turn signals ................................... 106
LIM indicator lamp
DISTRONIC PLUS ........................... 164
Loading guidelines ............................ 248
Locking
see Central locking
Locking (doors)
Automatic ........................................ 78
Emergency locking ........................... 79
From inside (central locking but-
ton) .................................................. 78
Locking centrally
see Central locking
Locking verification signal (on-
board computer) ............................... 205
Low-beam headlamps
Changing bulb s.............................. 111
Display message ............................ 219
Switching on/of f........................... 105
Lumbar support
Adjusting the 4-way lumbar sup-
port .................................................. 95
Index11
Page 16 of 346
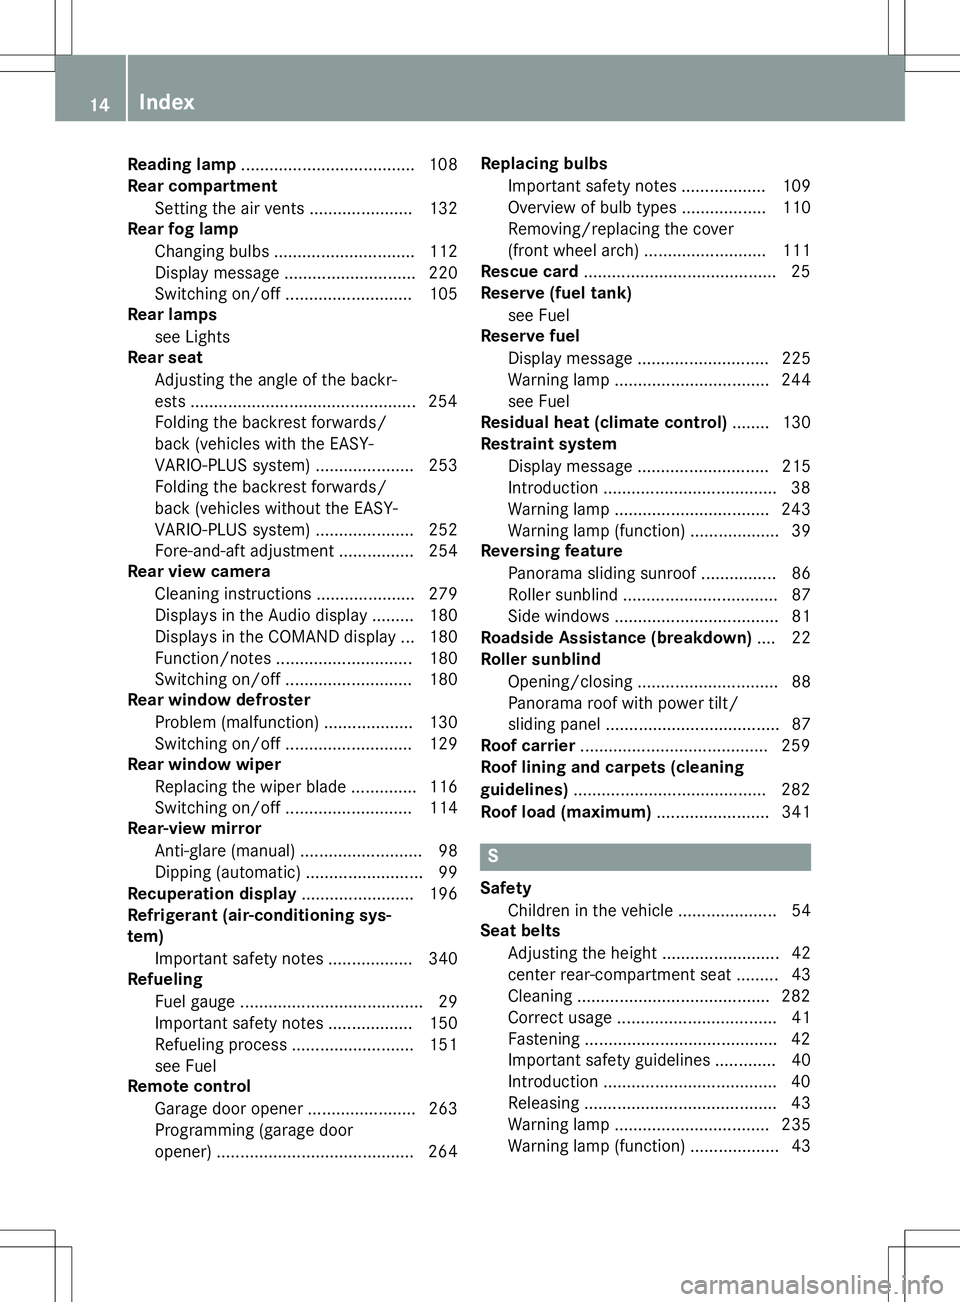
Reading lamp..................................... 108
Rear compartment
Setting the air vents ...................... 132
Rear fog lamp
Changing bulb s.............................. 112
Display message ............................ 220
Switching on/of f........................... 105
Rear lamps
see Lights
Rear seat
Adjusting the angle of the backr-
ests ................................................ 254
Folding the backrest forwards/
back (vehicles with the EASY-
VARIO-PLUS system) ..................... 253
Folding the backrest forwards/
back (vehicles without the EASY-
VARIO-PLUS system) ..................... 252
Fore-and-aft adjustment ................ 254
Rear view camera
Cleaning instructions ..................... 279
Displays in the Audio display ......... 180
Displays in the COMAND display ... 180
Function/note s............................. 180
Switching on/of f........................... 180
Rear window defroster
Problem (malfunction) ................... 130
Switching on/of f........................... 129
Rear window wiper
Replacing the wiper blad e.............. 116
Switching on/of f........................... 114
Rear-view mirror
Anti-glare (manual) .......................... 98
Dipping (automatic) ......................... 99
Recuperation display ........................ 196
Refrigerant (air-conditioning sys-tem)
Important safety notes .................. 340
Refueling
Fuel gaug e....................................... 29
Important safety notes .................. 150
Refueling process .......................... 151
see Fuel
Remote control
Garage door opener ....................... 263
Programming (garage door
opener) .......................................... 264 Replacing bulbs
Important safety notes .................. 109
Overview of bulb types .................. 110
Removing/replacing the cover
(front wheel arch) .......................... 111
Rescue card ......................................... 25
Reserve (fuel tank)
see Fuel
Reserve fuel
Display message ............................ 225
Warning lamp ................................. 244
see Fuel
Residual heat (climate control) ........ 130
Restraint system
Display message ............................ 215
Introduction ..................................... 38
Warning lamp ................................. 243
Warning lamp (function) ................... 39
Reversing feature
Panorama sliding sunroo f................ 86
Roller sunblind ................................. 87
Side windows ................................... 81
Roadside Assistance (breakdown) .... 22
Roller sunblind
Opening/closing .............................. 88
Panorama roof with power tilt/
sliding panel ..................................... 87
Roof carrier ........................................ 259
Roof lining and carpets (cleaning
guidelines) ......................................... 282
Roof load (maximum) ........................ 341
S
Safety
Children in the vehicle ..................... 54
Seat belts
Adjusting the height ......................... 42
center rear-compartment sea t......... 43
Cleaning ......................................... 282
Correct usage .................................. 41
Fastening ......................................... 42
Important safety guidelines ............. 40
Introduction ..................................... 40
Releasing ......................................... 43
Warning lamp ................................. 235
Warning lamp (function) ................... 43
14Index
Page 112 of 346
bulbs of the same type and the specified volt-
age.
Marks on the glass tube reduce the service
life of the bulbs. Do not touch the glass tube
with your bare hands. If necessary, clean the glass tube when cold with alcohol or spirit and
rub it off with a lint-free cloth.
Protect bulbs from moisture during opera-
tion. Do not allow bulbs to come into contact
with liquids.
Replace only the bulbs listed ( Ypage 110).
Have the bulbs that you cannot replace your-
self changed at a qualified specialist work- shop.
If you require assistance changing bulbs, con- sult a qualified specialist workshop.
If the new bulb still does not light up, consult
a qualified specialist workshop.
Bulbs and lamps are an important aspect of
vehicle safety. You must therefore make sure that these function correctly at all times.
Have the headlamp setting checked regularly.
Vehicles with LED headlamps: the light
clusters of your vehicle are equipped with
LED light bulbs. Do not replace the bulbs
yourself. Contact a qualified specialist work-
shop which has the necessary specialist
knowledge and tools to carry out the workrequired.
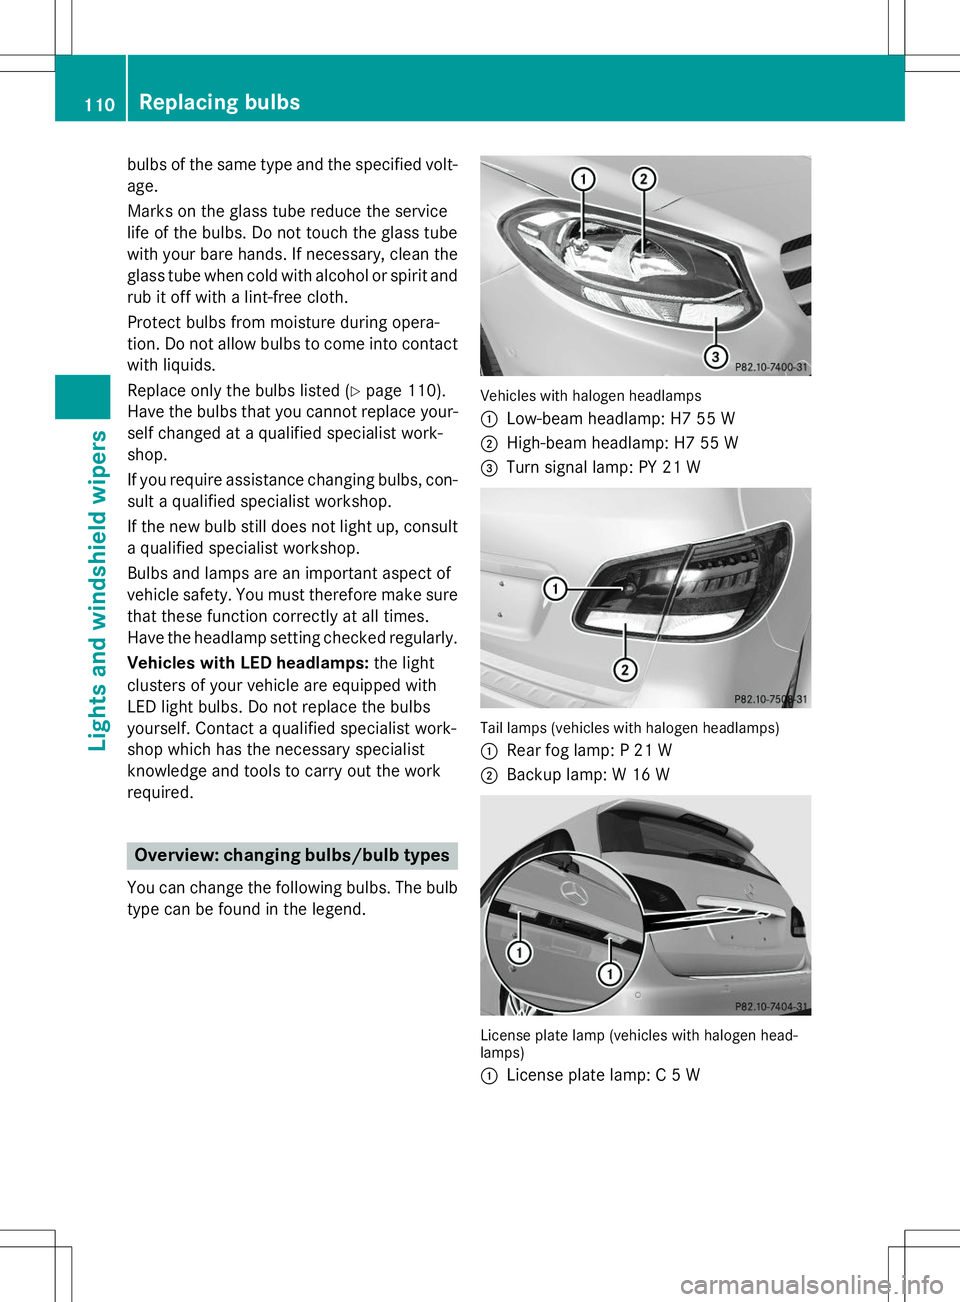
Overview: changing bulbs/bulb types
You can change the following bulbs. The bulb type can be found in the legend.
Vehicles with halogen headlamps :
Low-beam headlamp: H7 55 W
;High-beam headlamp: H7 55 W
=Turn signal lamp: PY 21 W
Tail lamps (vehicles with halogen headlamps) :
Rear fog lamp: P 21 W
;Backup lamp: W 16 W
License plate lamp (vehicles with halogen head- lamps) :
License plate lamp: C 5 W
110Replacing bulbs
Lights and windshield wipers
Page 114 of 346
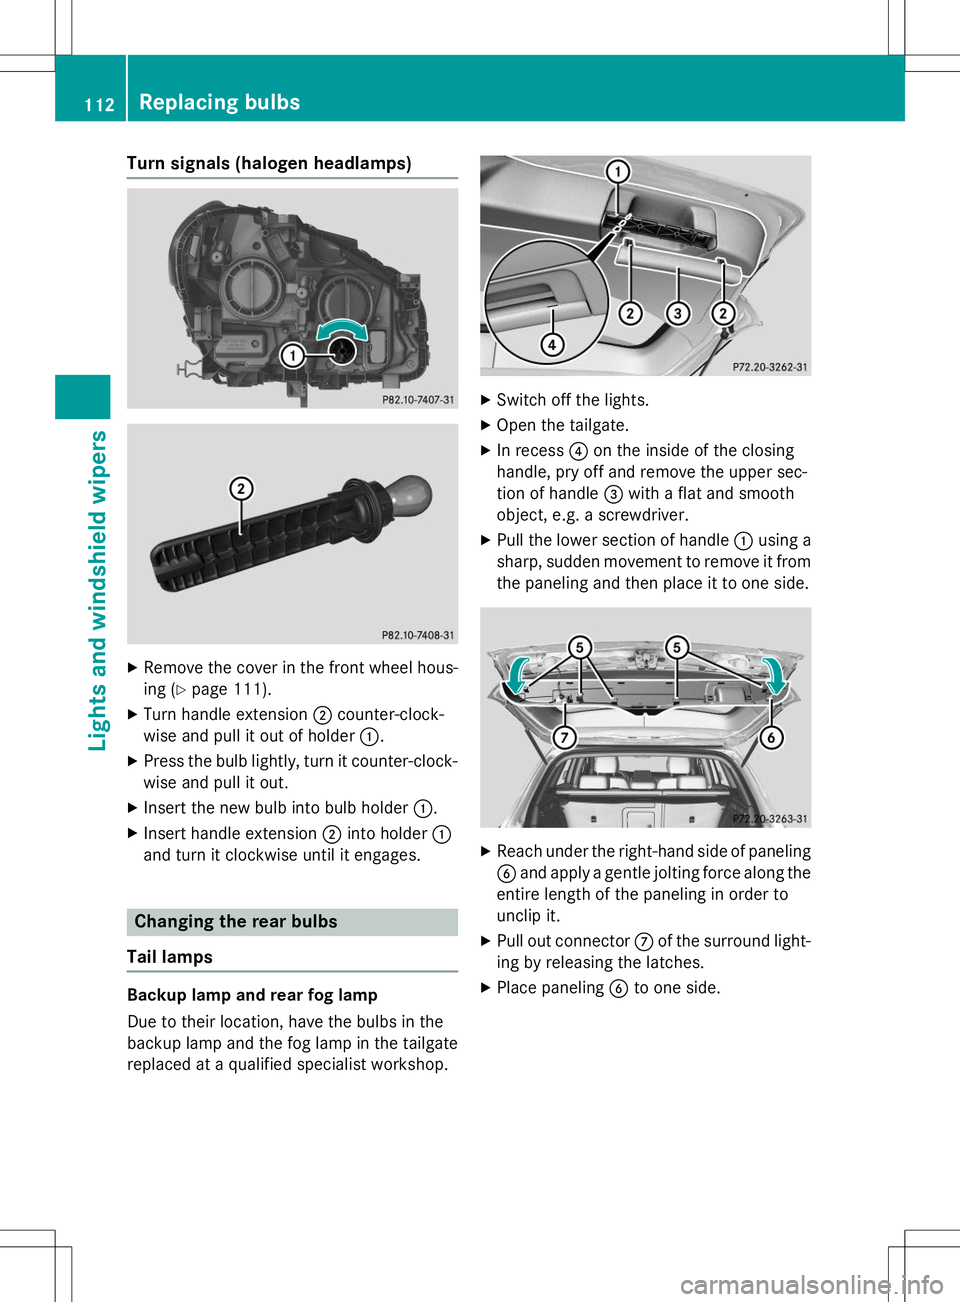
Turn signals (halogen headlamps)
XRemove the cover in the front wheel hous-
ing ( Ypage 111).
X Turn handle extension ;counter-clock-
wise and pull it out of holder :.
X Press the bulb lightly, turn it counter-clock-
wise and pull it out.
X Insert the new bulb into bulb holder :.
X Insert handle extension ;into holder :
and turn it clockwise until it engages.
Changing the rear bulbs
Tail lamps
Backup lamp and rear fog lamp
Due to their location, have the bulbs in the
backup lamp and the fog lamp in the tailgate replaced at a qualified specialist workshop.
X Switch off the lights.
X Open the tailgate.
X In recess ?on the inside of the closing
handle, pry off and remove the upper sec-
tion of handle =with a flat and smooth
object, e.g. a screwdriver.
X Pull the lower section of handle :using a
sharp, sudden movement to remove it from the paneling and then place it to one side.
X Reach under the right-hand side of paneling
B and apply a gentle jolting force along the
entire length of the paneling in order to
unclip it.
X Pull out connector Cof the surround light-
ing by releasing the latches.
X Place paneling Bto one side.
112Replacing bulbs
Lights and windshield wipers
Page 115 of 346
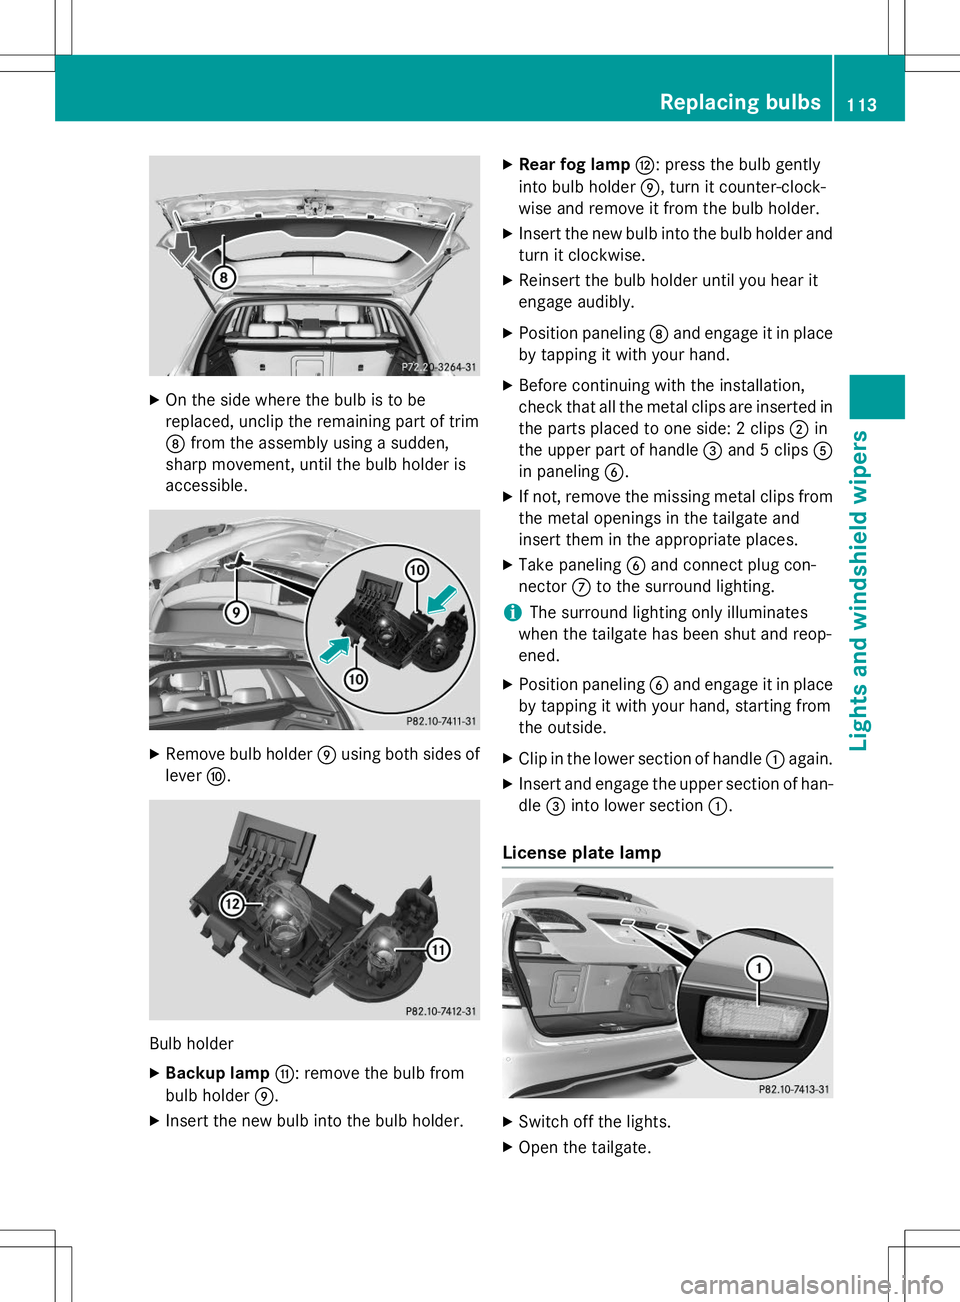
XOn the side where the bulb is to be
replaced, unclip the remaining part of trimD from the assembly using a sudden,
sharp movement, until the bulb holder isaccessible.
X Remove bulb holder Eusing both sides of
lever F.
Bulb holder
X Backup lamp G: remove the bulb from
bulb holder E.
X Insert the new bulb into the bulb holder. X
Rear fog lamp H: press the bulb gently
into bulb holder E, turn it counter-clock-
wise and remove it from the bulb holder.
X Insert the new bulb into the bulb holder and
turn it clockwise.
X Reinsert the bulb holder until you hear it
engage audibly.
X Position paneling Dand engage it in place
by tapping it with your hand.
X Before continuing with the installation,
check that all the metal clips are inserted in
the parts placed to one side: 2 clips ;in
the upper part of handle =and 5 clips A
in paneling B.
X If not, remove the missing metal clips from
the metal openings in the tailgate and
insert them in the appropriate places.
X Take paneling Band connect plug con-
nector Cto the surround lighting.
iThe surround lighting only illuminates
when the tailgate has been shut and reop- ened.
X Position paneling Band engage it in place
by tapping it with your hand, starting from
the outside.
X Clip in the lower section of handle :again.
X Insert and engage the upper section of han-dle =into lower section :.
License plate lamp
X
Switch off the lights.
X Open the tailgate.
Replacing bulbs113
Lights and windshield wipers
Z
Page 182 of 346
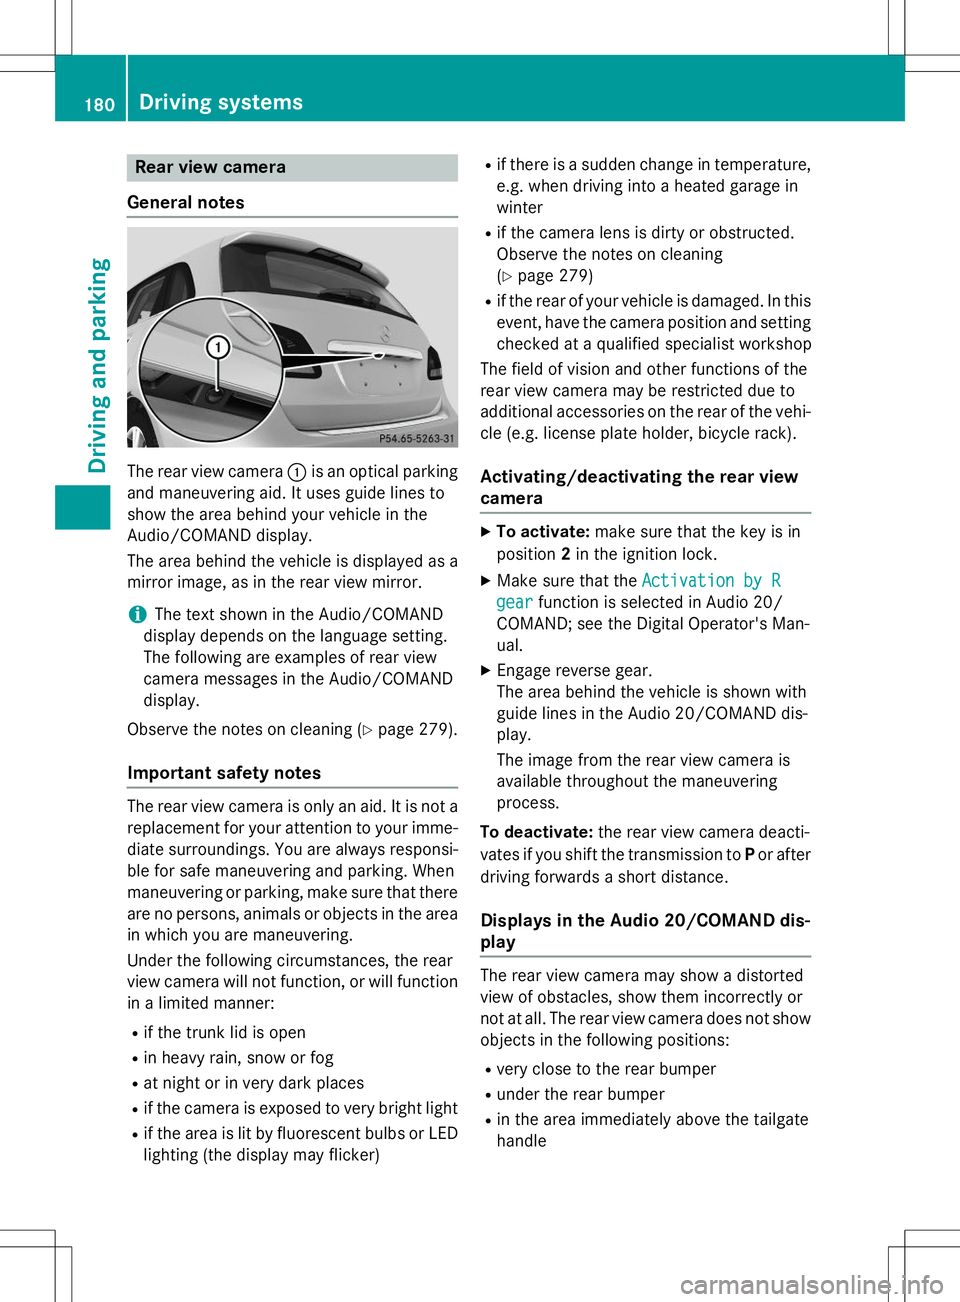
Rear view camera
General notes
The rear view camera :is an optical parking
and maneuvering aid. It uses guide lines to
show the area behind your vehicle in the
Audio/COMAND display.
The area behind the vehicle is displayed as a
mirror image, as in the rear view mirror.
iThe text shown in the Audio/COMAND
display depends on the language setting.
The following are examples of rear view
camera messages in the Audio/COMAND
display.
Observe the notes on cleaning ( Ypage 279).
Important safety notes
The rear view camera is only an aid. It is not a
replacement for your attention to your imme-
diate surroundings. You are always responsi- ble for safe maneuvering and parking. When
maneuvering or parking, make sure that there
are no persons, animals or objects in the area in which you are maneuvering.
Under the following circumstances, the rear
view camera will not function, or will function
in a limited manner:
R if the trunk lid is open
R in heavy rain, snow or fog
R at night or in very dark places
R if the camera is exposed to very bright light
R if the area is lit by fluorescent bulbs or LED
lighting (the display may flicker) R
if there is a sudden change in temperature,
e.g. when driving into a heated garage in
winter
R if the camera lens is dirty or obstructed.
Observe the notes on cleaning(Y page 279)
R if the rear of your vehicle is damaged. In this
event, have the camera position and setting
checked at a qualified specialist workshop
The field of vision and other functions of the
rear view camera may be restricted due to
additional accessories on the rear of the vehi-
cle (e.g. license plate holder, bicycle rack).
Activating/deactivating the rear view
camera
X To activate: make sure that the key is in
position 2in the ignition lock.
X Make sure that the
Activation by R
gearfunction is selected in Audio 20/
COMAND; see the Digital Operator's Man-
ual.
X Engage reverse gear.
The area behind the vehicle is shown with
guide lines in the Audio 20/COMAND dis-
play.
The image from the rear view camera is
available throughout the maneuvering
process.
To deactivate: the rear view camera deacti-
vates if you shift the transmission to Por after
driving forwards a short distance.
Displays in the Audio 20/COMAND dis-play
The rear view camera may show a distorted
view of obstacles, show them incorrectly or
not at all. The rear view camera does not show
objects in the following positions:
R very close to the rear bumper
R under the rear bumper
R in the area immediately above the tailgate
handle
180Driving systems
Driving and parking