2015 MERCEDES-BENZ B-CLASS SPORTS turn signal
[x] Cancel search: turn signalPage 187 of 346
below 37 mph (60 km/h) or above 124 mph
(200 km/h).
Activating ATTENTION ASSIST
XActivate ATTENTION ASSIST using the on-
board computer ( Ypage 203).
The system determines the attention level
of the driver depending on the setting
selected:
Selection
Standard: the sensitivity with
which the system determines the attention
level is set to normal.
Selection
Sensitive: the sensitivity is set
higher. The attention level detected by Atten- tion Assist is adapted accordingly and the
driver is warned earlier.
Vehicles with black and white multifunc-
tion display: when ATTENTION ASSIST is
activated, the multifunction display in the sta-
tus overview shows the Àsymbol.
Vehicles with color multifunction display: when ATTENTION ASSIST is deactivated, the
multifunction display in the assistance
graphic shows the ésymbol.
When ATTENTION ASSIST has been deactiva-
ted, it is automatically reactivated after the
engine has been stopped. The sensitivity
selected corresponds to the last selection
activated (standard/sensitive).
Warning in the multifunction display
If fatigue or increasing lapses in concentra-
tion are detected, a warning appears in the
multifunction display:
ATTENTION ASSIST
Take a Break!.
In addition to the message shown in the mul-
tifunction display, you will then hear a warn-
ing tone.
X If necessary, take a break.
X Confirm the message by pressing the a
button on the steering wheel.
On long journeys, take regular breaks in good
time to allow yourself to rest properly. If you
do not take a break and ATTENTION ASSIST still detects increasing lapses in concentra-
tion, you will be warned again after
15 minutes at the earliest. This will only hap-
pen if ATTENTION ASSIST still detects typical
indicators of fatigue or increasing lapses in
concentration.
If a warning is output in the multifunction dis-
play, a service station search is performed in
COMAND. You can select a service station
and navigation to this service station will then
begin. This function can be activated and
deactivated in COMAND.
Lane Tracking package
General notes
The Lane Tracking package consists of Blind
Spot Assist ( Ypage 185) and Lane Keeping
Assist ( Ypage 187).
Blind Spot Assist
General notes
Blind Spot Assist monitors the areas on either
side of the vehicle that are not visible to the
driver with two lateral, rear-facing radar sen-
sors. A warning display in the exterior mirrors draws your attention to vehicles detected in
the monitored area. If you then switch on the corresponding turn signal to change lanes,
you will also receive a visual and audible col-
lision warning.
Blind Spot Assist supports you from a speed
of approximately 20 mph (30 km/ h).
Important safety notes
GWARNING
Blind Spot Assist does not react to: R vehicles overtaken too closely on the side,
placing them in the blind spot area
R vehicles which approach with a large speed
differential and overtake your vehicle
As a result, Blind Spot Assist may not give
warnings in such situations. There is a risk of an accident.
Driving systems185
Driving and pa rking
Z
Page 189 of 346
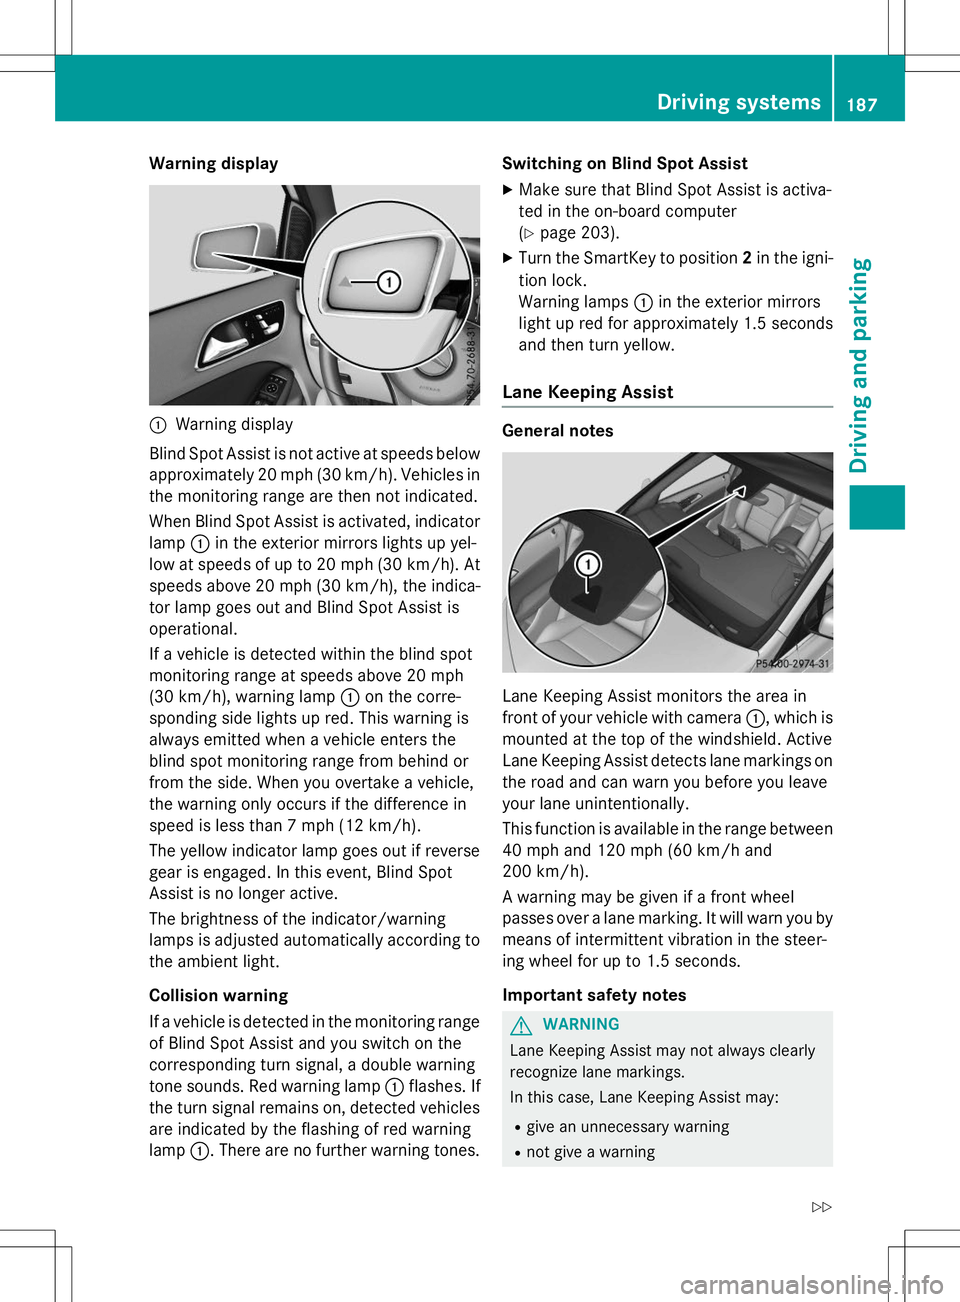
Warning display
:Warning display
Blind Spot Assist is not active at speeds below approximately 20 mph (30 km/h). Vehicles in
the monitoring range are then not indicated.
When Blind Spot Assist is activated, indicator lamp :in the exterior mirrors lights up yel-
low at speeds of up to 20 mph (30 km/h). At speeds above 20 mph (30 km/h), the indica-
tor lamp goes out and Blind Spot Assist is
operational.
If a vehicle is detected within the blind spot
monitoring range at speeds above 20 mph
(30 km/h), warning lamp :on the corre-
sponding side lights up red. This warning is
always emitted when a vehicle enters the
blind spot monitoring range from behind or
from the side. When you overtake a vehicle,
the warning only occurs if the difference in
speed is less than 7 mph (12 km/h).
The yellow indicator lamp goes out if reverse
gear is engaged. In this event, Blind Spot
Assist is no longer active.
The brightness of the indicator/warning
lamps is adjusted automatically according to
the ambient light.
Collision warning
If a vehicle is detected in the monitoring range of Blind Spot Assist and you switch on the
corresponding turn signal, a double warning
tone sounds. Red warning lamp :flashes. If
the turn signal remains on, detected vehicles
are indicated by the flashing of red warning
lamp :. There are no further warning tones. Switching on Blind Spot Assist
X Make sure that Blind Spot Assist is activa-
ted in the on-board computer(Y page 203).
X Turn the SmartKey to position 2in the igni-
tion lock.
Warning lamps :in the exterior mirrors
light up red for approximately 1.5 seconds
and then turn yellow.
Lane Keeping Assist
General notes
Lane Keeping Assist monitors the area in
front of your vehicle with camera :, which is
mounted at the top of the windshield. Active
Lane Keeping Assist detects lane markings on
the road and can warn you before you leave
your lane unintentionally.
This function is available in the range between
40 mph and 120 mph (60 km/h and
200 km/h).
A warning may be given if a front wheel
passes over a lane marking. It will warn you by means of intermittent vibration in the steer-
ing wheel for up to 1.5 seconds.
Important safety notes
GWARNING
Lane Keeping Assist may not always clearly
recognize lane markings.
In this case, Lane Keeping Assist may:
R give an unnecessary warning
R not give a warning
Driving systems187
Driving and parking
Z
Page 190 of 346
There is a risk of an accident.
Always pay particular attention to the traffic
situation and stay in lane, in particular if
warned by Lane Keeping Assist.
GWARNING
The Lane Keeping Assist warning does not
return the vehicle to the original lane. There isa risk of an accident.
You should always steer, brake or accelerate
yourself, in particular if warned by Lane Keep- ing Assist.
If you fail to adapt your driving style, Lane
Keeping Assist can neither reduce the risk of
an accident nor override the laws of physics.
Lane Keeping Assist cannot take into account the road, traffic and weather conditions. Lane
Keeping Assist is merely an aid. You are
responsible for the distance to the vehicle in
front, for vehicle speed, for braking in good
time and for staying in your lane.
The Lane Keeping Assist does not keep the
vehicle in the lane.
The system may be impaired or may not func- tion if:
R there is poor visibility, e.g. due to insuffi-
cient illumination of the road, or due to
snow, rain, fog or spray
R there is glare, e.g. from oncoming traffic,
the sun or reflections (e.g. when the road
surface is wet)
R the windshield is dirty, fogged up, damaged
or covered, for instance by a sticker, in the
vicinity of the camera
R there are no, several or unclear lane mark-
ings for a lane, e.g. in areas with road con-
struction work
R the lane markings are worn away, dark or
covered up, e.g. by dirt or snow
R the distance to the vehicle in front is too
small and the lane markings thus cannot be
detected R
the lane markings change quickly, e.g.
lanes branch off, cross one another ormerge
R the road is narrow and winding
R there are strong shadows cast on the road
Switching on Lane Keeping Assist
X Activate Lane Keeping Assist using the on-
board computer; to do so, select
Standard
orAdaptive( Y page 203).
If you drive at speeds above 60 km/ hand
lane markings are detected, the lane mark-
ings in the assistance graphics display ( Y page 202) are shown in green.
When
Standardis selected, no warning vibra-
tion occurs if:
R you have switched on the turn signals. In
this event, the warnings are suppressed for
a certain period of time.
R a driving safety system intervenes, such as
ABS, BAS or ESP ®
.
When
Adaptiveis selected, no warning vibra-
tion occurs if:
R you have switched on the turn signals. In
this event, the warnings are suppressed for
a certain period of time.
R a driving safety system intervenes, e.g.
ABS, BAS or ESP ®
.
R you accelerate hard, e.g. kickdown.
R you brake hard.
R you steer actively, e.g. swerve to avoid an
obstacle or change lanes quickly.
R you cut the corner on a sharp bend.
In order that you are warned only when nec-
essary and in good time if you cross the lane marking, the system recognizes certain con-
ditions and warns you accordingly.
The warning vibration occurs earlier if:
R you approach the outer lane marking on a
bend.
R the road has very wide lanes, e.g. a high-way.
R the system recognizes solid lane markings.
188Driving systems
Driving and parking
Page 221 of 346
Display messagesPossible causes/consequences andMSolutions
ator's Manualdisplay messages must not be shown in the
multifunction display.
X Wait for a period of at least 60 seconds until the necessary sys-
tem checks have been completed.
X Make sure that the display messages do not appear in the mul-
tifunction display.
If these conditions are fulfilled, the front-passenger seat can be
occupied again. Whether the PASSENGER AIR BAG OFF or ON
indicator lamp remains lit or goes out depends on how OCS clas-
sifies the occupant.
If the conditions are not fulfilled, the system is not operating cor- rectly.
X Visit a qualified specialist workshop immediately.
For further information about the Occupant Classification System, see ( Ypage 47).
Lights
iVehicles with LED bulbs in the light clusters:
The display message for the corresponding light will only appear if all the LEDs have failed.
Display messagesPossible causes/consequences and MSolutions
b
Check Left Low
BeamorCheck
Right Low Beam
The left or right-hand low-beam headlamp is defective.
X Halogen headlamp: replace the bulb (Ypage 109).
X LED headlamps: consult a qualified specialist workshop.
b
Check Rear Left
Turn Signalor
Check Rear Right
Turn Signal
The rear left-hand or rear right-hand turn signal is defective.
X Tail lamps (vehicles with halogen headlamps): replace the
bulb ( Ypage 109).
X Tail lamps (vehicles with LED headlamps): visit a qualified
specialist workshop.
b
Check Front Left
Turn Signalor
Check Front Right
Turn Signal
The front left-hand or front right-hand turn signal is defective.
X Halogen headlamp: replace the bulb (Ypage 109).
X LED headlamps: consult a qualified specialist workshop.
Displaymessages219
On-board computer and displays
Z
Page 222 of 346
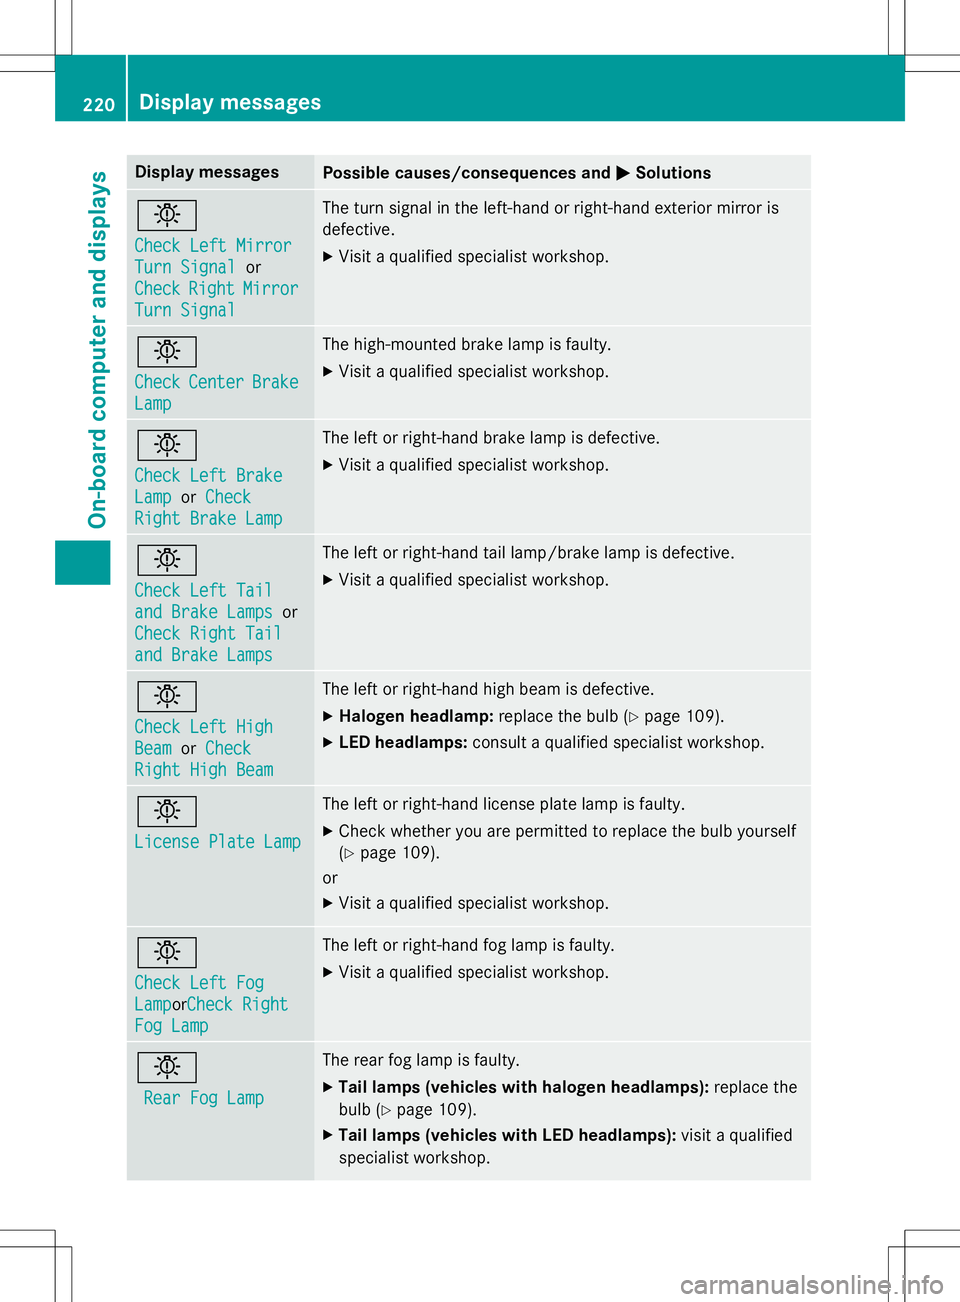
Display messagesPossible causes/consequences andMSolutions
b
Check Left Mirror
Turn Signalor
CheckRightMirror
Turn Signal
The turn signal in the left-hand or right-hand exterior mirror is
defective.
X Visit a qualified specialist workshop.
b
CheckCenterBrake
Lamp
The high-mounted brake lamp is faulty. XVisit a qualified specialist workshop.
b
Check Left Brake
LamporCheck
Right Brake Lamp
The left or right-hand brake lamp is defective. XVisit a qualified specialist workshop.
b
Check Left Tail
and Brake Lampsor
Check Right Tail
and Brake Lamps
The left or right-hand tail lamp/brake lamp is defective.
X Visit a qualified specialist workshop.
b
Check Left High
BeamorCheck
Right High Beam
The left or right-hand high beam is defective.
X Halogen headlamp: replace the bulb (Ypage 109).
X LED headlamps: consult a qualified specialist workshop.
b
License Plate Lamp
The left or right-hand license plate lamp is faulty.
X Check whether you are permitted to replace the bulb yourself (Y page 109).
or
X Visit a qualified specialist workshop.
b
Check Left Fog
LamporCheck Right
Fog Lamp
The left or right-hand fog lamp is faulty.
X Visit a qualified specialist workshop.
b
Rear Fog Lamp
The rear fog lamp is faulty.
X Tail lamps (vehicles with halogen headlamps): replace the
bulb ( Ypage 109).
X Tail lamps (vehicles with LED headlamps): visit a qualified
specialist workshop.
220Display messages
On-board computer and displays
Page 267 of 346
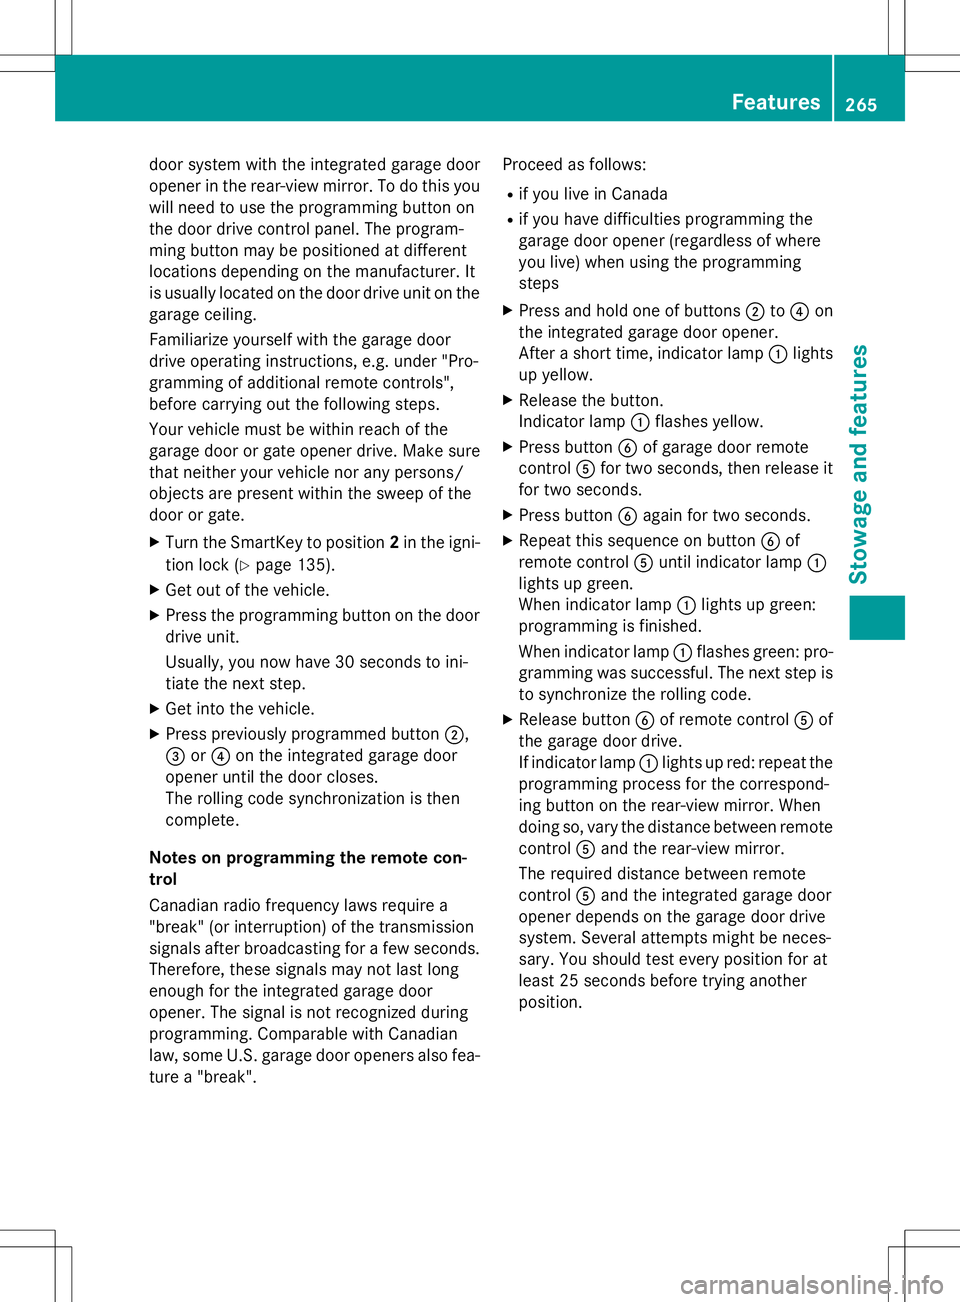
door system with the integrated garage door
opener in the rear-view mirror. To do this you
will need to use the programming button on
the door drive control panel. The program-
ming button may be positioned at different
locations depending on the manufacturer. It
is usually located on the door drive unit on thegarage ceiling.
Familiarize yourself with the garage door
drive operating instructions, e.g. under "Pro-
gramming of additional remote controls",
before carrying out the following steps.
Your vehicle must be within reach of the
garage door or gate opener drive. Make sure
that neither your vehicle nor any persons/
objects are present within the sweep of the
door or gate.
X Turn the SmartKey to position 2in the igni-
tion lock ( Ypage 135).
X Get out of the vehicle.
X Press the programming button on the door
drive unit.
Usually, you now have 30 seconds to ini-
tiate the next step.
X Get into the vehicle.
X Press previously programmed button ;,
= or? on the integrated garage door
opener until the door closes.
The rolling code synchronization is then
complete.
Notes on programming the remote con-
trol
Canadian radio frequency laws require a
"break" (or interruption) of the transmission
signals after broadcasting for a few seconds. Therefore, these signals may not last long
enough for the integrated garage door
opener. The signal is not recognized during
programming. Comparable with Canadian
law, some U.S. garage door openers also fea-
ture a "break". Proceed as follows:
R if you live in Canada
R if you have difficulties programming the
garage door opener (regardless of where
you live) when using the programmingsteps
X Press and hold one of buttons ;to? on
the integrated garage door opener.
After a short time, indicator lamp :lights
up yellow.
X Release the button.
Indicator lamp :flashes yellow.
X Press button Bof garage door remote
control Afor two seconds, then release it
for two seconds.
X Press button Bagain for two seconds.
X Repeat this sequence on button Bof
remote control Auntil indicator lamp :
lights up green.
When indicator lamp :lights up green:
programming is finished.
When indicator lamp :flashes green: pro-
gramming was successful. The next step is to synchronize the rolling code.
X Release button Bof remote control Aof
the garage door drive.
If indicator lamp :lights up red: repeat the
programming process for the correspond-
ing button on the rear-view mirror. When
doing so, vary the distance between remote control Aand the rear-view mirror.
The required distance between remote
control Aand the integrated garage door
opener depends on the garage door drive
system. Several attempts might be neces-
sary. You should test every position for at
least 25 seconds before trying another
position.
Features265
Stowage and features
Z
Page 268 of 346
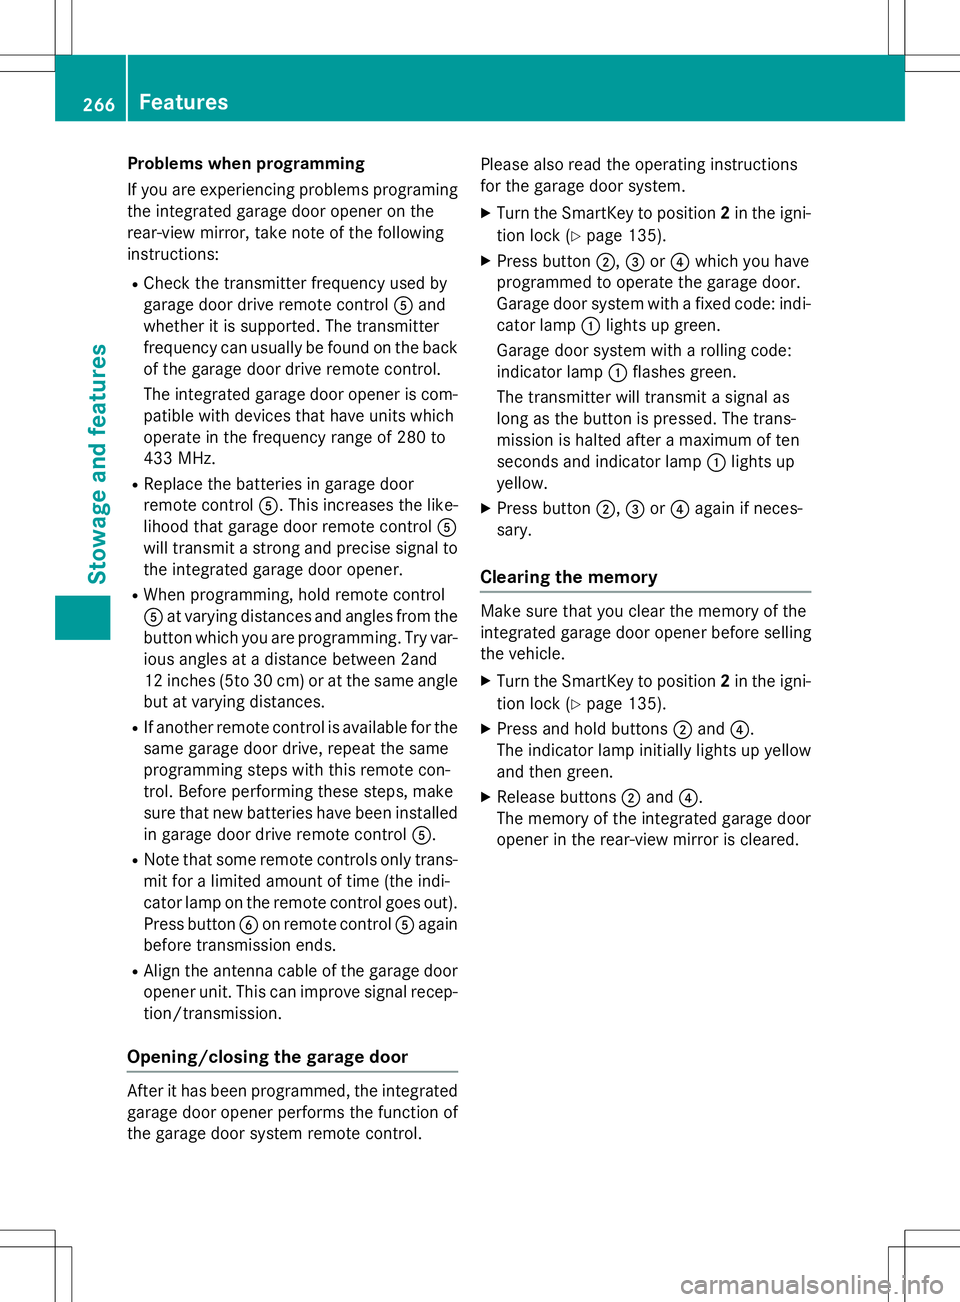
Problems when programming
If you are experiencing problems programing
the integrated garage door opener on the
rear-view mirror, take note of the following
instructions:
R Check the transmitter frequency used by
garage door drive remote control Aand
whether it is supported. The transmitter
frequency can usually be found on the back
of the garage door drive remote control.
The integrated garage door opener is com-
patible with devices that have units which
operate in the frequency range of 280 to
433 MHz.
R Replace the batteries in garage door
remote control A. This increases the like-
lihood that garage door remote control A
will transmit a strong and precise signal to
the integrated garage door opener.
R When programming, hold remote controlA at varying distances and angles from the
button which you are programming. Try var- ious angles at a distance between 2and
12 inches (5to 30 cm) or at the same angle
but at varying distances.
R If another remote control is available for the
same garage door drive, repeat the same
programming steps with this remote con-
trol. Before performing these steps, make
sure that new batteries have been installed
in garage door drive remote control A.
R Note that some remote controls only trans-
mit for a limited amount of time (the indi-
cator lamp on the remote control goes out).
Press button Bon remote control Aagain
before transmission ends.
R Align the antenna cable of the garage door
opener unit. This can improve signal recep-tion/transmission.
Opening/closing the garage door
After it has been programmed, the integrated
garage door opener performs the function of
the garage door system remote control. Please also read the operating instructions
for the garage door system.
X Turn the SmartKey to position 2in the igni-
tion lock ( Ypage 135).
X Press button ;,= or? which you have
programmed to operate the garage door.
Garage door system with a fixed code: indi-
cator lamp :lights up green.
Garage door system with a rolling code:
indicator lamp :flashes green.
The transmitter will transmit a signal as
long as the button is pressed. The trans-
mission is halted after a maximum of ten
seconds and indicator lamp :lights up
yellow.
X Press button ;,= or? again if neces-
sary.
Clearing the memory
Make sure that you clear the memory of the
integrated garage door opener before selling
the vehicle.
X Turn the SmartKey to position 2in the igni-
tion lock ( Ypage 135).
X Press and hold buttons ;and ?.
The indicator lamp initially lights up yellow
and then green.
X Release buttons ;and ?.
The memory of the integrated garage door
opener in the rear-view mirror is cleared.
266Features
Stowage and features
Page 281 of 346
Always switch off the windshield wipers and
the ignition before cleaning the windshield orwiper blades.
!Only fold the windshield wipers away from
the windshield when vertical. Otherwise,
you will damage the hood.
!Do not pull the wiper blade. Otherwise,
the wiper blade could be damaged.
!Do not clean wiper blades too often and
do not rub them too hard. Otherwise, the
graphite coating could be damaged. This
could cause wiper noise.
!Hold the wiper arm securely when folding
back. The windshield could be damaged if
the wiper arm smacks against it suddenly.
X Fold the windshield wiper arms away from
the windshield.
X Carefully clean the wiper blades with a
damp cloth.
X Fold the windshield wiper arms back again
before switching on the ignition.
Cleaning the exterior lighting
!Only use cleaning agents or cleaning
cloths which are suitable for plastic light
lenses. Unsuitable cleaning agents or
cleaning cloths could scratch or damage
the plastic light lenses.
X Clean the plastic lenses of the exterior
lights with a wet sponge and a mild cleaning
agent, e.g. Mercedes-Benz car shampoo or cleaning cloths.
Cleaning the mirror turn signals
!Only use cleaning agents or cleaning
cloths that are suitable for plastic lenses.
Unsuitable cleaning agents or cleaning
cloths could scratch or damage the plastic lenses of the mirror turn signals.
X Clean the plastic lenses of the mirror turn
signals in the exterior mirror housing using
a wet sponge and mild cleaning agent, e.g. Mercedes-Benz car shampoo or cleaning
cloths.
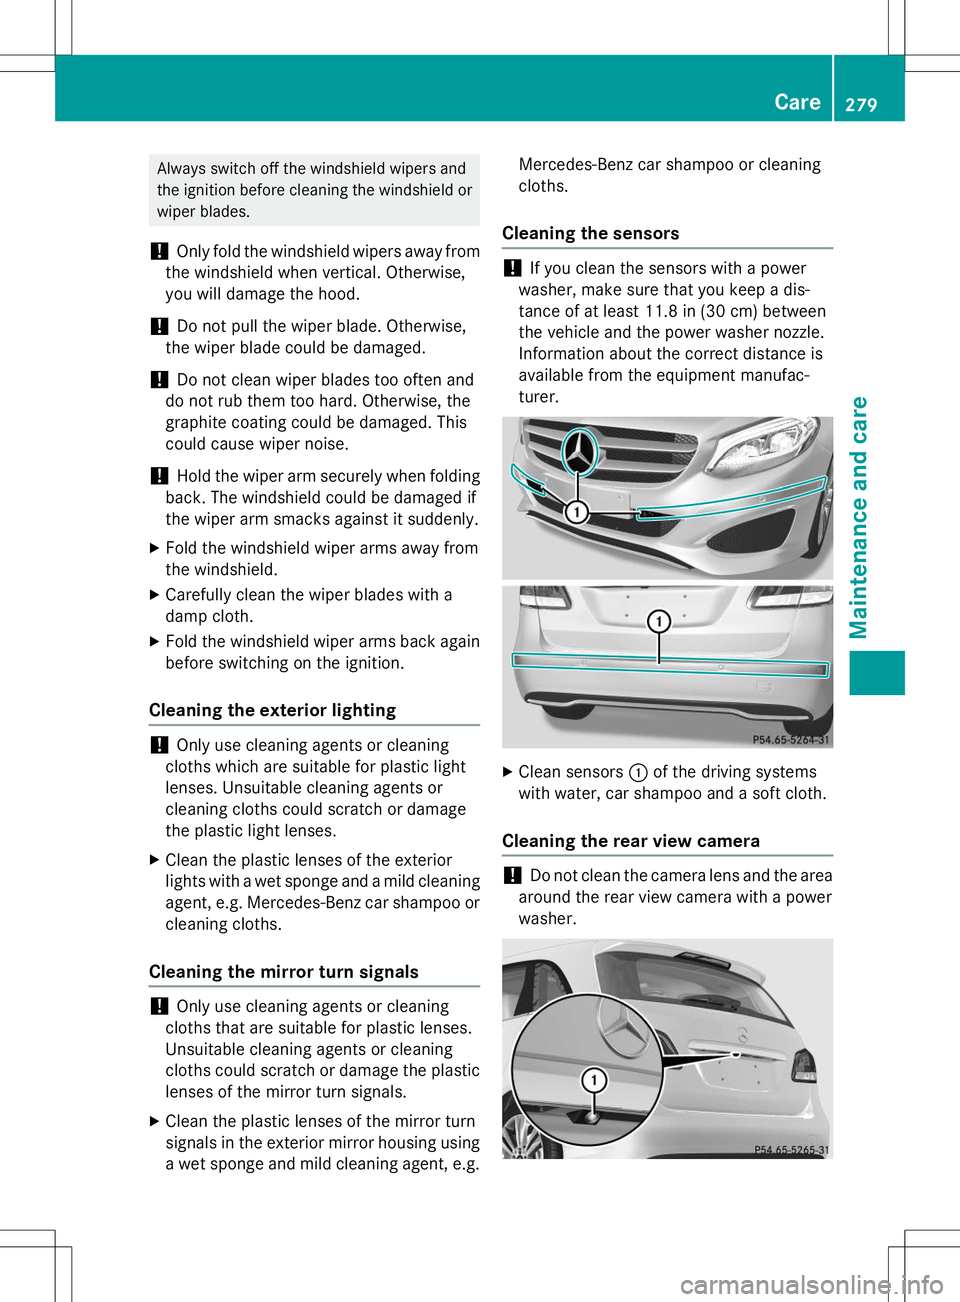
Cleaning the sensors
!If you clean the sensors with a power
washer, make sure that you keep a dis-
tance of at least 11.8 in (30 cm) between
the vehicle and the power washer nozzle.
Information about the correct distance is
available from the equipment manufac-
turer.
X Clean sensors :of the driving systems
with water, car shampoo and a soft cloth.
Cleaning the rear view camera
!Do not clean the camera lens and the area
around the rear view camera with a power
washer.
Care279
Maintenance and care
Z