2015 MERCEDES-BENZ B-Class ELECTRIC charging
[x] Cancel search: chargingPage 185 of 338
Outside temperature display
You should pay special attention to road con-
ditions when temperatures are around freez-
ing point.
Bear in mind that the outside temperature
display indicates the temperature measured
and does not record the road temperature.
The outside temperature display is in the mul- tifunction display (Y page 186).
Changes in the outside temperature are dis-
played after a short delay. E-CELL display
G
WARNING
There is a risk of an accident if you accelerate or overtake when the power output of the
drive system is reduced.
You should therefore adapt your driving style
and drive particularly carefully. Charge the
high-voltage battery at a charge station imme- diately. X
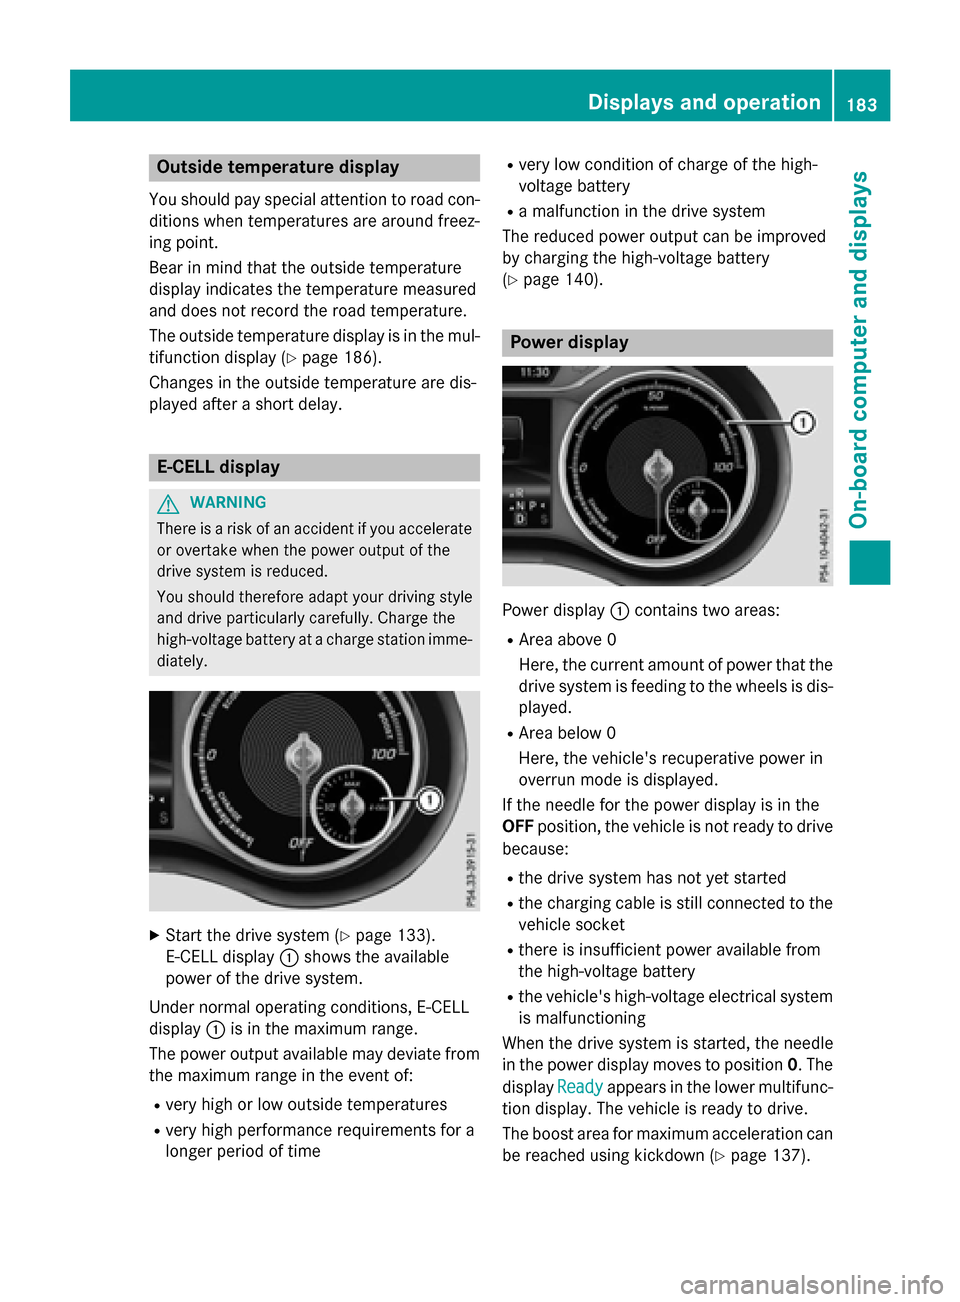
Start the drive system (Y page 133).
E-CELL display :shows the available
power of the drive system.
Under normal operating conditions, E-CELL
display :is in the maximum range.
The power output available may deviate from
the maximum range in the event of:
R very high or low outside temperatures
R very high performance requirements for a
longer period of time R
very low condition of charge of the high-
voltage battery
R a malfunction in the drive system
The reduced power output can be improved
by charging the high-voltage battery
(Y page 140). Power display
Power display
:contains two areas:
R Area above 0
Here, the current amount of power that the
drive system is feeding to the wheels is dis-
played.
R Area below 0
Here, the vehicle's recuperative power in
overrun mode is displayed.
If the needle for the power display is in the
OFF position, the vehicle is not ready to drive
because:
R the drive system has not yet started
R the charging cable is still connected to the
vehicle socket
R there is insufficient power available from
the high-voltage battery
R the vehicle's high-voltage electrical system
is malfunctioning
When the drive system is started, the needle
in the power display moves to position 0. The
display Ready
Ready appears in the lower multifunc-
tion display. The vehicle is ready to drive.
The boost area for maximum acceleration can
be reached using kickdown (Y page 137). Displays and operation
183On-board computer and displays Z
Page 186 of 338
The braking performance of the electric
motor using recuperative braking is, in some
operating modes, either reduced or not effec-
tive:
R when the condition of charge of the high-
voltage battery increases
R if the high-voltage battery is not yet at a
normal operating temperature
R when driving close to the maximum speed
R when the vehicle is almost stationary
R in transmission position N
R during and after ESP stability control
If necessary, counteract the reduced regen-
erative braking effect by applying the brake
yourself. Charge level display
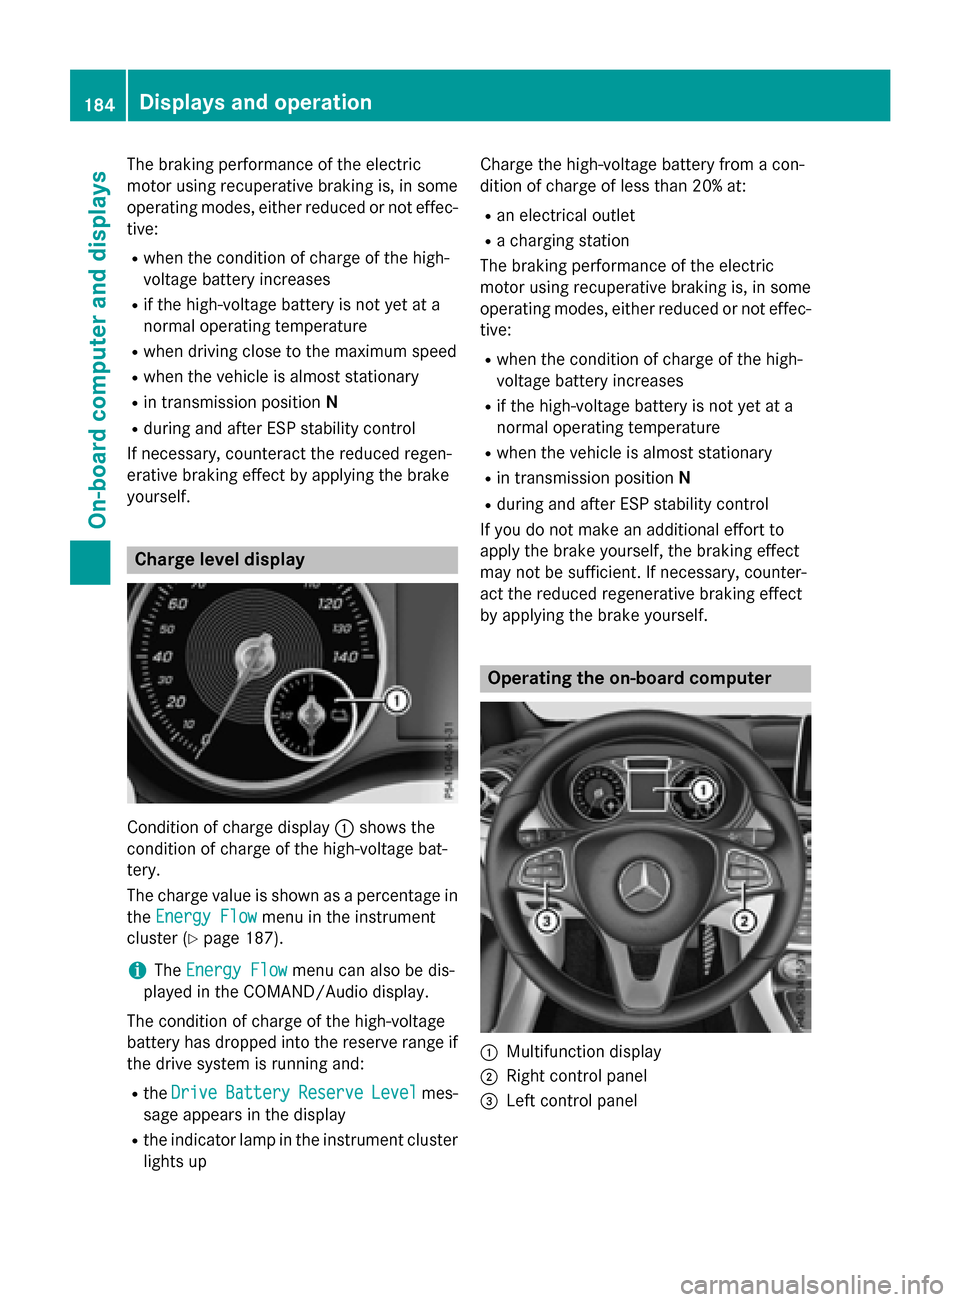
Condition of charge display
:shows the
condition of charge of the high-voltage bat-
tery.
The charge value is shown as a percentage in
the Energy Flow Energy Flow menu in the instrument
cluster (Y page 187).
i The
Energy Flow
Energy Flow menu can also be dis-
played in the COMAND/Audio display.
The condition of charge of the high-voltage
battery has dropped into the reserve range if
the drive system is running and:
R the Drive Drive Battery
Battery Reserve
ReserveLevel
Levelmes-
sage appears in the display
R the indicator lamp in the instrument cluster
lights up Charge the high-voltage battery from a con-
dition of charge of less than 20% at:
R an electrical outlet
R a charging station
The braking performance of the electric
motor using recuperative braking is, in some
operating modes, either reduced or not effec-
tive:
R when the condition of charge of the high-
voltage battery increases
R if the high-voltage battery is not yet at a
normal operating temperature
R when the vehicle is almost stationary
R in transmission position N
R during and after ESP stability control
If you do not make an additional effort to
apply the brake yourself, the braking effect
may not be sufficient. If necessary, counter-
act the reduced regenerative braking effect
by applying the brake yourself. Operating the on-board computer
:
Multifunction display
; Right control panel
= Left control panel 184
Displays and operationOn-board computer and displays
Page 190 of 338
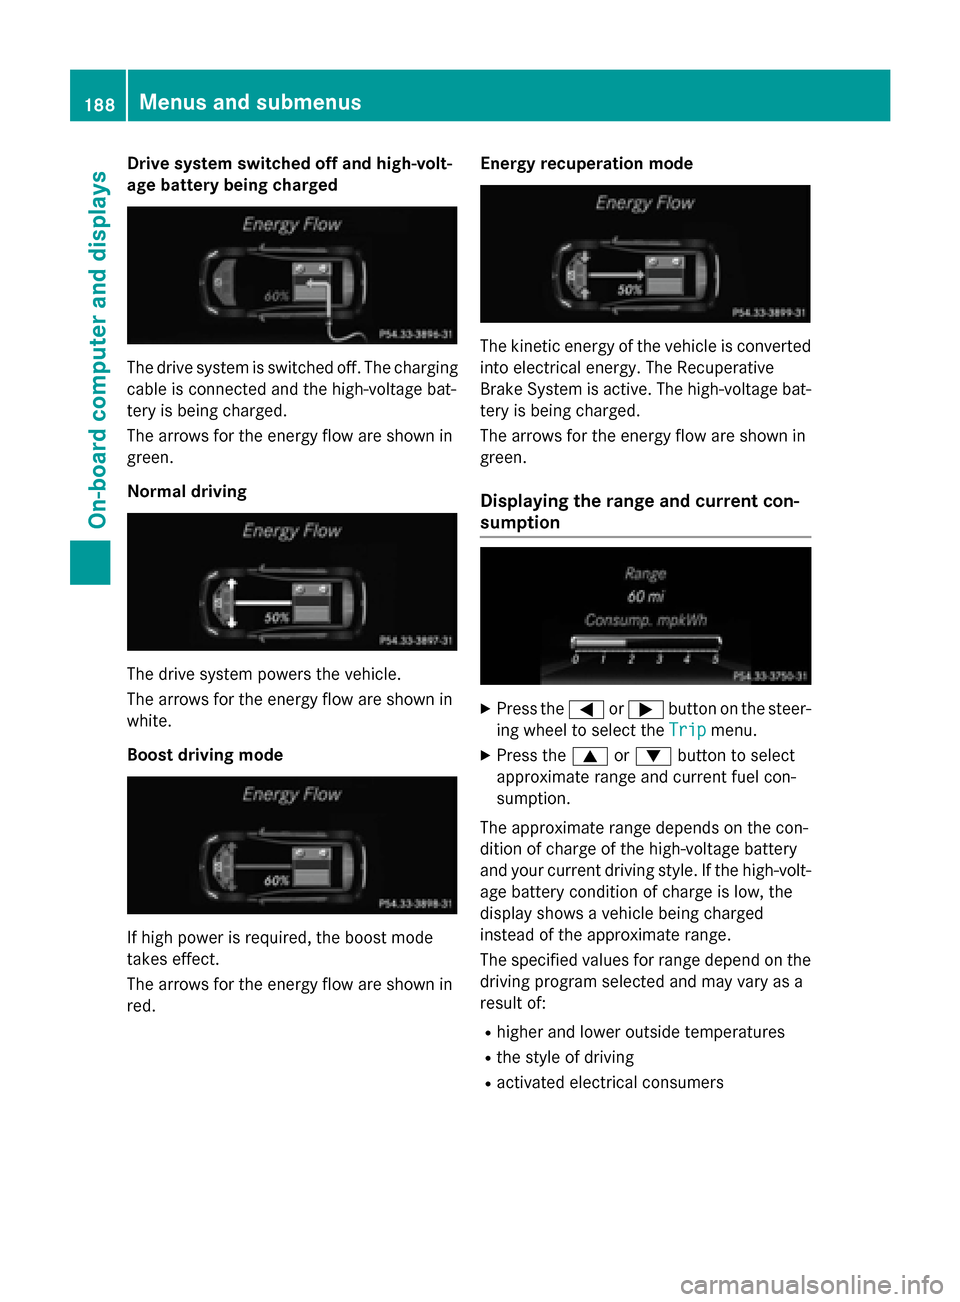
Drive system switched off and high-volt-
age battery being charged The drive system is switched off. The charging
cable is connected and the high-voltage bat-
tery is being charged.
The arrows for the energy flow are shown in
green.
Normal driving The drive system powers the vehicle.
The arrows for the energy flow are shown in
white.
Boost driving mode If high power is required, the boost mode
takes effect.
The arrows for the energy flow are shown in
red. Energy recuperation mode The kinetic energy of the vehicle is converted
into electrical energy. The Recuperative
Brake System is active. The high-voltage bat-
tery is being charged.
The arrows for the energy flow are shown in
green.
Displaying the range and current con-
sumption X
Press the =or; button on the steer-
ing wheel to select the Trip Tripmenu.
X Press the 9or: button to select
approximate range and current fuel con-
sumption.
The approximate range depends on the con-
dition of charge of the high-voltage battery
and your current driving style. If the high-volt- age battery condition of charge is low, the
display shows a vehicle being charged
instead of the approximate range.
The specified values for range depend on the
driving program selected and may vary as a
result of:
R higher and lower outside temperatures
R the style of driving
R activated electrical consumers 188
Menus and sub
menusOn-board computer and displays
Page 197 of 338
Activating/deactivating Blind Spot
Assist X
Press the =or; button on the steer-
ing wheel to select the DriveAssist
DriveAssist menu.
X Press the 9or: button to select
Blind Spot Assist
Blind Spot Assist .
X Press the abutton.
The current selection is displayed.
X To activate/deactivate: press thea
button again.
For further information about Blind Spot
Assist, see (Y page 177). Service menu
Depending on the equipment installed in the
vehicle, you have the following options in the
Serv. Serv. menu:
R Calling up display messages in message
memory (Y page 200)
R Checking the tire pressure electronically
(Y page 307)
R Calling up the service due date
(Y page 271) Settings menu
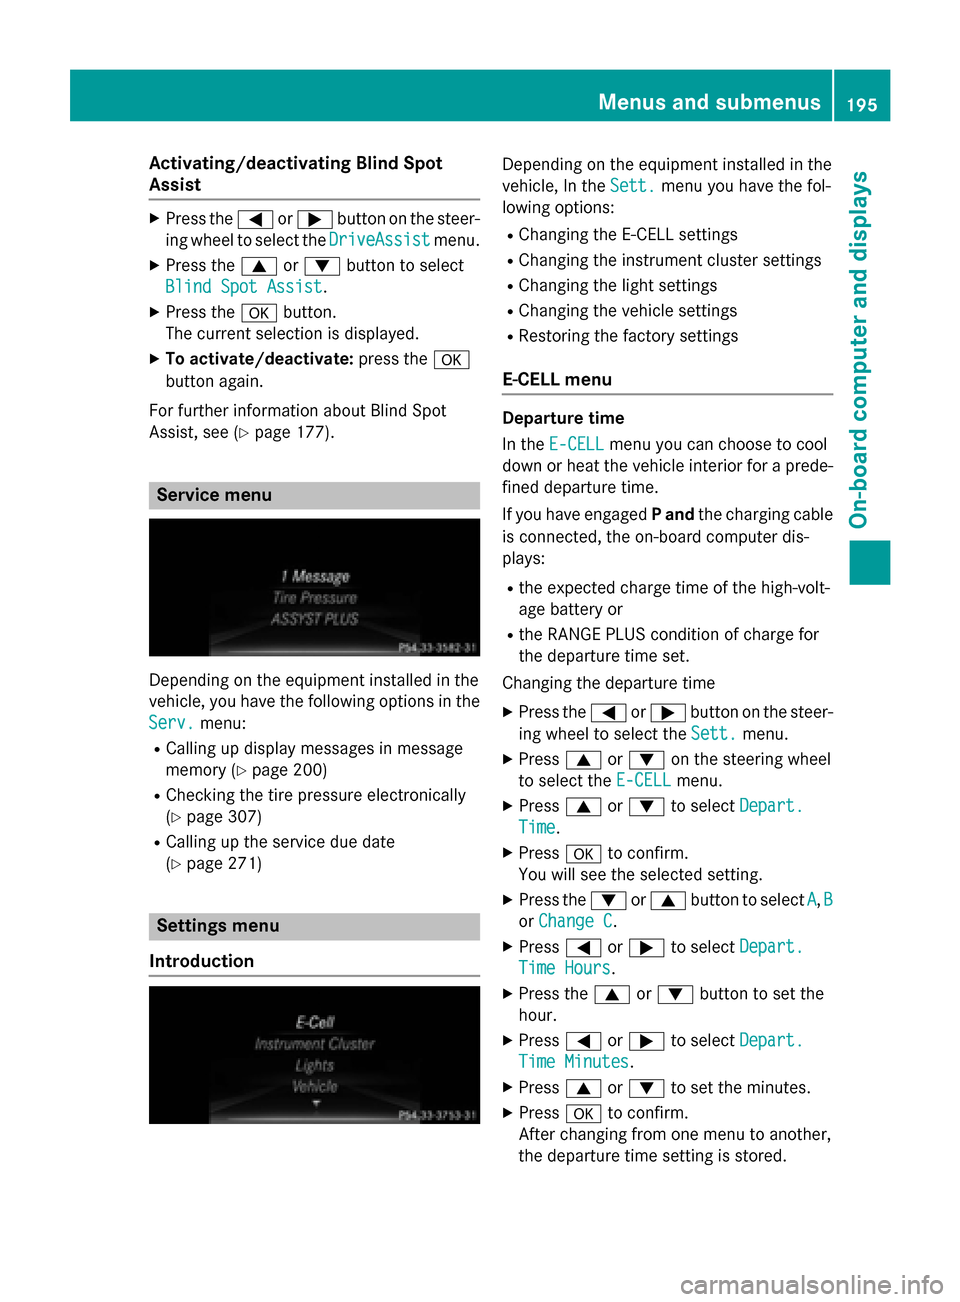
Introduction Depending on the equipment installed in the
vehicle, In the
Sett. Sett.menu you have the fol-
lowing options:
R Changing the E-CELL settings
R Changing the instrument cluster settings
R Changing the light settings
R Changing the vehicle settings
R Restoring the factory settings
E ‑CELL menu Departure time
In the
E-CELL E-CELL menu you can choose to cool
down or heat the vehicle interior for a prede- fined departure time.
If you have engaged Pand the charging cable
is connected, the on-board computer dis-
plays:
R the expected charge time of the high-volt-
age battery or
R the RANGE PLUS condition of charge for
the departure time set.
Changing the departure time
X Press the =or; button on the steer-
ing wheel to select the Sett.
Sett. menu.
X Press 9or: on the steering wheel
to select the E‑CELL E‑CELLmenu.
X Press 9or: to select Depart.
Depart.
Time
Time.
X Press ato confirm.
You will see the selected setting.
X Press the :or9 button to select A
A, B
B
or Change C
Change C.
X Press =or; to select Depart.
Depart.
Time Hours
Time Hours.
X Press the 9or: button to set the
hour.
X Press =or; to select Depart.
Depart.
Time Minutes
Time Minutes.
X Press 9or: to set the minutes.
X Press ato confirm.
After changing from one menu to another,
the departure time setting is stored. Menus and submenus
195On-board computer and displays Z
Page 198 of 338
Selecting the departure time
X Press the =or; button on the steer-
ing wheel to select the Sett.
Sett.menu.
X Press 9or: on the steering wheel
to select the E‑CELL
E‑CELL menu.
X Press 9or: to select Depart.
Depart.
Time
Time.
X Press ato confirm.
X Press the :or9 button to select
one of the three departure times or Timer
Timer
Off
Off (no timer active).
X Press ato confirm.
Charging with RANGE PLUS
If you have engaged Pand the charging cable
is connected, the on-board computer dis-
plays:
R the expected charge time of the high-volt-
age battery or
R the RANGE PLUS condition of charge for
the departure time set
RANGE PLUS charges when:
R you have activated RANGE PLUS via the
center console prior to charging and
R the high-voltage battery is fully charged
If charging is not complete by departure time,
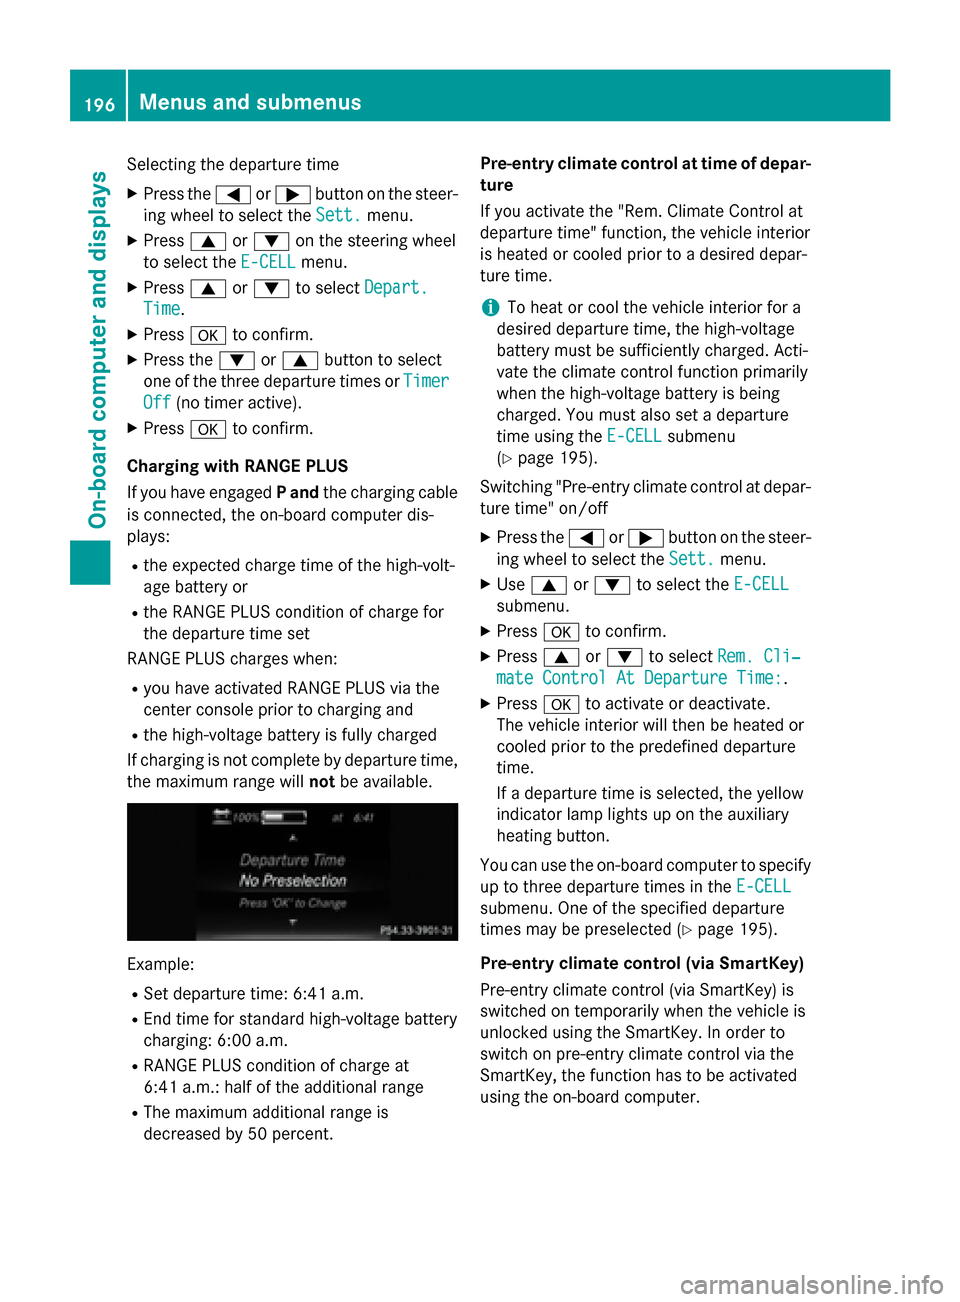
the maximum range will notbe available. Example:
R Set departure time: 6:41 a.m.
R End time for standard high-voltage battery
charging: 6:00 a.m.
R RANGE PLUS condition of charge at
6:41 a.m.: half of the additional range
R The maximum additional range is
decreased by 50 percent. Pre-entry climate control at time of depar-
ture
If you activate the "Rem. Climate Control at
departure time" function, the vehicle interior
is heated or cooled prior to a desired depar-
ture time.
i To heat or cool the vehicle interior for a
desired departure time, the high-voltage
battery must be sufficiently charged. Acti-
vate the climate control function primarily
when the high-voltage battery is being
charged. You must also set a departure
time using the E-CELL
E-CELL submenu
(Y page 195).
Switching "Pre-entry climate control at depar-
ture time" on/off
X Press the =or; button on the steer-
ing wheel to select the Sett. Sett.menu.
X Use 9 or: to select the E-CELL
E-CELL
submenu.
X Press ato confirm.
X Press 9or: to select Rem. Cli‐
Rem. Cli‐
mate Control At Departure Time:
mate Control At Departure Time:.
X Press ato activate or deactivate.
The vehicle interior will then be heated or
cooled prior to the predefined departure
time.
If a departure time is selected, the yellow
indicator lamp lights up on the auxiliary
heating button.
You can use the on-board computer to specify up to three departure times in the E-CELL E-CELL
submenu. One of the specified departure
times may be preselected (Y page 195).
Pre-entry climate control (via SmartKey)
Pre-entry climate control (via SmartKey) is
switched on temporarily when the vehicle is
unlocked using the SmartKey. In order to
switch on pre-entry climate control via the
SmartKey, the function has to be activated
using the on-board computer. 196
Menus and submenusOn-board computer and displays
Page 199 of 338
Activating/deactivating pre-entry climate
control (via SmartKey)
X Press the =or; button on the steer-
ing wheel to select the Sett.
Sett. menu.
X Use 9 or: to select the E-CELL
E-CELL
submenu.
X Press ato confirm.
X Press 9or: to select Pre-Entry
Pre-Entry
Climate Cont. (Via Key):
Climate Cont. (Via Key):.
X Press ato activate or deactivate.
If pre-entry climate control (via SmartKey)
is activated, pre-entry climate control (via
SmartKey) is switched on temporarily when
you unlock the vehicle.
Setting the maximum charge current
Before charging the high-voltage battery,
check the maximum permissible charge cur-
rent for the relevant power socket.
You can set a maximum charge current in the
E-CELL E-CELL menu.
It is only necessary to select the maximum
charge current if there are no charge current
settings on the charging cable.
i The maximum charge current values in
the on-board computer may deviate from
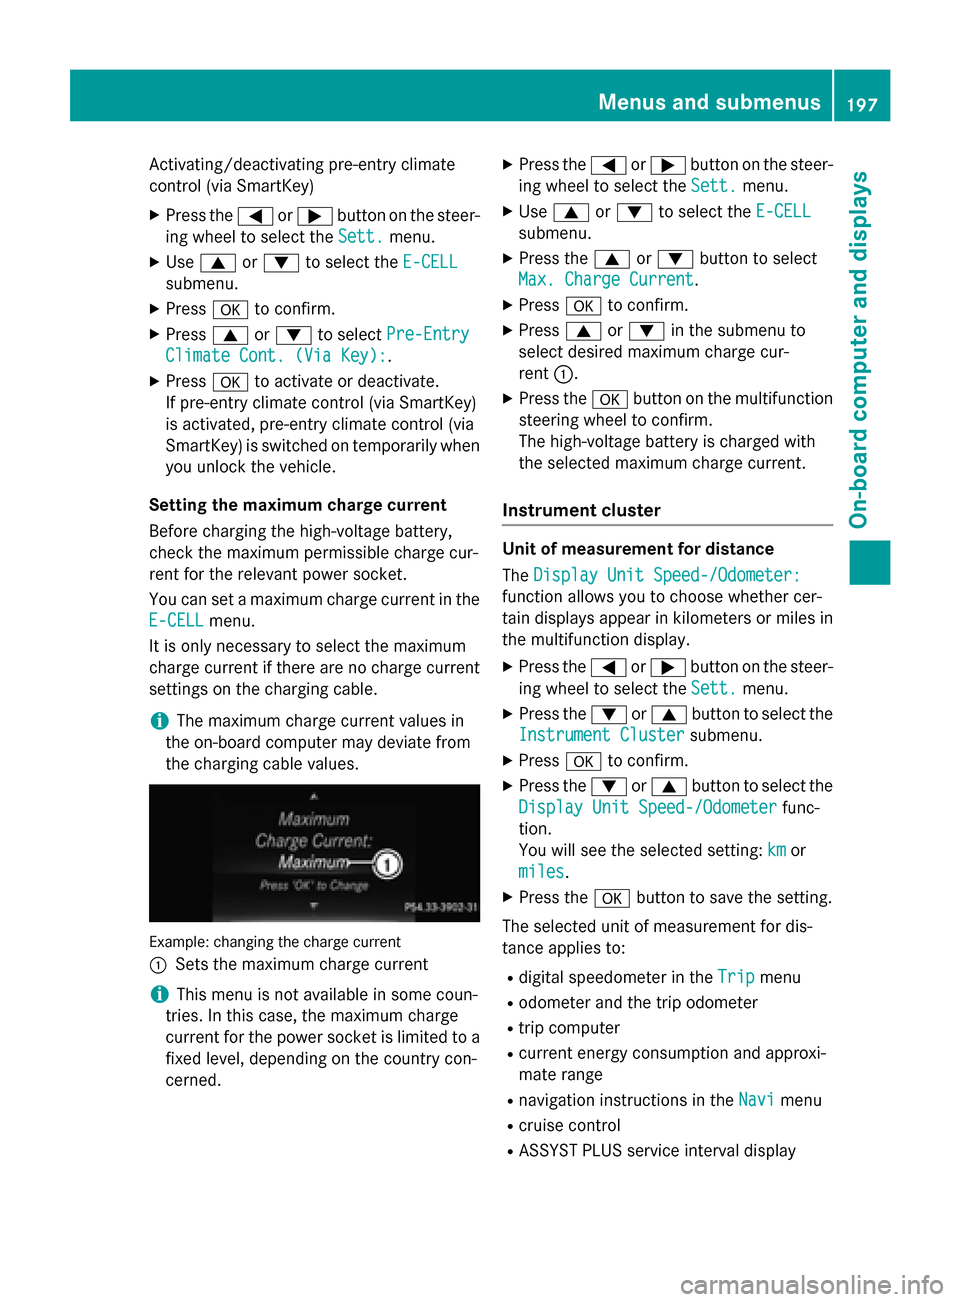
the charging cable values. Example: changing the charge current
:
Sets the maximum charge current
i This menu is not available in some coun-
tries. In this case, the maximum charge
current for the power socket is limited to a fixed level, depending on the country con-
cerned. X
Press the =or; button on the steer-
ing wheel to select the Sett.
Sett. menu.
X Use 9 or: to select the E-CELL E-CELL
submenu.
X Press the 9or: button to select
Max. Charge Current
Max. Charge Current.
X Press ato confirm.
X Press 9or: in the submenu to
select desired maximum charge cur-
rent :.
X Press the abutton on the multifunction
steering wheel to confirm.
The high-voltage battery is charged with
the selected maximum charge current.
Instrument cluster Unit of measurement for distance
The
Display Unit Speed-/Odometer: Display Unit Speed-/Odometer:
function allows you to choose whether cer-
tain displays appear in kilometers or miles in the multifunction display.
X Press the =or; button on the steer-
ing wheel to select the Sett. Sett.menu.
X Press the :or9 button to select the
Instrument Cluster
Instrument Cluster submenu.
X Press ato confirm.
X Press the :or9 button to select the
Display Unit Speed-/Odometer
Display Unit Speed-/Odometer func-
tion.
You will see the selected setting: km kmor
miles
miles.
X Press the abutton to save the setting.
The selected unit of measurement for dis-
tance applies to:
R digital speedometer in the Trip
Trip menu
R odometer and the trip odometer
R trip computer
R current energy consumption and approxi-
mate range
R navigation instructions in the Navi
Navi menu
R cruise control
R ASSYST PLUS service interval display Menus and submenus
197On-board computer and displays Z
Page 210 of 338
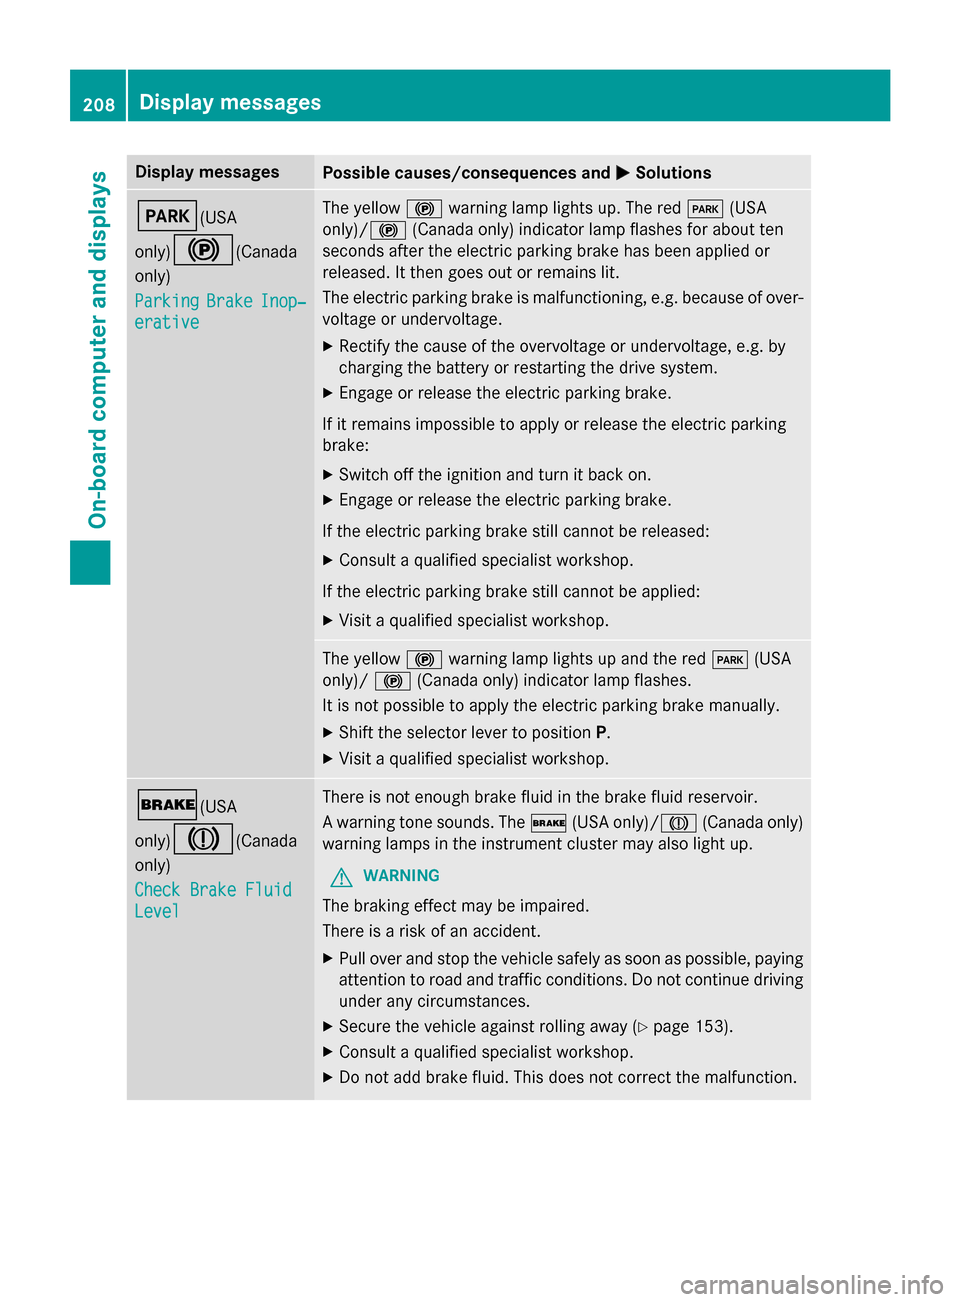
Display messages
Possible causes/consequences and
M
MSolutions F(USA
only)!
(Canada
only)
Parking Parking Brake
BrakeInop‐
Inop‐
erative
erative The yellow
!warning lamp lights up. The red F(USA
only)/ !(Canada only) indicator lamp flashes for about ten
seconds after the electric parking brake has been applied or
released. It then goes out or remains lit.
The electric parking brake is malfunctioning, e.g. because of over-
voltage or undervoltage.
X Rectify the cause of the overvoltage or undervoltage, e.g. by
charging the battery or restarting the drive system.
X Engage or release the electric parking brake.
If it remains impossible to apply or release the electric parking
brake:
X Switch off the ignition and turn it back on.
X Engage or release the electric parking brake.
If the electric parking brake still cannot be released:
X Consult a qualified specialist workshop.
If the electric parking brake still cannot be applied:
X Visit a qualified specialist workshop. The yellow
!warning lamp lights up and the red F(USA
only)/ !(Canada only) indicator lamp flashes.
It is not possible to apply the electric parking brake manually.
X Shift the selector lever to position P.
X Visit a qualified specialist workshop. $(USA
only)J
(Canada
only)
Check Brake Fluid Check Brake Fluid
Level Level There is not enough brake fluid in the brake fluid reservoir.
A warning tone sounds. The
$(USA only)/ J(Canada only)
warning lamps in the instrument cluster may also light up.
G WARNING
The braking effect may be impaired.
There is a risk of an accident. X Pull over and stop the vehicle safely as soon as possible, paying
attention to road and traffic conditions. Do not continue driving
under any circumstances.
X Secure the vehicle against rolling away (Y page 153).
X Consult a qualified specialist workshop.
X Do not add brake fluid. This does not correct the malfunction. 208
Display
messagesOn-board computer and displays
Page 228 of 338
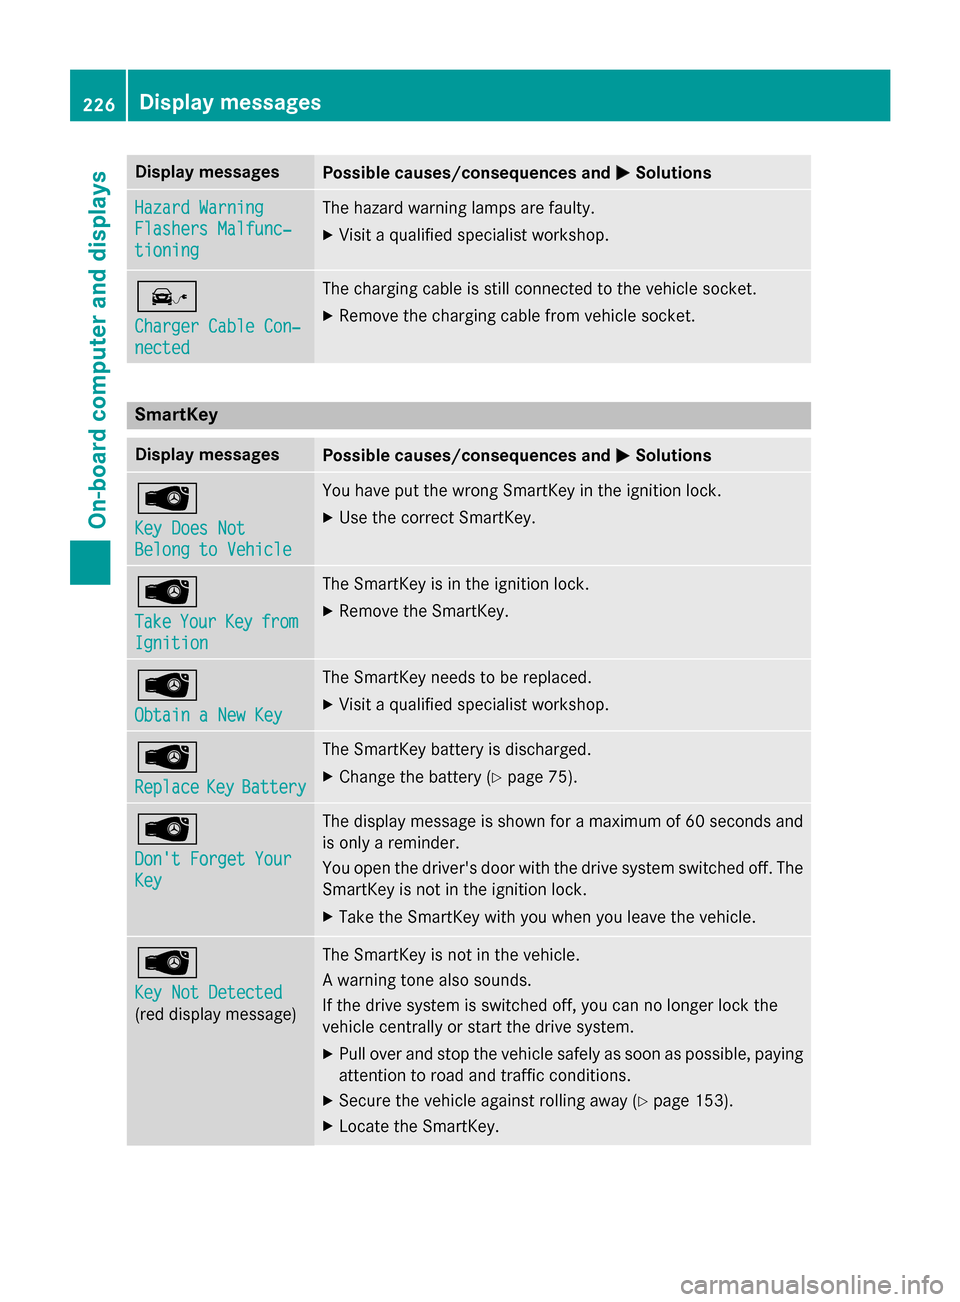
Display messages
Possible causes/consequences and
M
MSolutions Hazard Warning
Hazard Warning
Flashers Malfunc‐ Flashers Malfunc‐
tioning tioning The hazard warning lamps are faulty.
X Visit a qualified specialist workshop. î
Charger Cable Con‐ Charger Cable Con‐
nected nected The charging cable is still connected to the vehicle socket.
X Remove the charging cable from vehicle socket. SmartKey
Display messages
Possible causes/consequences and
M
MSolutions Â
Key Does Not Key Does Not
Belong to Vehicle Belong to Vehicle You have put the wrong SmartKey in the ignition lock.
X Use the correct SmartKey. Â
Take Take
Your
YourKey
Keyfrom
from
Ignition
Ignition The SmartKey is in the ignition lock.
X Remove the SmartKey. Â
Obtain a New Key Obtain a New Key The SmartKey needs to be replaced.
X Visit a qualified specialist workshop. Â
Replace Replace
Key
KeyBattery
Battery The SmartKey battery is discharged.
X Change the battery (Y page 75).Â
Don't Forget Your Don't Forget Your
Key Key The display message is shown for a maximum of 60 seconds and
is only a reminder.
You open the driver's door with the drive system switched off. The SmartKey is not in the ignition lock.
X Take the SmartKey with you when you leave the vehicle. Â
Key Not Detected Key Not Detected
(red display message) The SmartKey is not in the vehicle.
A warning tone also sounds.
If the drive system is switched off, you can no longer lock the
vehicle centrally or start the drive system.
X Pull over and stop the vehicle safely as soon as possible, paying
attention to road and traffic conditions.
X Secure the vehicle against rolling away (Y page 153).
X Locate the SmartKey. 226
Display
messagesOn-board computer and displays