2015 MERCEDES-BENZ B-Class ELECTRIC climate control
[x] Cancel search: climate controlPage 126 of 338
immediately to open/close the side window
in the door. The side window stops. To con-
tinue closing the side window, pull on the
W switch.
X Convenience closing feature: press and
hold the ebutton until the side win-
dows are closed.
The indicator lamp in the ebutton lights
up. Air-recirculation mode is activated.
If parts of the body are in the closing area
during convenience closing, proceed as fol-
lows:
X Press the Wbutton for opening/closing
the side windows.
The side window stops.
X To then open the side windows, press the
W button again.
or X Press the ebutton for longer than two
seconds.
The side windows move in the opposite
direction.
X Convenience opening feature: press and
hold the ebutton until the side win-
dows are opened. The side windows move
back to their original positions.
The indicator lamp in the ebutton goes
out. Air-recirculation mode is deactivated.
Notes on the automatic reversing feature for
the side windows (Y page 83).
If you open the side windows manually after
closing them with the convenience closing
feature, they will remain in this position when
opened using the convenience opening fea-
ture. Pre-entry climate control via Smart-
Key
Before getting in, the vehicle interior can be
briefly warmed or ventilated in advance. In
addition, the air from the air vent can be pre-
cooled. The high-voltage battery must be sufficiently
charged before the pre-entry climate control
(via SmartKey) can be activated.
Activating/deactivating the pre-entry cli-
mate control (via SmartKey)
When the vehicle is unlocked using the Smart-
Key or KEYLESS-GO, the climate control func-
tions are activated.
The pre-cooling and pre-heating climate con- trol functions last 5 minutes.
When the vehicle is pre-cooled, the following
functions are activated as necessary:
R Climate control system
R Cooling with air dehumidification
R Blower
When the vehicle is pre-heated, the following functions are activated as necessary:
R Climate control system
R Blower
R Seat heating
R Windshield heating
R Rear window defroster
Pre-entry climate control is automatically
switched off when operational readiness
mode is requested.
Activating/deactivating pre-entry cli-
mate control (via SmartKey)
You can activate and deactivate pre-entry cli-
mate control (via SmartKey) via the on-board
computer in the E-CELL
E-CELL submenu
(Y page 196).
i If the condition of charge of the high-volt-
age battery is below the specified minimum
condition of charge, pre-entry climate con- trol will not be activated even if it has been
set. 124
Operating the climate control systemsClimate control
Page 127 of 338
Pre-entry climate control at departure
time and immediate pre-entry climate control
Important safety notes G
WARNING
If persons, particularly children are subjected to prolonged exposure to extreme heat or
cold, there is a risk of injury, possibly even
fatal. Never leave children unattended in the
vehicle.
General notes Using the "Pre-entry climate control at depar-
ture time" function, you can cool or heat the
vehicle interior prior to the desired departure time.
When using the "Pre-entry climate control at
departure time" function, the condition of
charge of the high-voltage battery must be
higher than the specified minimum condition of charge.
The running time of the climate control may
be reduced if:
R the vehicle is not connected to an electric
power supply
R the high-voltage battery is not fully charged
With active "Pre-entry climate control at
departure time" the condition of charge of the
high-voltage battery can be reduced, even if
the charge cable connector is connected.
In certain situations, the desired interior tem-
perature cannot be reached.
When the vehicle is cooled, the following
functions are activated as necessary:
R Climate control system
R Cooling with air dehumidification
R Blower
When the vehicle is heated, the following
functions are activated as necessary:
R Climate control system
R Blower
R Seat heating R
Windshield heating
R Rear window defroster
"Immediate pre-entry climate control" is auto-
matically switched off when operational read- iness mode is requested.
Setting the departure time You can set a departure time for the "Pre-
entry climate control at departure time". Your
vehicle will then be cooled or heated until the desired temperature is reached in time for the
set departure time. "Pre-entry climate control at departure time" will be activated a maxi-
mum of 35 minutes before departure. If the
departure is delayed, the vehicle will be
heated or cooled for a further five minutes.
You can set the desired departure time in the
E-CELL E-CELL submenu on the on-board computer
(Y page 195).
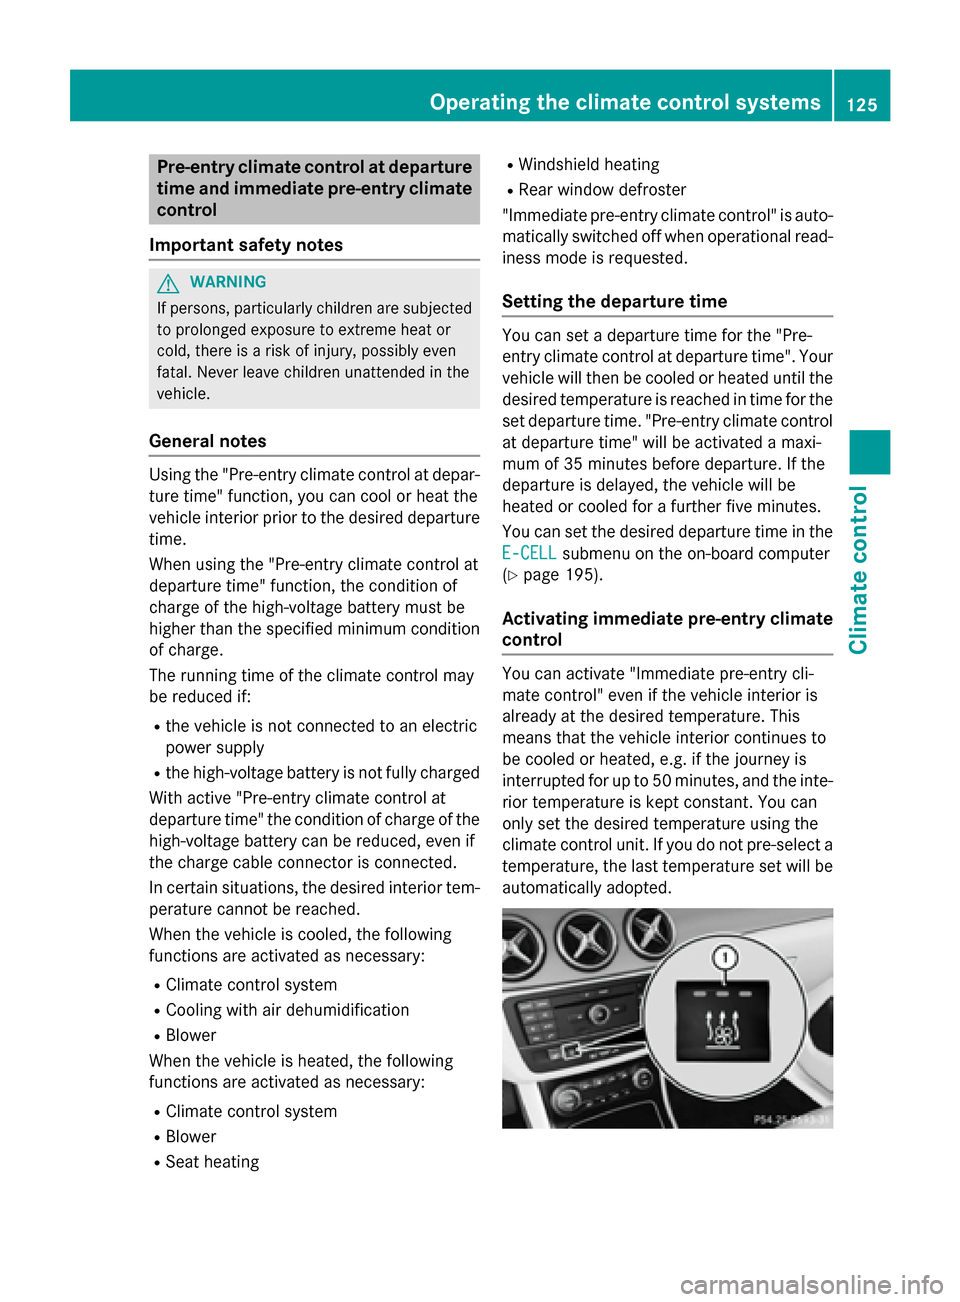
Activating immediate pre-entry climate
control You can activate "Immediate pre-entry cli-
mate control" even if the vehicle interior is
already at the desired temperature. This
means that the vehicle interior continues to
be cooled or heated, e.g. if the journey is
interrupted for up to 50 minutes, and the inte-
rior temperature is kept constant. You can
only set the desired temperature using the
climate control unit. If you do not pre-select a temperature, the last temperature set will be
automatically adopted. Operating the climate control systems
125Climate control Z
Page 128 of 338
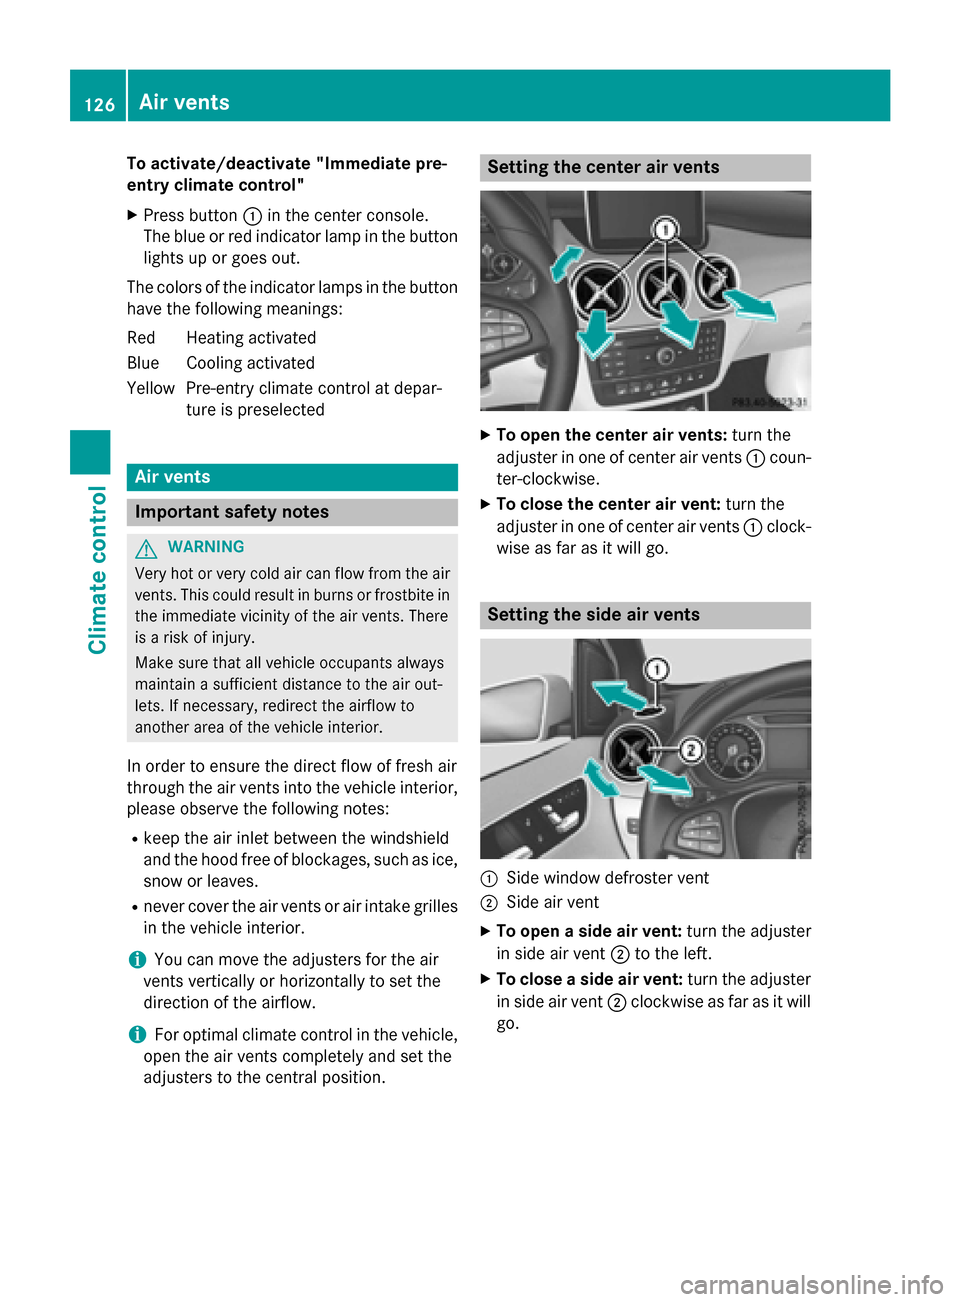
To activate/deactivate "Immediate pre-
entry climate control"
X Press button :in the center console.
The blue or red indicator lamp in the button
lights up or goes out.
The colors of the indicator lamps in the button have the following meanings:
Re dH eating activated
Blue Cooling activated
Yellow Pre-entry climate control at depar- ture is preselected Air vents
Important safety notes
G
WARNING
Very hot or very cold air can flow from the air vents. This could result in burns or frostbite in the immediate vicinity of the air vents. There
is a risk of injury.
Make sure that all vehicle occupants always
maintain a sufficient distance to the air out-
lets. If necessary, redirect the airflow to
another area of the vehicle interior.
In order to ensure the direct flow of fresh air
through the air vents into the vehicle interior,
please observe the following notes:
R keep the air inlet between the windshield
and the hood free of blockages, such as ice, snow or leaves.
R never cover the air vents or air intake grilles
in the vehicle interior.
i You can move the adjusters for the air
vents vertically or horizontally to set the
direction of the airflow.
i For optimal climate control in the vehicle,
open the air vents completely and set the
adjusters to the central position. Setting the center air vents
X
To open the center air vents: turn the
adjuster in one of center air vents :coun-
ter-clockwise.
X To close the center air vent: turn the
adjuster in one of center air vents :clock-
wise as far as it will go. Setting the side air vents
:
Side window defroster vent
; Side air vent
X To open a side air vent: turn the adjuster
in side air vent ;to the left.
X To close a side air vent: turn the adjuster
in side air vent ;clockwise as far as it will
go. 126
Air ventsClimate control
Page 129 of 338
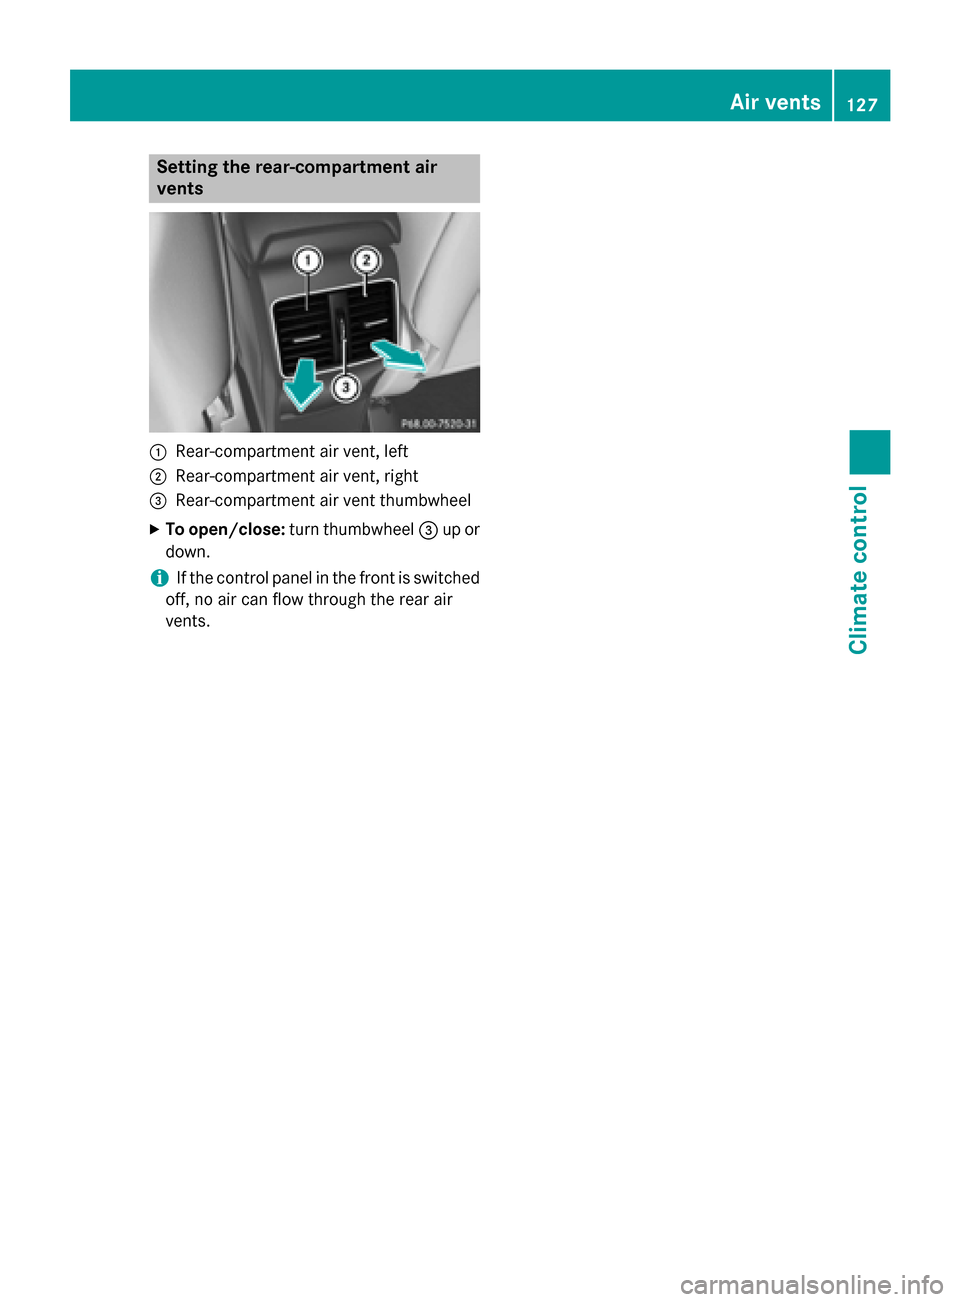
Setting the rear-compartment air
vents :
Rear-compartment air vent, left
; Rear-compartment air vent, right
= Rear-compartment air vent thumbwheel
X To open/close: turn thumbwheel =up or
down.
i If the control panel in the front is switched
off, no air can flow through the rear air
vents. Air vents
127Climate control Z
Page 143 of 338
To avoid hazardous situations, observe the
following:
R Only connect the charging cable to mains
sockets that:
- are installed correctly and
- have been approved by an electrical spe-
cialist.
R For safety reasons, only use the charging
cables supplied with the vehicle, or charg-
ing cables which have been approved for
use with this vehicle.
R Never use a damaged charging cable.
R Do not use:
- Extension cables
- Cable drums
- Multiple sockets
R Do not use a socket adapter to connect the
charging cable to the mains socket. The
only exception is if the adapter has been
tested and approved by the manufacturer
for charging the high-voltage battery in an
electric vehicle.
R Always observe the safety notes in the
socket adapter's operating instructions.
The vehicle's high voltage electrical system is under high voltage.
R Do not handle high-voltage components or
the orange cables of the vehicle's high-volt-age electrical system.
R Do not touch high-voltage components or
the orange cables of the high-voltage elec-
trical system when a vehicle has been
involved in a crash.
R Do not touch any damaged components or
damaged orange cables of the vehicle's
high-voltage electrical system.
R Do not remove the covers of the high-volt-
age electrical system components that are
marked with a warning sticker. General notes
Method of operation The vehicle is equipped with a high-voltage
battery for driving. The high-voltage battery
stores the energy needed to operate the elec-
tric motor and releases it again.
The electric motor uses energy that has been stored in the high-voltage battery when pull-
ing away, accelerating and during the jour-
ney.
In overrun mode (except D+), kinetic energy
is converted by means of energy recuperation
into electrical energy and stored in the high-
voltage battery.
The high-voltage battery can be charged as
follows:
R through energy recuperation while the
vehicle is in motion
R with the charging cable at a mains socket
while the vehicle is stationary
R with the charging cable at a charging sta-
tion while the vehicle is stationary
The high-voltage battery can be charged in a
voltage range from 110 V to 240 V.
If the condition of charge drops to less than
13%, the high-voltage battery reserve indica-
tor lamp lights up in the instrument cluster.
Charge the high-voltage battery as soon as
possible.
Below a condition of charge of 5%, the per-
formance of the vehicle is reduced. The vehi-
cle's high-voltage electrical system switches
off at a condition of charge of 0%.
Use of the pre-entry climate control function
may mean that the high-voltage battery is not fully charged.
Discharged battery The vehicle's high-voltage electrical system
switches off if the high-voltage battery is com-
pletely discharged. 30 seconds prior to this,
you are informed of the switch-off by the
Battery level too low. Stop and Battery level too low. Stop and High-voltage battery
141Driving and parking Z
Page 155 of 338
Calling up functions in the "My
Mercedes Electric - Vehicle Homepage"
The "My Mercedes Electric - Vehicle Home-
page" allows you access to information about your vehicle and its functions using remote
query and remote configuration. For example,
climate control can be activated using remote
configuration which means that it need not be set in the vehicle. Power for the climate con-
trol is primarily supplied via the charging
cable connected to the mains supply. In this
way, the range of the vehicle in most cases is not reduced. If climate control is activated,
the battery charge level and thus the range
may be reduced. The "Vehicle Homepage"
provides you with information all about how
to use your vehicle.
If the vehicle is entered in your personal area of the "Vehicle Homepage", you can also
access the following functions:
R request the current condition of charge of
the high-voltage battery
R program the departure time (Y page 195)
R order and activate the "Pre-entry climate
control at departure time" function
If the vehicle is charging, the predicted charg-
ing time and the predicted range will also be
shown.
This data is estimated and may be influenced
by the following factors:
R outside temperature
R switched on consumers, e.g. climate con-
trol and seat heating
R personal driving style
R road and traffic conditions
R route characteristics
Therefore, allow for a sufficient reserve.
i Information on additional functions and
operating instructions can be found on the "Vehicle Homepage". Connecting the vehicle to the Internet Via a radio module
This function is not available in all countries
and requires an activated mbrace access.
You can use the "Vehicle Homepage" if the
vehicle has a connection to the Internet via a mobile phone. The radio module uses a
mobile phone connection and transmits the
necessary data by radio. The vehicle auto-
matically recognizes whether a connection tothe Internet via the radio module is possible
or not. No presets are necessary.
To enable the transfer of data via the mobile
communications module, you do not need a
SIM card.
i Restrictions in reception are possible if
the vehicle is in an underground car park,
for example. Restrictions may also occur in areas with poor mobile network coverage. Parking
Important safety notes
G
WARNING
If you release the parking brake on uphill or
downhill gradients, the vehicle can begin to
move when in park position P. There is a risk
of an accident.
To avoid hazardous situations:
R prevent the parked vehicle from rolling on
uphill or downhill gradients by always
applying the parking brake.
R do not park the vehicle on uphill or downhill
gradients if the parking brake is malfunc-
tioning. Parking
153Driving and parking Z
Page 198 of 338
Selecting the departure time
X Press the =or; button on the steer-
ing wheel to select the Sett.
Sett.menu.
X Press 9or: on the steering wheel
to select the E‑CELL
E‑CELL menu.
X Press 9or: to select Depart.
Depart.
Time
Time.
X Press ato confirm.
X Press the :or9 button to select
one of the three departure times or Timer
Timer
Off
Off (no timer active).
X Press ato confirm.
Charging with RANGE PLUS
If you have engaged Pand the charging cable
is connected, the on-board computer dis-
plays:
R the expected charge time of the high-volt-
age battery or
R the RANGE PLUS condition of charge for
the departure time set
RANGE PLUS charges when:
R you have activated RANGE PLUS via the
center console prior to charging and
R the high-voltage battery is fully charged
If charging is not complete by departure time,
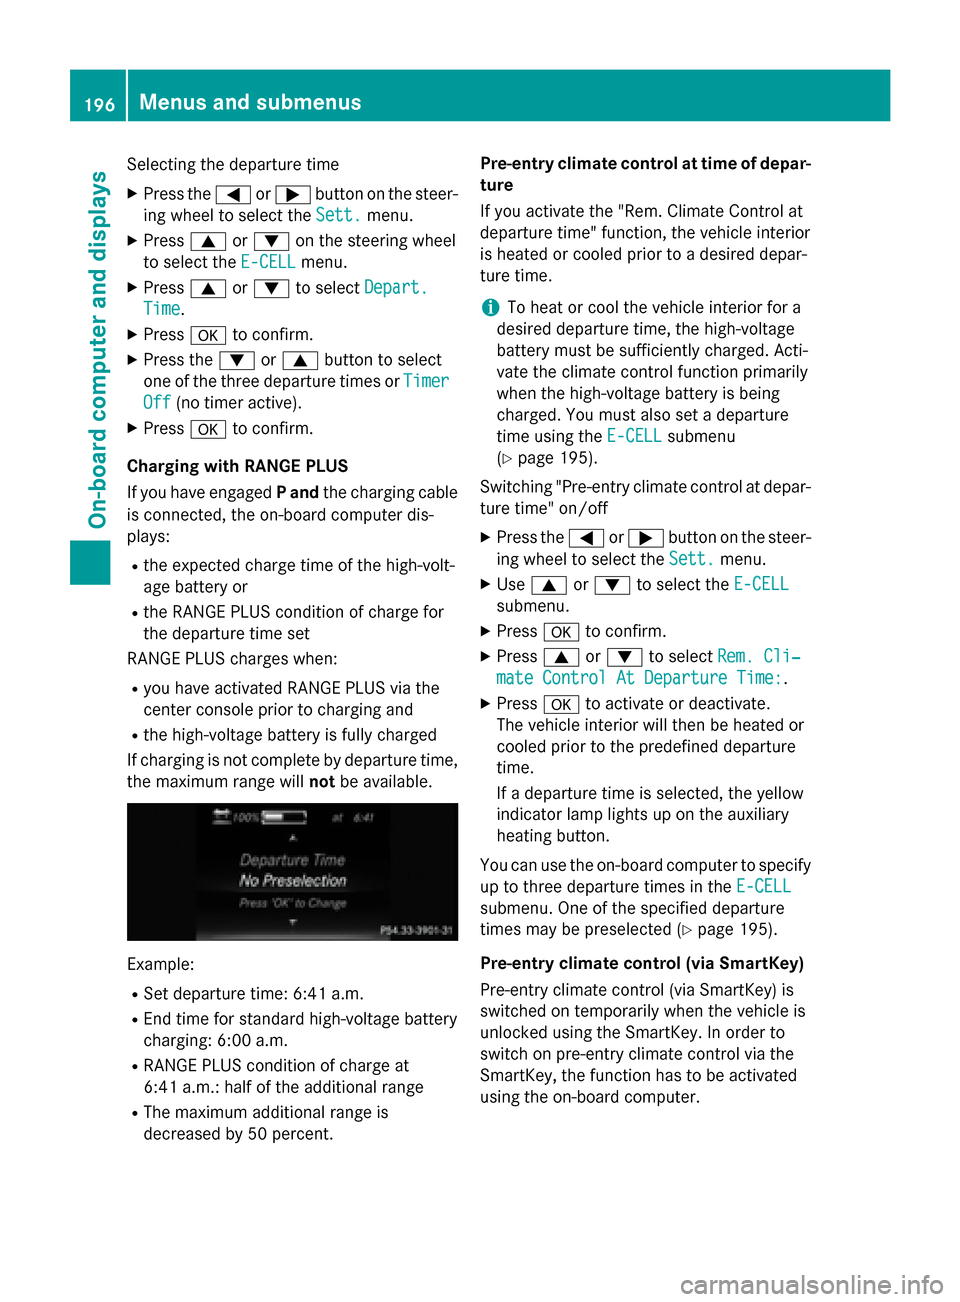
the maximum range will notbe available. Example:
R Set departure time: 6:41 a.m.
R End time for standard high-voltage battery
charging: 6:00 a.m.
R RANGE PLUS condition of charge at
6:41 a.m.: half of the additional range
R The maximum additional range is
decreased by 50 percent. Pre-entry climate control at time of depar-
ture
If you activate the "Rem. Climate Control at
departure time" function, the vehicle interior
is heated or cooled prior to a desired depar-
ture time.
i To heat or cool the vehicle interior for a
desired departure time, the high-voltage
battery must be sufficiently charged. Acti-
vate the climate control function primarily
when the high-voltage battery is being
charged. You must also set a departure
time using the E-CELL
E-CELL submenu
(Y page 195).
Switching "Pre-entry climate control at depar-
ture time" on/off
X Press the =or; button on the steer-
ing wheel to select the Sett. Sett.menu.
X Use 9 or: to select the E-CELL
E-CELL
submenu.
X Press ato confirm.
X Press 9or: to select Rem. Cli‐
Rem. Cli‐
mate Control At Departure Time:
mate Control At Departure Time:.
X Press ato activate or deactivate.
The vehicle interior will then be heated or
cooled prior to the predefined departure
time.
If a departure time is selected, the yellow
indicator lamp lights up on the auxiliary
heating button.
You can use the on-board computer to specify up to three departure times in the E-CELL E-CELL
submenu. One of the specified departure
times may be preselected (Y page 195).
Pre-entry climate control (via SmartKey)
Pre-entry climate control (via SmartKey) is
switched on temporarily when the vehicle is
unlocked using the SmartKey. In order to
switch on pre-entry climate control via the
SmartKey, the function has to be activated
using the on-board computer. 196
Menus and submenusOn-board computer and displays
Page 199 of 338
Activating/deactivating pre-entry climate
control (via SmartKey)
X Press the =or; button on the steer-
ing wheel to select the Sett.
Sett. menu.
X Use 9 or: to select the E-CELL
E-CELL
submenu.
X Press ato confirm.
X Press 9or: to select Pre-Entry
Pre-Entry
Climate Cont. (Via Key):
Climate Cont. (Via Key):.
X Press ato activate or deactivate.
If pre-entry climate control (via SmartKey)
is activated, pre-entry climate control (via
SmartKey) is switched on temporarily when
you unlock the vehicle.
Setting the maximum charge current
Before charging the high-voltage battery,
check the maximum permissible charge cur-
rent for the relevant power socket.
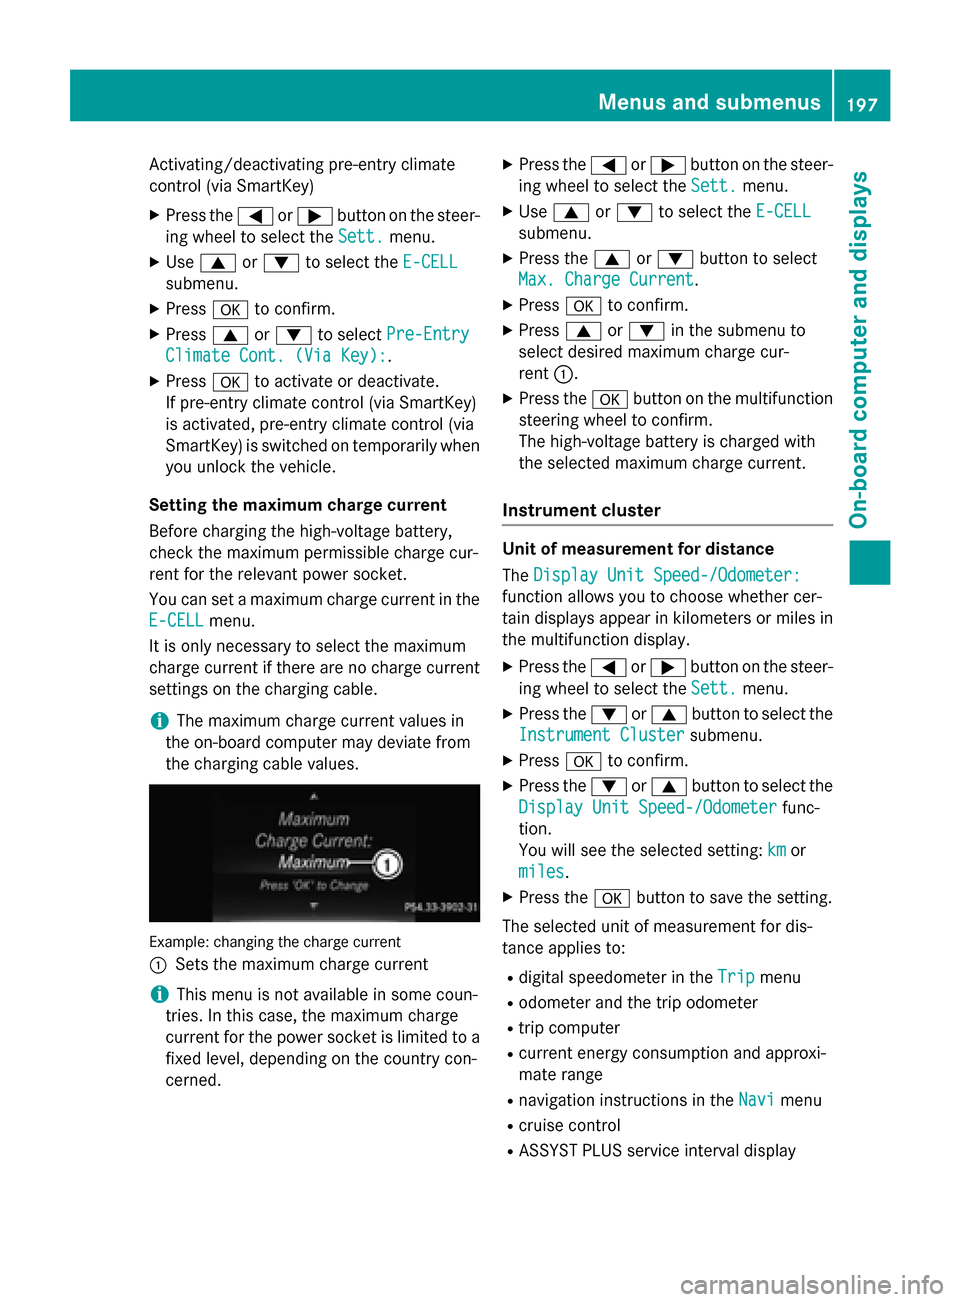
You can set a maximum charge current in the
E-CELL E-CELL menu.
It is only necessary to select the maximum
charge current if there are no charge current
settings on the charging cable.
i The maximum charge current values in
the on-board computer may deviate from
the charging cable values. Example: changing the charge current
:
Sets the maximum charge current
i This menu is not available in some coun-
tries. In this case, the maximum charge
current for the power socket is limited to a fixed level, depending on the country con-
cerned. X
Press the =or; button on the steer-
ing wheel to select the Sett.
Sett. menu.
X Use 9 or: to select the E-CELL E-CELL
submenu.
X Press the 9or: button to select
Max. Charge Current
Max. Charge Current.
X Press ato confirm.
X Press 9or: in the submenu to
select desired maximum charge cur-
rent :.
X Press the abutton on the multifunction
steering wheel to confirm.
The high-voltage battery is charged with
the selected maximum charge current.
Instrument cluster Unit of measurement for distance
The
Display Unit Speed-/Odometer: Display Unit Speed-/Odometer:
function allows you to choose whether cer-
tain displays appear in kilometers or miles in the multifunction display.
X Press the =or; button on the steer-
ing wheel to select the Sett. Sett.menu.
X Press the :or9 button to select the
Instrument Cluster
Instrument Cluster submenu.
X Press ato confirm.
X Press the :or9 button to select the
Display Unit Speed-/Odometer
Display Unit Speed-/Odometer func-
tion.
You will see the selected setting: km kmor
miles
miles.
X Press the abutton to save the setting.
The selected unit of measurement for dis-
tance applies to:
R digital speedometer in the Trip
Trip menu
R odometer and the trip odometer
R trip computer
R current energy consumption and approxi-
mate range
R navigation instructions in the Navi
Navi menu
R cruise control
R ASSYST PLUS service interval display Menus and submenus
197On-board computer and displays Z