2015 MERCEDES-BENZ B-Class ELECTRIC bulb
[x] Cancel search: bulbPage 112 of 338
X
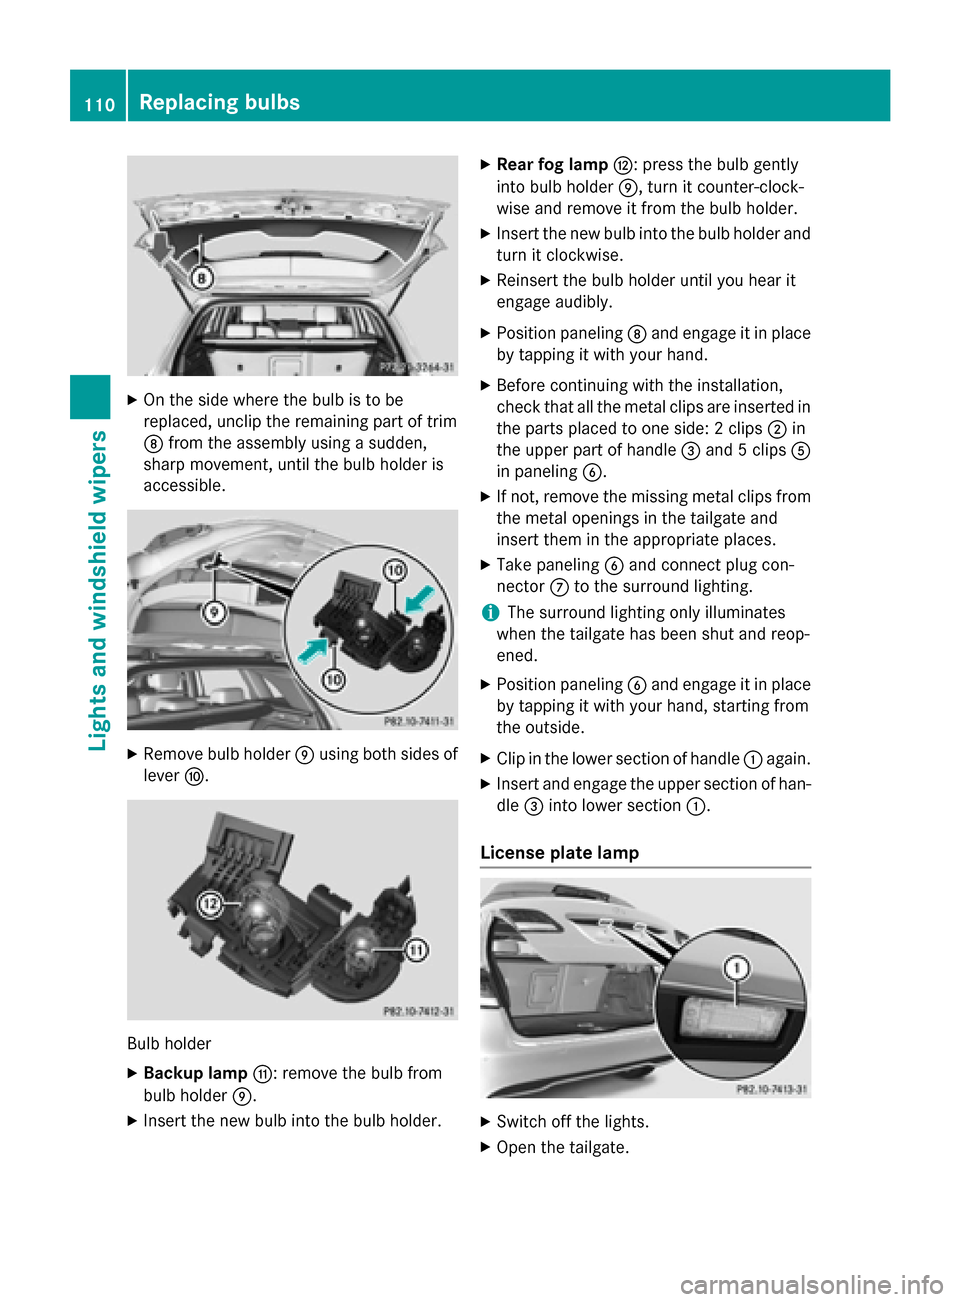
On the side where the bulb is to be
replaced, unclip the remaining part of trim
D from the assembly using a sudden,
sharp movement, until the bulb holder is
accessible. X
Remove bulb holder Eusing both sides of
lever F. Bulb holder
X Backup lamp G: remove the bulb from
bulb holder E.
X Insert the new bulb into the bulb holder. X
Rear fog lamp H: press the bulb gently
into bulb holder E, turn it counter-clock-
wise and remove it from the bulb holder.
X Insert the new bulb into the bulb holder and
turn it clockwise.
X Reinsert the bulb holder until you hear it
engage audibly.
X Position paneling Dand engage it in place
by tapping it with your hand.
X Before continuing with the installation,
check that all the metal clips are inserted in
the parts placed to one side: 2 clips ;in
the upper part of handle =and 5 clips A
in paneling B.
X If not, remove the missing metal clips from
the metal openings in the tailgate and
insert them in the appropriate places.
X Take paneling Band connect plug con-
nector Cto the surround lighting.
i The surround lighting only illuminates
when the tailgate has been shut and reop-
ened.
X Position paneling Band engage it in place
by tapping it with your hand, starting from
the outside.
X Clip in the lower section of handle :again.
X Insert and engage the upper section of han-
dle =into lower section :.
License plate lamp X
Switch off the lights.
X Open the tailgate. 110
Replacing bulbsLights and windshield wipers
Page 113 of 338
X
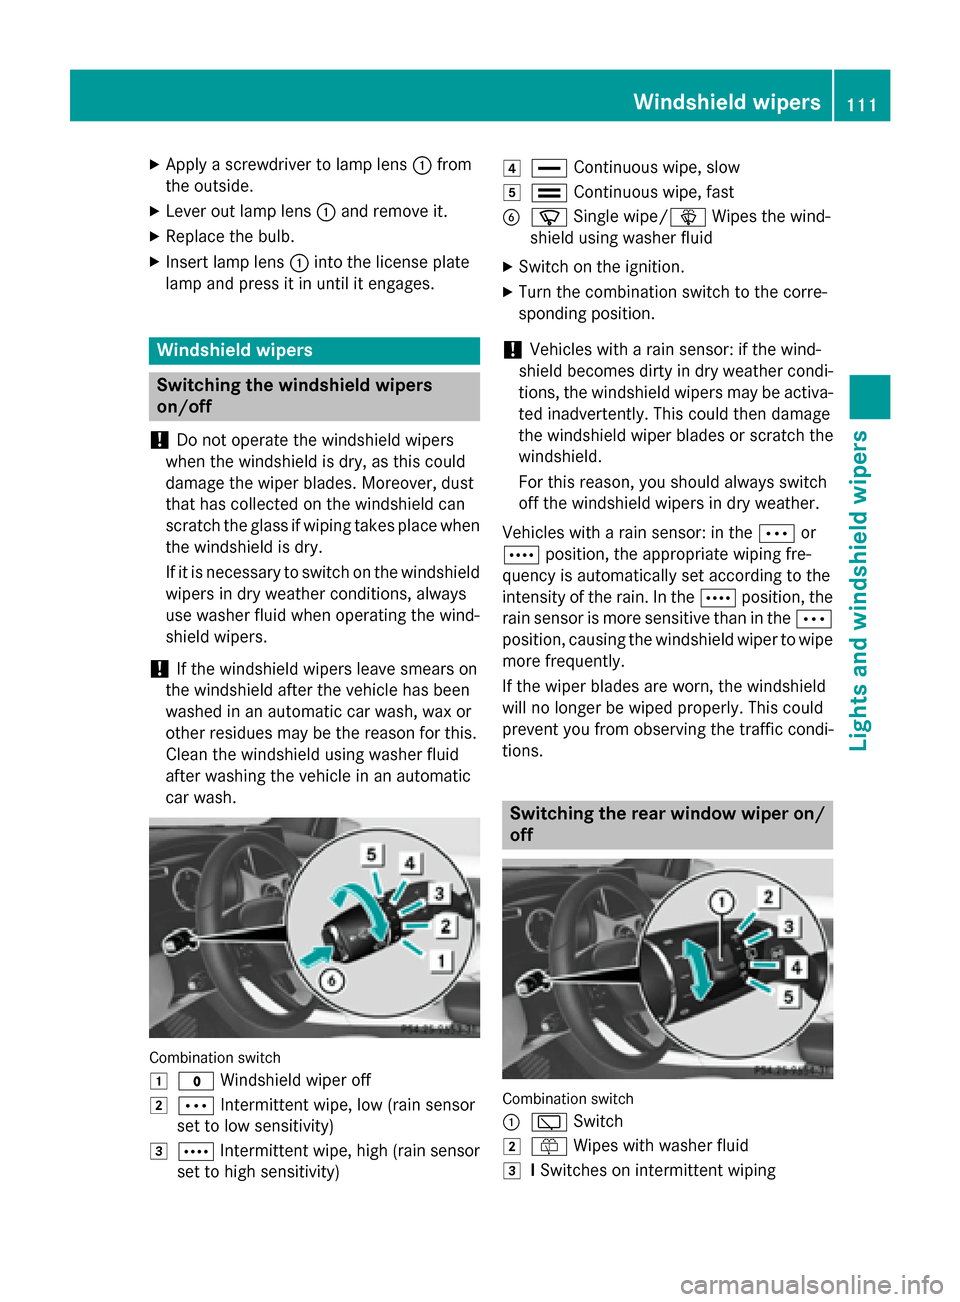
Apply a screwdriver to lamp lens :from
the outside.
X Lever out lamp lens :and remove it.
X Replace the bulb.
X Insert lamp lens :into the license plate
lamp and press it in until it engages. Windshield wipers
Switching the windshield wipers
on/off
! Do not operate the windshield wipers
when the windshield is dry, as this could
damage the wiper blades. Moreover, dust
that has collected on the windshield can
scratch the glass if wiping takes place when the windshield is dry.
If it is necessary to switch on the windshield wipers in dry weather conditions, always
use washer fluid when operating the wind-
shield wipers.
! If the windshield wipers leave smears on
the windshield after the vehicle has been
washed in an automatic car wash, wax or
other residues may be the reason for this.
Clean the windshield using washer fluid
after washing the vehicle in an automatic
car wash. Combination switch
1
$ Windshield wiper off
2 Ä Intermittent wipe, low (rain sensor
set to low sensitivity)
3 Å Intermittent wipe, high (rain sensor
set to high sensitivity) 4
° Continuous wipe, slow
5 ¯ Continuous wipe, fast
B í Single wipe/î Wipes the wind-
shield using washer fluid
X Switch on the ignition.
X Turn the combination switch to the corre-
sponding position.
! Vehicles with a rain sensor: if the wind-
shield becomes dirty in dry weather condi-
tions, the windshield wipers may be activa-
ted inadvertently. This could then damage
the windshield wiper blades or scratch the
windshield.
For this reason, you should always switch
off the windshield wipers in dry weather.
Vehicles with a rain sensor: in the Äor
Å position, the appropriate wiping fre-
quency is automatically set according to the
intensity of the rain. In the Åposition, the
rain sensor is more sensitive than in the Ä
position, causing the windshield wiper to wipe
more frequently.
If the wiper blades are worn, the windshield
will no longer be wiped properly. This could
prevent you from observing the traffic condi-
tions. Switching the rear window wiper on/
off Combination switch
:
è Switch
2 ô Wipes with washer fluid
3 ISwitches on intermittent wiping Windshield wipers
111Lights andwindshield wipers Z
Page 175 of 338
Under the following circumstances, the rear
view camera will not function, or will function
in a limited manner:
R if the trunk lid is open
R in heavy rain, snow or fog
R at night or in very dark places
R if the camera is exposed to very bright light
R if the area is lit by fluorescent bulbs or LED
lighting (the display may flicker)
R if there is a sudden change in temperature,
e.g. when driving into a heated garage in
winter
R if the camera lens is dirty or obstructed.
Observe the notes on cleaning
(Y page 276)
R if the rear of your vehicle is damaged. In this
event, have the camera position and setting checked at a qualified specialist workshop
The field of vision and other functions of the
rear view camera may be restricted due to
additional accessories on the rear of the vehi-
cle (e.g. license plate holder, bicycle rack).
Activating/deactivating the rear view
camera X
To activate: make sure that the key is in
position 2in the ignition lock.
X Make sure that the Activation by R Activation by R
gear
gear function is selected in Audio 20/
COMAND; see the Digital Operator's Man-
ual.
X Engage reverse gear.
The area behind the vehicle is shown with
guide lines in the Audio 20/COMAND dis-
play.
The image from the rear view camera is
available throughout the maneuvering
process.
To deactivate: the rear view camera deacti-
vates if you shift the transmission to Por after
driving forwards a short distance. Displays in the Audio 20/COMAND dis-
play The rear view camera may show a distorted
view of obstacles, show them incorrectly or
not at all. The rear view camera does not show
objects in the following positions:
R very close to the rear bumper
R under the rear bumper
R in the area immediately above the tailgate
handle
! Objects not at ground level may appear to
be further away than they actually are, e.g.:
R the bumper of a parked vehicle
R the drawbar of a trailer
R the ball coupling of a trailer tow hitch
R the rear section of an HGV
R a slanted post
Use the guidelines only for orientation.
Approach objects no further than the bot-
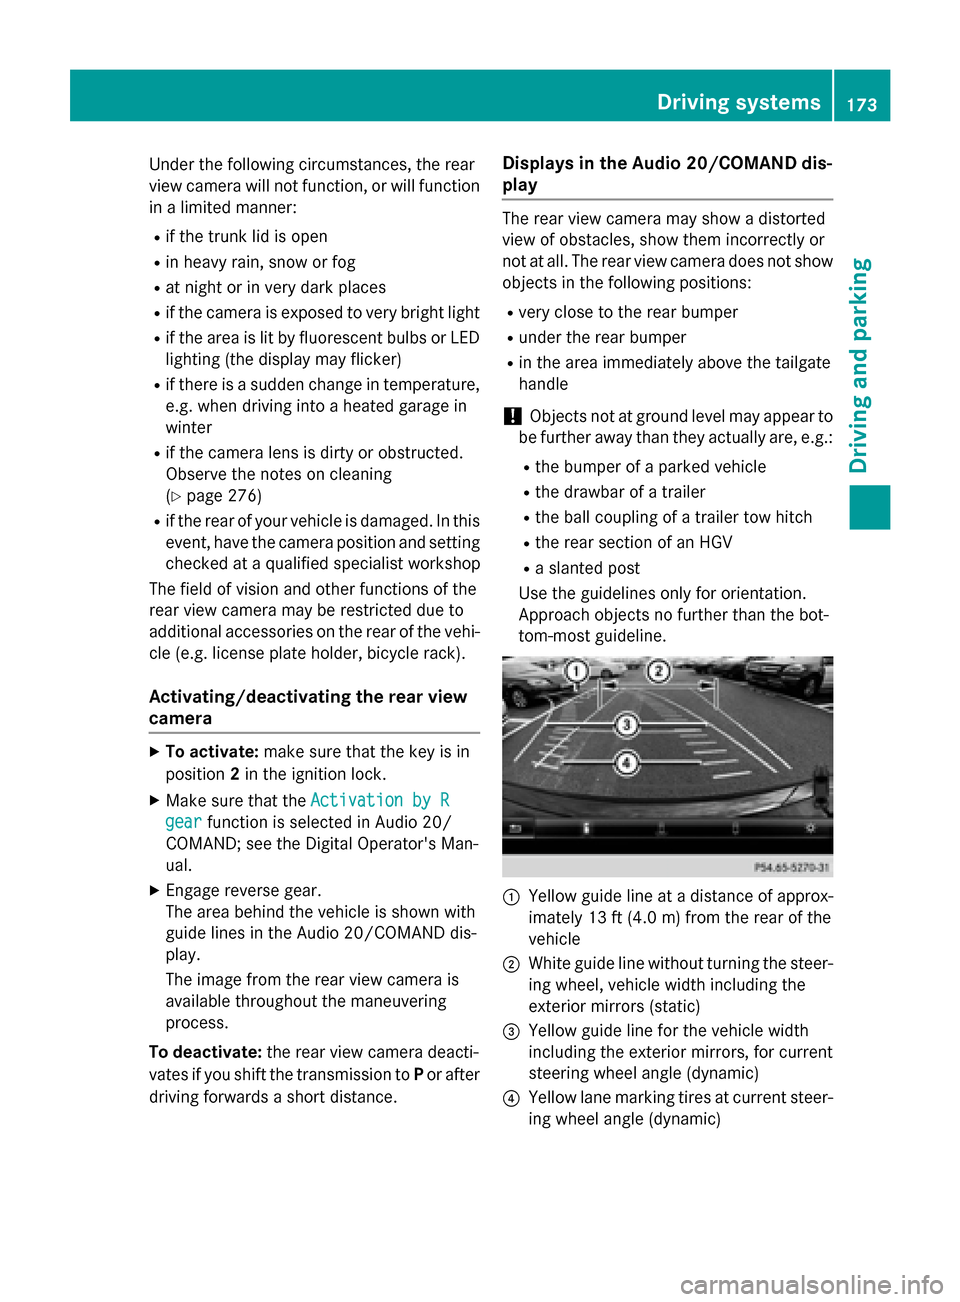
tom-most guideline. :
Yellow guide line at a distance of approx-
imately 13 ft (4.0 m) from the rear of the
vehicle
; White guide line without turning the steer-
ing wheel, vehicle width including the
exterior mirrors (static)
= Yellow guide line for the vehicle width
including the exterior mirrors, for current
steering wheel angle (dynamic)
? Yellow lane marking tires at current steer-
ing wheel angle (dynamic) Driving systems
173Driving and parking Z
Page 216 of 338
Display messages
Possible causes/consequences and
M
MSolutions ator's Manual
ator's Manual
display messages must not be shown in the
multifunction display.
X Wait for a period of at least 60 seconds until the necessary sys-
tem checks have been completed.
X Make sure that the display messages do not appear in the mul-
tifunction display.
If these conditions are fulfilled, the front-passenger seat can be
occupied again. Whether the PASSENGER AIR BAG OFF or ON
indicator lamp remains lit or goes out depends on how OCS clas-
sifies the occupant.
If the conditions are not fulfilled, the system is not operating cor- rectly.
X Visit a qualified specialist workshop immediately.
For further information about the Occupant Classification System, see (Y page 49). Lights
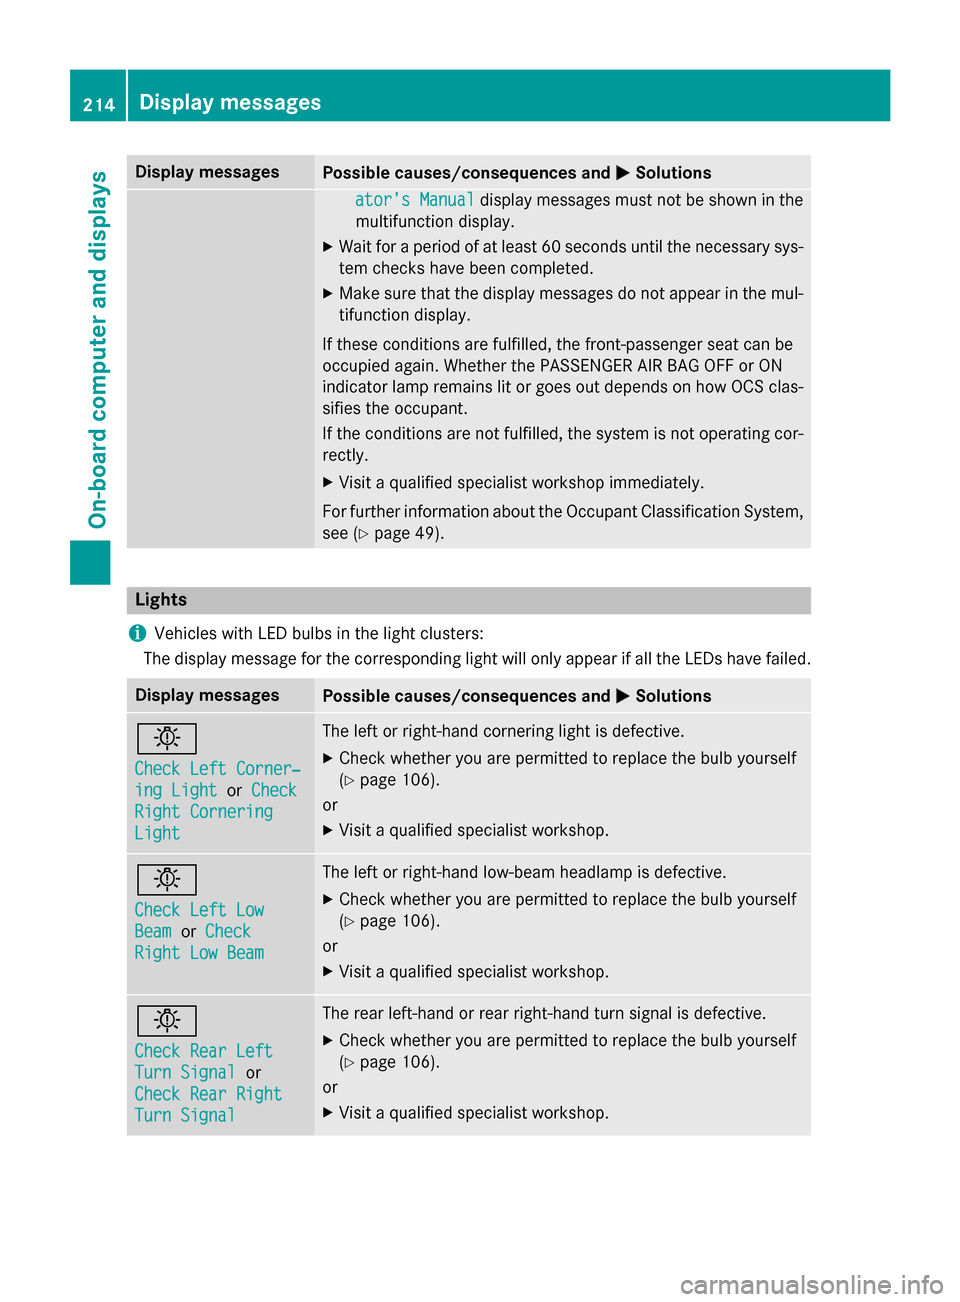
i Vehicles with LED bulbs in the light clusters:
The display message for the corresponding light will only appear if all the LEDs have failed. Display messages
Possible causes/consequences and
M MSolutions b
Check Left Corner‐ Check Left Corner‐
ing Light ing Light
orCheck
Check
Right Cornering
Right Cornering
Light Light The left or right-hand cornering light is defective.
X Check whether you are permitted to replace the bulb yourself
(Y page 106).
or
X Visit a qualified specialist workshop. b
Check Left Low Check Left Low
Beam Beam
orCheck
Check
Right Low Beam
Right Low Beam The left or right-hand low-beam headlamp is defective.
X Check whether you are permitted to replace the bulb yourself
(Y page 106).
or
X Visit a qualified specialist workshop. b
Check Rear Left Check Rear Left
Turn Signal Turn Signal
or
Check Rear Right
Check Rear Right
Turn Signal Turn Signal The rear left-hand or rear right-hand turn signal is defective.
X Check whether you are permitted to replace the bulb yourself
(Y page 106).
or
X Visit a qualified specialist workshop. 214
Display
messagesOn-board computer and displays
Page 217 of 338
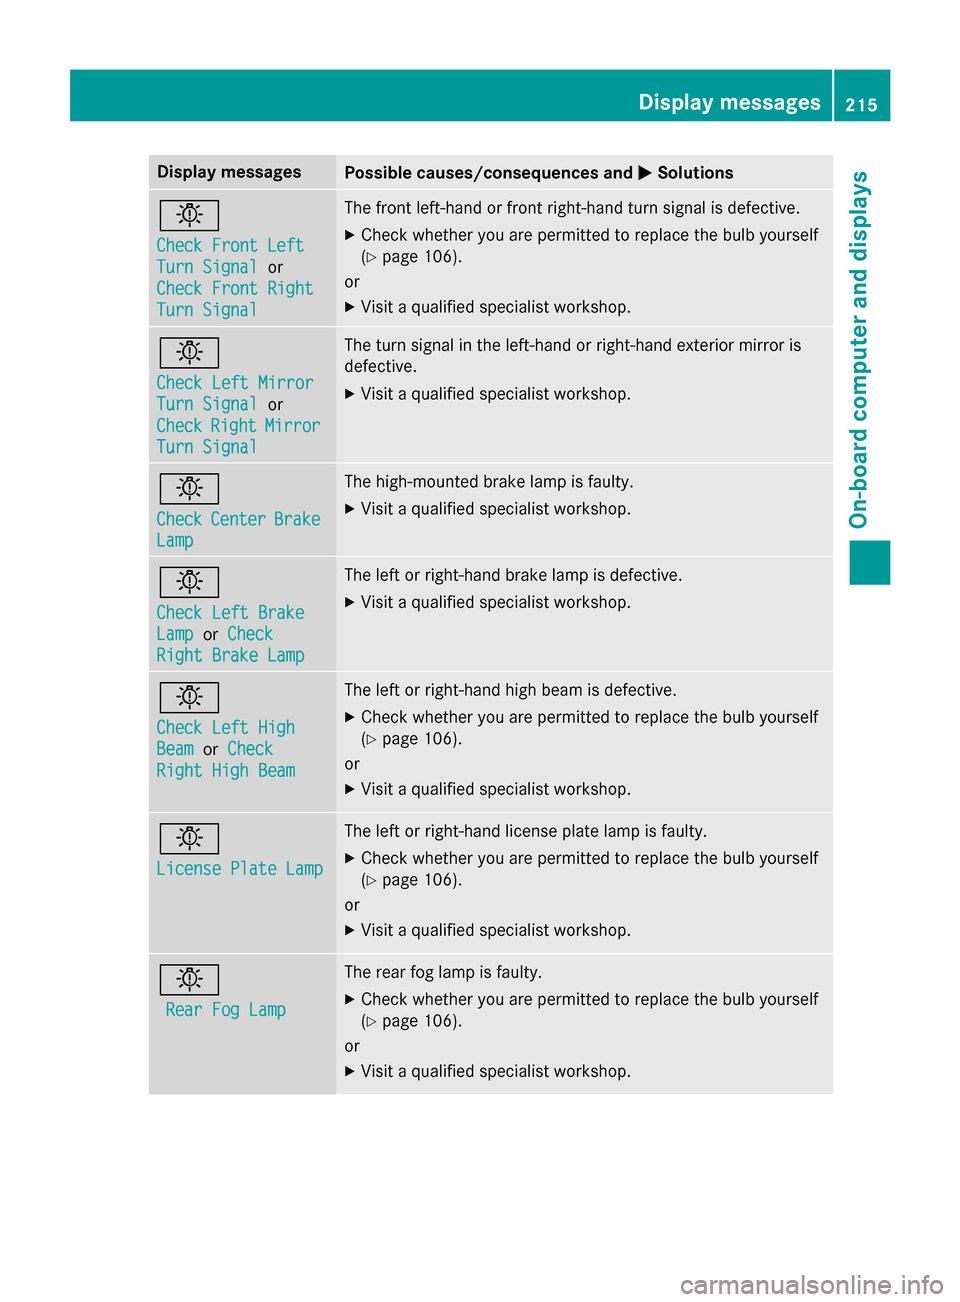
Display messages
Possible causes/consequences and
M
MSolutions b
Check Front Left Check Front Left
Turn Signal Turn Signal
or
Check Front Right
Check Front Right
Turn Signal Turn Signal The front left-hand or front right-hand turn signal is defective.
X Check whether you are permitted to replace the bulb yourself
(Y page 106).
or
X Visit a qualified specialist workshop. b
Check Left Mirror Check Left Mirror
Turn Signal Turn Signal
or
Check
Check Right
RightMirror
Mirror
Turn Signal
Turn Signal The turn signal in the left-hand or right-hand exterior mirror is
defective.
X Visit a qualified specialist workshop. b
Check Check
Center
Center Brake
Brake
Lamp
Lamp The high-mounted brake lamp is faulty.
X
Visit a qualified specialist workshop. b
Check Left Brake Check Left Brake
Lamp Lamp
orCheck
Check
Right Brake Lamp
Right Brake Lamp The left or right-hand brake lamp is defective.
X Visit a qualified specialist workshop. b
Check Left High Check Left High
Beam Beam
orCheck
Check
Right High Beam
Right High Beam The left or right-hand high beam is defective.
X Check whether you are permitted to replace the bulb yourself
(Y page 106).
or
X Visit a qualified specialist workshop. b
License Plate Lamp License Plate Lamp The left or right-hand license plate lamp is faulty.
X Check whether you are permitted to replace the bulb yourself
(Y page 106).
or
X Visit a qualified specialist workshop. b
Rear Fog Lamp Rear Fog Lamp The rear fog lamp is faulty.
X Check whether you are permitted to replace the bulb yourself
(Y page 106).
or
X Visit a qualified specialist workshop. Display
messages
215On-board computer and displays Z
Page 218 of 338
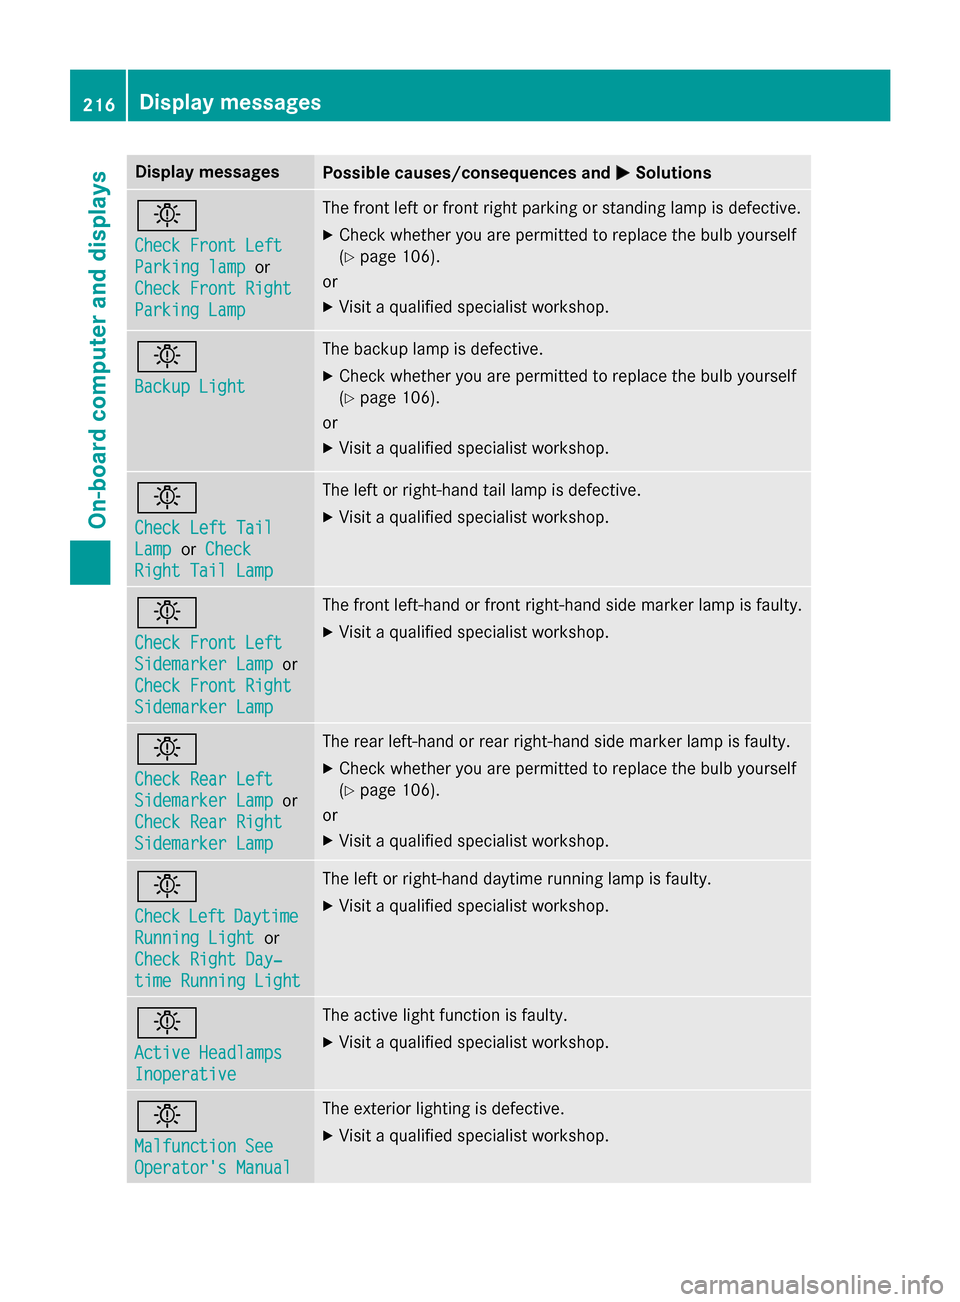
Display messages
Possible causes/consequences and
M
MSolutions b
Check Front Left Check Front Left
Parking lamp Parking lamp
or
Check Front Right
Check Front Right
Parking Lamp Parking Lamp The front left or front right parking or standing lamp is defective.
X Check whether you are permitted to replace the bulb yourself
(Y page 106).
or
X Visit a qualified specialist workshop. b
Backup Light Backup Light The backup lamp is defective.
X Check whether you are permitted to replace the bulb yourself
(Y page 106).
or
X Visit a qualified specialist workshop. b
Check Left Tail Check Left Tail
Lamp Lamp
orCheck
Check
Right Tail Lamp
Right Tail Lamp The left or right-hand tail lamp is defective.
X Visit a qualified specialist workshop. b
Check Front Left Check Front Left
Sidemarker Lamp Sidemarker Lamp
or
Check Front Right
Check Front Right
Sidemarker Lamp Sidemarker Lamp The front left-hand or front right-hand side marker lamp is faulty.
X Visit a qualified specialist workshop. b
Check Rear Left Check Rear Left
Sidemarker Lamp Sidemarker Lamp
or
Check Rear Right
Check Rear Right
Sidemarker Lamp Sidemarker Lamp The rear left-hand or rear right-hand side marker lamp is faulty.
X Check whether you are permitted to replace the bulb yourself
(Y page 106).
or
X Visit a qualified specialist workshop. b
Check Check
Left
LeftDaytime
Daytime
Running Light
Running Light or
Check Right Day‐
Check Right Day‐
time Running Light time Running Light The left or right-hand daytime running lamp is faulty.
X Visit a qualified specialist workshop. b
Active Headlamps Active Headlamps
Inoperative Inoperative The active light function is faulty.
X Visit a qualified specialist workshop. b
Malfunction See Malfunction See
Operator's Manual Operator's Manual The exterior lighting is defective.
X Visit a qualified specialist workshop. 216
Display
messagesOn-board computer and displays