2015 MERCEDES-BENZ B-Class ELECTRIC ECO mode
[x] Cancel search: ECO modePage 126 of 338
immediately to open/close the side window
in the door. The side window stops. To con-
tinue closing the side window, pull on the
W switch.
X Convenience closing feature: press and
hold the ebutton until the side win-
dows are closed.
The indicator lamp in the ebutton lights
up. Air-recirculation mode is activated.
If parts of the body are in the closing area
during convenience closing, proceed as fol-
lows:
X Press the Wbutton for opening/closing
the side windows.
The side window stops.
X To then open the side windows, press the
W button again.
or X Press the ebutton for longer than two
seconds.
The side windows move in the opposite
direction.
X Convenience opening feature: press and
hold the ebutton until the side win-
dows are opened. The side windows move
back to their original positions.
The indicator lamp in the ebutton goes
out. Air-recirculation mode is deactivated.
Notes on the automatic reversing feature for
the side windows (Y page 83).
If you open the side windows manually after
closing them with the convenience closing
feature, they will remain in this position when
opened using the convenience opening fea-
ture. Pre-entry climate control via Smart-
Key
Before getting in, the vehicle interior can be
briefly warmed or ventilated in advance. In
addition, the air from the air vent can be pre-
cooled. The high-voltage battery must be sufficiently
charged before the pre-entry climate control
(via SmartKey) can be activated.
Activating/deactivating the pre-entry cli-
mate control (via SmartKey)
When the vehicle is unlocked using the Smart-
Key or KEYLESS-GO, the climate control func-
tions are activated.
The pre-cooling and pre-heating climate con- trol functions last 5 minutes.
When the vehicle is pre-cooled, the following
functions are activated as necessary:
R Climate control system
R Cooling with air dehumidification
R Blower
When the vehicle is pre-heated, the following functions are activated as necessary:
R Climate control system
R Blower
R Seat heating
R Windshield heating
R Rear window defroster
Pre-entry climate control is automatically
switched off when operational readiness
mode is requested.
Activating/deactivating pre-entry cli-
mate control (via SmartKey)
You can activate and deactivate pre-entry cli-
mate control (via SmartKey) via the on-board
computer in the E-CELL
E-CELL submenu
(Y page 196).
i If the condition of charge of the high-volt-
age battery is below the specified minimum
condition of charge, pre-entry climate con- trol will not be activated even if it has been
set. 124
Operating the climate control systemsClimate control
Page 134 of 338
The drive system can be switched off while
the vehicle is in motion by pressing and hold- ing the Start/Stop button for three seconds.
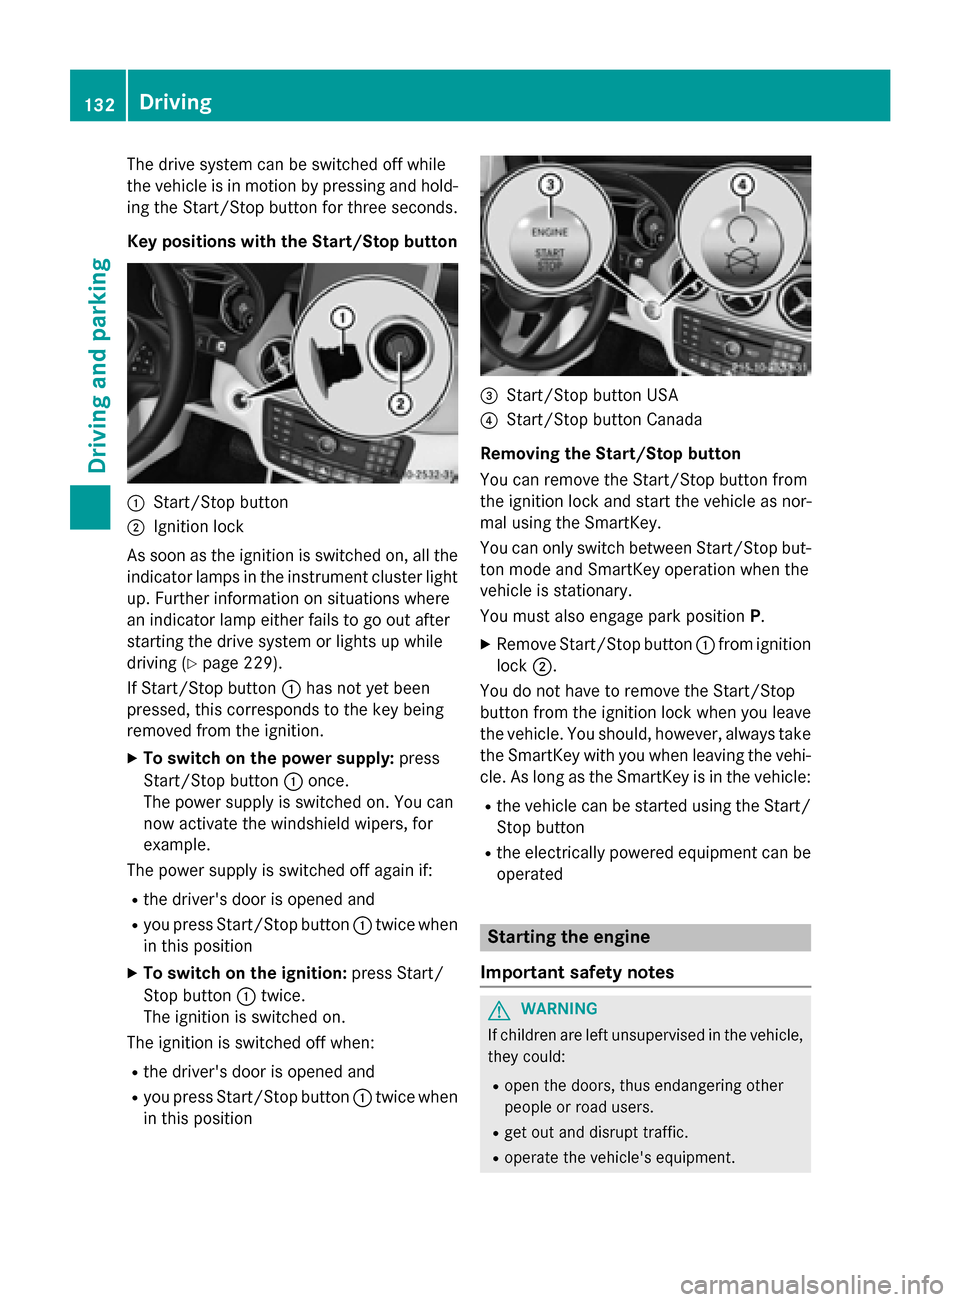
Key positions with the Start/Stop button :
Start/Stop button
; Ignition lock
As soon as the ignition is switched on, all the
indicator lamps in the instrument cluster light up. Further information on situations where
an indicator lamp either fails to go out after
starting the drive system or lights up while
driving (Y page 229).
If Start/Stop button :has not yet been
pressed, this corresponds to the key being
removed from the ignition.
X To switch on the power supply: press
Start/Stop button :once.
The power supply is switched on. You can
now activate the windshield wipers, for
example.
The power supply is switched off again if:
R the driver's door is opened and
R you press Start/Stop button :twice when
in this position
X To switch on the ignition: press Start/
Stop button :twice.
The ignition is switched on.
The ignition is switched off when:
R the driver's door is opened and
R you press Start/Stop button :twice when
in this position =
Start/Stop button USA
? Start/Stop button Canada
Removing the Start/Stop button
You can remove the Start/Stop button from
the ignition lock and start the vehicle as nor-
mal using the SmartKey.
You can only switch between Start/Stop but-
ton mode and SmartKey operation when the
vehicle is stationary.
You must also engage park position P.
X Remove Start/Stop button :from ignition
lock ;.
You do not have to remove the Start/Stop
button from the ignition lock when you leave
the vehicle. You should, however, always take the SmartKey with you when leaving the vehi-cle. As long as the SmartKey is in the vehicle:
R the vehicle can be started using the Start/
Stop button
R the electrically powered equipment can be
operated Starting the engine
Important safety notes G
WARNING
If children are left unsupervised in the vehicle, they could:
R open the doors, thus endangering other
people or road users.
R get out and disrupt traffic.
R operate the vehicle's equipment. 132
DrivingDriving and parking
Page 140 of 338
Drive program
Sis characterized by the fol-
lowing:
R the vehicle exhibits sporty driving charac-
teristics.
R the entire power output can be utilized by
depressing the accelerator pedal.
Drive program E+is characterized by the fol-
lowing:
R reduced torque and significantly reduced
power. This supports an especially efficient
and even driving style and results in a
reduction in speed to approximately
70 mph (110 km/h).
R the vehicle pulling away more gently in
forward gear unless the accelerator pedal
is depressed fully.
R the wheels are less likely to spin.
R particularly efficient overrun.
R full power output by using kickdown.
R the performance of air-conditioning system
and heating are reduced. Steering wheel paddle shifters
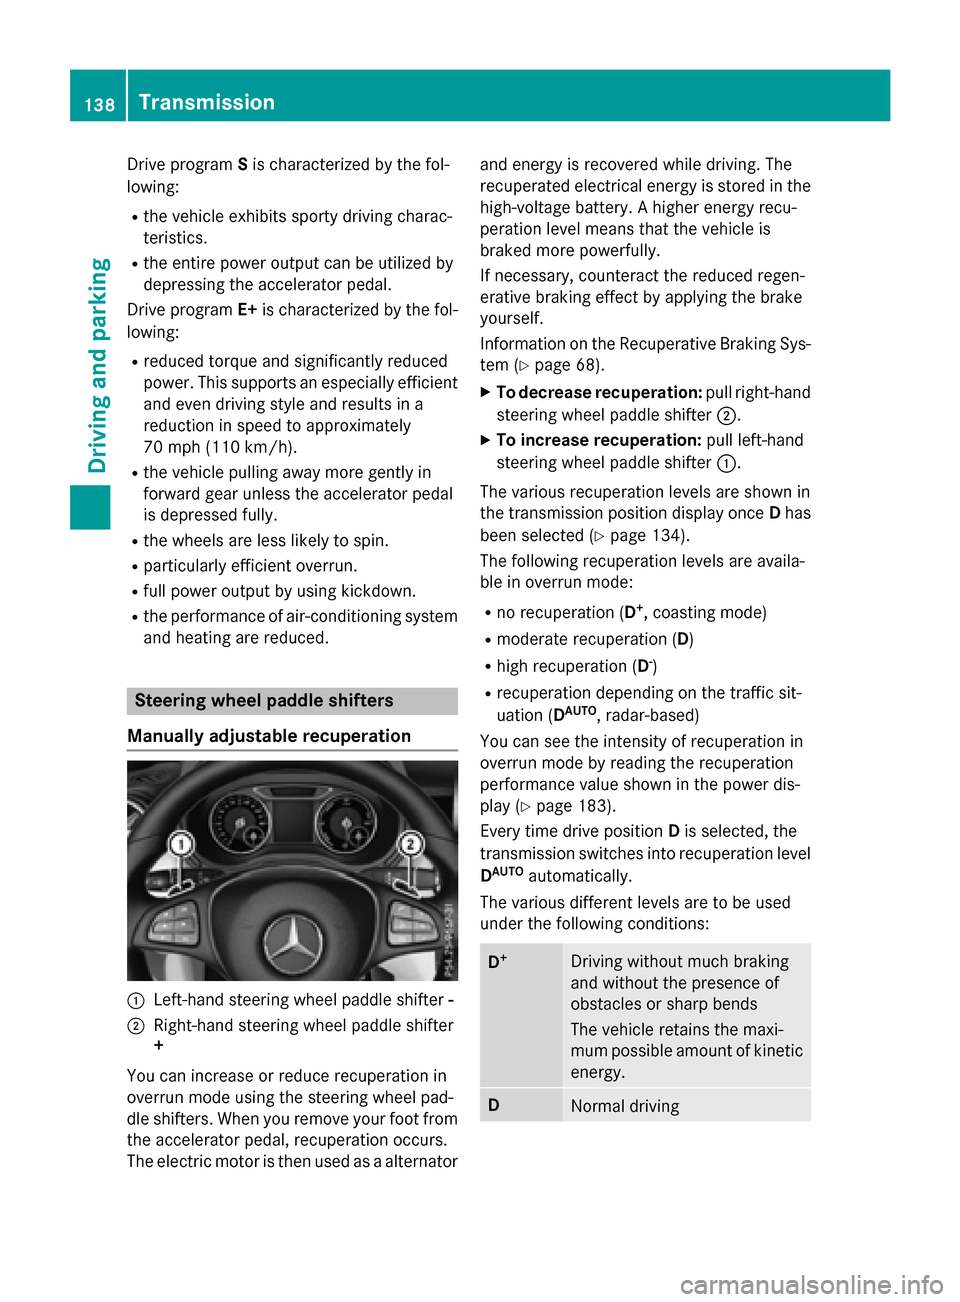
Manually adjustable recuperation :
Left-hand steering wheel paddle shifter -
; Right-hand steering wheel paddle shifter
+
You can increase or reduce recuperation in
overrun mode using the steering wheel pad-
dle shifters. When you remove your foot from
the accelerator pedal, recuperation occurs.
The electric motor is then used as a alternator and energy is recovered while driving. The
recuperated electrical energy is stored in the
high-voltage battery. A higher energy recu-
peration level means that the vehicle is
braked more powerfully.
If necessary, counteract the reduced regen-
erative braking effect by applying the brake
yourself.
Information on the Recuperative Braking Sys-
tem (Y page 68).
X To decrease recuperation: pull right-hand
steering wheel paddle shifter ;.
X To increase recuperation: pull left-hand
steering wheel paddle shifter :.
The various recuperation levels are shown in
the transmission position display once Dhas
been selected (Y page 134).
The following recuperation levels are availa-
ble in overrun mode:
R no recuperation (D +
, coasting mode)
R moderate recuperation (D)
R high recuperation (D -
)
R recuperation depending on the traffic sit-
uation (D AUTO
, radar-based)
You can see the intensity of recuperation in
overrun mode by reading the recuperation
performance value shown in the power dis-
play (Y page 183).
Every time drive position Dis selected, the
transmission switches into recuperation level
D AUTO
automatically.
The various different levels are to be used
under the following conditions: D
+ Driving without much braking
and without the presence of
obstacles or sharp bends
The vehicle retains the maxi-
mum possible amount of kinetic
energy. D
Normal driving138
TransmissionDriving an
d parking
Page 141 of 338
D
- Sporty driving or driving on a
downhill gradient
The brake pedal does not need
to be used as often because the
extent of the deceleration is
greater than in D.
Energy use when decelerating is
considerably higher than when
the vehicle is braked with the
brake pedal. D
AUTO
(radar-
based) The intensity of recuperation is
automatically adjusted to the
current traffic situation.
Default setting
In levels
Dand D-
, deceleration can be con-
trolled in an infinitely variable manner using
the accelerator pedal.
The braking performance of the electric
motor using recuperative braking is, in some
operating modes, either reduced or not effec-
tive:
R when the condition of charge of the high-
voltage battery increases
R if the high-voltage battery is not yet at a
normal operating temperature
R when driving close to the maximum speed
R when the vehicle is almost stationary
R in transmission position N
R during and after ESP stability control
If you do not make an additional effort to
apply the brake yourself, the braking effect
may not be sufficient. If necessary, counter-
act the reduced regenerative braking effect
by applying the brake yourself.
Radar-based recuperation The vehicle uses the sensors of COLLISION
PREVENTION ASSIST PLUS during radar-
based recuperation (D
AUTO
). The sensors
detect the distance to the vehicle ahead and
its speed. The intensity of recuperation is then automatically adjusted to the current
traffic situation.
The range can then be increased by storing
energy efficiently. Adjustment is infinitely var-
iable from overrun mode (no recuperation) to maximum recuperation.
Maintain sufficient distance to the vehicle in
front. Mercedes-Benz recommends that you
activate COLLISION PREVENTION ASSIST
PLUS as a visual and acoustic aid.
Examples of radar-based recuperation:
R Approaching a slower vehicle, a decelerat-
ing vehicle or when following a vehicle
downhill. Your vehicle decelerates slightly
and increases recuperation.
R Driving when no vehicle is detected in front
or when a vehicle is detected in the far dis- tance or an accelerating vehicle is detec-
ted. Your vehicle switches to overrun mode
at higher speeds.
R Driving on a steep downhill slope. Acceler-
ation downhill is reduced and recuperation is increased. This is comparable with shift-
ing down when driving downhill.
X To activate radar-based recuperation:
pull steering wheel paddle shifter :or;
towards you and hold for about one second.
X To deactivate radar-based recupera-
tion: briefly pull steering wheel paddle
shifter :or; towards you.
If you change between radar-based and man- ual recuperation, the following levels are acti-
vated depending on the selection via the
steering wheel paddle shifters: ;
Steering
wheel paddle
shifter + selects
D+
(overrun) :
Steering
wheel paddle
shifter - selects
D-
(maximum
recuperation) Transmission
139Driving and parking Z
Page 143 of 338
To avoid hazardous situations, observe the
following:
R Only connect the charging cable to mains
sockets that:
- are installed correctly and
- have been approved by an electrical spe-
cialist.
R For safety reasons, only use the charging
cables supplied with the vehicle, or charg-
ing cables which have been approved for
use with this vehicle.
R Never use a damaged charging cable.
R Do not use:
- Extension cables
- Cable drums
- Multiple sockets
R Do not use a socket adapter to connect the
charging cable to the mains socket. The
only exception is if the adapter has been
tested and approved by the manufacturer
for charging the high-voltage battery in an
electric vehicle.
R Always observe the safety notes in the
socket adapter's operating instructions.
The vehicle's high voltage electrical system is under high voltage.
R Do not handle high-voltage components or
the orange cables of the vehicle's high-volt-age electrical system.
R Do not touch high-voltage components or
the orange cables of the high-voltage elec-
trical system when a vehicle has been
involved in a crash.
R Do not touch any damaged components or
damaged orange cables of the vehicle's
high-voltage electrical system.
R Do not remove the covers of the high-volt-
age electrical system components that are
marked with a warning sticker. General notes
Method of operation The vehicle is equipped with a high-voltage
battery for driving. The high-voltage battery
stores the energy needed to operate the elec-
tric motor and releases it again.
The electric motor uses energy that has been stored in the high-voltage battery when pull-
ing away, accelerating and during the jour-
ney.
In overrun mode (except D+), kinetic energy
is converted by means of energy recuperation
into electrical energy and stored in the high-
voltage battery.
The high-voltage battery can be charged as
follows:
R through energy recuperation while the
vehicle is in motion
R with the charging cable at a mains socket
while the vehicle is stationary
R with the charging cable at a charging sta-
tion while the vehicle is stationary
The high-voltage battery can be charged in a
voltage range from 110 V to 240 V.
If the condition of charge drops to less than
13%, the high-voltage battery reserve indica-
tor lamp lights up in the instrument cluster.
Charge the high-voltage battery as soon as
possible.
Below a condition of charge of 5%, the per-
formance of the vehicle is reduced. The vehi-
cle's high-voltage electrical system switches
off at a condition of charge of 0%.
Use of the pre-entry climate control function
may mean that the high-voltage battery is not fully charged.
Discharged battery The vehicle's high-voltage electrical system
switches off if the high-voltage battery is com-
pletely discharged. 30 seconds prior to this,
you are informed of the switch-off by the
Battery level too low. Stop and Battery level too low. Stop and High-voltage battery
141Driving and parking Z
Page 159 of 338
Driving tips
General notes
Important safety notes G
WARNING
If you switch off the ignition while driving,
safety-relevant functions are only available
with limitations, or not at all. This could affect, for example, the power steering and the brake
boosting effect. You will require considerably
more effort to steer and brake. There is a risk of an accident.
Do not switch off the ignition while driving. G
WARNING
If you operate mobile communication equip-
ment while driving, you will be distracted from traffic conditions. You could also lose controlof the vehicle. There is a risk of an accident.
Only operate this equipment when the vehicleis stationary.
Observe the legal requirements for the coun- try in which you are driving. Some jurisdic-
tions prohibit the driver from using a mobile
phone while driving a vehicle.
If you make a call while driving, always use
hands-free mode. Only operate the telephone
when the traffic situation permits. If you are
unsure, pull over to a safe location and stop
before operating the telephone.
Bear in mind that at a speed of only 30 mph
(approximately 50 km/h), the vehicle covers
a distance of 44 ft (approximately 14 m) per
second.
Drive sensibly – save energy Observe the following tips to save energy:
R The tires should always be inflated to the
recommended tire pressure.
R Remove unnecessary loads.
R Remove roof racks when they are not nee-
ded.
R Avoid frequent acceleration or braking. Energy consumption also increases when
driving in low or high outside temperatures, in
stop-start traffic, on short journeys and in
hilly terrain.
Drinking and driving G
WARNING
Drinking and driving and/or taking drugs and driving are very dangerous combinations.
Even a small amount of alcohol or drugs can
affect your reflexes, perceptions and judg-
ment.
The possibility of a serious or even fatal acci-
dent is greatly increased when you drink or
take drugs and drive.
Do not drink or take drugs and drive or allow
anyone to drive who has been drinking or tak-
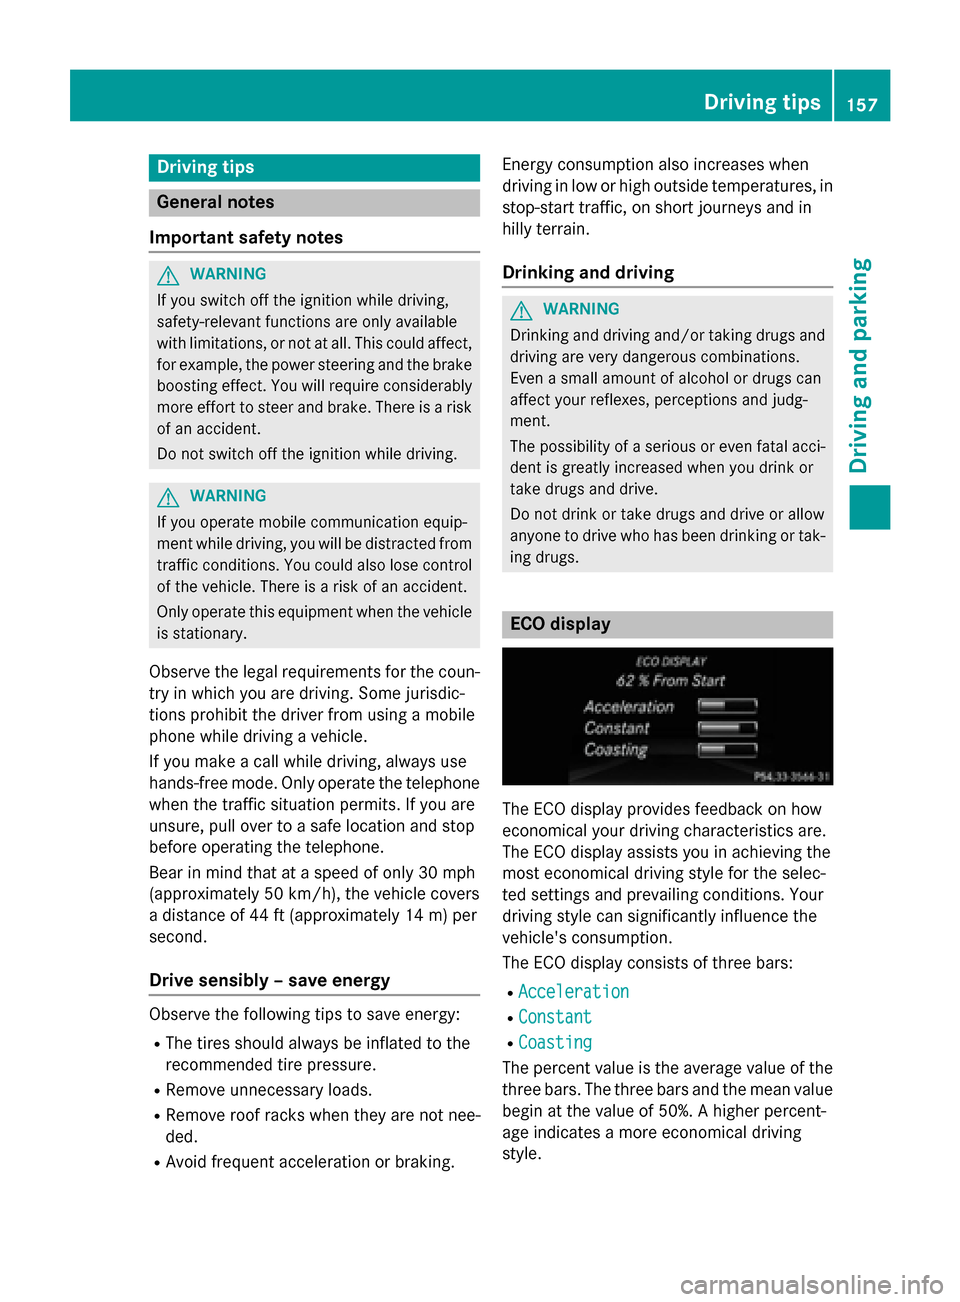
ing drugs. ECO display
The ECO display provides feedback on how
economical your driving characteristics are.
The ECO display assists you in achieving the
most economical driving style for the selec-
ted settings and prevailing conditions. Your
driving style can significantly influence the
vehicle's consumption.
The ECO display consists of three bars:
R Acceleration
Acceleration
R Constant Constant
R Coasting
Coasting
The percent value is the average value of the three bars. The three bars and the mean value
begin at the value of 50%. A higher percent-
age indicates a more economical driving
style. Driving tips
157Driving and pa rking Z
Page 160 of 338
The ECO display does not indicate the actual
fuel consumption. A fixed percentage count
in the ECO display does not indicate a fixed
consumption.
Apart from driving style, consumption is
dependent on many factors such as, e.g.:
R load
R tire pressure
R cold start
R choice of route
R electrical consumers switched on
These factors are not included in the ECO dis-
play.
The evaluation of your driving style is carried
out using the following three categories:
R Acceleration
Acceleration (evaluation of all accelera-
tion processes):
- The bar fills up: moderate acceleration,
especially at higher speeds
- The bar empties: sporty acceleration
R Constant
Constant (assessment of driving behavior
at all times)
- The bar fills up: constant speed and
avoidance of unnecessary acceleration
and deceleration
- The bar empties: fluctuations in speed
R Coasting
Coasting (assessment of all deceleration
processes)
- The bar fills up: anticipatory driving,
keeping your distance and early release
of the accelerator. The vehicle can coast
without use of the brakes.
- The bar empties: frequent braking
To achieve a higher value in the categories
Acceleration Acceleration andConstant
Constant, drive the vehi-
cle in drive program E+orE.
On long journeys at a constant speed, e.g. on
the highway, only the bar for Constant
Constantwill
change.
The ECO display summarizes the driving char- acteristics from the start of the journey to its completion. For this reason, the bars change
dynamically at the beginning of the journey.
On longer journeys, there are fewer changes. For more dynamic changes, carry out a man-
ual reset.
For further information on the ECO display,
see (Y page 187). Braking
Important safety notes G
WARNING
If you increase the recuperation level on slip- pery road surfaces, the drive wheels may lose
their traction. There is an increased danger of skidding and accidents.
Do not increase the recuperation level on slip-
pery road surfaces.
The braking performance of the electric
motor using recuperative braking is, in some
operating modes, either reduced or not effec- tive:
R when the condition of charge of the high-
voltage battery increases
R if the high-voltage battery is not yet at a
normal operating temperature
R when driving close to the maximum speed
R when the vehicle is almost stationary
R in transmission position N
R during and after ESP stability control
If you do not make an additional effort to
apply the brake yourself, the braking effect
may not be sufficient. If necessary, counter-
act the reduced regenerative braking effect
by applying the brake yourself.
Downhill gradients On long, steep gradients, you must reduce the
load on the brakes by selecting maximum
recuperation. This helps you to avoid over-
heating the brakes and wearing them out
excessively.
Recuperation allows the vehicle to be decel-
erated without placing a load on the braking
system. 158
Driving tipsDriving and parking
Page 162 of 338
fied specialist workshop. Consult a qualified
specialist workshop to arrange this.
Have brake pads installed and brake fluid
replaced at a qualified specialist workshop.
If the brake system has only been subject to
moderate loads, you should test the function- ality of your brakes at regular intervals.
You can find a description of Brake Assist
(BAS) on (Y page 63).
Mercedes-Benz recommends that you only
have brake pads/linings installed on your
vehicle which have been approved for
Mercedes-Benz vehicles or which correspond to an equivalent quality standard. Brake
pads/linings which have not been approved
for Mercedes-Benz vehicles or which are not
of an equivalent quality could affect your vehi-
cle's operating safety.
Mercedes-Benz recommends that you only
use brake fluid that has been specially
approved for your vehicle by Mercedes-Benz,
or which corresponds to an equivalent quality standard. Brake fluid which has not been
approved for Mercedes-Benz vehicles or
which is not of an equivalent quality could
affect your vehicle's operating safety.
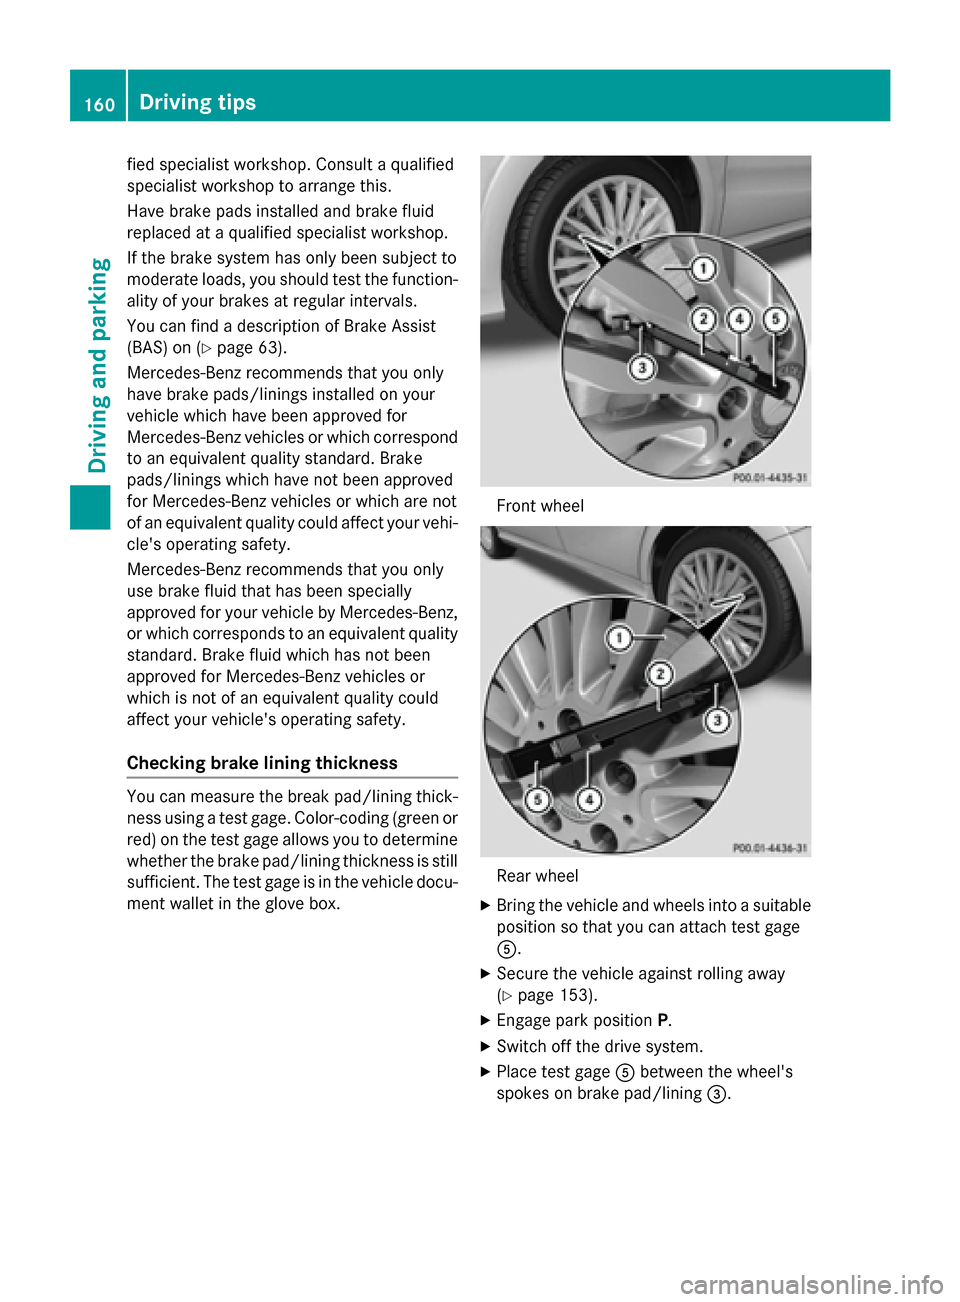
Checking brake lining thickness You can measure the break pad/lining thick-
ness using a test gage. Color-coding (green or
red) on the test gage allows you to determine whether the brake pad/lining thickness is still
sufficient. The test gage is in the vehicle docu-
ment wallet in the glove box. Front wheel
Rear wheel
X Bring the vehicle and wheels into a suitable
position so that you can attach test gage
A.
X Secure the vehicle against rolling away
(Y page 153).
X Engage park position P.
X Switch off the drive system.
X Place test gage Abetween the wheel's
spokes on brake pad/lining =.160
Driving tipsDriving and parking