Page 226 of 878
2262-3. Operating the lights and windshield wipers
■
The windshield wipers and washer can be operated when
The “POWER” switch is in ON mode.■
Effects of vehicle speed on wiper operation
Vehicle speed affects the following even when the wipers are not in AUTO mode: ●
Intermittent wiper interval●
Wiper operation when the washer is be ing used (delay until drip prevention
wiper sweep occurs)
When low speed wiper operation is selected , wiper operation will be switched from
low speed to intermittent wiper operatio n only when the vehicle is stationary.
(However, when the sensor sensitivity is ad justed to the highest level, the mode can-
not be switched.) Washer/wiper dual operation The wipers will automatically
operate a couple of times after
the washer squirts. (After oper-
ating several times, the wipers
operate one more time after a
short delay to prevent dripping.)
If the headlights are on, the
headlight cleaners will operate
once.
Page 231 of 878
2312-3. Operating the lights and windshield wipers
2
When driving Headlight cleaner switch
■
The headlight cleaner can be operated when
The “POWER” switch is in ON mode an d the headlight switch is turned on.■
Windshield washer linked operation
When the windshield washer is operated with the “POWER” switch in ON mode
and the headlights on, the headli ght cleaner will operate once. ( P. 2 2 3 )
NOTICE■
When the washer fluid tank is empty
Do not press the switch continually as the washer fluid pump may overheat. Washer fluid can be sprayed on the headlights.
Press the switch to clean the
headlights.
: If equipped
Page 263 of 878

2632-4. Using other driving systems
2
When driving ■
Rear view monitor system camera
■
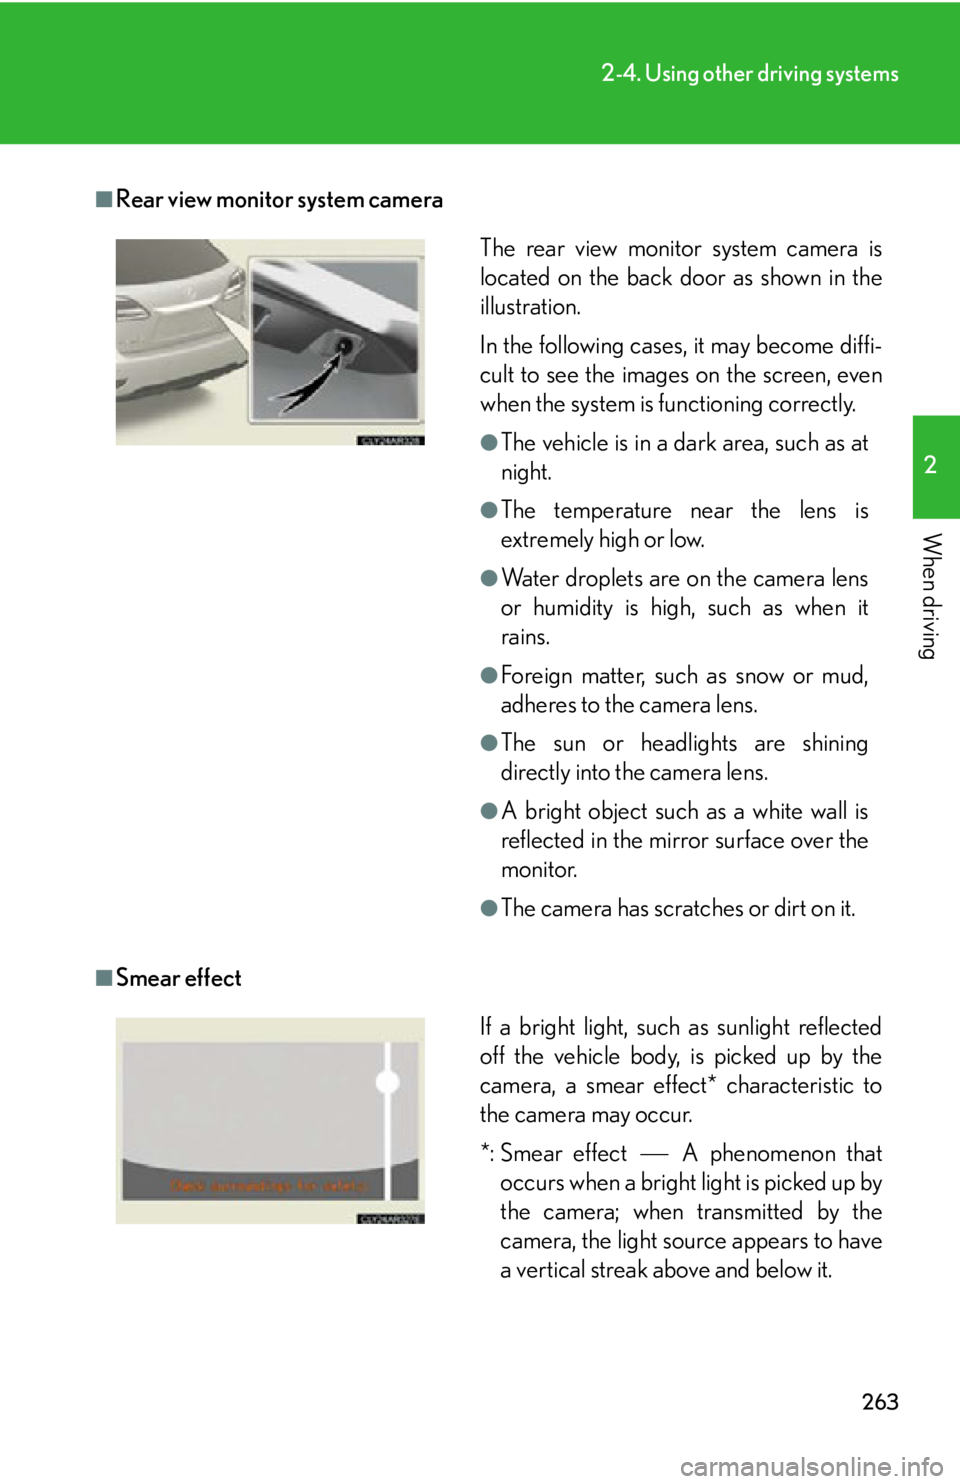
Smear effect The rear view monitor system camera is
located on the back door as shown in the
illustration.
In the following cases, it may become diffi-
cult to see the images on the screen, even
when the system is functioning correctly. ●
The vehicle is in a dark area, such as at
night. ●
The temperature near the lens is
extremely high or low. ●
Water droplets are on the camera lens
or humidity is high, such as when it
rains. ●
Foreign matter, such as snow or mud,
adheres to the camera lens. ●
The sun or headlights are shining
directly into the camera lens. ●
A bright object such as a white wall is
reflected in the mirror surface over the
monitor. ●
The camera has scratches or dirt on it.
If a bright light, such as sunlight reflected
off the vehicle body, is picked up by the
camera, a smear effect* characteristic to
the camera may occur.
*: Smear effect A phenomenon that
occurs when a bright light is picked up by
the camera; when transmitted by the
camera, the light source appears to have
a vertical streak above and below it.
Page 268 of 878

2682-4. Using other driving systems
■
Rear view monitor system camera
■
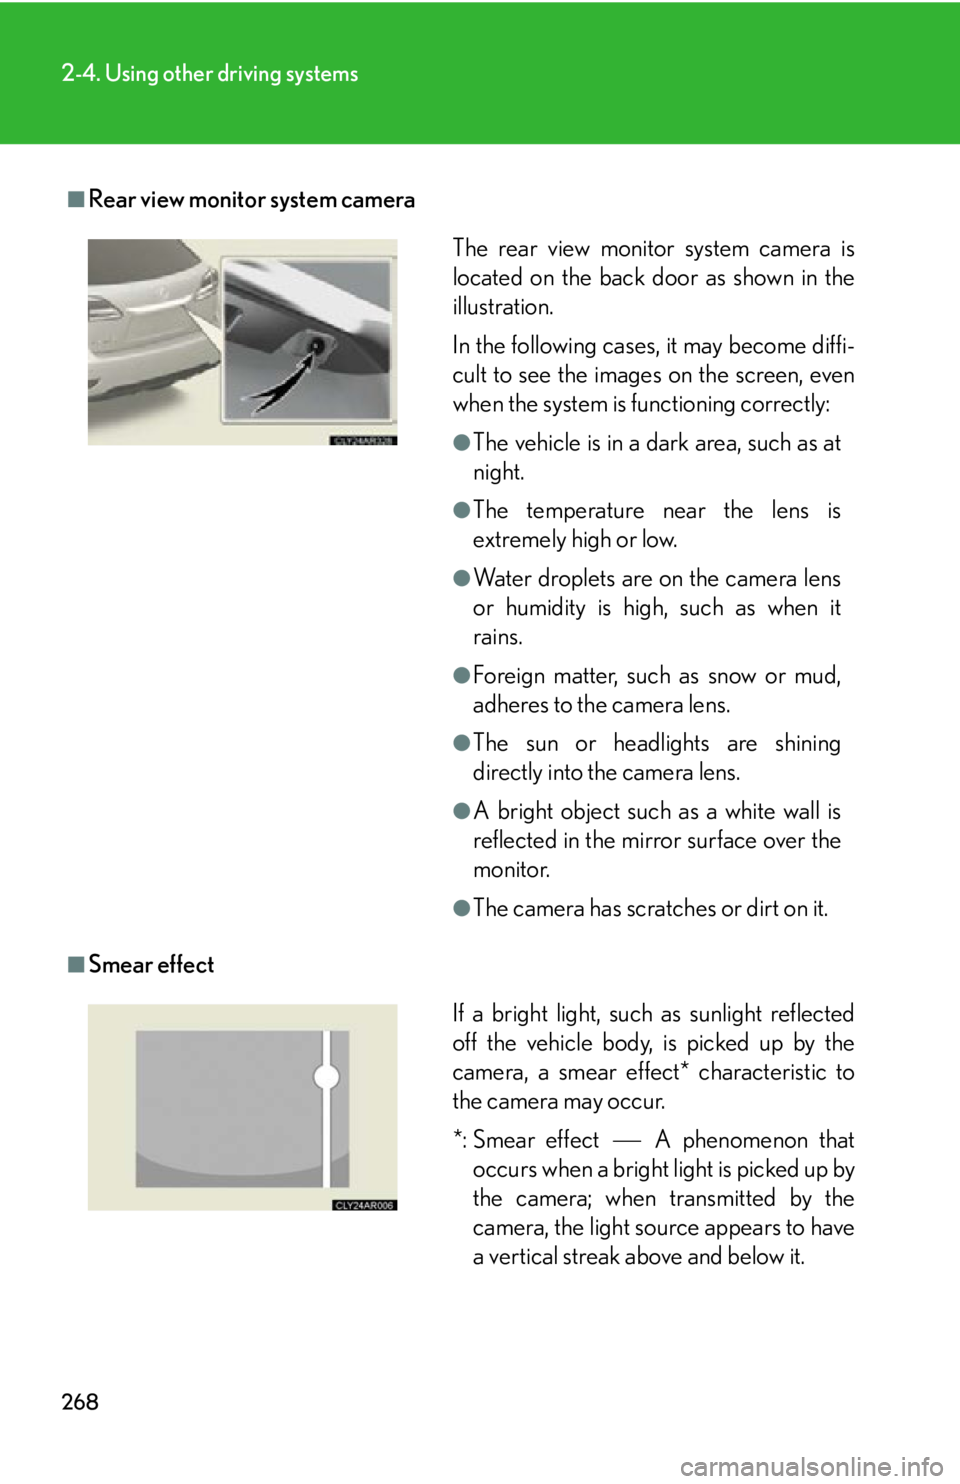
Smear effect The rear view monitor system camera is
located on the back door as shown in the
illustration.
In the following cases, it may become diffi-
cult to see the images on the screen, even
when the system is functioning correctly: ●
The vehicle is in a dark area, such as at
night. ●
The temperature near the lens is
extremely high or low. ●
Water droplets are on the camera lens
or humidity is high, such as when it
rains. ●
Foreign matter, such as snow or mud,
adheres to the camera lens. ●
The sun or headlights are shining
directly into the camera lens. ●
A bright object such as a white wall is
reflected in the mirror surface over the
monitor. ●
The camera has scratches or dirt on it.
If a bright light, such as sunlight reflected
off the vehicle body, is picked up by the
camera, a smear effect* characteristic to
the camera may occur.
*: Smear effect A phenomenon that
occurs when a bright light is picked up by
the camera; when transmitted by the
camera, the light source appears to have
a vertical streak above and below it.
Page 332 of 878
3323-1. Lexus Display Audio system
Display settings
Changing between day mode and night mode
When the headlights are turned on, the screen dims.
However, the screen can be switch ed to day mode by selecting “Day
Mode”.
If the screen is set in day mode with th e headlight switch turned on, this condi-
tion is memorized even with the “POWER” switch is turned off. You can adjust the contrast and brightness of the screen and also turn the
display off.
To display the “Display Settings” sc reen, press the “MENU” button on the
Lexus Display Audio controller and then select “Display” on the “Menu”
screen.
Turn off screen The screen is turned off. To turn
it on, press the “AUDIO” or
“MENU” button on the Lexus
Display Audio controller.
Changes to day mode.
( P. 3 3 2 )
Adjust screen contrast/
brightness ( P. 333)
Adjust screen contrast/
brightness of rear view moni-
tor camera ( P. 333)
Page 645 of 878
6454-2. Maintenance
4
Maintenance and care Items Check points
Indicators/buzzers • Do the indicators and buzzers
function properly?
Lights • Do all the lights come on?
• Are the headlights aimed cor-
rectly? ( P. 7 0 5 )
Pa r k i n g b r a ke • Does the parking brake pedal
move smoothly?
• When parked on a slope and the
parking brake is on, is the vehicle
securely stopped?
Seat belts • Do the seat belts operate
smoothly?
• The seat belts should not be dam-
aged.
Seats • Do the seat controls operate prop-
erly?
Steering wheel • Does the steering wheel rotate
smoothly?
• Does the steering wheel have the
correct amount of free play?
• There should not be any strange
sounds coming from the steering
wheel.
Page 705 of 878
7054-3. Do-it-yourself maintenance
4
Maintenance and care Headlight aim (vehicles without LED headlights) ■ Removing the engine compartment cover
P. 6 5 5
■ Vertical movement adjusting bolts
Vehicles with halogen headlights
Adjustment bolt A
Adjustment bolt B
Vehicles with discharge headlights
Adjustment bolt A
Adjustment bolt B
■ Before checking the headlight aim
Make sure the vehicle has a full tank of gas and the area around
the headlight is not deformed.
Park the vehicle on level ground.
Sit in the driver’s seat.
Bounce the vehicle several times.STEP 1
STEP 2
STEP 3
STEP 4
Page 706 of 878
7064-3. Do-it-yourself maintenance
■ Adjusting the headlight aim
Vehicles with halogen headlights
Turn bolt A in either direction
using a Phillips-head screw-
driver. Remember the turning direction
and the number of turns.
Turn bolt B the same number of
turns and in the same direction
as in step 1 using a Phillips-head
screwdriver. If the headlight cannot be
adjusted using this procedure,
take the vehicle to your Lexus
dealer to adjust the headlight
aim.STEP 1
STEP 2