Page 727 of 886
7274-3. Do-it-yourself maintenance
4
Maintenance and care ■ Tail and back-up lights
Remove the access hole cover. Use a flathead screwdriver
wrapped in a cloth.
Turn the bulb base counterclock-
wise.
Tail light
Back-up light
Remove the light bulb.
Tail light
Back-up lightSTEP 1
STEP 2
STEP 3
Page 728 of 886
7284-3. Do-it-yourself maintenance
■ Rear side marker light (right side)
Remove the bolts using a Phillips-
head screwdriver and remove the
clip.
Removing the clip
Installing the clip
Turn the bulb base counterclock-
wise.
Remove the light bulb.STEP 1
STEP 2
STEP 3
Page 729 of 886
7294-3. Do-it-yourself maintenance
4
Maintenance and care ■ Rear side marker light (left side)
Turn the bulb base counterclock-
wise.
Remove the light bulb.
■ Lights other than the above
If any of the lights listed below ha s burnt out, have it replaced by your
Lexus dealer.
● Discharge headlight low beams (if equipped)
● Daytime running lights
● Parking lights
● Front side marker lights
● Front fog lights
● Side turn signal lights
● Stop lights
● High mounted stoplight
● License plate lightsSTEP 1
STEP 2
Page 732 of 886
7324-3. Do-it-yourself maintenance
CAUTION■
Discharge headlights (if equipped) ●
Contact your Lexus dealer be fore replacing discharge he adlights (including light
bulbs).●
Do not touch the discharge headlight’s high voltage socket when the headlights
are turned on.
An extremely high voltage of 30000 V wi ll be discharged and could result in
serious injury or death by electric shock.●
Do not attempt to take apart or repair the low beam discharge headlight bulbs,
connectors, power supply circuits, or related components.
Doing so could result in electric shock and serious injury or death.■
To prevent damage or fire
Make sure bulbs are fully seated and locked.
Page 741 of 886

5
When trouble arises
7415-1. Essential information
CAUTION■
While towing ●
When towing using a rope, avoid sudden starts, etc. which place excessive stress
on the towing hook and rope.
The towing hook or rope may become damaged, broken debris may hit people
and cause serious damage.●
Do not turn the “ENGINE START STOP” switch off.
There is a possibility that the steering wheel is locked and can not be operated.■
Installing towing eyelet to the vehicle
Make sure that towing eyelet is installed securely.
If not securely installed, towing eyelet may come loose during towing.
NOTICE■
To prevent damage to the vehicle when towing using a wheel-lift type truck
When raising the vehicle, ensure adequa te ground clearance for towing at the
opposite end of the raised vehicle. Without adequate clearance, the vehicle could
be damaged while being towed.■
To prevent body damage when to wing with a sling-type truck
Do not tow with a sling-type truck, either from the front or rear.■
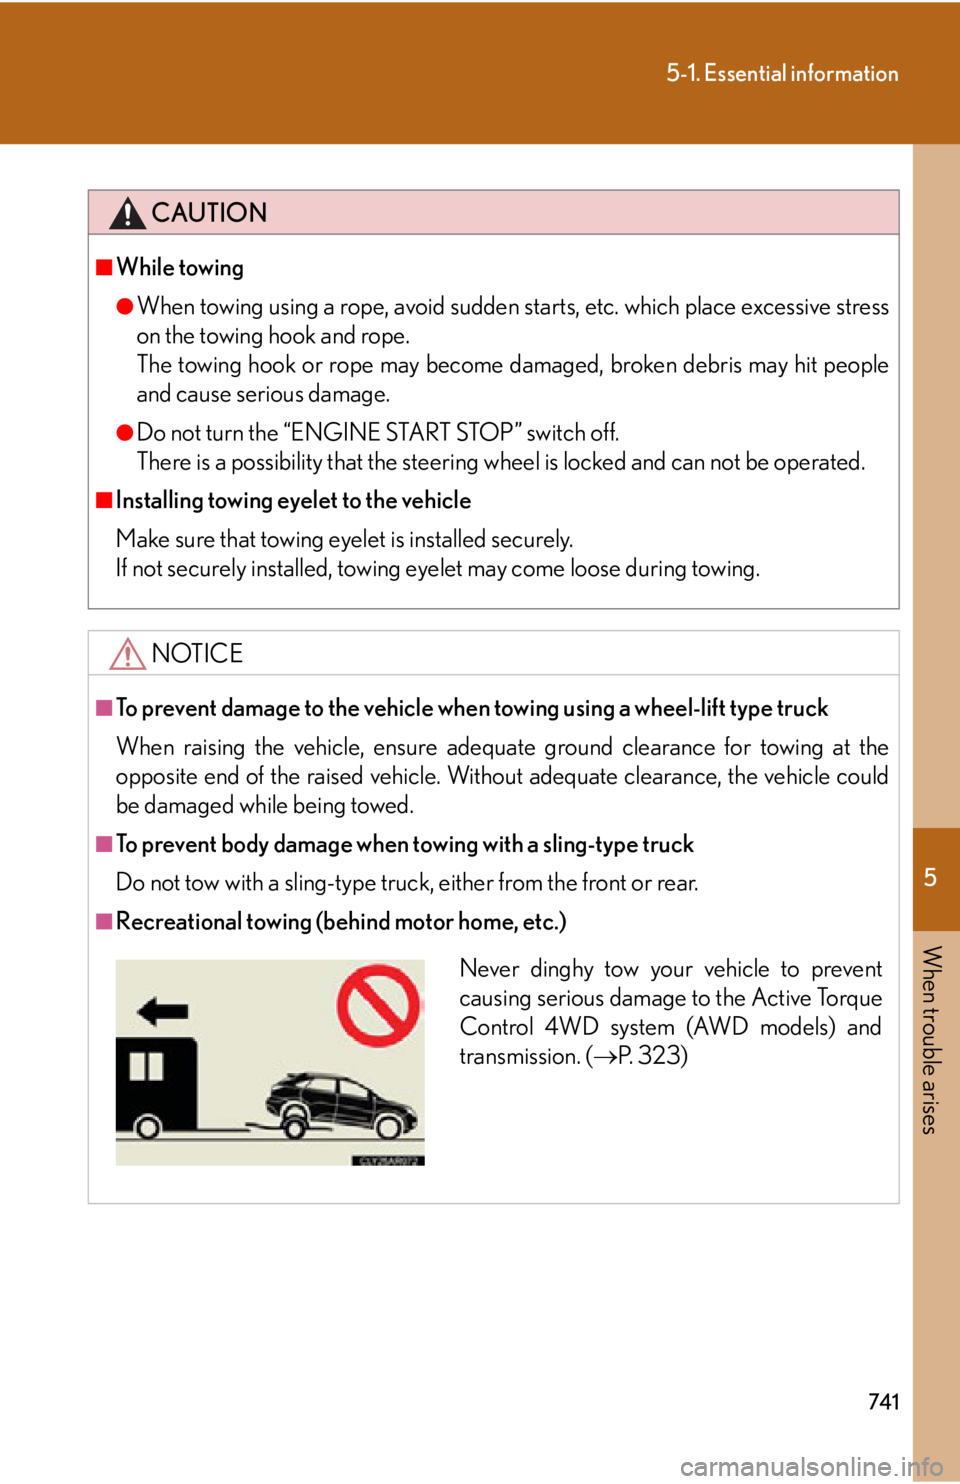
Recreational towing (behind motor home, etc.)
Never dinghy tow your vehicle to prevent
causing serious damage to the Active Torque
Control 4WD system (AWD models) and
transmission. ( P. 323)
Page 756 of 886
7565-2. Steps to take in an emergency
Have the vehicle inspected by y our Lexus dealer immediately.
A buzzer sounds and a warning message is shown on the multi-informa-
tion display. Failure to investigate the cause of the fo llowing warnings may
lead to the system operating abnormally and possibly cause an accident.
Have the vehicle inspected by your Lexus dealer immediately. Wa r n i n g m e s s a g e Details
(AWD models) Indicates a malfunction in the AWD system
Indicates a malfunction in the steering lock system
Indicates a malfunction in the brake lights system
Page 767 of 886
5
When trouble arises
7675-2. Steps to take in an emergency
Sounds
once Sounds
once
(Displayed alternately)
(Flashes) An attempt was
made to exit the
vehicle with the
electronic key and
lock the doors
without first turn-
ing the “ENGINE
START STOP”
switch off. Tu r n t h e
“ENGINE START
STOP” switch off
and lock the
doors again.
Sounds
once
(Flashes) An attempt was
made to start the
engine without
the electronic key
being present, or
the electronic key
was not function-
ing normally.
An attempt was
made to drive
when the regular
key was not inside
the vehicle. Confirm that the
electronic key is
inside the vehicle.Interior
buzzer Exterior
buzzer Wa r n i n g m e s s a g e Details Correction
procedure
Page 769 of 886
5
When trouble arises
7695-2. Steps to take in an emergency
Sounds
once Con-
tinuous
(Flashes) An attempt was
made to lock the
doors using the
smart access sys-
tem with push-
button start while
the electronic key
was still inside the
vehicle.
Retrieve the elec-
tronic key from
the vehicle and
lock the doors
again.An attempt was
made to lock
either front door
by opening a door
and putting the
inside lock button
into the lock posi-
tion, then closing
the door by pull-
ing on the outside
door handle with
the electronic key
still inside the
vehicle. Interior
buzzer Exterior
buzzer Wa r n i n g m e s s a g e Details Correction
procedure