Page 326 of 405
8
PHONE
325
1. PHONE OPERATION (HANDS-FREE SYSTEM FOR CELLULAR PHONES)
CT200h_Navi_OM76146U_(U)14.06.17 09:48
■CALLING FROM E-MAIL/SMS/
MMS MESSAGE DISPLAY
1Display the message inbox screen.
(→ P.320)
2Select the desired message.
3Select .
�zIf there are 2 or more phone numbers,
select the desired number.
4Check that the “Call” screen is dis-
played.
■ CALLING FROM A NUMBER
WITHIN A MESSAGE
1Display the message inbox screen.
(→ P.320)
2Select the desired message.
3Select the text area.
4Select the desired number.
�zIdentified phone numbers contained in the
message are displayed.
CALLING THE MESSAGE
SENDER
Calls can be made to an e-mail/SMS/
MMS message sender’s phone number.
This operation can be performed while
driving.
Calls can be made to a number identi-
fied in a message’s text area.
This operation cannot be performed
while driving.
Page 328 of 405
327
CT200h_Navi_OM76146U_(U)14.06.17 09:48
8
PHONE
2. SETUP
1. PHONE/MESSAGE SETTINGS
1Press the “MENU” button on the
Remote Touch.
2Select “Setup” .
3Select “Phone”.
4Select the item to be set.
PHONE/MESSAGE SETTINGS
SCREEN
No.InformationPage
Registering/connecting a
phone 55
Sound settings328
Contact/call history set-
tings329
Messaging settings341
Phone display settings343
Page 329 of 405
328
2. SETUP
CT200h_Navi_OM76146U_(U)14.06.17 09:48
1Display the phone top screen.
(→ P.310)
2Select “Settings” .
1Display the “Phone/Message Settings”
screen. (→P.327)
2Select “Sound Settings” .
3Select the desired item to be set.
DISPLAYING THE PHONE/
MESSAGE SETTINGS SCREEN
IN A DIFFERENT WAY“Sound Settings” SCREEN
The call and ringtone volume can be ad-
justed. A ringtone can be selected.
Page 330 of 405

329
2. SETUP
CT200h_Navi_OM76146U_(U)14.06.17 09:48
8
PHONE
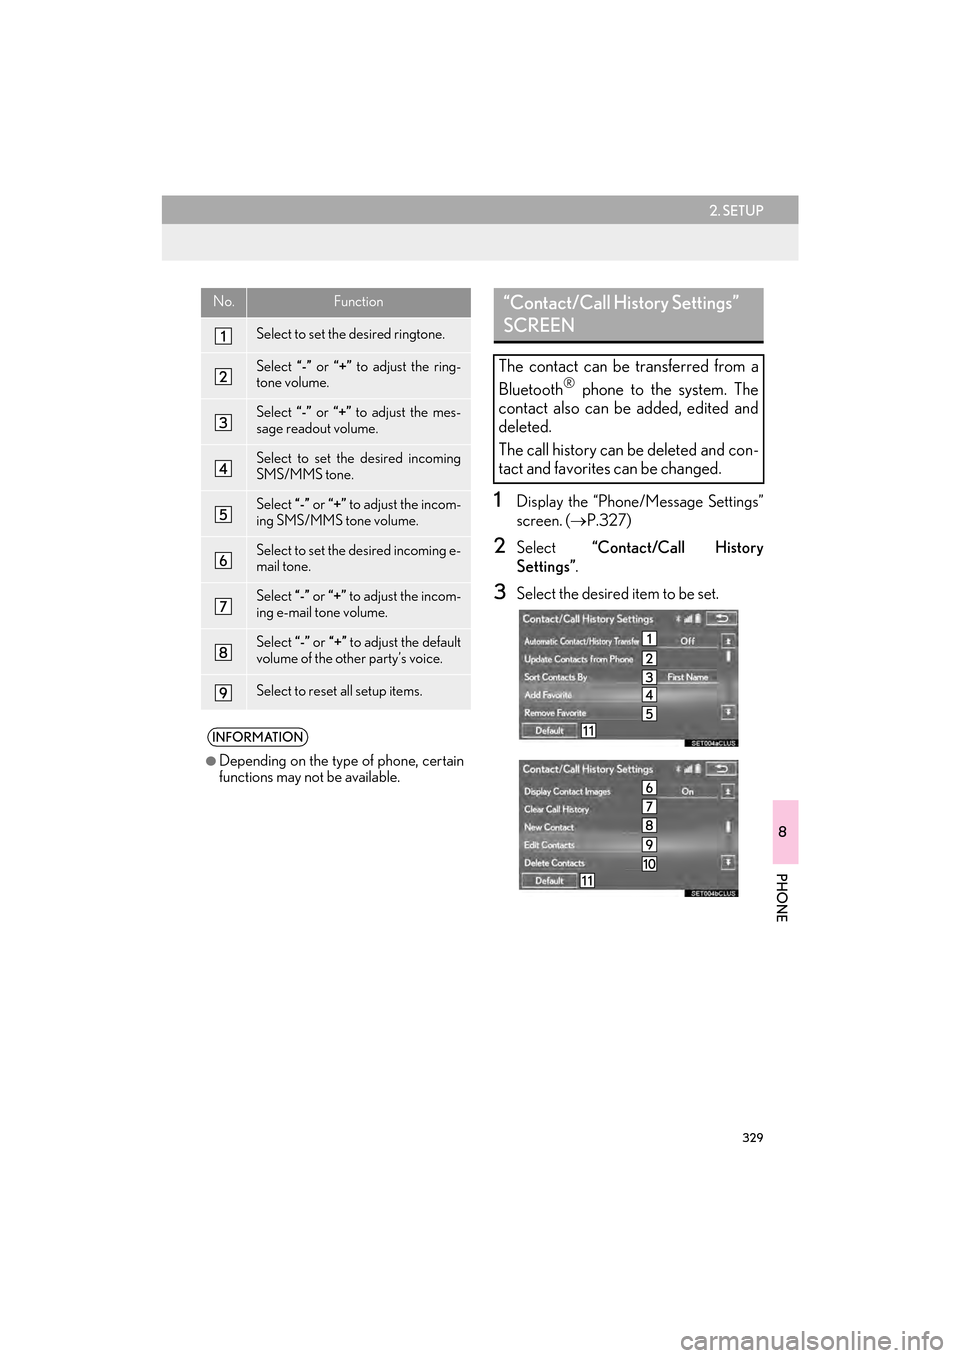
1Display the “Phone/Message Settings”
screen. (→P.327)
2Select “Contact/Call History
Settings” .
3Select the desired item to be set.
No.Function
Select to set the desired ringtone.
Select “-” or “+” to adjust the ring-
tone volume.
Select “-” or “+” to adjust the mes-
sage readout volume.
Select to set the desired incoming
SMS/MMS tone.
Select “-” or “+” to adjust the incom-
ing SMS/MMS tone volume.
Select to set the desired incoming e-
mail tone.
Select “-” or “+” to adjust the incom-
ing e-mail tone volume.
Select “-” or “+” to adjust the default
volume of the other party’s voice.
Select to reset all setup items.
INFORMATION
●
Depending on the type of phone, certain
functions may not be available.
“Contact/Call History Settings”
SCREEN
The contact can be transferred from a
Bluetooth® phone to the system. The
contact also can be added, edited and
deleted.
The call history can be deleted and con-
tact and favorites can be changed.
Page 331 of 405

330
2. SETUP
CT200h_Navi_OM76146U_(U)14.06.17 09:48
*: For PBAP compatible Bluetooth®
phones, this function is available when
“Automatic Contact/History Transfer” is
set to off. (→P.329)
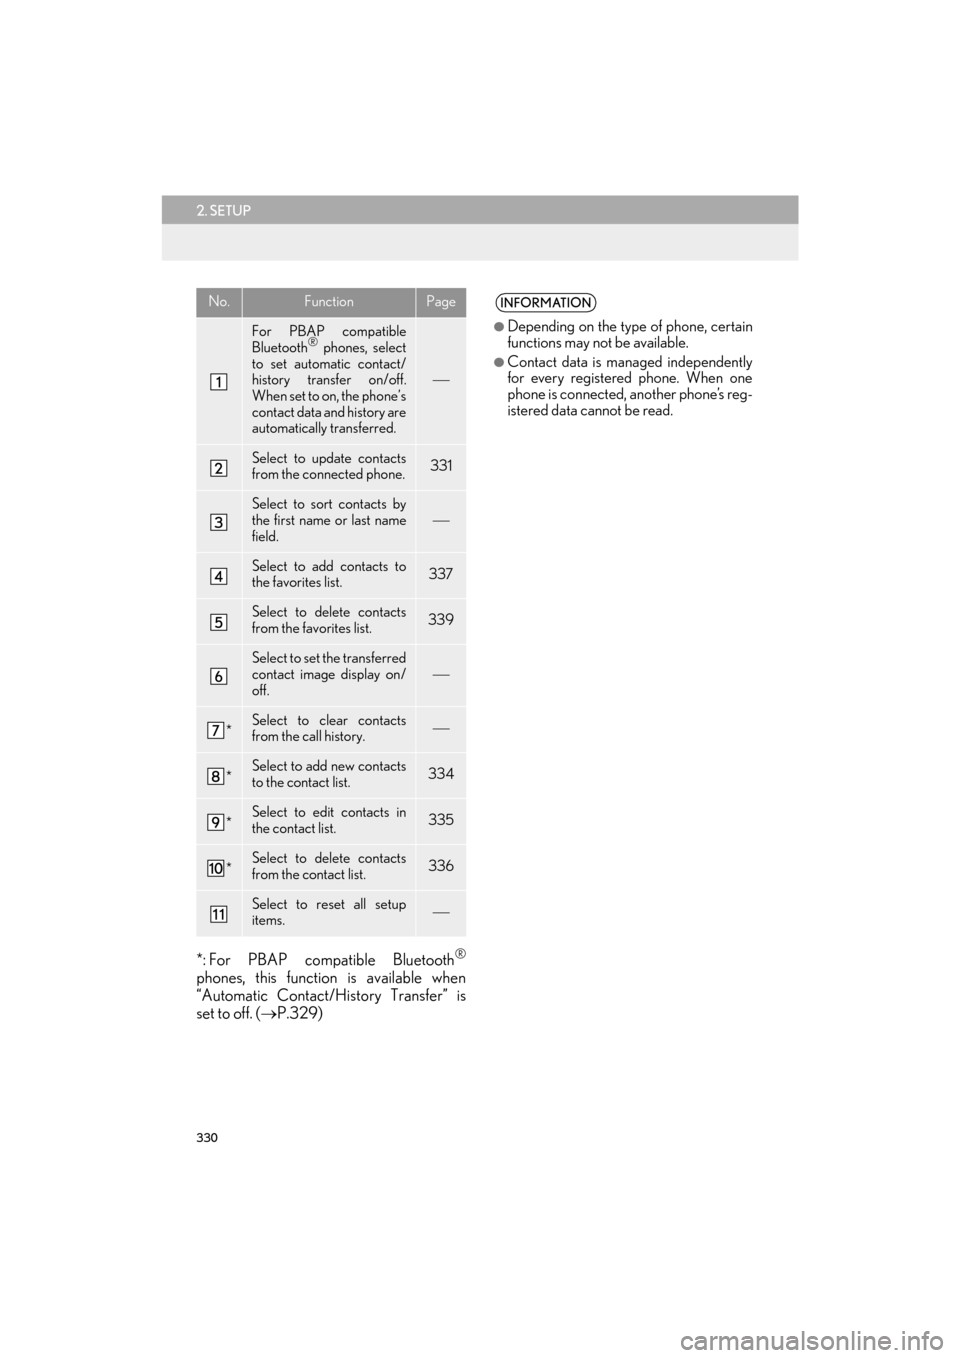
No.FunctionPage
For PBAP compatible
Bluetooth® phones, select
to set automatic contact/
history transfer on/off.
When set to on, the phone’s
contact data and history are
automatically transferred.
Select to update contacts
from the connected phone.331
Select to sort contacts by
the first name or last name
field.
Select to add contacts to
the favorites list. 337
Select to delete contacts
from the favorites list. 339
Select to set the transferred
contact image display on/
off.
*Select to clear contacts
from the call history.
*Select to add new contacts
to the contact list.334
*Select to edit contacts in
the contact list.335
*Select to delete contacts
from the contact list.336
Select to reset all setup
items.
INFORMATION
●
Depending on the type of phone, certain
functions may not be available.
●Contact data is managed independently
for every registered phone. When one
phone is connected, another phone’s reg-
istered data cannot be read.
Page 334 of 405
333
2. SETUP
CT200h_Navi_OM76146U_(U)14.06.17 09:48
8
PHONE
■UPDATING THE CONTACTS IN A
DIFFERENT WAY (FROM THE “Call
History” SCREEN)
1Display the phone top screen.
(→ P.310)
2Select the “Call History” tab and select
a contact not yet registered in the con-
tact list.
3Select “Update Contact” .
4Select the desired contact.
5Select a phone type for the phone num-
ber.
For PBAP compatible Bluetooth®
phones, this function is available when
“Automatic Contact/History Transfer”
is set to off.
(→ P.329)
Page 335 of 405
334
2. SETUP
CT200h_Navi_OM76146U_(U)14.06.17 09:48
1Select “New Contact” .
2Enter the name and select “OK” .
3Enter the phone number and select
“OK”.
4Select the phone type for the phone
number.
5To add another number to this contact,
select “Yes”.
■REGISTERING A NEW CONTACT
IN A DIFFERENT WAY (FROM THE
“Call History” SCREEN)
1Display the phone top screen.
(→ P.310)
2Select the “Call History” tab and select
a contact not yet registered in the con-
tact list.
3Select “Add to Contacts” .
4Follow the steps in “REGISTERING A
NEW CONTACT TO THE
CONTACT LIST” from “STEP 2”.
(→ P.334)
REGISTERING A NEW
CONTACT TO THE CONTACT
LIST
New contact data can be registered.
Up to 4 numbers per person can be reg-
istered. For PBAP compatible
Bluetooth
® phones, this function is
available when “Automatic Contact/
History Transfer” is set to off. ( →P.329)
Page 337 of 405
336
2. SETUP
CT200h_Navi_OM76146U_(U)14.06.17 09:48
■EDITING THE CONTACT IN A DIF-
FERENT WAY (FROM THE “Con-
tact Details” SCREEN)
1Display the phone top screen.
(→ P.310)
2Select the “Contacts”, “Call History”
tab or the “Favorites” tab and select the
desired contact.
3Select “Edit Contact” .
“E-mail Addresses” : Select to display all
registered e-mail addresses for the contact.
4Follow the steps in “EDITING THE
CONTACT DATA” from “STEP 4”.
( → P.335)
1Select “Delete Contacts” .
2Select the desired contact and select
“Delete”.
3Select “Yes” when the confirmation
screen appears.
DELETING THE CONTACT
DATA
For PBAP compatible Bluetooth
®
phones, this function is available when
“Automatic Contact/History Transfer”
is set to off. ( →P.329)
INFORMATION
●
Multiple data can be selected and
deleted at the same time.