Page 228 of 407
539
Driving your vehicle
Hazardous driving conditions
When hazardous driving conditions
are encountered such as water,
snow, ice, mud, sand, or similar haz-
ards, follow these suggestions:
Drive cautiously and allow extradistance for braking.
Avoid sudden braking or steering.
When braking with non-ABS brakes pump the brake pedal with
a light up-and-down motion until
the vehicle is stopped.
Do not pump the brake pedal on a
vehicle equipped with ABS. If stalled in snow, mud, or sand,
use second gear. Accelerate slow-
ly to avoid spinning the drive
wheels.
Use sand, rock salt, or other non- slip material under the drive
wheels to provide traction when
stalled in ice, snow, or mud.
Reducing the risk of a rollover
This multi-purpose passenger vehi-
cle is defined as a Crossover Utility
Vehicle (CUV). CUV’s have higher
ground clearance and a narrower
track to make them capable of per-
forming in a wide variety of off-road
applications. Specific design charac-
teristics give them a higher center of
gravity than ordinary vehicles. An
advantage of the higher ground
clearance is a better view of the
road, which allows you to anticipate
problems. They are not designed for
cornering at the same speeds as
conventional passenger vehicles,
any more than low-slung sports vehi-
cles are designed to perform satis-
factorily in off-road conditions. Due to
this risk, driver and passengers are
strongly recommended to buckle
their seat belts. In a rollover crash,
an unbelted person is more likely to
die than a person wearing a seat
belt. There are steps that a driver can
make to reduce the risk of a rollover.
SPECIAL DRIVING CONDITIONS
WARNING- Downshifting
Do not downshift with an auto-
matic transaxle while driving on
slippery surfaces. The sudden
change in tire speed could
cause the tires to skid and
result in an accident.
Page 242 of 407
What to do in an emergency
26
ROAD WARNING
Hazard warning flasher
The hazard warning flasher serves
as a warning to other drivers to exer-
cise extreme caution when
approaching, overtaking, or passing
your vehicle.
It should be used whenever emer-
gency repairs are being made or
when the vehicle is stopped near the
edge of a roadway.Depress the flasher switch with the
ignition switch in any position. The
flasher switch is located in the center
console switch panel. All turn signal
lights will flash simultaneously.
• The hazard warning flasher oper-
ates whether your vehicle is run-
ning or not.
The turn signals do not work when the hazard flasher is on.
Care must be taken when using the hazard warning flasher while
the vehicle is being towed.
OPSE064018L
Page 244 of 407
What to do in an emergency
46
IF THE VEHICLE WILL NOT START
If vehicle doesn't turn over or
turns over slowly
1. Be sure the shift lever is in N(Neutral) or P (Park) and the
emergency brake is set.
2. Check the battery connections to be sure they are clean and tight.
3. Turn on the interior light. If the light dims or goes out when you oper-
ate the starter, the battery is dis-
charged.
4. Check the starter connections to be sure they are securely tightened.
5. Do not push or pull the vehicle to start it. See instructions for "Jump
starting".
WARNING- Push/pull
start
Do not push or pull the vehicle
to start it. Push or pull starting
may cause motor damage.
Page 247 of 407
67
What to do in an emergency
5. Start the vehicle with the boosterbattery and the auxiliary battery
begins to charge when EV ready
light glows, then start the vehicle
with the discharged battery. If the
first starting attempt is not suc-
cessful, wait a few minutes before
making another attempt in order to
allow the discharged battery to
recharge.
If the cause of your battery discharg-ing is not apparent, you should haveyour vehicle checked by an author-ized Kia dealer.
Push-starting
Your reduction gear equipped vehicle
should not be push-started.
WARNING- Tow starting
vehicle
Never tow a vehicle to start it
because this could result in
motor damage.
Page 269 of 407
Maintenance
67
At least monthly:
Check the coolant level in thecoolant reservoir.
Check the operation of all exterior lights, including the stoplights, turn
signals and hazard warning flash-
ers.
Check the inflation pressures of all tires including the spare.
At least twice a year
(i.e., every Spring and Fall):
Check the radiator, heater and air conditioning hoses for leaks or
damage.
Check the windshield washer spray and wiper operation. Clean
the wiper blades with clean cloth
dampened with washer fluid.
Check the headlight alignment.
Check the muffler, exhaust pipes, shields and clamps.
Check the lap/shoulder belts for wear and function.
Check for worn tires and loose wheel lug nuts.
At least once a year:
Clean the body and door drainholes.
Lubricate the door hinges and checks, and hood hinges.
Lubricate the door and hood locks and latches.
Lubricate the door rubber weather- strips.
Check the air conditioning system.
Inspect and lubricate the reduction gear linkage and controls.
Clean the battery and terminals.
Check the brake fluid level.
Page 295 of 407
Maintenance
32
7
✽
✽
NOTICE
If you connect unauthorized elec-
tronic devices to the battery, the bat-
tery may be discharged. Never use
unauthorized devices.
Battery recharging
Your vehicle has a maintenance-free,
calcium-based battery.
If the battery becomes discharged
in a short time (because, for exam-
ple, the headlights or interior lights
were left on while the vehicle was
not in use), recharge it by slow
charging (trickle) for 10 hours.
If the battery gradually discharges because of high electric load while
the vehicle is being used, recharge
it at 20-30A for two hours. When recharging the battery,
observe the following precautions:
The battery must be removed from
the vehicle and placed in an area
with good ventilation.
Do not allow cigarettes, sparks, or flame near the battery.
Watch the battery during charging, and stop or reduce the charging
rate if the battery cells begin
gassing (boiling) violently or if the
temperature of the electrolyte of
any cell exceeds 49°C (120°F).
Wear eye protection when check- ing the battery during charging.WARNING- Risk of elec-
trocution
Never touch the electrical igni-
tion system while the vehicle is
running. This system works
with high voltage which can
"zap" you.
Page 310 of 407
747
Maintenance
FUSES
A vehicle’s electrical system is pro-
tected from electrical overload dam-
age by fuses.
This vehicle has 3 (or 4) fuse panels,
one located in the driver’s side panel
bolster, the other in the motor com-
partment near the battery.
If any of your vehicle’s lights, acces-
sories, or controls do not work, check
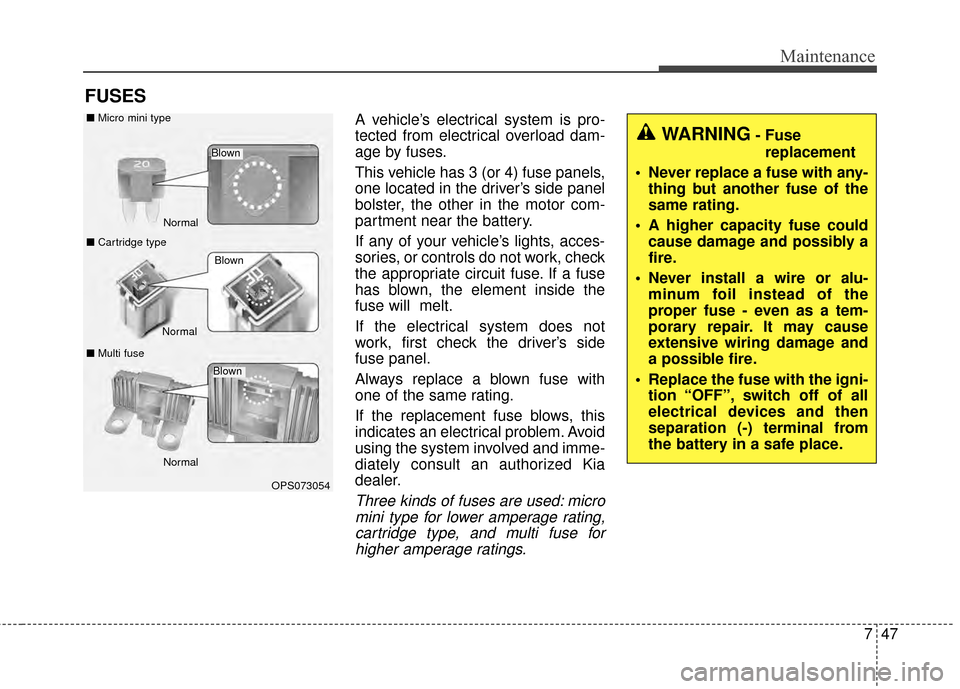
the appropriate circuit fuse. If a fuse
has blown, the element inside the
fuse will melt.
If the electrical system does not
work, first check the driver’s side
fuse panel.
Always replace a blown fuse with
one of the same rating.
If the replacement fuse blows, this
indicates an electrical problem. Avoid
using the system involved and imme-
diately consult an authorized Kia
dealer.
Three kinds of fuses are used: micromini type for lower amperage rating,cartridge type, and multi fuse forhigher amperage ratings.
WARNING- Fuse
replacement
Never replace a fuse with any- thing but another fuse of the
same rating.
A higher capacity fuse could cause damage and possibly a
fire.
Never install a wire or alu- minum foil instead of the
proper fuse - even as a tem-
porary repair. It may cause
extensive wiring damage and
a possible fire.
Replace the fuse with the igni- tion “OFF”, switch off of all
electrical devices and then
separation (-) terminal from
the battery in a safe place.
OPS073054
Normal
Normal
■
Micro mini type
■ Cartridge type
■ Multi fuse
Blown
Blown
Normal
Blown
Page 321 of 407
Maintenance
58
7
LIGHT BULBS
Use only the bulbs of the specified
wattage.
If you don’t have necessary tools, the correct bulbs and the expertise,
consult an authorized Kia dealer. In
many cases, it is difficult to replace
vehicle light bulbs because other
parts of the vehicle must be
removed before you can get to the
bulb. This is especially true if you
have to remove the headlight
assembly to get to the bulb(s).
Removing/installing the headlight
assembly can result in damage to
the vehicle.
Do not install additional bulb or LED. If you install that, the lamp
may not be operated properly and
fuse box or electric wiring system
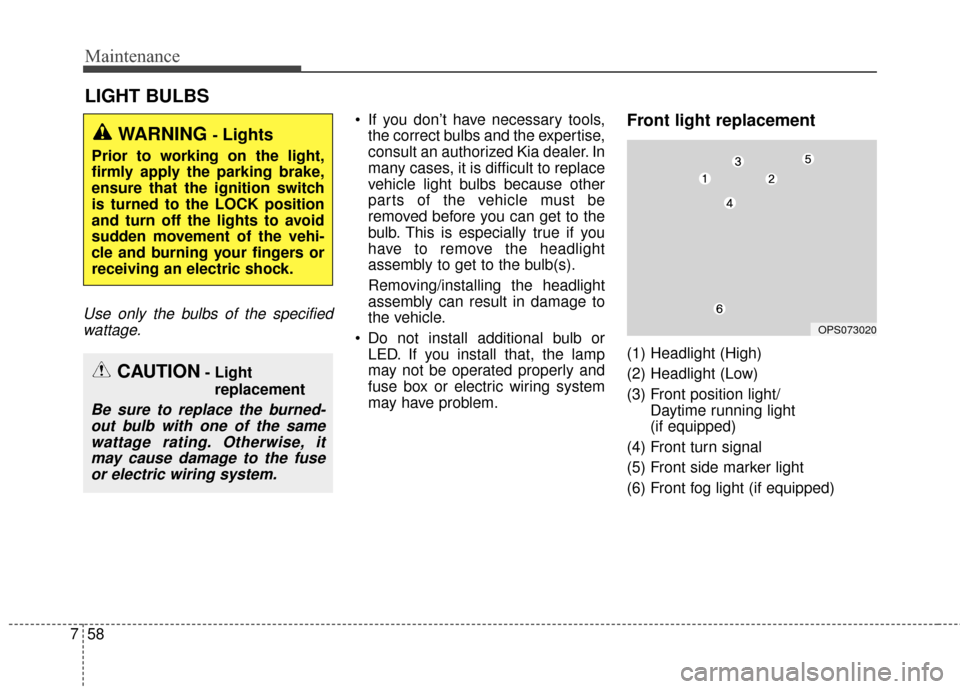
may have problem.Front light replacement
(1) Headlight (High)
(2) Headlight (Low)
(3) Front position light/ Daytime running light
(if equipped)
(4) Front turn signal
(5) Front side marker light
(6) Front fog light (if equipped)
WARNING - Lights
Prior to working on the light,
firmly apply the parking brake,
ensure that the ignition switch
is turned to the LOCK position
and turn off the lights to avoid
sudden movement of the vehi-
cle and burning your fingers or
receiving an electric shock.
CAUTION- Light replacement
Be sure to replace the burned-out bulb with one of the samewattage rating. Otherwise, itmay cause damage to the fuseor electric wiring system.
OPS073020