2015 KIA MORNING section 8
[x] Cancel search: section 8Page 355 of 420
Maintenance
28 7
✽
✽
NOTICE
The “COLD” range is for reference only
and should NOT be used to determine
the transaxle fluid level.
✽ ✽
NOTICE
New automatic transaxle fluid should be
red. The red dye is added so the assem-
bly plant can identify it as automatic
transaxle fluid and distinguish it from
engine oil or antifreeze. The red dye,
which is not an indicator of fluid quali-
ty, is not permanent. As the vehicle is
driven, the automatic transaxle fluid
will begin to look darker. The colour
may eventually appear light brown.
Therefore, have an authorised Kia deal-
er change the automatic transaxle fluid
according to the Scheduled
Maintenance at the beginning of this
section.
Use only the specified automatic
transaxle fluid. (Refer to "Recommended
lubricants or capacities" in section 8.)
Changing the automatic transaxle
fluid
Have the automatic transaxle fluid
changed by an authorised Kia dealer
according to the Maintenance Schedule
at the beginning of this section.
WARNING - Transaxle fluid
The transaxle fluid level should be
checked when the engine is at nor-
mal operating temperature. This
means that the engine, radiator,
radiator hose and exhaust system
etc., are very hot. Exercise great
care not to burn yourself during
this procedure.
CAUTION
Low fluid level causes transaxle
shift slippage. Overfilling can
cause foaming, loss of fluid and
transaxle malfunction.
The use of a non-specified fluid
could cause transaxle malfunc-
tion and failure.
WARNING- Parking brake
To avoid sudden movement of the
vehicle, apply the parking brake
and depress the brake pedal before
moving the shift lever.
Page 358 of 420
731
Maintenance
Replace the filter according to the
Maintenance Schedule.
If the vehicle is operated in extremely
dusty or sandy areas, replace the
element more often than the usual
recommended intervals. (Refer to
“Maintenance under severe usage condi-
tions” in this section.)
CAUTION
Do not drive with the air cleaner
removed; this will result in exces-
sive engine wear.
When removing the air cleaner fil-
ter, be careful that dust or dirt
does not enter the air intake, or
damage may result.
Use a Kia genuine part. Use of
non-genuine parts could damage
the air flow sensor.
Page 366 of 420
739
Maintenance
Reset items
Items should be reset after the battery
has been discharged or the battery has
been disconnected.
Auto up/down window (See section 4)
Sunroof (See section 4)
Trip computer (See section 4)
Climate control system
(See section 4)
Clock (See section 4)
Audio (See section 4)WARNING
Before performing maintenance
or recharging the battery, turn off
all accessories and stop the
engine.
The negative battery cable must
be removed first and installed
last when the battery is discon-
nected.
Operation related to the battery
should be done in an authorised
Kia dealer.
CAUTION
Keep the battery away from water
or any liquid.
For your safety, use the authentic-
ity by approved authorised Kia
dealer, when you replace the bat-
tery.
WARNING- Recharging
battery
When recharging the battery,
observe the following precautions:
The battery must be removed
from the vehicle and placed in an
area with good ventilation.
Do not allow cigarettes, sparks,
or flame near the battery.
Watch the battery during charg-
ing, and stop or reduce the charg-
ing rate if the battery cells begin
gassing (boiling) violently or if
the temperature of the electrolyte
of any cell exceeds 49°C (120°F).
Wear eye protection when check-
ing the battery during charging.
Disconnect the battery charger in
the following order.
1. Turn off the battery charger main
switch.
2. Unhook the negative clamp from
the negative battery terminal.
3. Unhook the positive clamp from
the positive battery terminal.
Page 367 of 420
Maintenance
40 7
CAUTION
Underinflation also results in
excessive wear, poor handling
and reduced fuel economy.
Wheel deformation also is
possible. Keep your tyre pres-
sures at the proper levels. If a
tyre frequently needs refilling,
have it checked by an autho-
rised Kia dealer.
Overinflation produces a
harsh ride, excessive wear at
the centre of the tyre tread,
and a greater possibility of
damage from road hazards.
TYRES AND WHEELS
Tyre care
For proper maintenance, safety, and
maximum fuel economy, you must
always maintain recommended tyre
inflation pressures and stay within
the load limits and weight distribution
recommended for your vehicle.
Recommended cold tyre inflation
pressures
All tyre pressures (including the
spare) should be checked when the
tyres are cold. “Cold Tyres” means
the vehicle has not been driven for at
least three hours or driven less than
1.6 km (one mile).
Recommended pressures must be
maintained for the best ride, top vehi-
cle handling, and minimum tyre
wear.
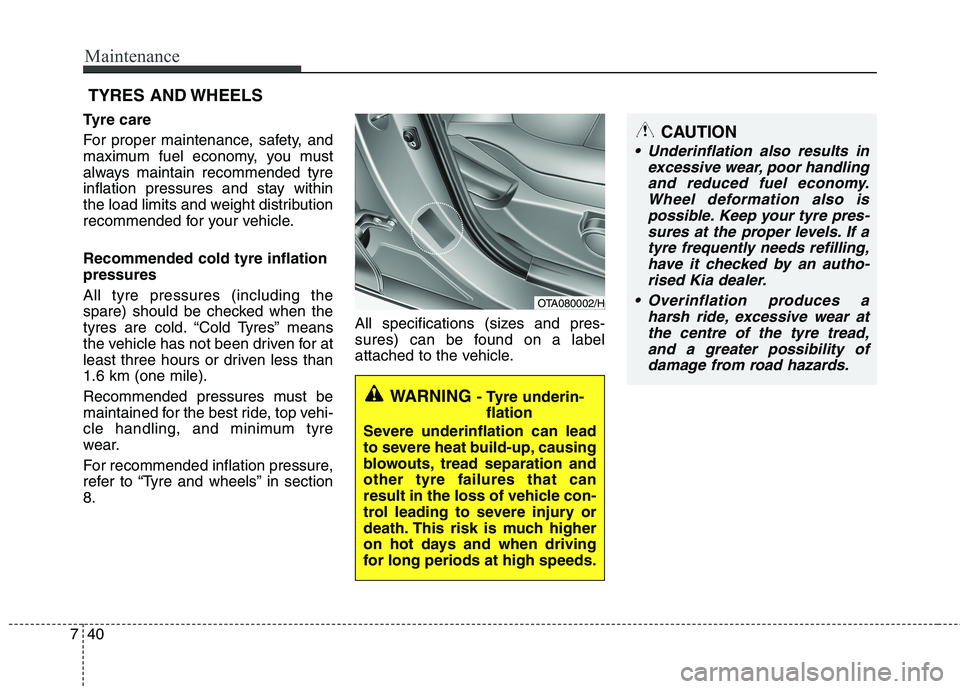
For recommended inflation pressure,
refer to “Tyre and wheels” in section
8.All specifications (sizes and pres-
sures) can be found on a label
attached to the vehicle.
WARNING - Tyre underin-
flation
Severe underinflation can lead
to severe heat build-up, causing
blowouts, tread separation and
other tyre failures that can
result in the loss of vehicle con-
trol leading to severe injury or
death. This risk is much higher
on hot days and when driving
for long periods at high speeds.
OTA080002/H
Page 369 of 420
Maintenance
42 7
Remove the valve cap from the tyre
valve stem. Press the tyre gauge
firmly onto the valve to get a pres-
sure measurement. If the cold tyre
inflation pressure matches the rec-
ommended pressure on the tyre and
loading information label, no further
adjustment is necessary. If the pres-
sure is low, add air until you reach
the recommended amount.
If you overfill the tyre, release air by
pushing on the metal stem in the
centre of the tyre valve. Recheck the
tyre pressure with the tyre gauge. Be
sure to put the valve caps back on
the valve stems. They help prevent
leaks by keeping out dirt and mois-
ture.Tyre rotation
To equalize tread wear, it is recom-
mended that the tyres be rotated
every 12,000 km (7,500 miles) or
sooner if irregular wear develops.
During rotation, check the tyres for
correct balance.
When rotating tyres, check for
uneven wear and damage. Abnormal
wear is usually caused by incorrect
tyre pressure, improper wheel align-
ment, out-of-balance wheels, severe
braking or severe cornering. Look for
bumps or bulges in the tread or side
of tyre. Replace the tyre if you find
either of these conditions. Replace
the tyre if fabric or cord is visible.
After rotation, be sure to bring the
front and rear tyre pressures to spec-
ification and check lug nut tightness.
Refer to “Tyre and wheels” in section
8.
WARNING
Inspect your tyres frequently
for proper inflation as well as
wear and damage. Always use
a tyre pressure gauge.
Tyres with too much or too lit-
tle pressure wear unevenly
causing poor handling, loss of
vehicle control, and sudden
tyre failure leading to acci-
dents, injuries, and even death.
The recommended cold tyre
pressure for your vehicle can
be found in this manual and on
the tyre label located on the
driver's side centre pillar.
Worn tyres can cause acci-
dents. Replace tyres that are
worn, show uneven wear, or
are damaged.
Remember to check the pres-
sure of your spare tyre. Kia
recommends that you check
the spare every time you
check the pressure of the
other tyres on your vehicle.
Page 373 of 420
Maintenance
46 7
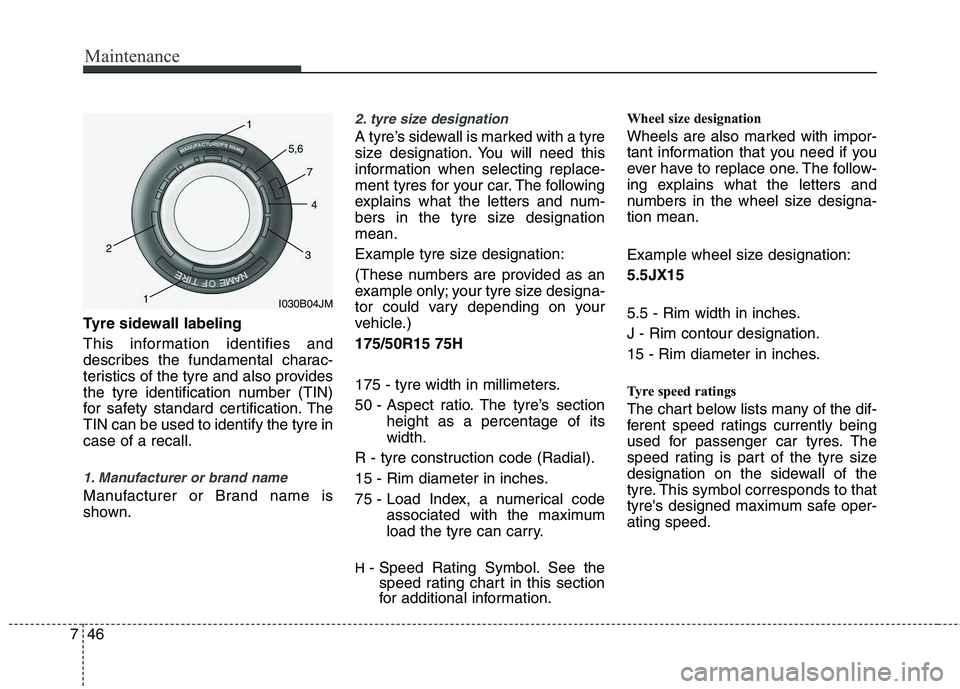
Tyre sidewall labeling
This information identifies and
describes the fundamental charac-
teristics of the tyre and also provides
the tyre identification number (TIN)
for safety standard certification. The
TIN can be used to identify the tyre in
case of a recall.
1. Manufacturer or brand name
Manufacturer or Brand name is
shown.
2. tyre size designation
A tyre’s sidewall is marked with a tyre
size designation. You will need this
information when selecting replace-
ment tyres for your car. The following
explains what the letters and num-
bers in the tyre size designation
mean.
Example tyre size designation:
(These numbers are provided as an
example only; your tyre size designa-
tor could vary depending on your
vehicle.)
175/50R15 75H
175 - tyre width in millimeters.
50 - Aspect ratio. The tyre’s section
height as a percentage of its
width.
R - tyre construction code (Radial).
15 - Rim diameter in inches.
75 - Load Index, a numerical code
associated with the maximum
load the tyre can carry.
H - Speed Rating Symbol. See the
speed rating chart in this section
for additional information.
Wheel size designation
Wheels are also marked with impor-
tant information that you need if you
ever have to replace one. The follow-
ing explains what the letters and
numbers in the wheel size designa-
tion mean.
Example wheel size designation:
5.5JX15
5.5 - Rim width in inches.
J - Rim contour designation.
15 - Rim diameter in inches.
Tyre speed ratings
The chart below lists many of the dif-
ferent speed ratings currently being
used for passenger car tyres. The
speed rating is part of the tyre size
designation on the sidewall of the
tyre. This symbol corresponds to that
tyre's designed maximum safe oper-
ating speed.
I030B04JM
1
1
23
4
5,6
7
Page 375 of 420
Maintenance
48 7
6. Maximum load rating
This number indicates the maximum
load in kilograms and pounds that can
be carried by the tyre. When replacing
the tyres on the vehicle, always use a
tyre that has the same load rating as
the factory installed tyre.
7. Uniform tyre quality grading
Quality grades can be found where
applicable on the tyre sidewall
between tread shoulder and maxi-
mum section width.
For example:
TREADWEAR 400
TRACTION A
TEMPERATURE A
Tread wear
The tread wear grade is a compara-
tive rating based on the wear rate of
the tyre when tested under controlled
conditions on a specified government
test course. For example, a tyre grad-
ed 150 would wear one-and-a-half
times (1½) as well on the government
course as a tyre graded 100.
The relative performance of tyres
depends upon the actual conditions
of their use, however, and may
depart significantly from the norm
due to variations in driving habits,
service practices and differences in
road characteristics and climate.
These grades are molded on the
side-walls of passenger vehicle
tyres. The tyres available as standard
or optional equipment on your vehi-
cle may vary with respect to grade.
Traction - AA, A, B & C
The traction grades, from highest to
lowest, are AA, A, B and C. Those
grades represent the tyre’s ability to
stop on wet pavement as measured
under controlled conditions on speci-
fied government test surfaces of
asphalt and concrete. A tyre marked C
may have poor traction performance.
WARNING
The traction grade assigned to
this tyre is based on straight-
ahead braking traction tests,
and does not include accelera-
tion, cornering, hydroplaning,
or peak traction characteristics.
Page 379 of 420
Maintenance
52 7
If you do not have a spare, use a fuse of
the same rating from a circuit you may
not need for operating the vehicle, such
as the cigarette lighter fuse.
If the headlights or other electrical com-
ponents do not work and the fuses are
OK, check the fuse panel in the engine
compartment. If a fuse is blown, it must
be replaced.
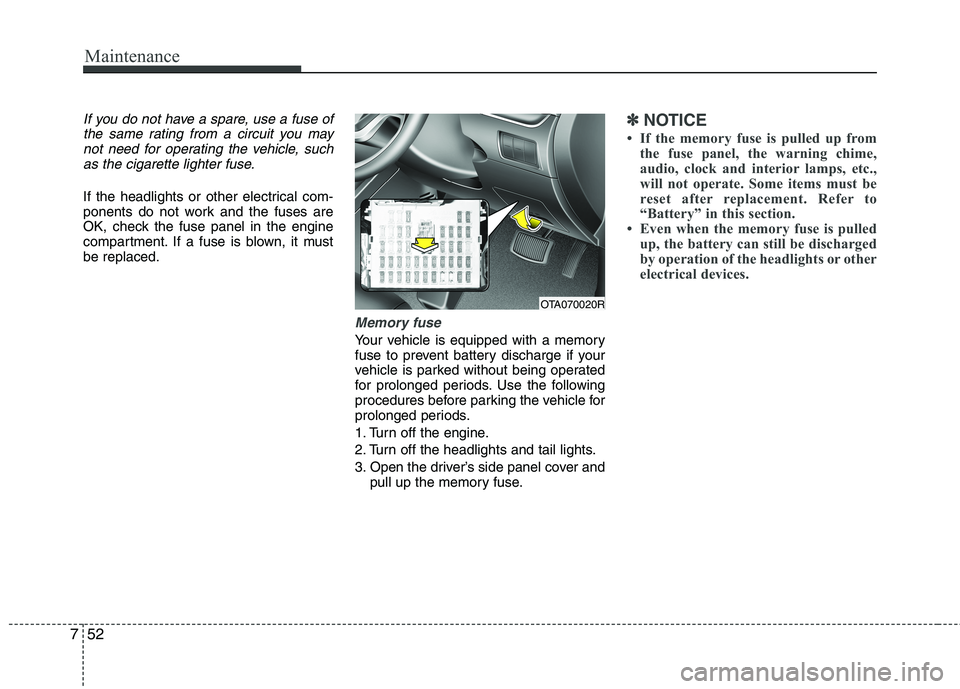
Memory fuse
Your vehicle is equipped with a memory
fuse to prevent battery discharge if your
vehicle is parked without being operated
for prolonged periods. Use the following
procedures before parking the vehicle for
prolonged periods.
1. Turn off the engine.
2. Turn off the headlights and tail lights.
3. Open the driver’s side panel cover and
pull up the memory fuse.
✽ ✽
NOTICE
• If the memory fuse is pulled up from
the fuse panel, the warning chime,
audio, clock and interior lamps, etc.,
will not operate. Some items must be
reset after replacement. Refer to
“Battery” in this section.
• Even when the memory fuse is pulled
up, the battery can still be discharged
by operation of the headlights or other
electrical devices.
OTA070020R